
Node.js read and write from Azure Table Storage

I'm a full-stack developer from South Africa 🇿🇦. I love writing about JavaScript, HTML and CSS.
We have been exploring node.js in combination with Azure, and today we will connect to a database!
Not any database, but Azure Table Storage.
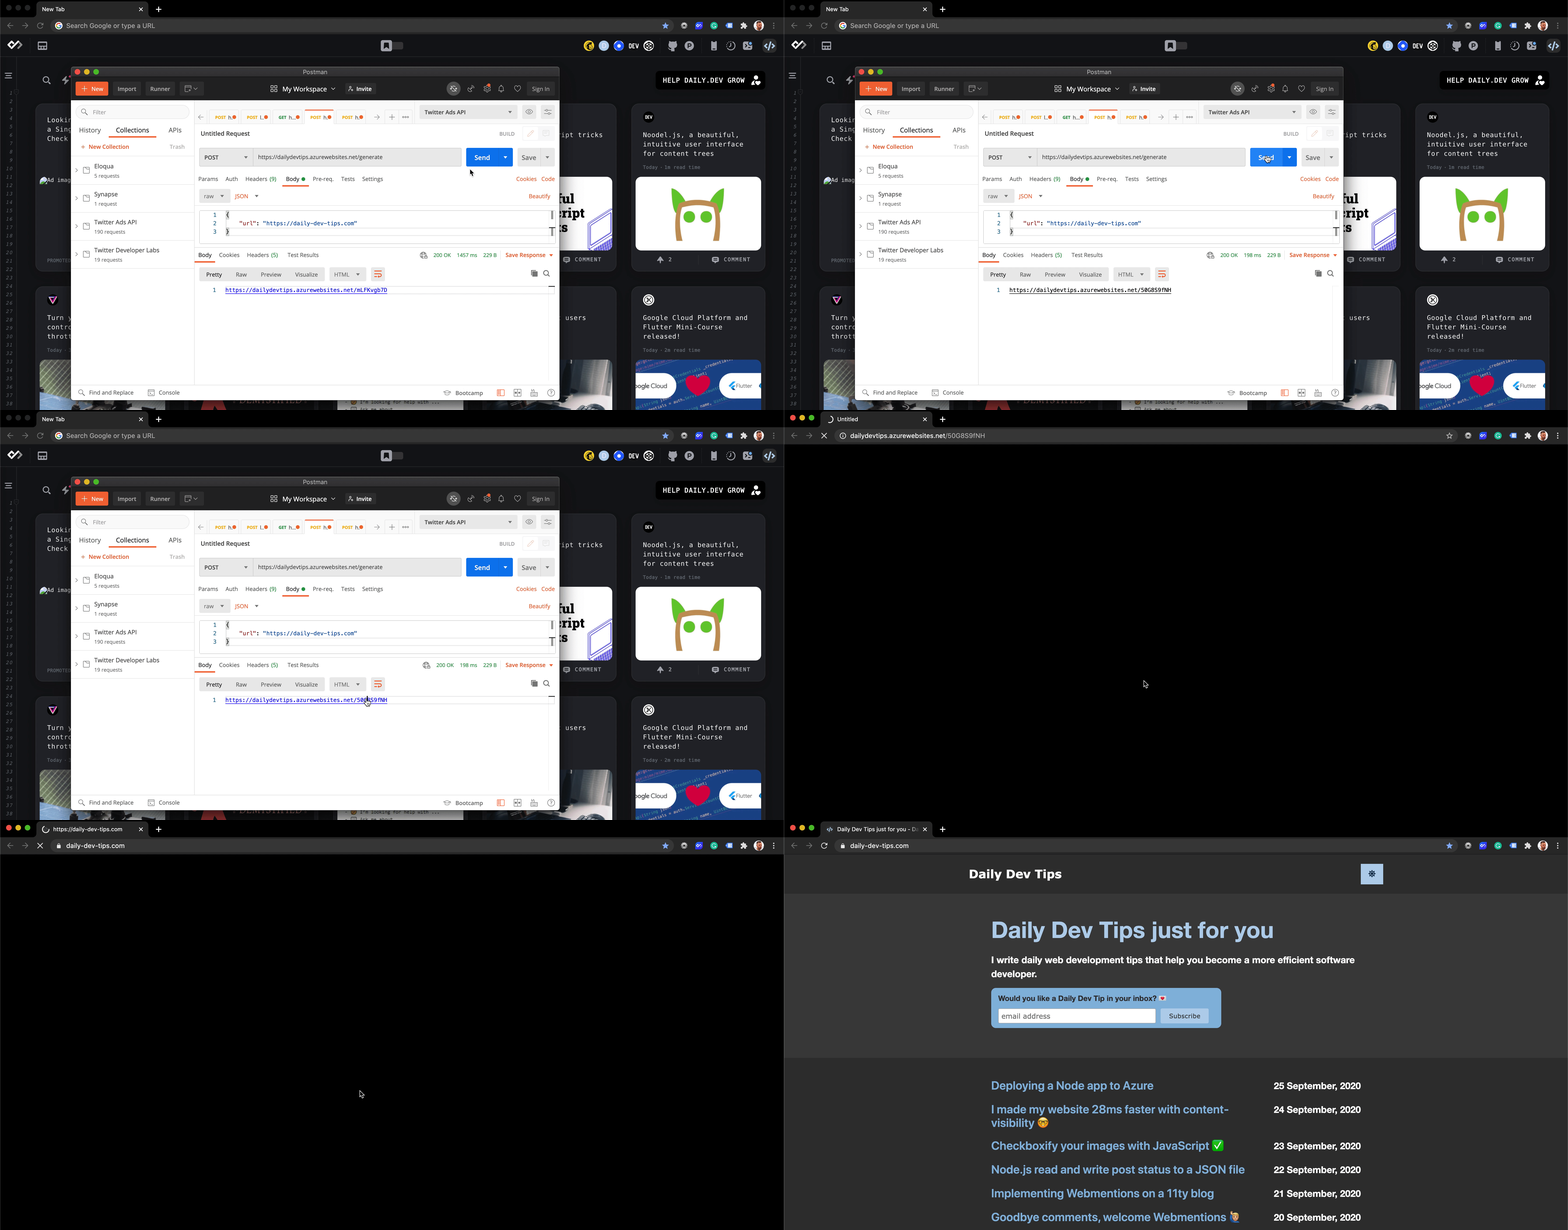
We will also finalize our short-url node tool, and it will look like this.
Click any of these links if you are looking for the other articles in the Node.js Azure series.
- Deploying a Node app to Azure
- GitHub automated-deployments to Azure
- Adding a custom domain to Azure App Service
- Adding SSL to our Azure Node app
Creating an Azure Table Storage
Azure Table Storage is a NoSQL database, where we can store large amounts of data.
In our case, we are storing URLS, which will get a random unique ID to retrieve them.
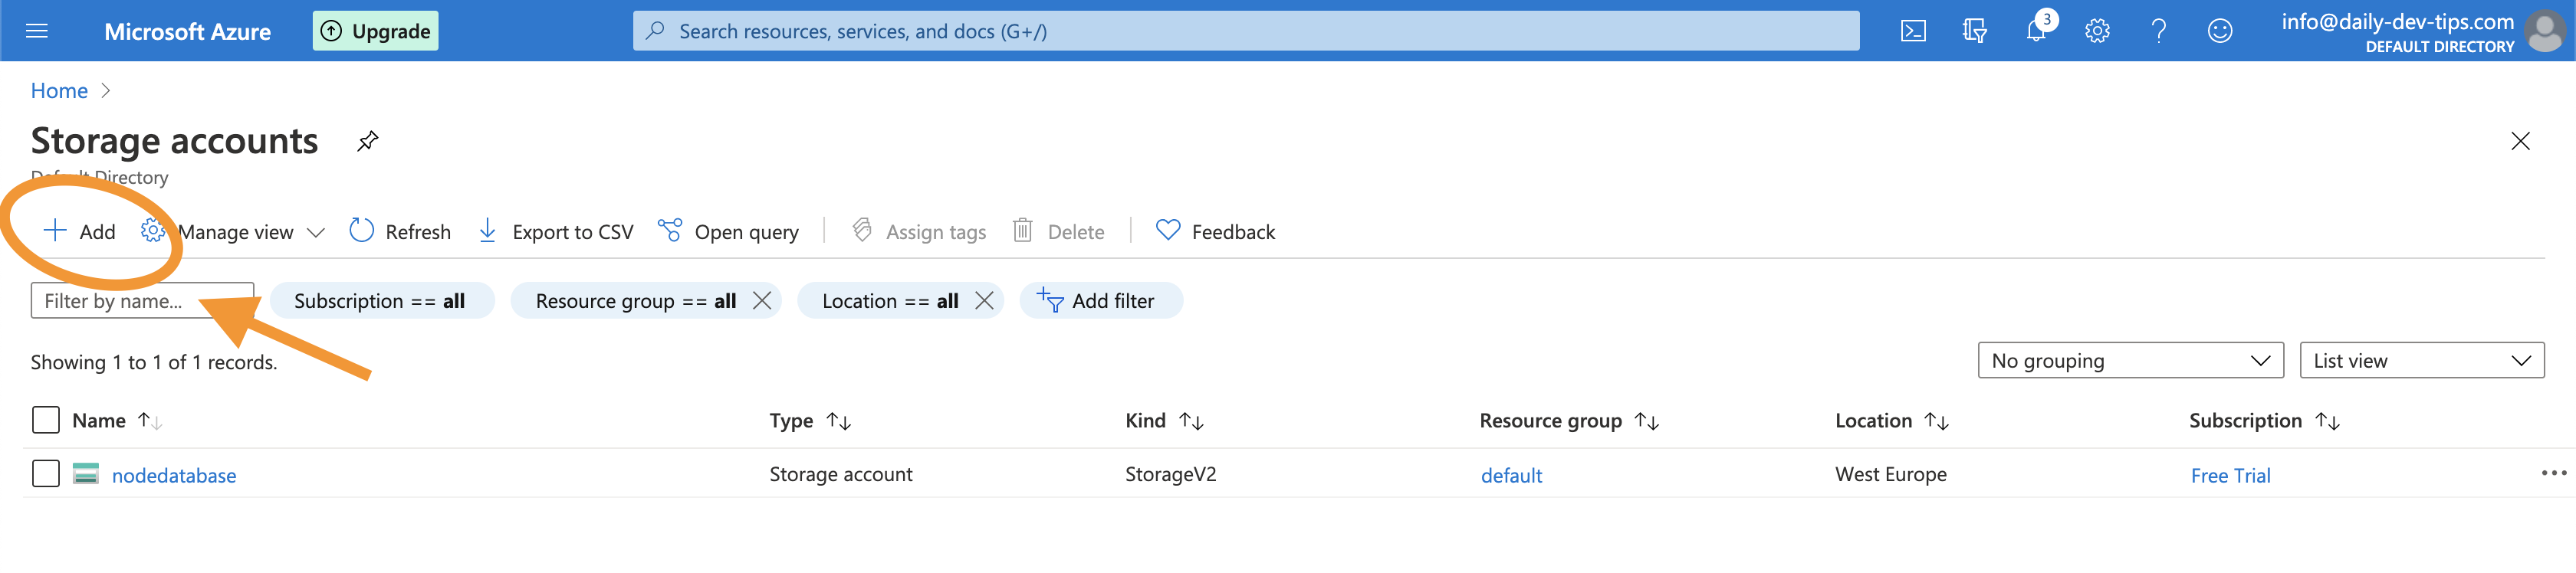
To create a new Table Storage we have to go to "Storage accounts" and click the Add button.
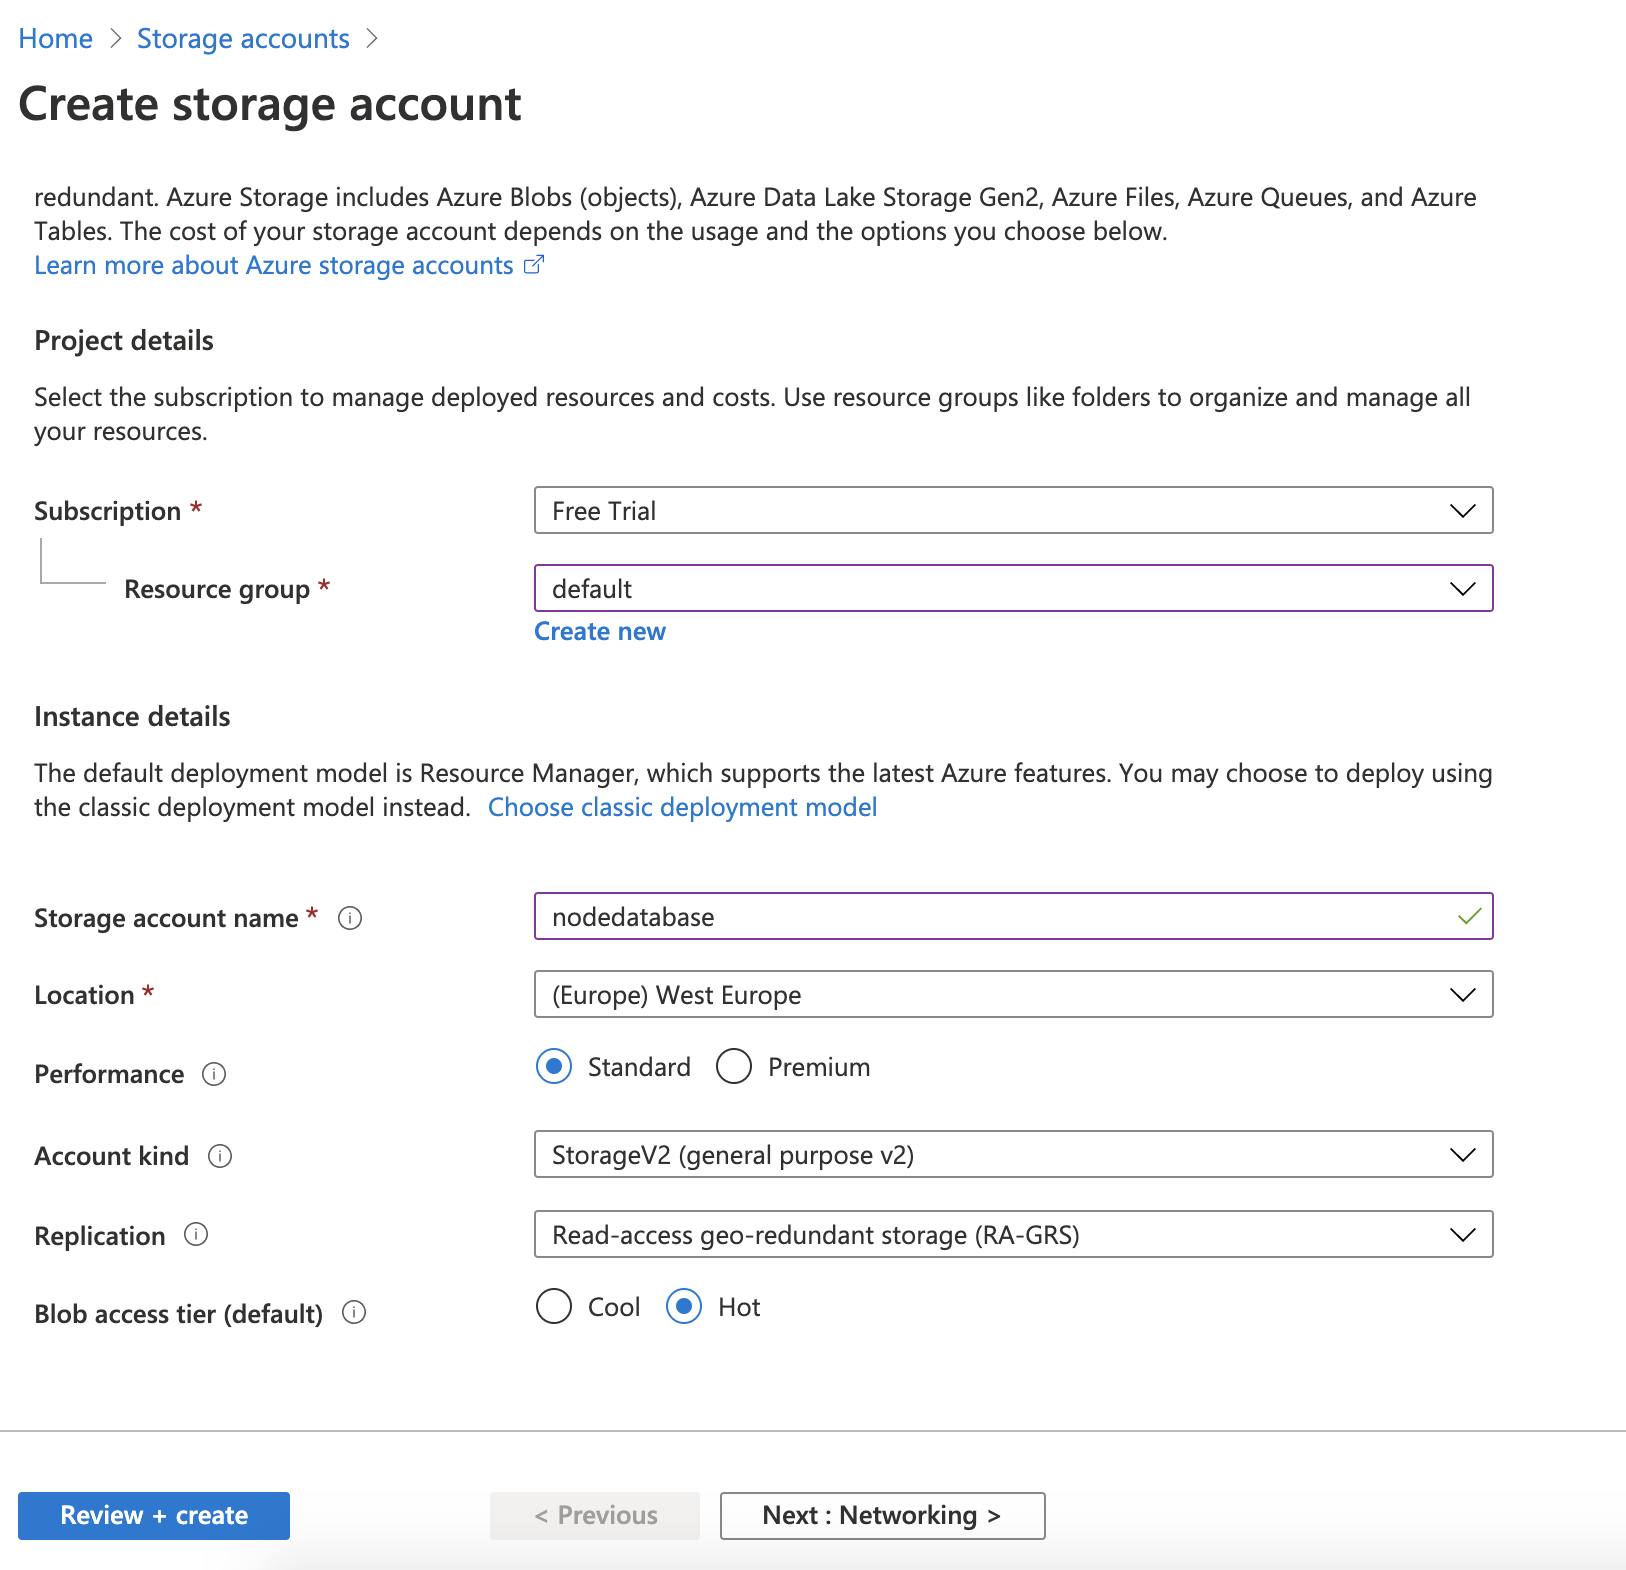
On the following screen, you will have to fill out the following details.
- Resource group: Choose the one we created for the App Service
- Storage account name: Your unique name for this storage account
- Location: Same as our App Service
- Then we can click
Review + create
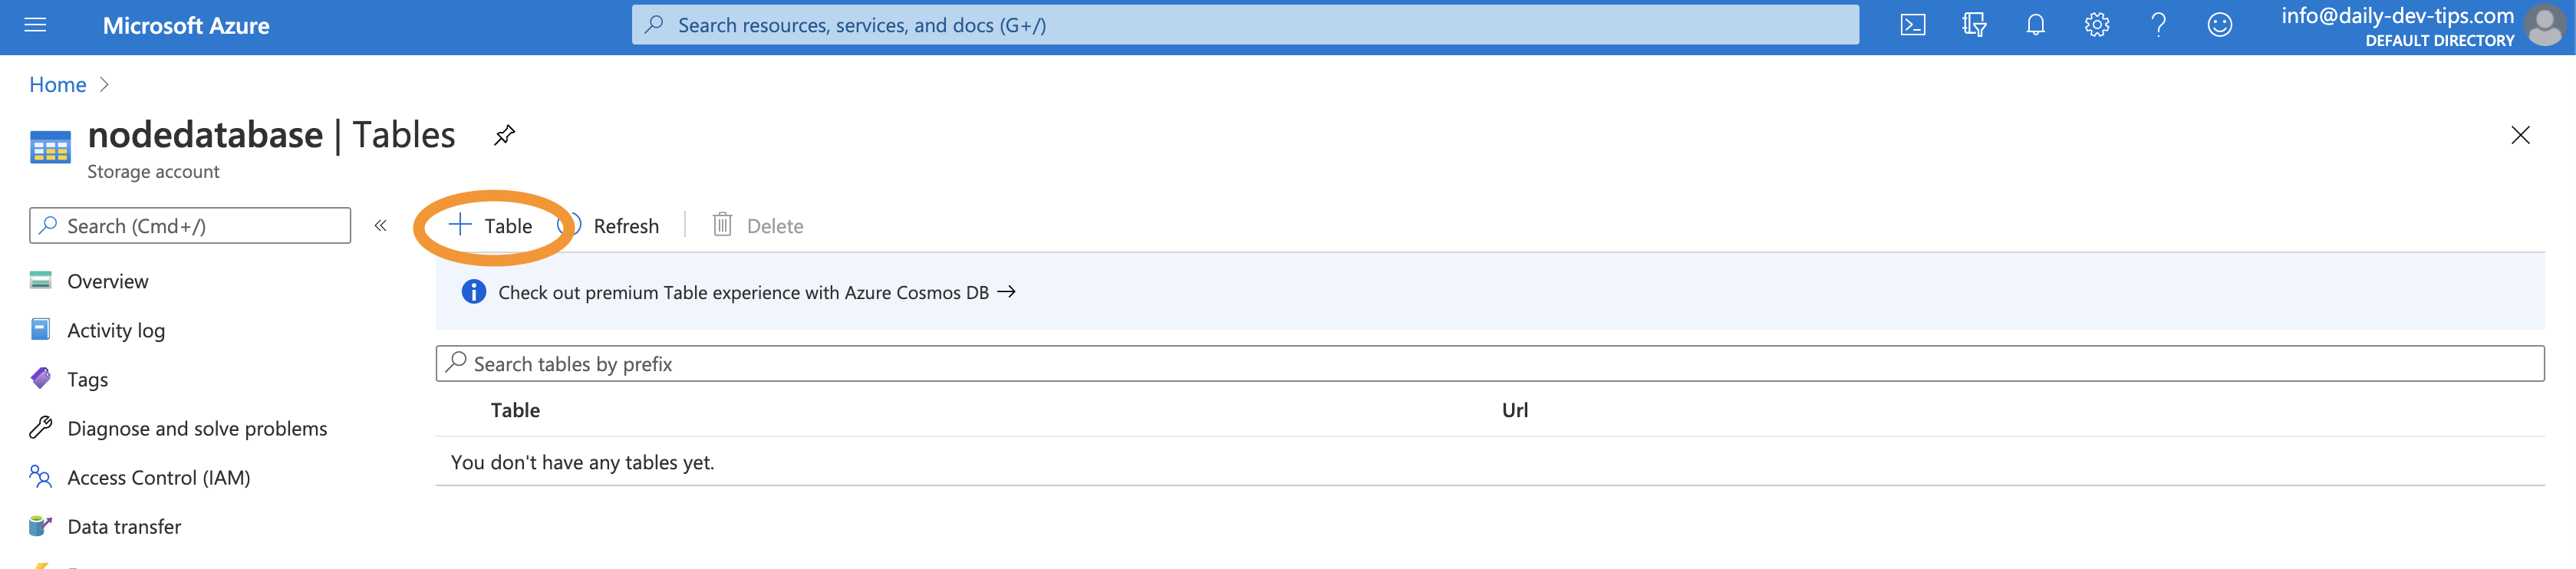
Once that is done, we can open our resource and click the tables button.
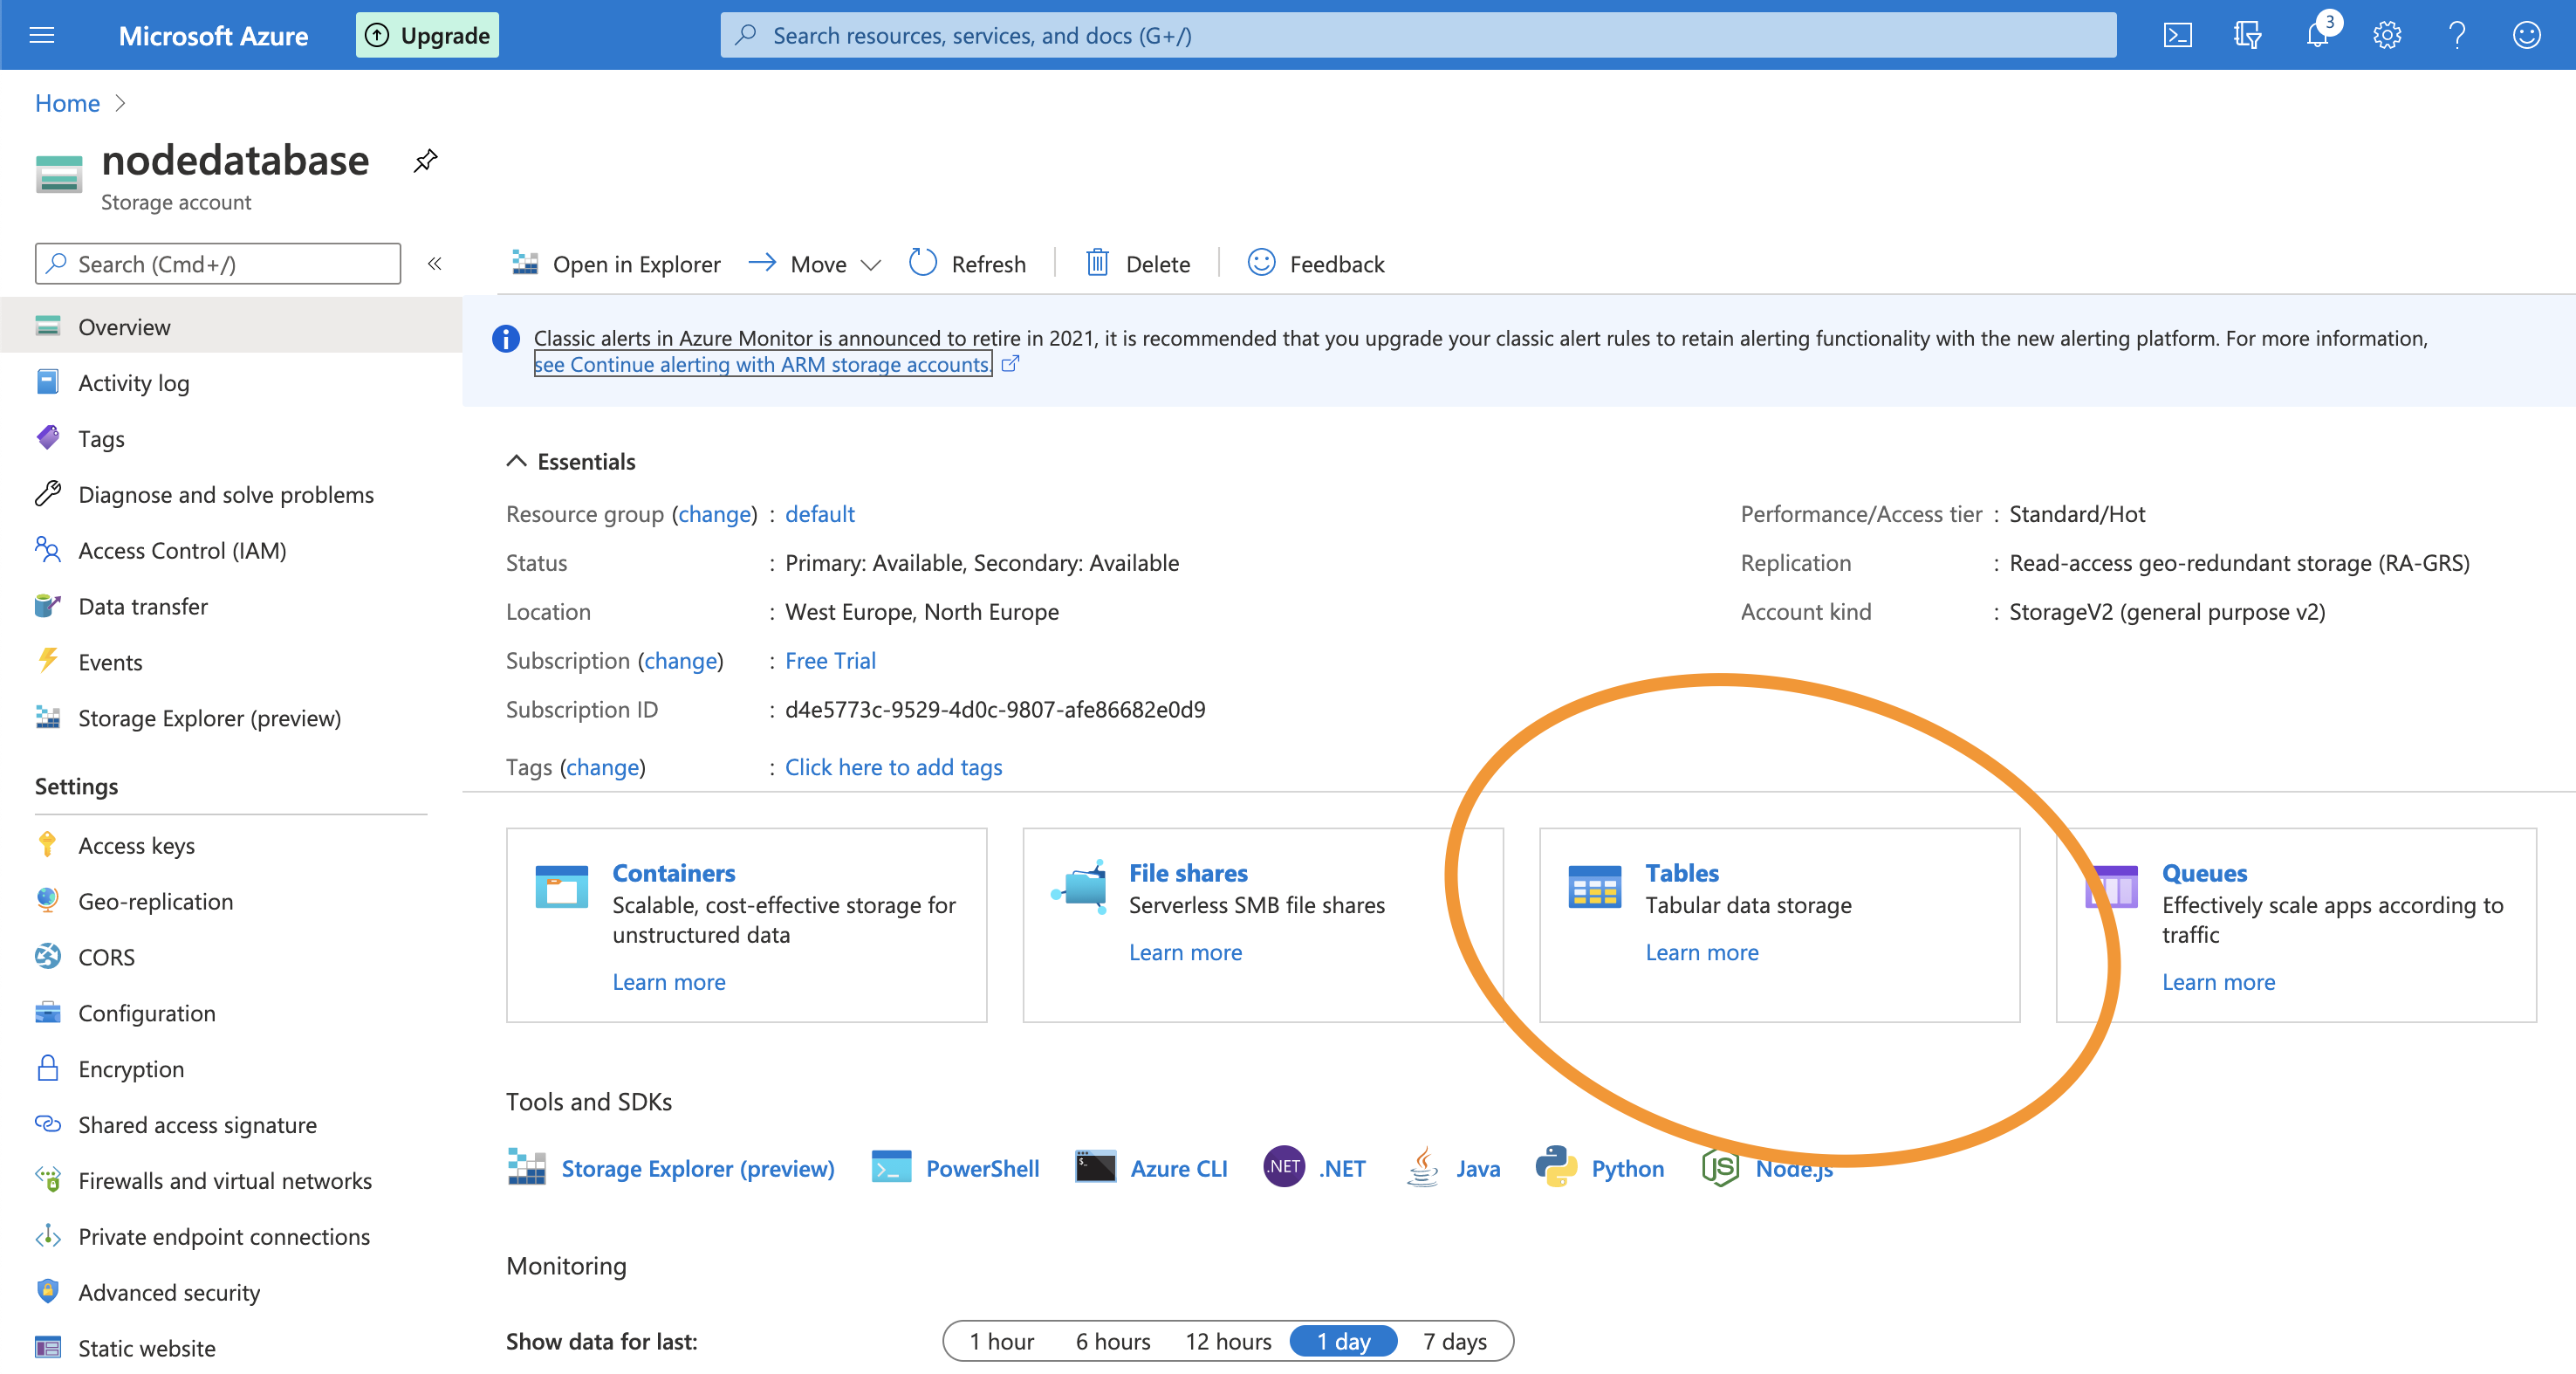
We will go to another view where we can add a new Table.
Note a Storage account can have multiple tables or other storages.
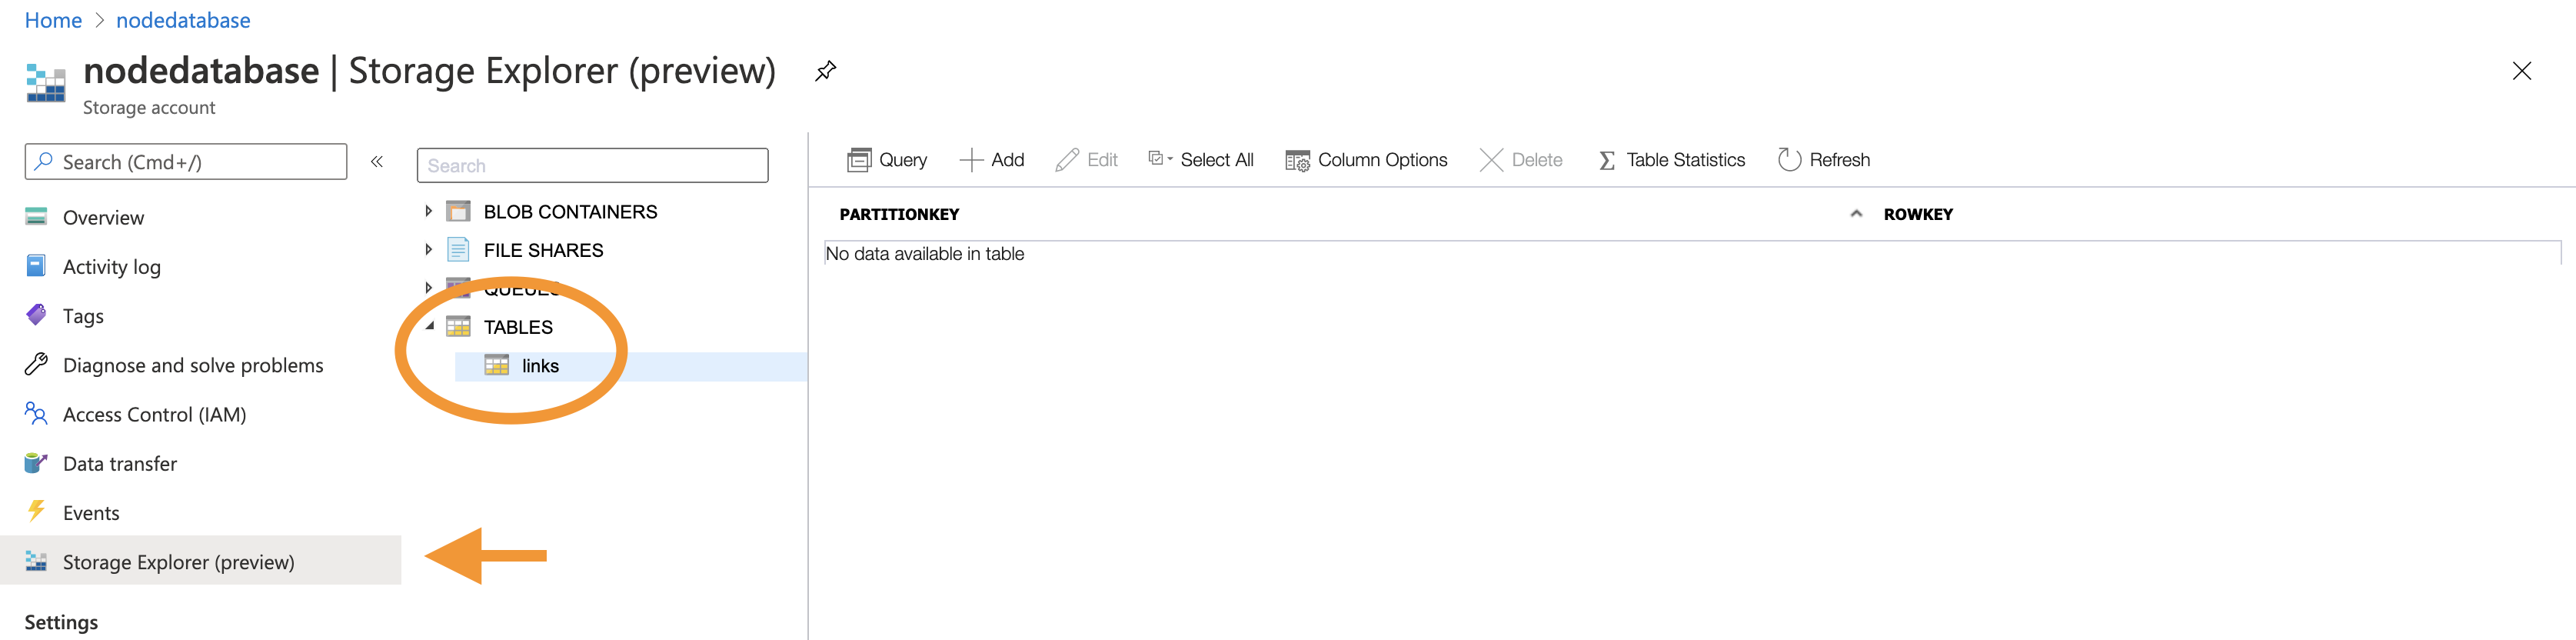
We can then go ahead and open the Storage Explorer to see our table. (This is still a Preview mode)
Linking the Azure Table Storage and App Service
If you are testing local you can add the following two lines to your routes.js.
process.env.AZURE_STORAGE_ACCOUNT = "{storage_account}";
process.env.AZURE_STORAGE_CONNECTION_STRING = "{connection}";
You can replace these values with the actual values from the Storage Account.
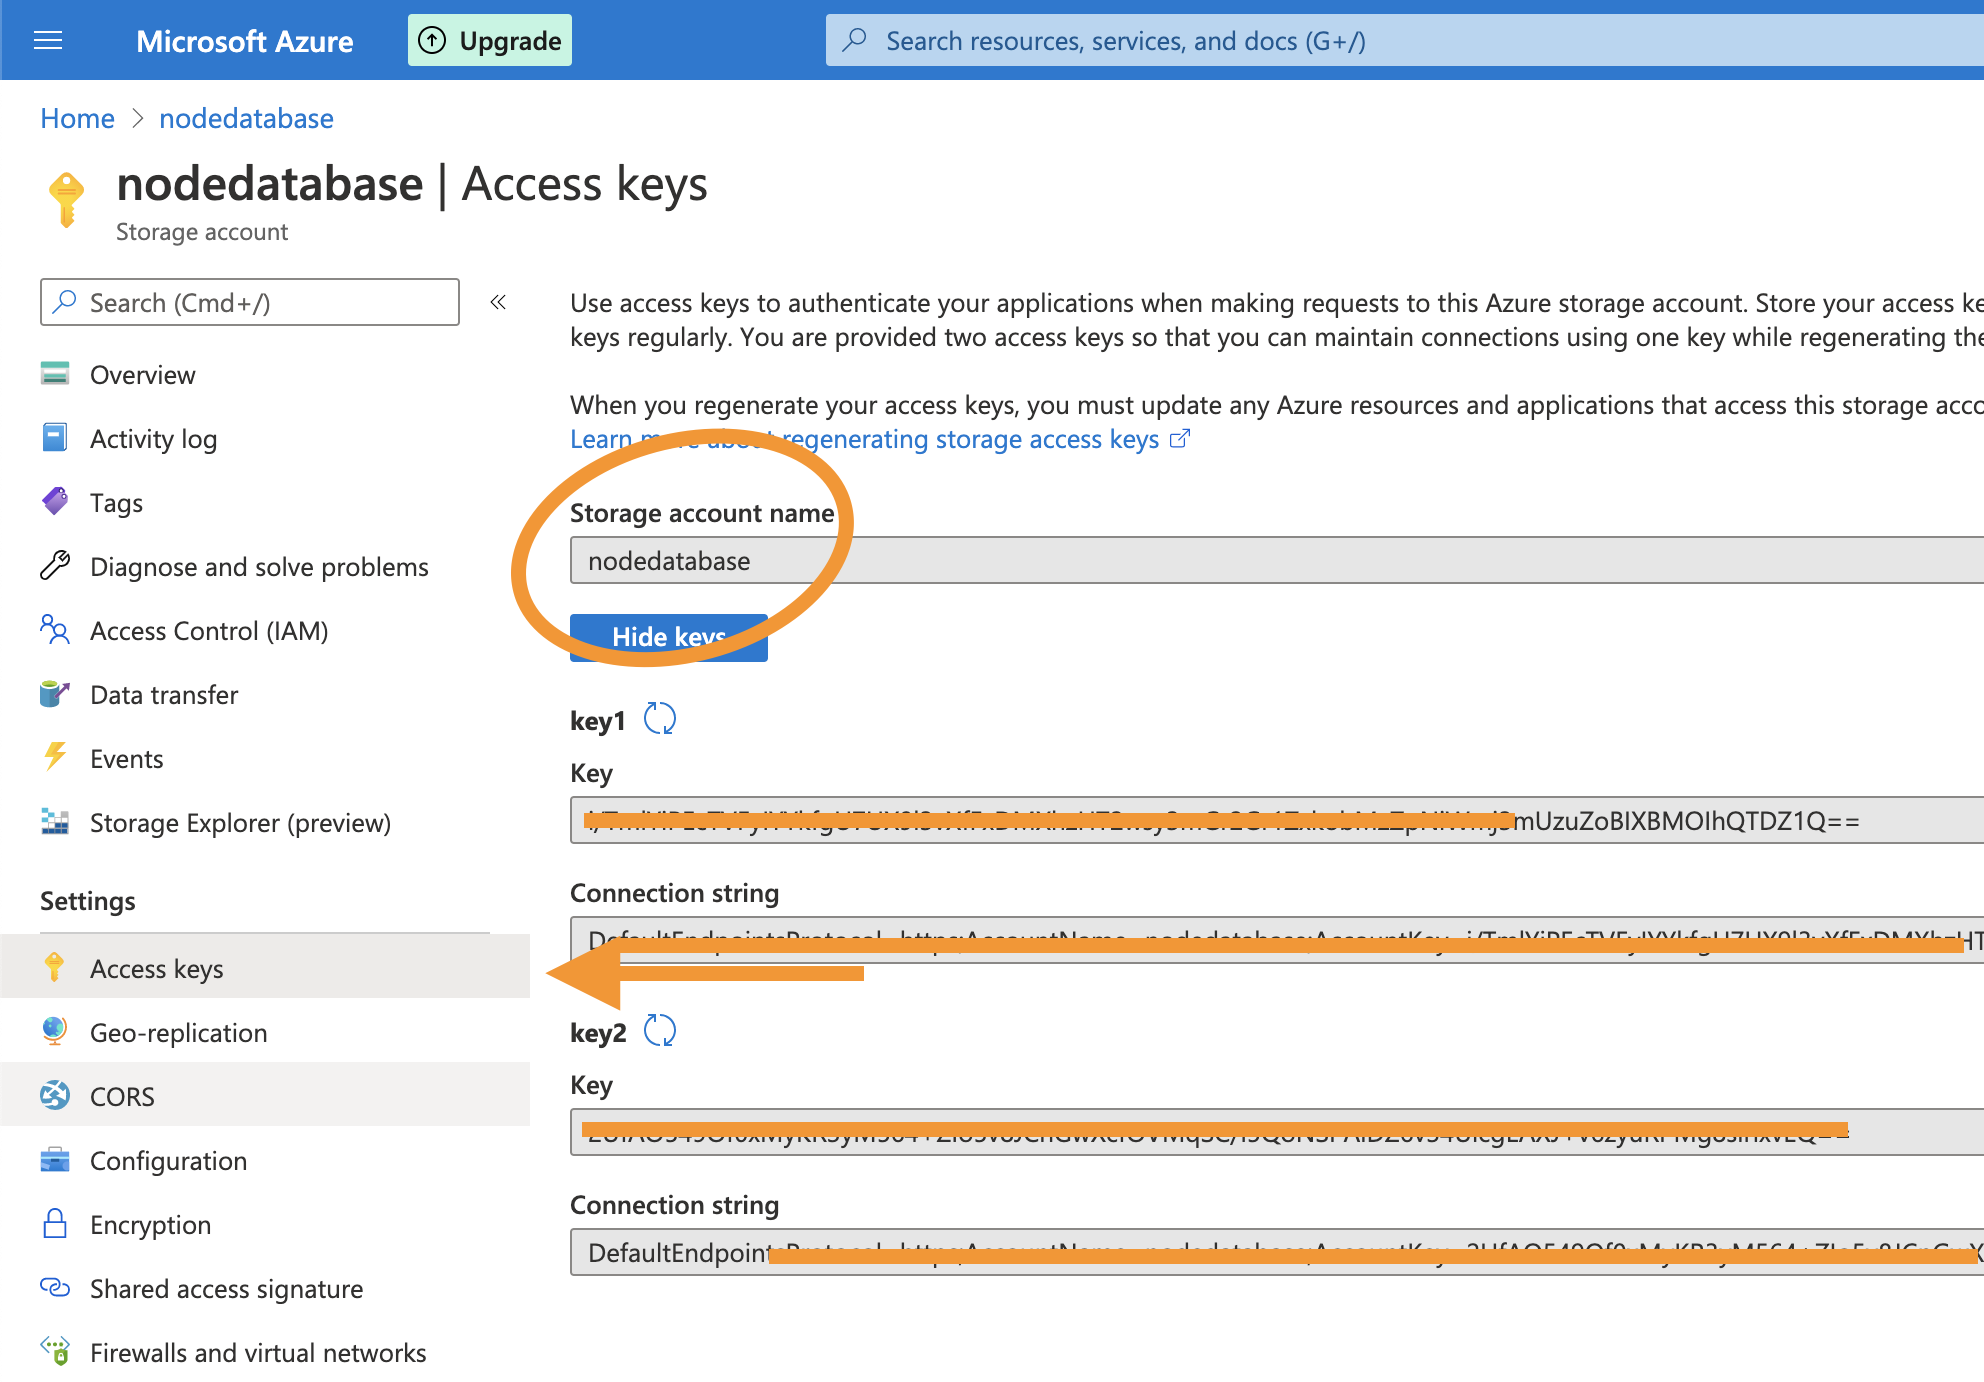
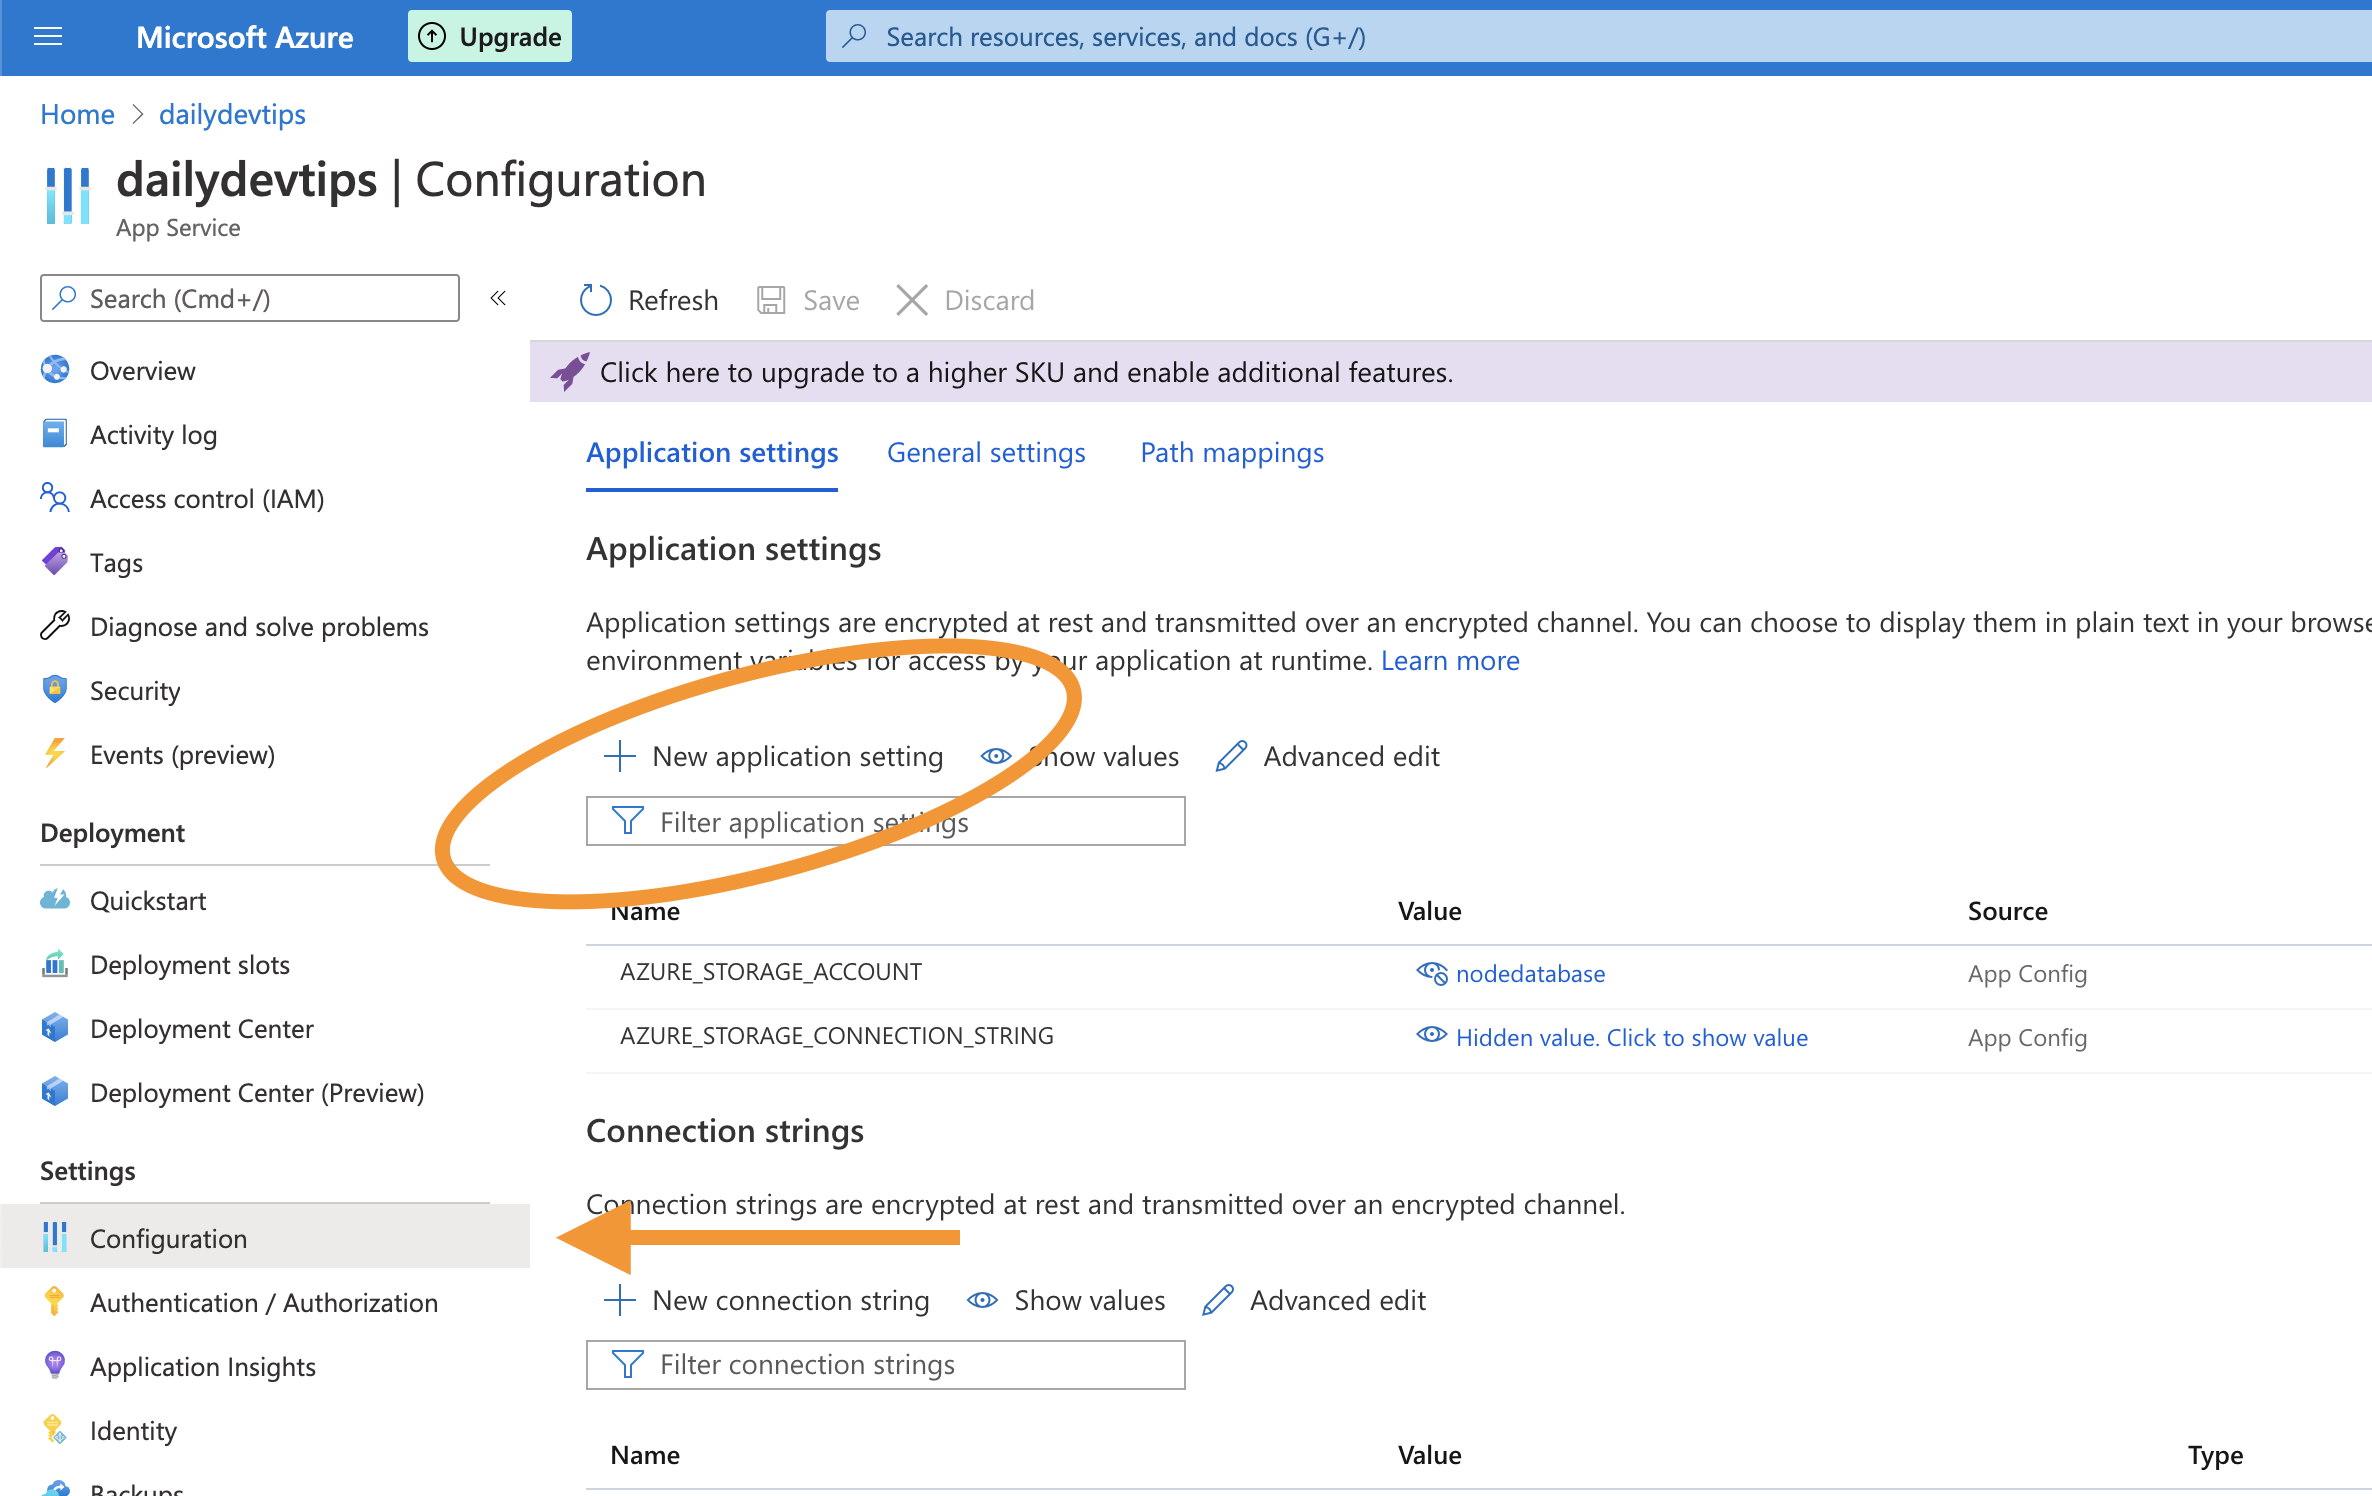
Once you are ready to publish it to Azure, you can remove the two keys above and visit the App Service in Azure.
Go to Configuration and add these two values as Application Settings.
Connecting to Azure Table Storage in Node.js
Once we setup our table in Azure, we can modify our Node.js app to connect to this database.
You can find my starter project here on GitHub.
Let's first install the dependencies we need.
npm i -s azure-storage
npm i -s shortid
That will install the azure-storage package and the shortid package.
We can open up our routes.js file and add these packages.
const azure = require("azure-storage");
const shortid = require('shortid');
const table = 'links';
const entGen = azure.TableUtilities.entityGenerator;
Node.js Adding data in Azure Table Storage
Our first objective is to start writing data to our Table Storage.
Let's define our POST route.
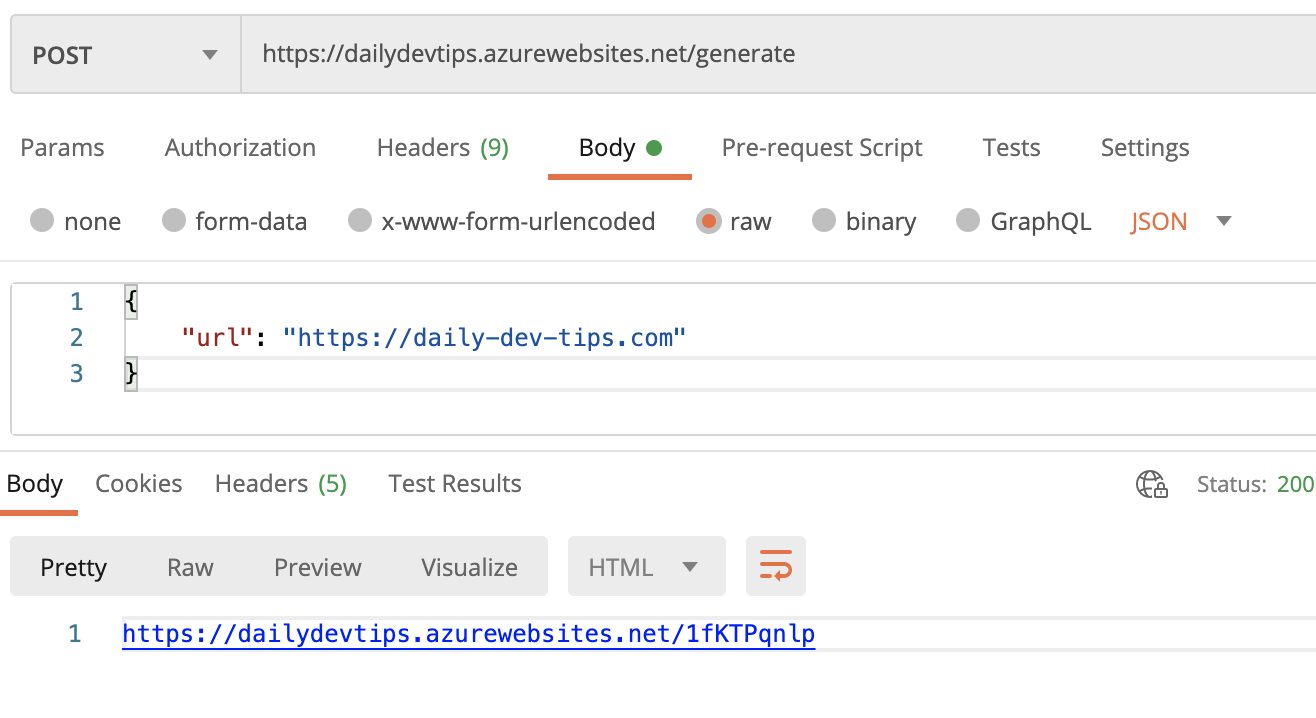
The route is called generate and accepts a POST with a JSON object that looks as such:
{
    "url": "https://daily-dev-tips.com"
}
router.route("/generate").post(function (req, res) {
    const { url } = req.body;
    let code = shortid.generate();
    generateCodeUntilSuccess(code, url).then((c) => {
        res.status(200).send('https://dailydevtips.azurewebsites.net/' + c);
    });
});
Once the body comes in, we generate a unique short-id and call then function generateCodeUntilSuccess once that returns something, we send the browser the new short url!
Lets see that generateCodeUntilSuccess function
async function generateCodeUntilSuccess(code, url) {
    return await addLink(code, url).then((c) => {
        return c;
    }).catch((e) => {
        generateCodeUntilSuccess(shortid.generate(), url);
    });
}
Here we use a async...await method since we need to make sure the generated code is unique.
If that fails, we let the function call itself.
This means all the magic happens in the addLink function above.
The addLink function accepts a code and a URL. It will first connect to the azure Table Storage and query if this code is already used.
If that is the case, we will reject this call.
If the code is not used before we can go ahead and insert this into our table.
To insert into the table storage, we need to always pass the partitionKey and the rowKey these are our unique identifiers.
Be aware: It is not an auto-increment field, and we have to provide the actual unique values.
Once we insert our row, we resolve the code to show back to the user.
function addLink(code, url) {
    return new Promise((resolve, reject) => {
        try {
            var tableService = azure.createTableService();
            var query = new azure.TableQuery().top(1).where("RowKey eq ?", code);
            tableService.queryEntities(table, query, null, function (error, result, response) {
                if (!error) {
                    var link = {
                        PartitionKey: entGen.String('link_' + code),
                        RowKey: entGen.String(code),
                        Url: entGen.String(url),
                    };
                    tableService.insertEntity(table, link, function (error, result, response) {
                        if (!error) {
                            resolve(code);
                        }
                        reject(error);
                    });
                }
            });
        } catch (e) {
            reject(e);
        }
    });
}
If we run this in Postman, we should see a return like this.
Node.js Reading data from Azure Table Storage
Of course it's cool to write data, but we want to visit that url we just created and get redirected to the URL we provided as input.
Let's start off by defining the route for our unique code.
router.route("/:uniqueId").get(function (req, res) {
    const uniqueId = req.params.uniqueId;
    getRecord(uniqueId).then(url => {
        res.redirect(301, url);
    }).catch(err => {
        res.status(400).send("Error: Code not found");
    });
});
We create a "wildcard" route and retrieve our unique code from the URL.
We then call the getRecord function, and on success, we redirect the user to the returned URL.
So, what does this getRecord function do?
It's basically a copy of the above check function, but build to return the actual url if it finds a record.
function getRecord(uniqueId) {
    return new Promise(function (resolve, reject) {
        try {
            var tableService = azure.createTableService();
            var query = new azure.TableQuery().top(1).where("RowKey eq ?", uniqueId);
            tableService.queryEntities(table, query, null, function (error, result, response) {
                if (!error) {
                    if (result.entries[0] !== undefined) {
                        resolve(result.entries[0].Url._);
                    } else {
                        reject('code not found');
                    }
                } else {
                    reject(error);
                }
            });
        } catch (e) {
            reject(e);
        }
    });
}
If we visit our unique URL, we get redirected to our defined link we want to end up at.
You can find the full code for this project on GitHub.
Thank you for reading, and let's connect!
Thank you for reading my blog. Feel free to subscribe to my email newsletter and connect on Facebook or Twitter



