
Adding SSL to our Azure Node app

I'm a full-stack developer from South Africa 🇿🇦. I love writing about JavaScript, HTML and CSS.
So far, we had some cool introductions to Azure, exploring the following topics.
- Deploying a Node app to Azure
- GitHub automated-deployments to Azure
- Adding a custom domain to Azure App Service
In this article, we will learn how to bind an SSL to our custom domain in the Azure App.
Having an SSL on a domain is very important. Most browsers are even blocking non-secure websites, so it's a no-go not to have a SSL.
Note: Like the custom domain, this is not available on the free tier!
SSL Options
There are quite a few options when it comes to adding an SSL to a domain.
The simplest way you can go is by buying an SSL from an authority like Comodo, or your domain provider.
For me, I'm going with a free alternative 💸.
We can go for Let's Encrypt, but it's a bit difficult to get that working on Azure, so in our instance, we are using ZeroSSL.
Getting our SSL from ZeroSSL
Let's start by getting our actual certificate from ZeroSSL. Visit the Zero SSL website and fill out your domain in the header section.

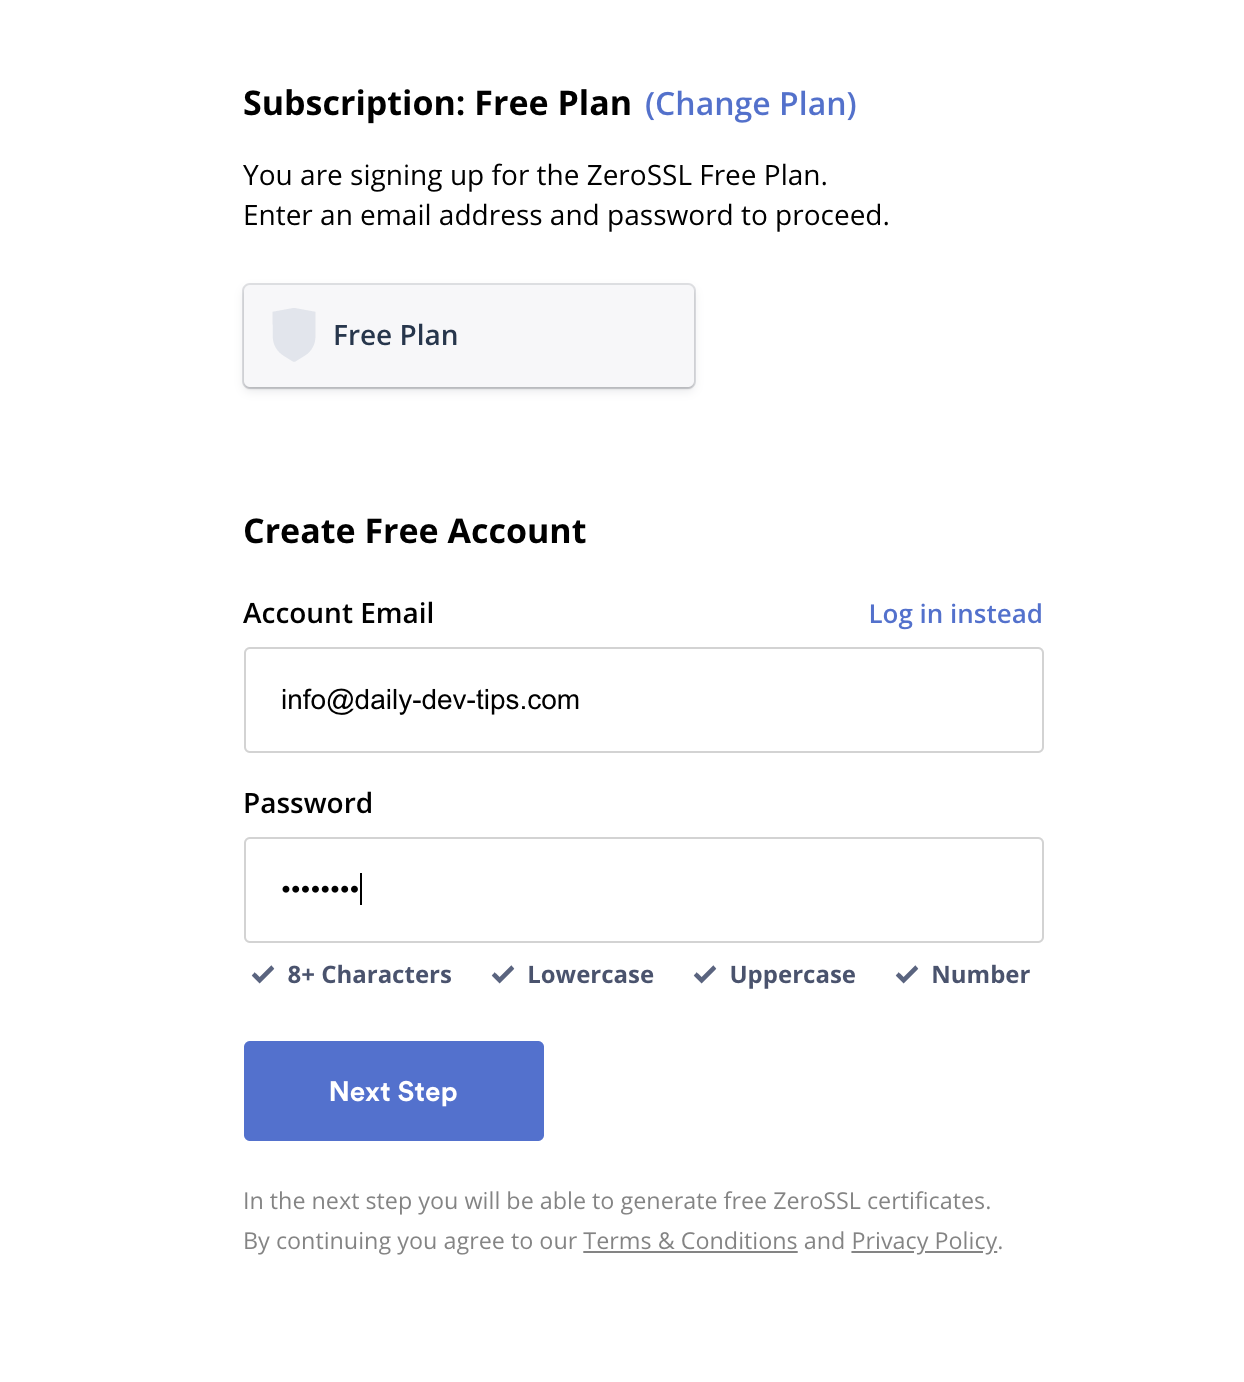
We can then create a free account.
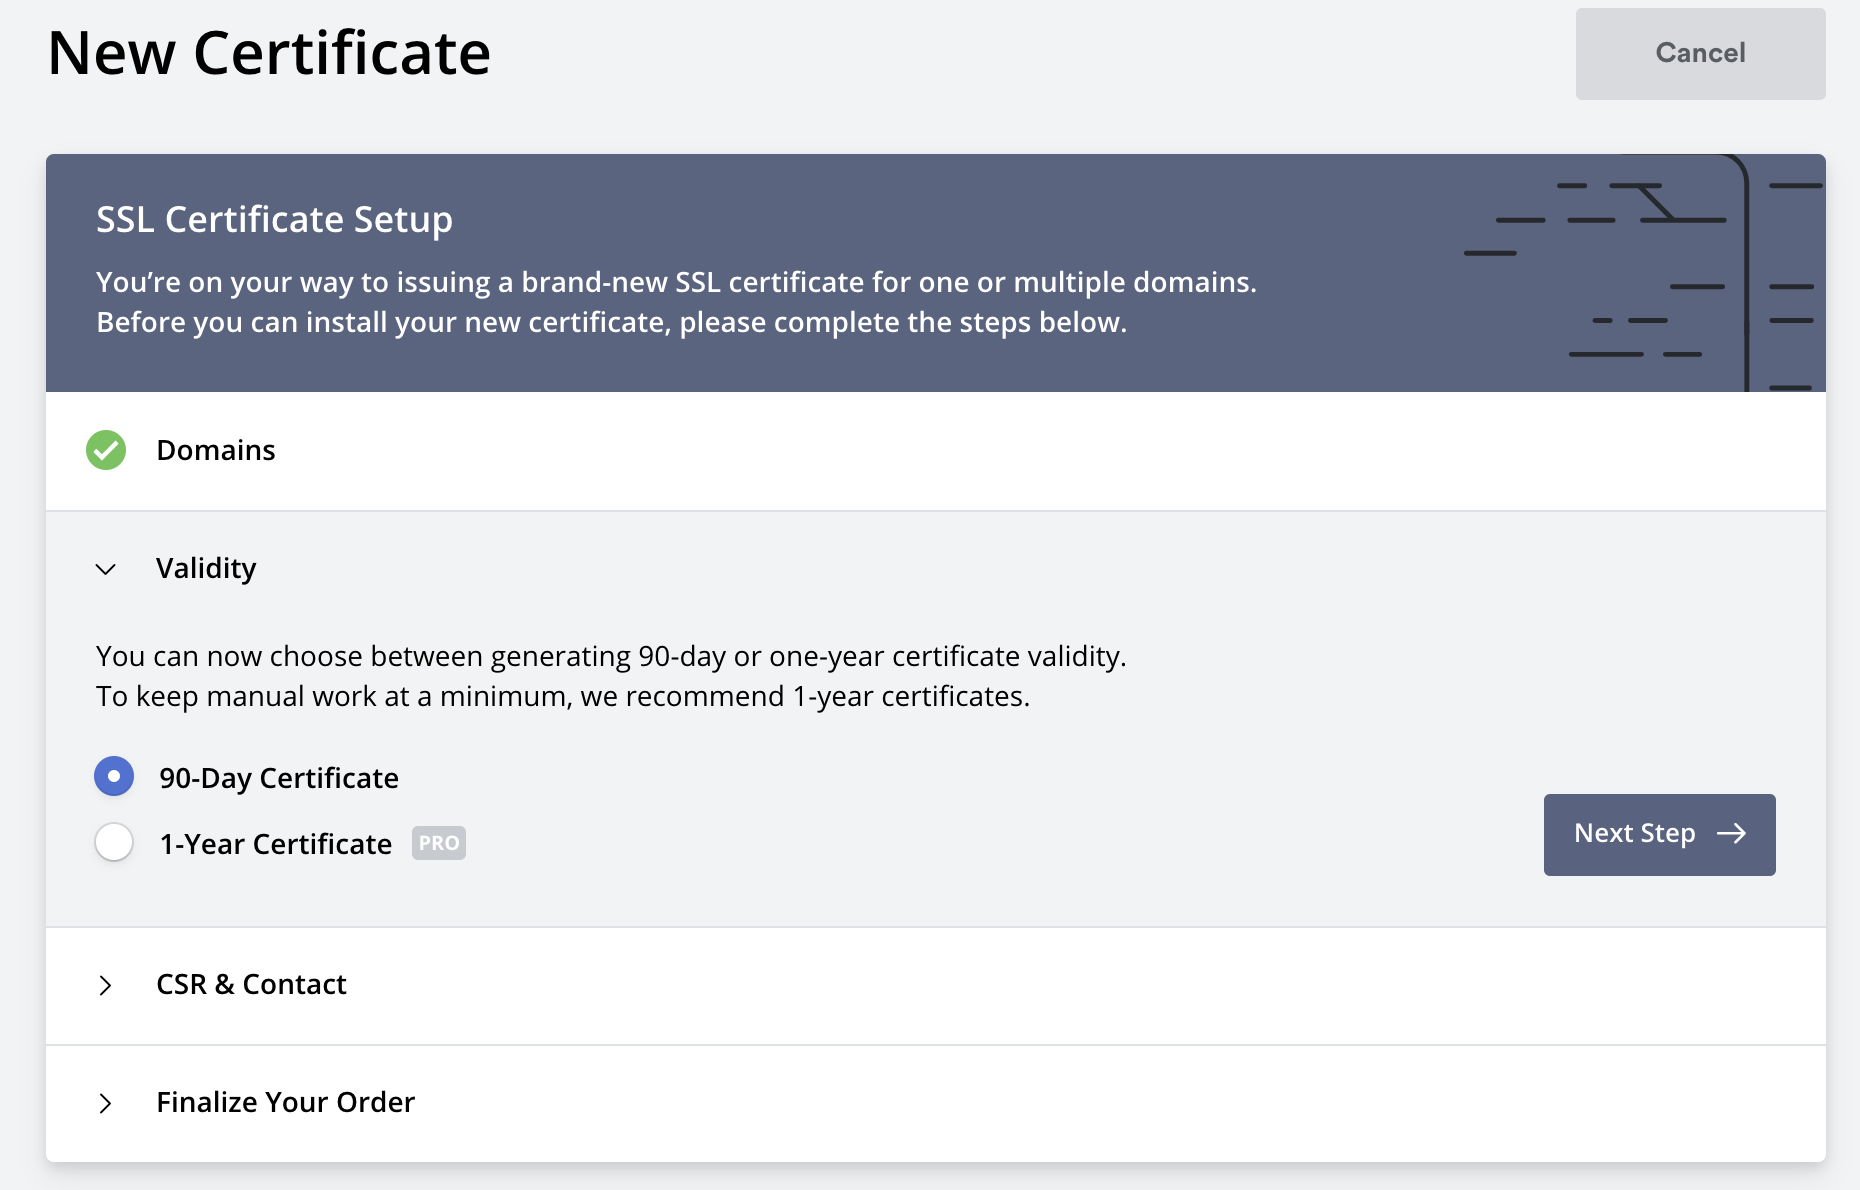
In the following section, we can finalise the details for our SSL certificate. In the first section, we select the 90-day option since that's free.
We do have to re-enter every 90 days (us cheapskates)
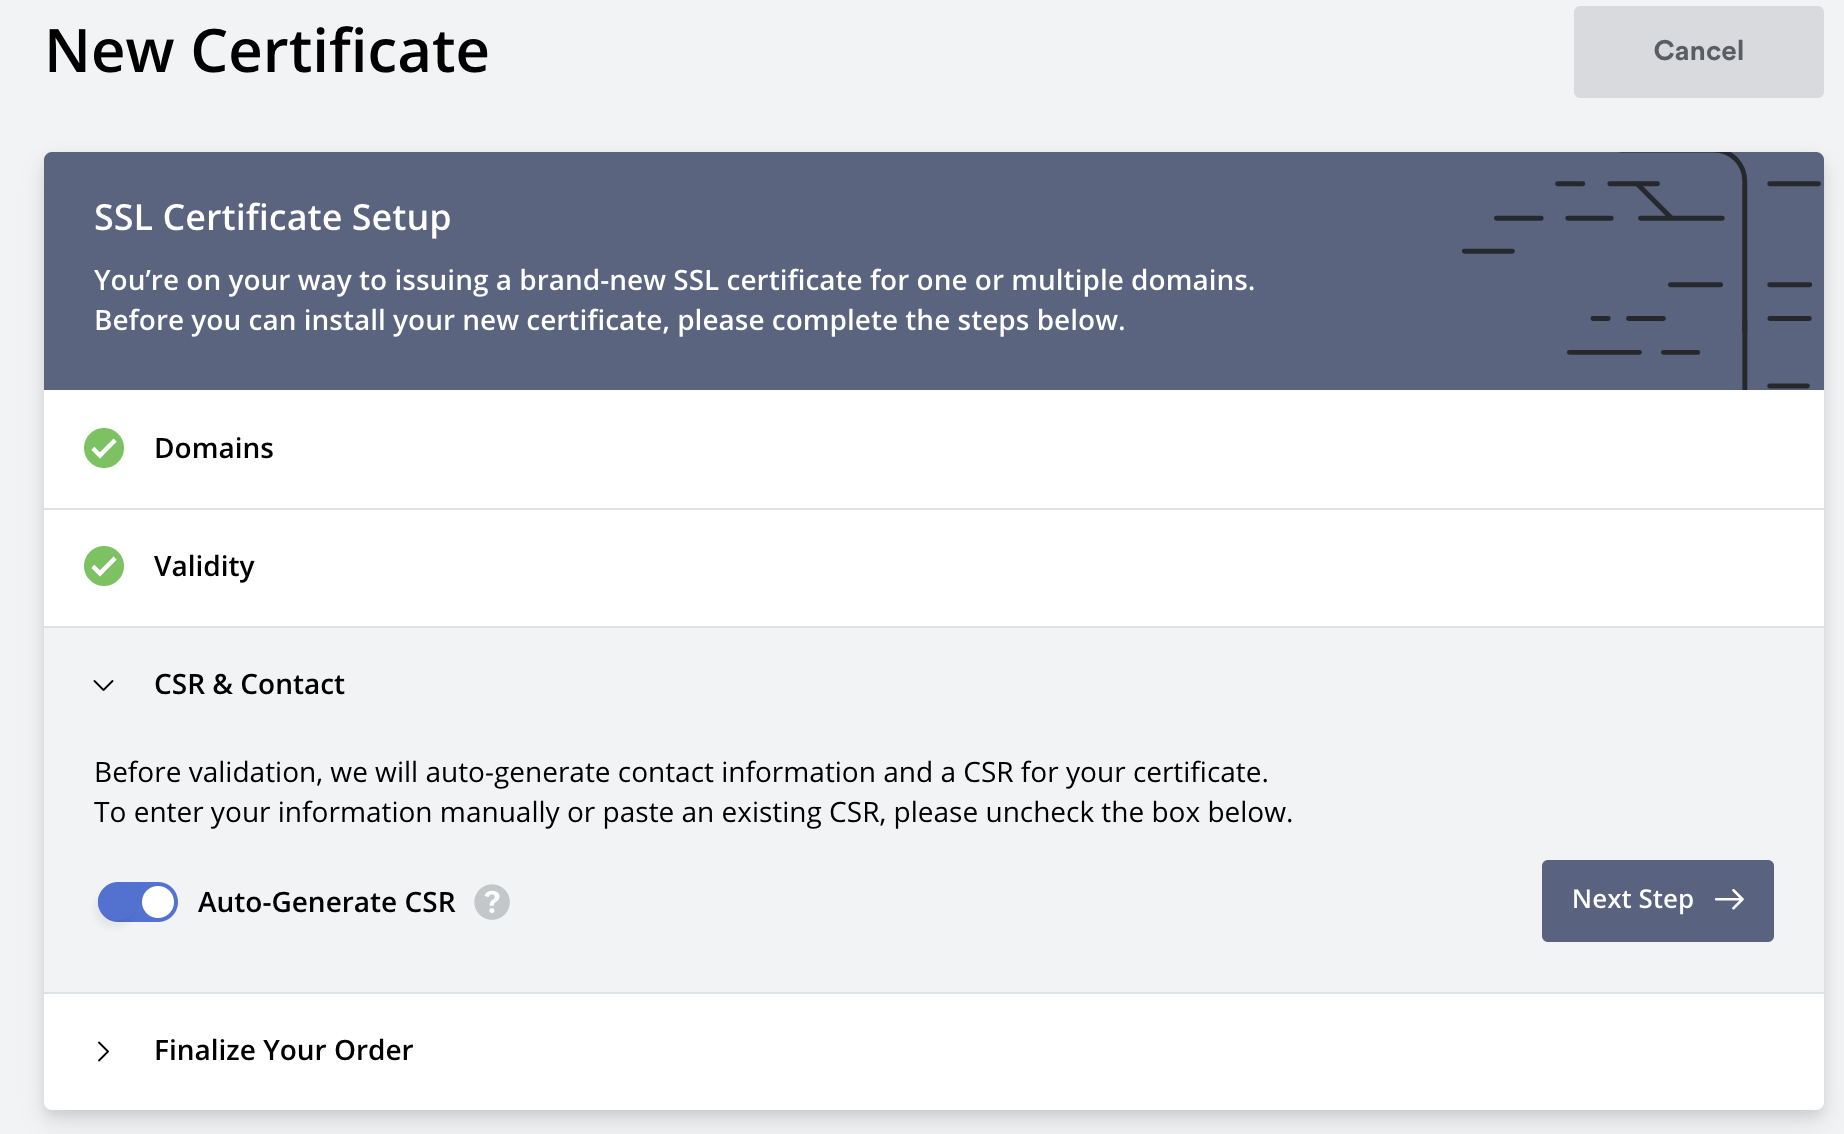
In step two, we check the option to generate the CSR automatically. We don't want to do this ourselves.
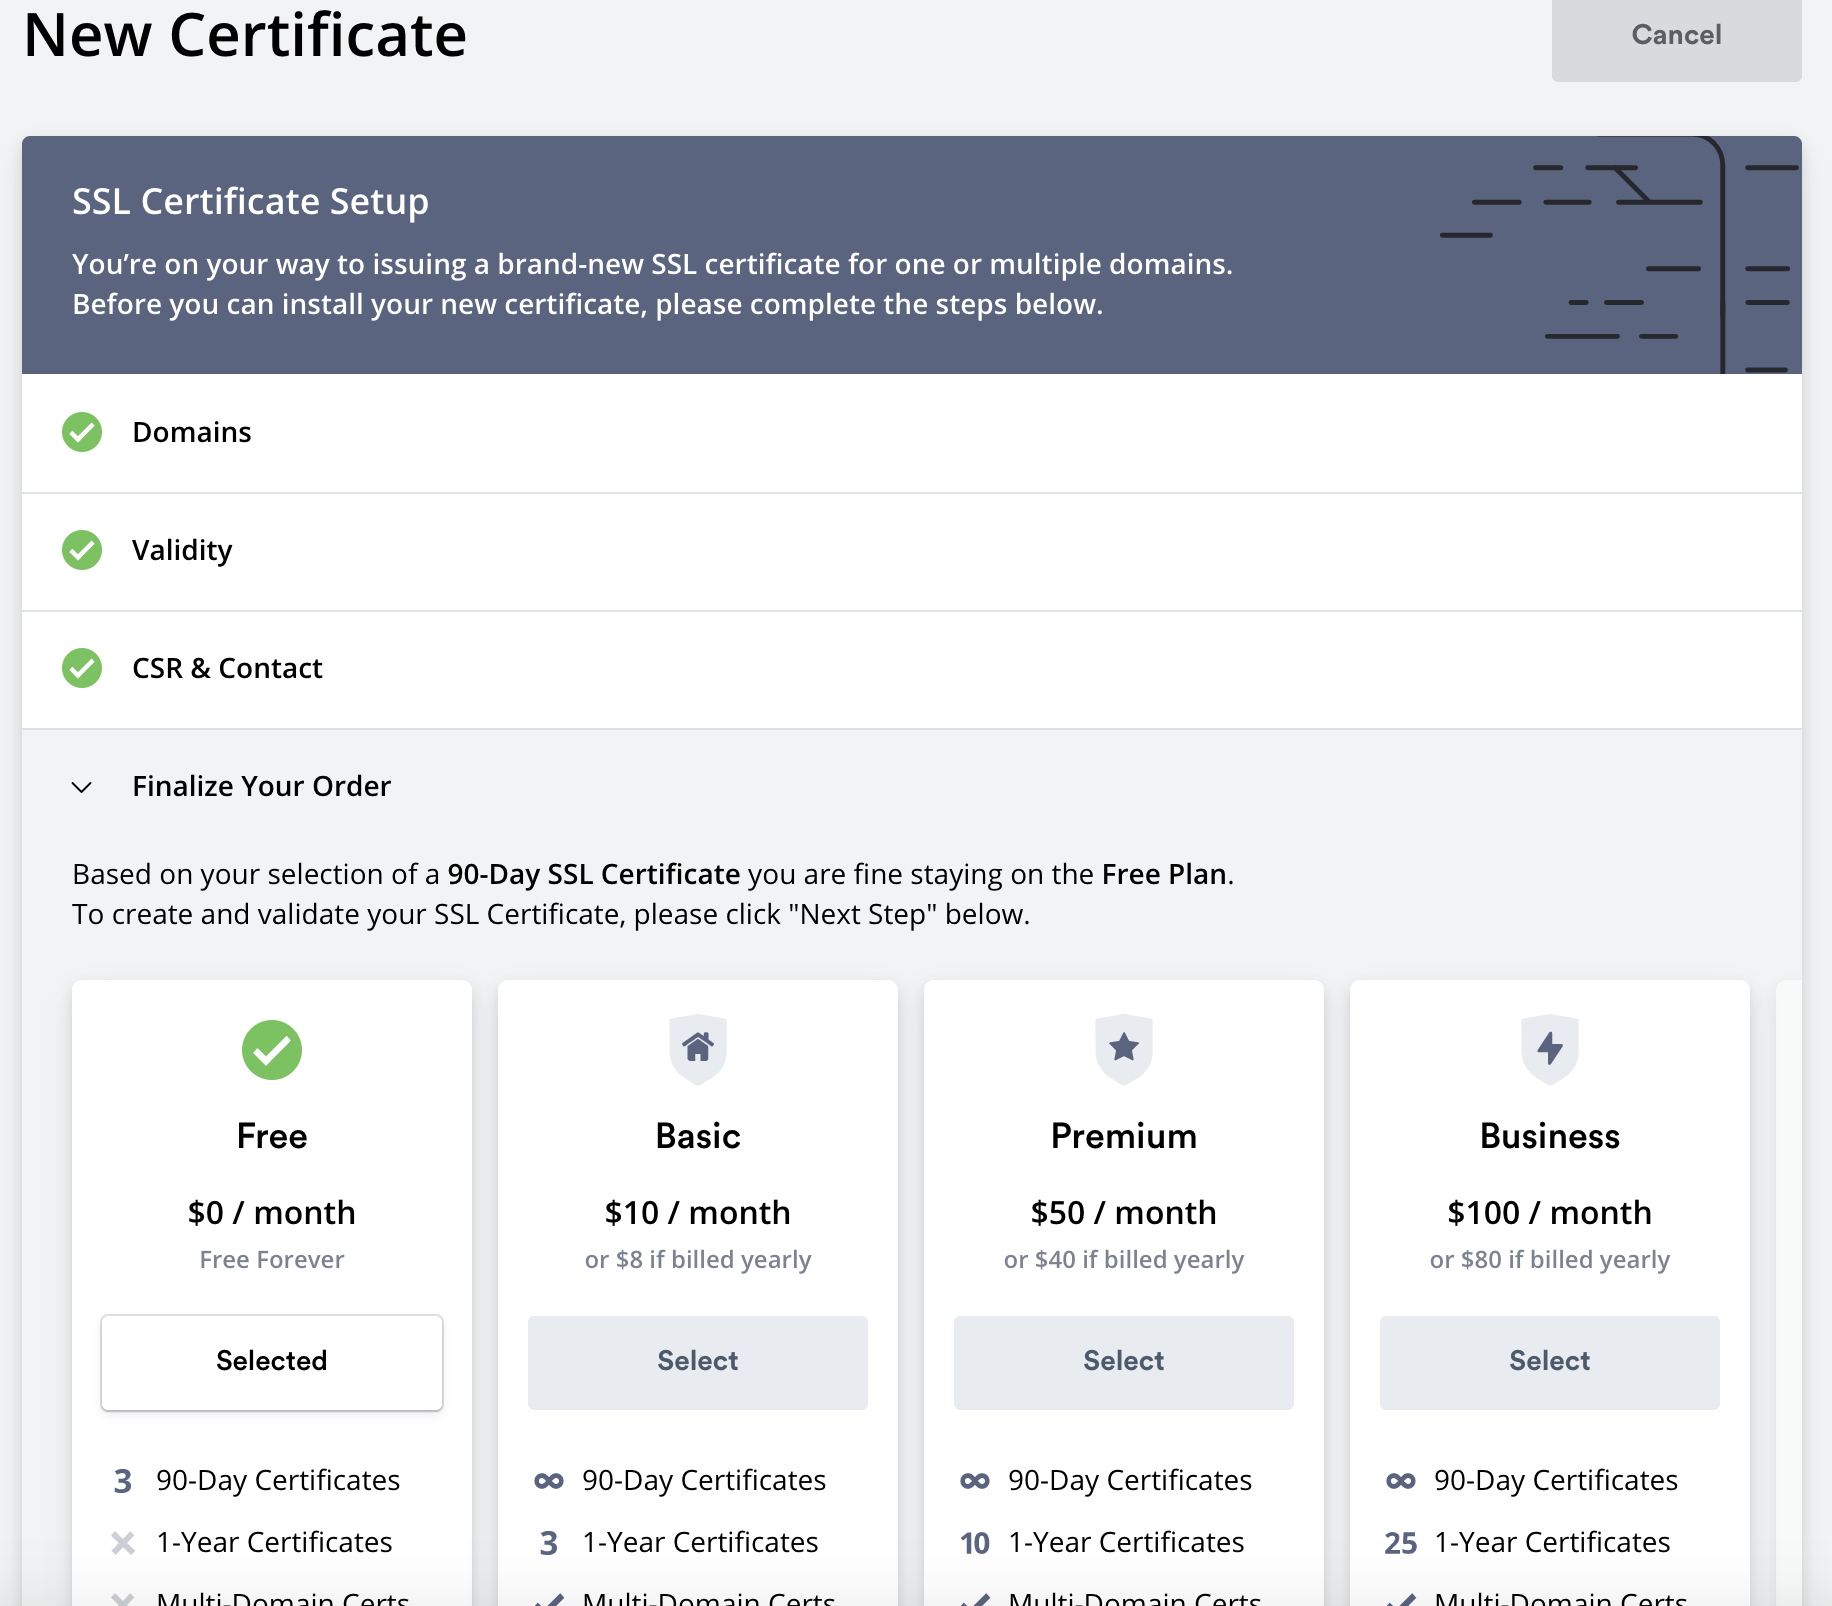
In step three, we select the free option.
In the next step, we select our verification method. For me, using the DNS option is the quickest way, so I'm choosing that one.
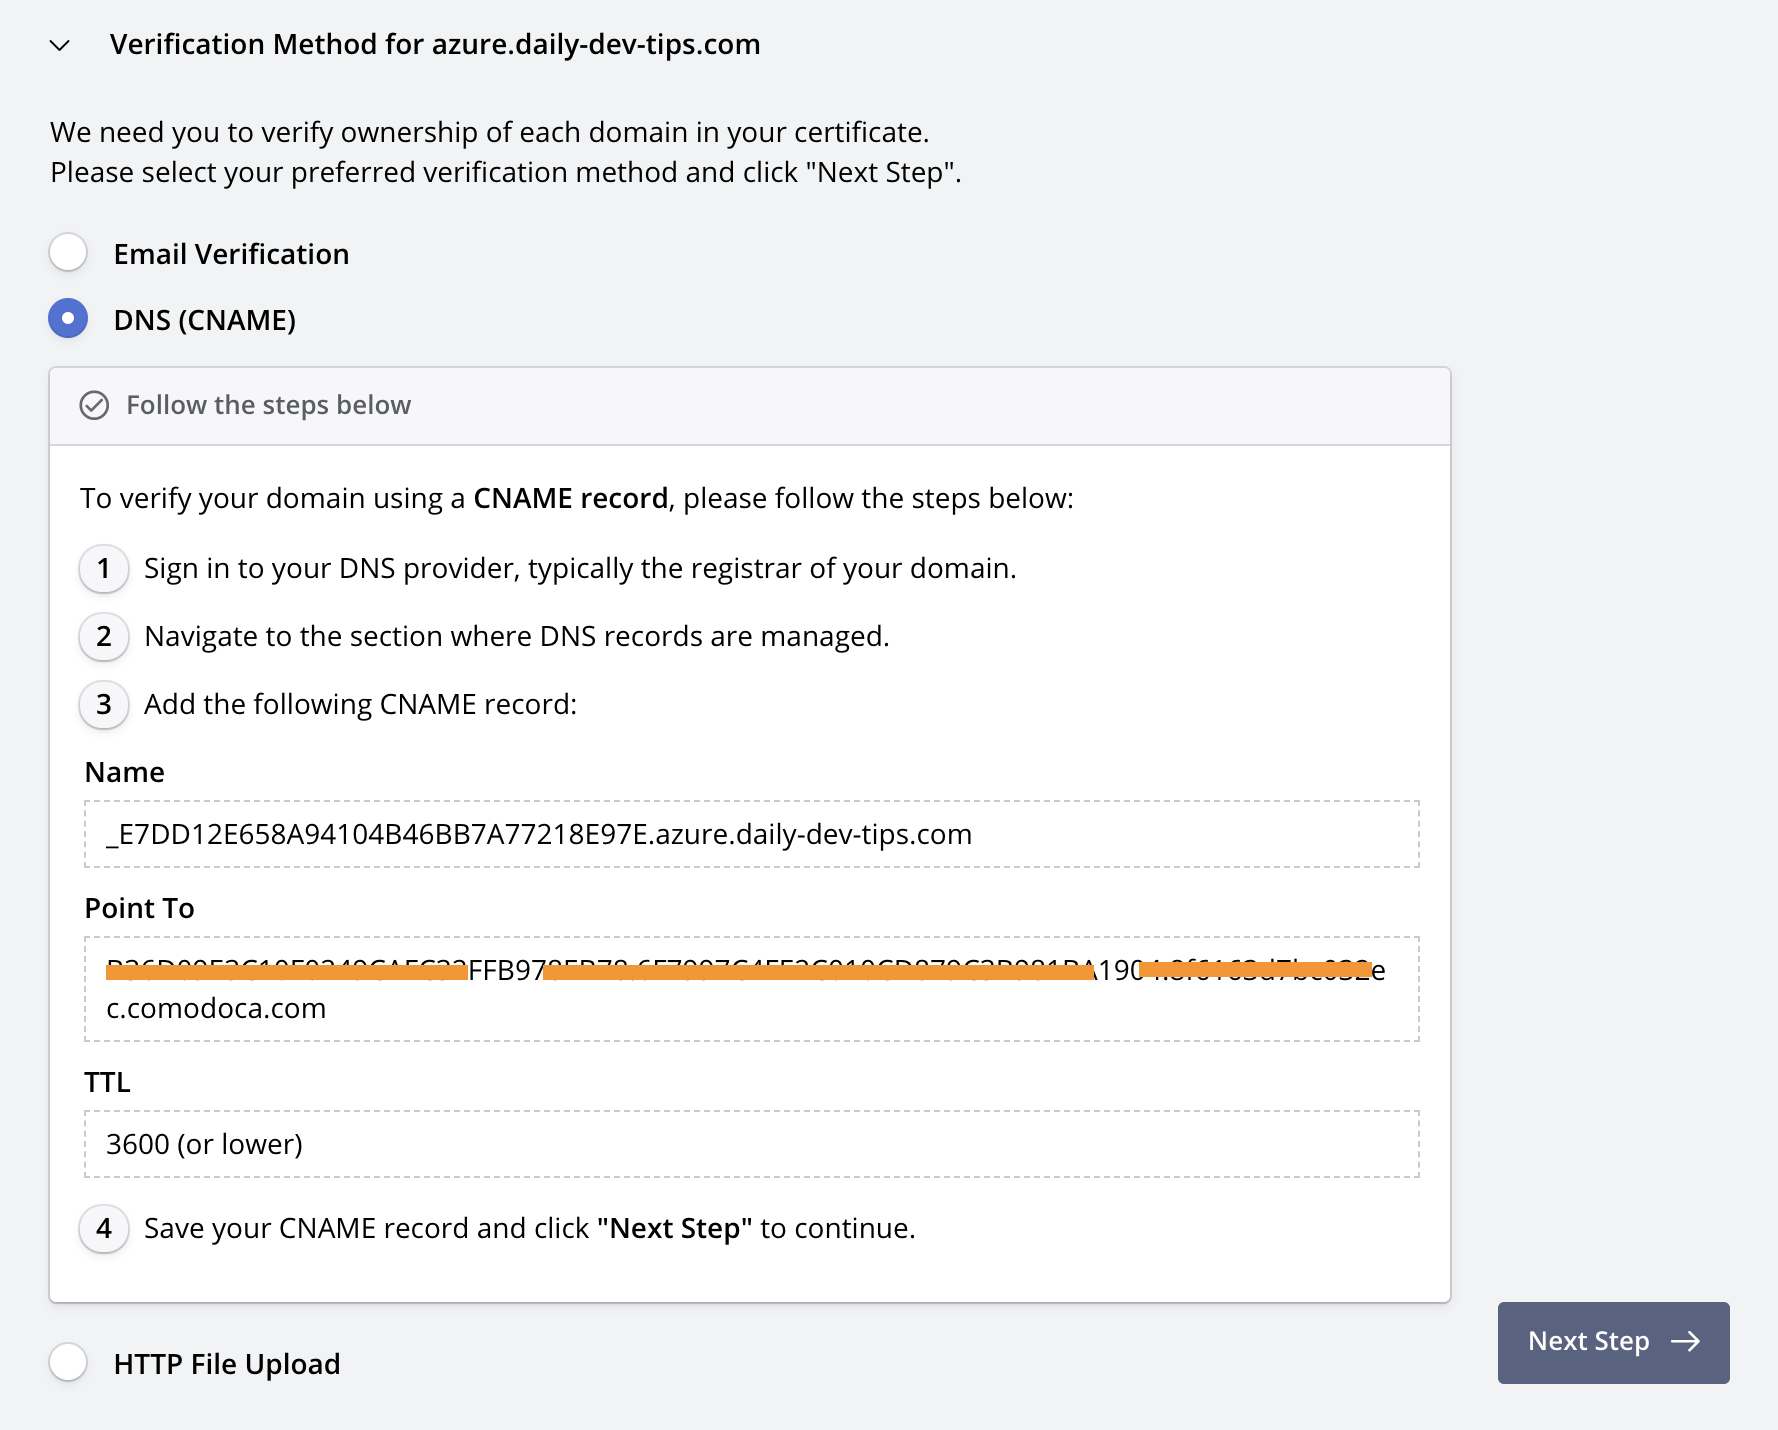
Verifying the SSL via CNAME
At this point, we need to go to our domain registrar (Netlify for me) and visit our DNS section.
Add a new DNS record that will have the following setup.
- Type: CNAME
- Name: What ZeroSSL gave you
- Value: The value ZeroSSL provided you
- TTL: 3600 or less
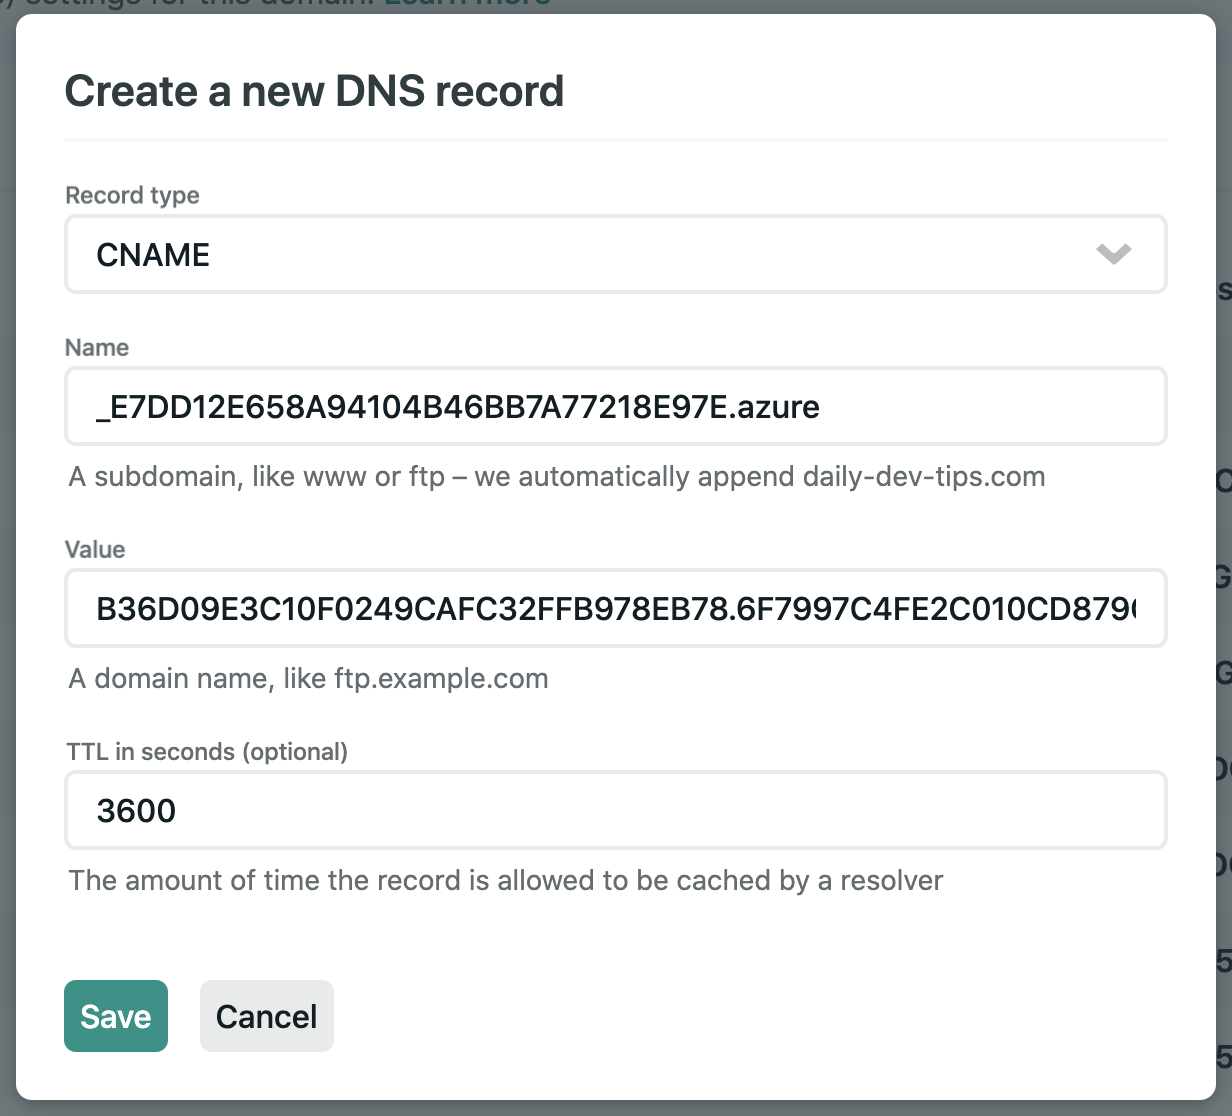
Once we added this, head back to ZeroSSL and click "Verify Domain".
You can then download the default ZIP from here.

Adding the SSL to our Azure App Service
Now that we have our SSL, we can go ahead and add it to our Azure App Service.
Go to your App Service in Azure and click the "Custom Domains" option.
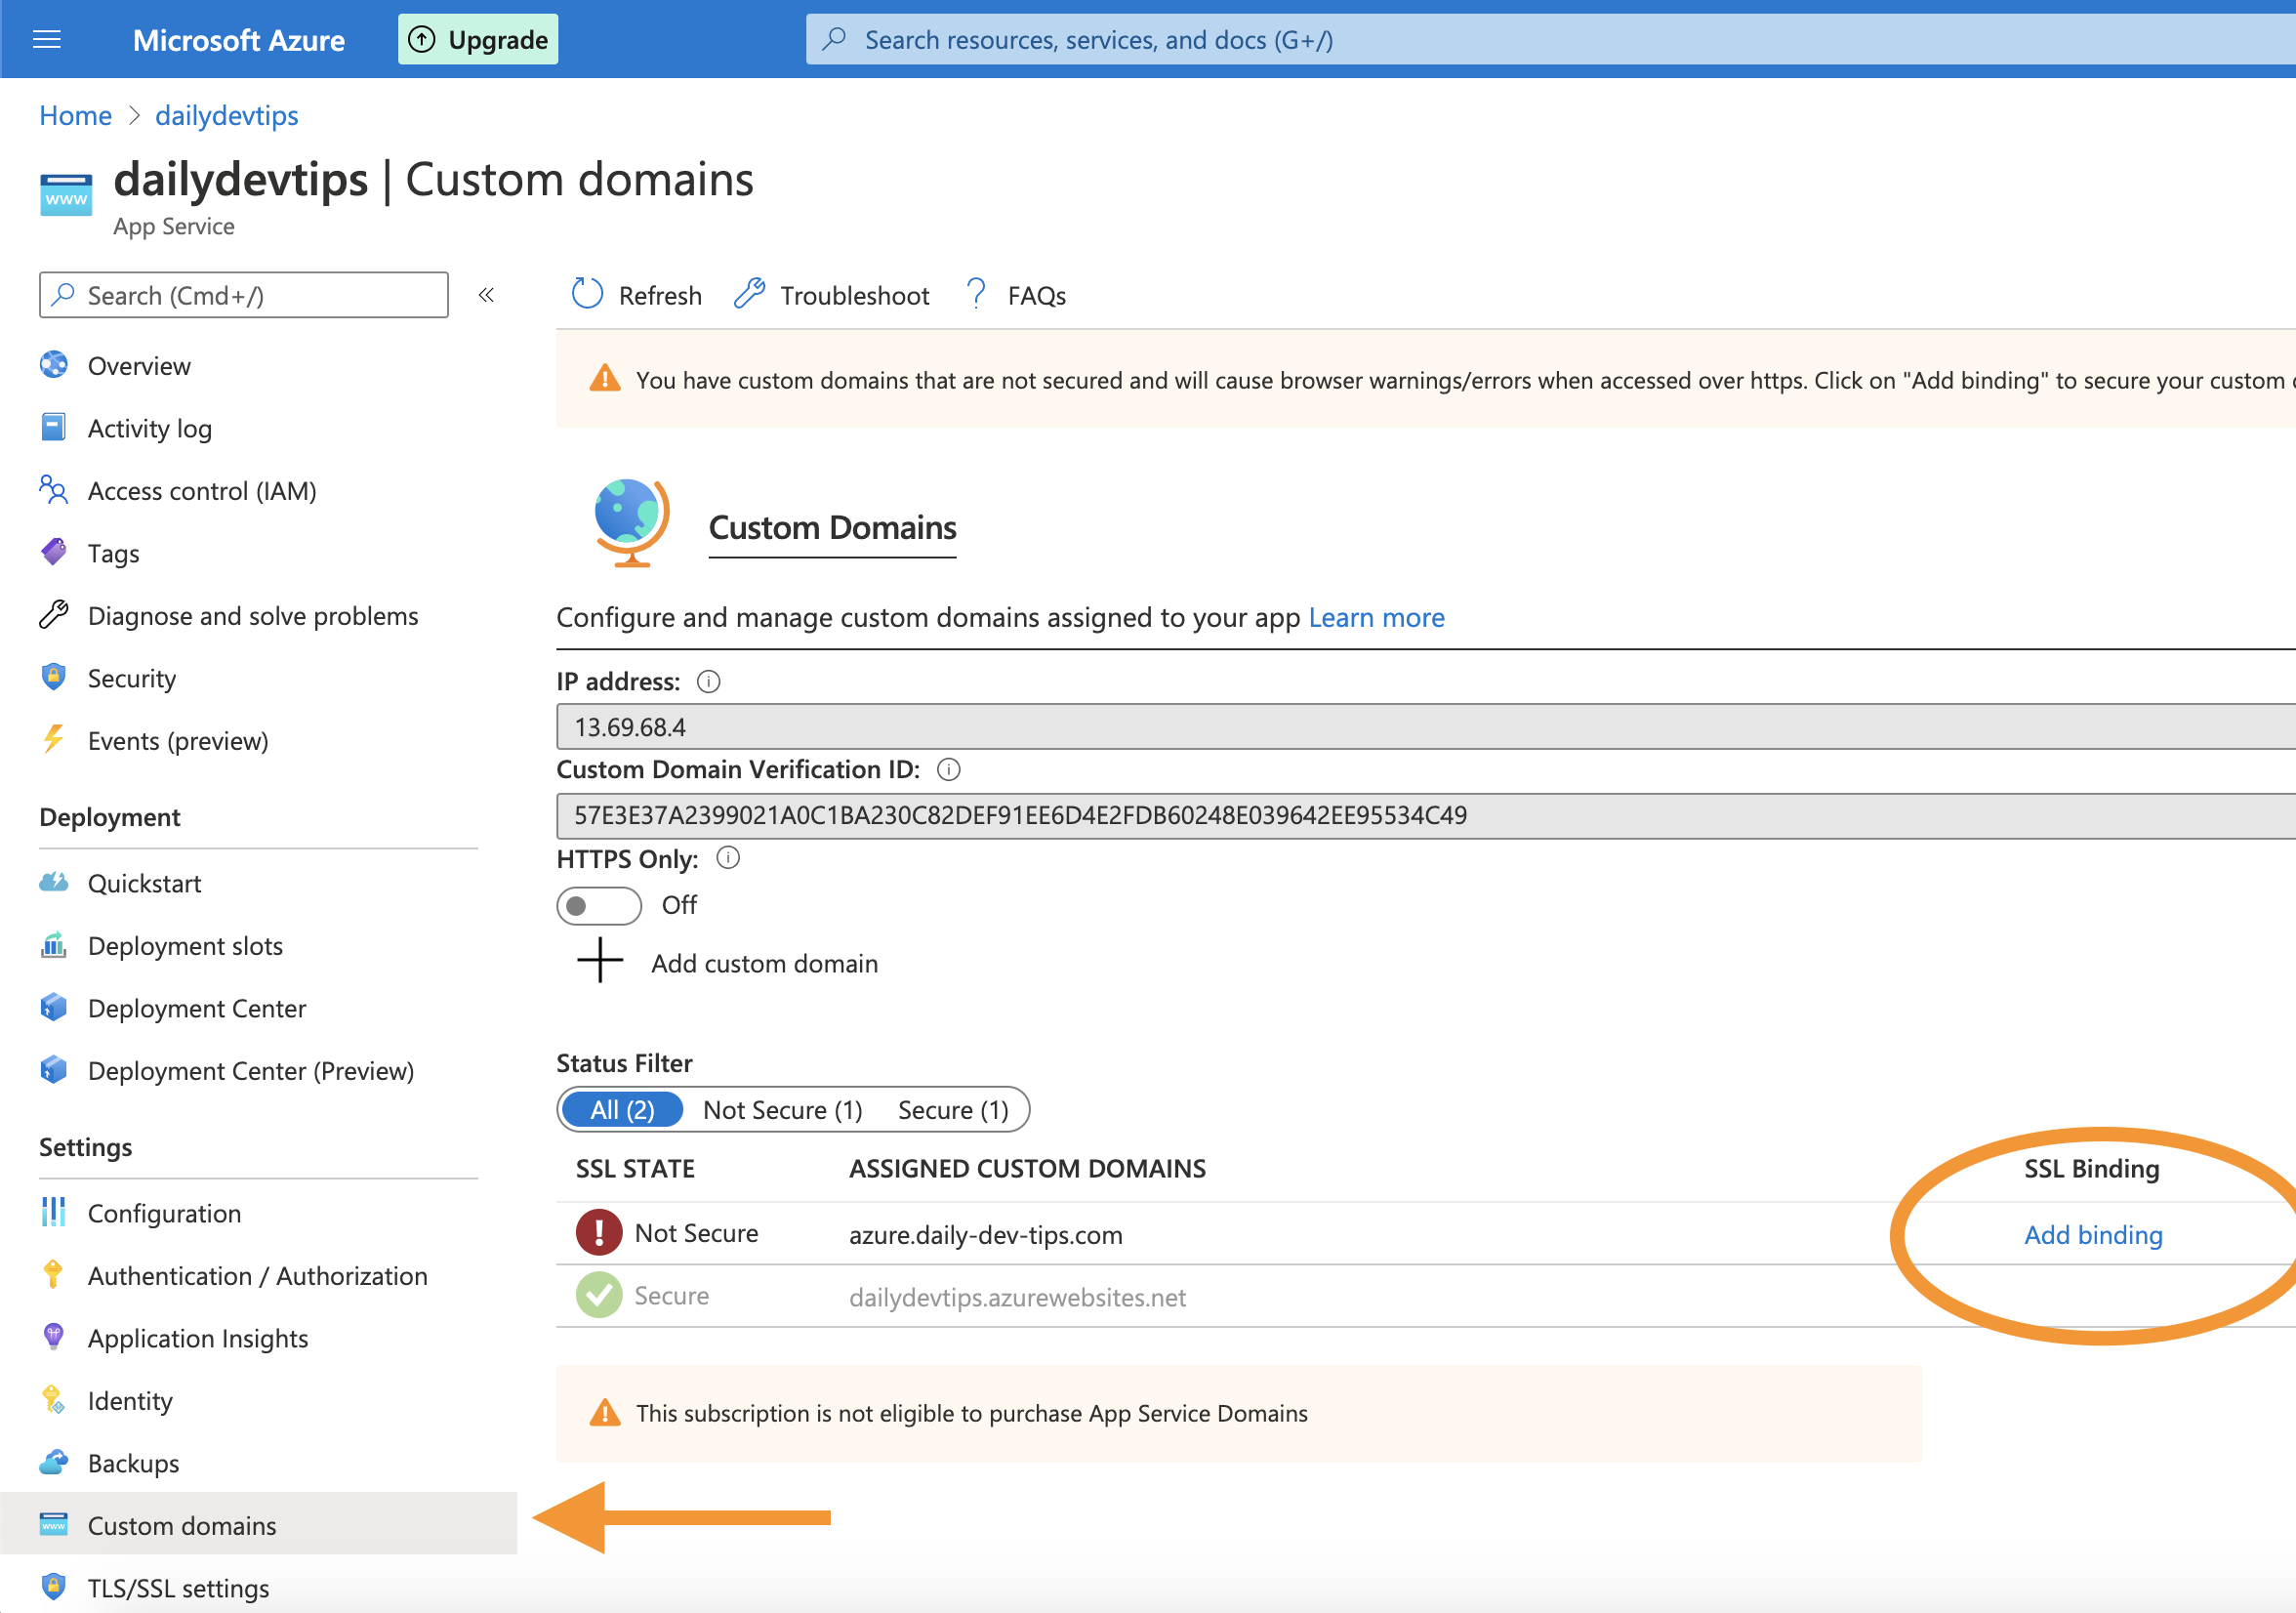
If you do not already have a custom domain, view this article on adding an Azure custom domain).
We can then click on the "Add Binding" option. A side-draw will open up.
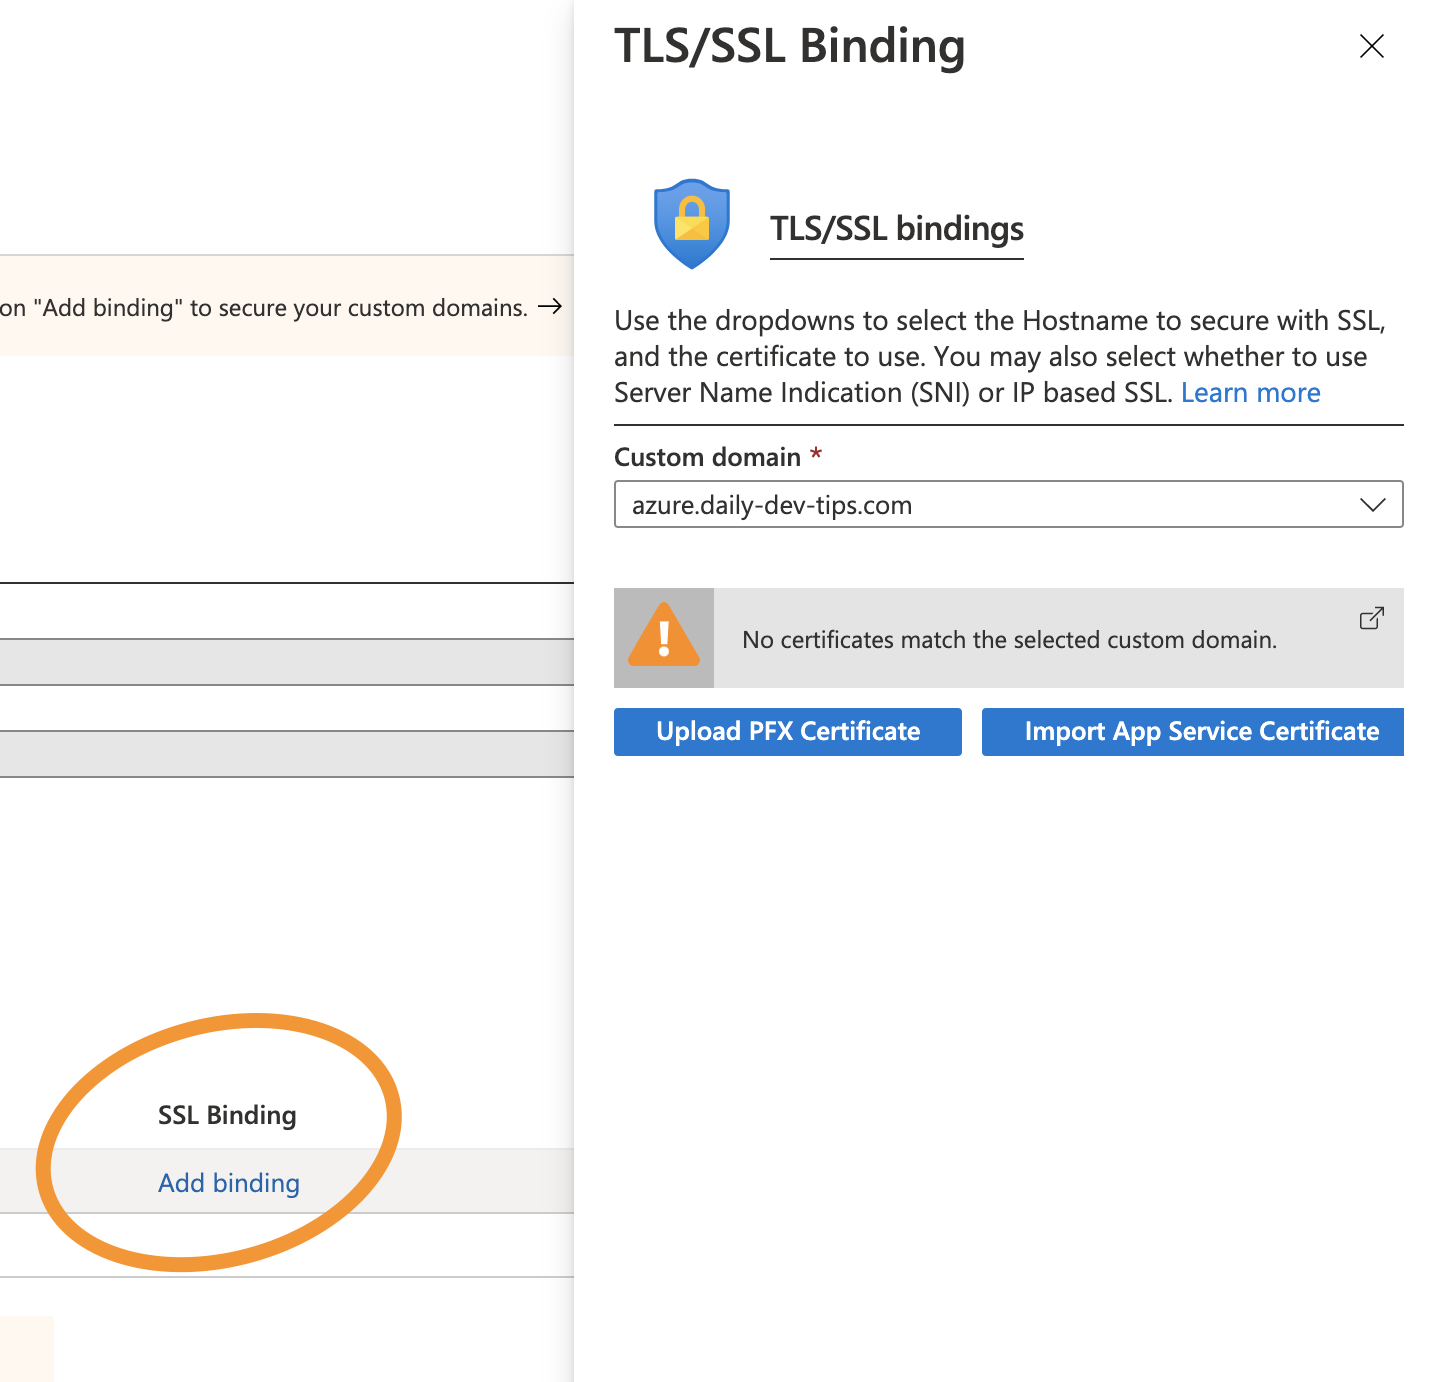
As you can see, in the above screenshot, it's asking for a PFX Certificate.
We did not receive that from ZeroSSL, so we need to convert our existing certificate.
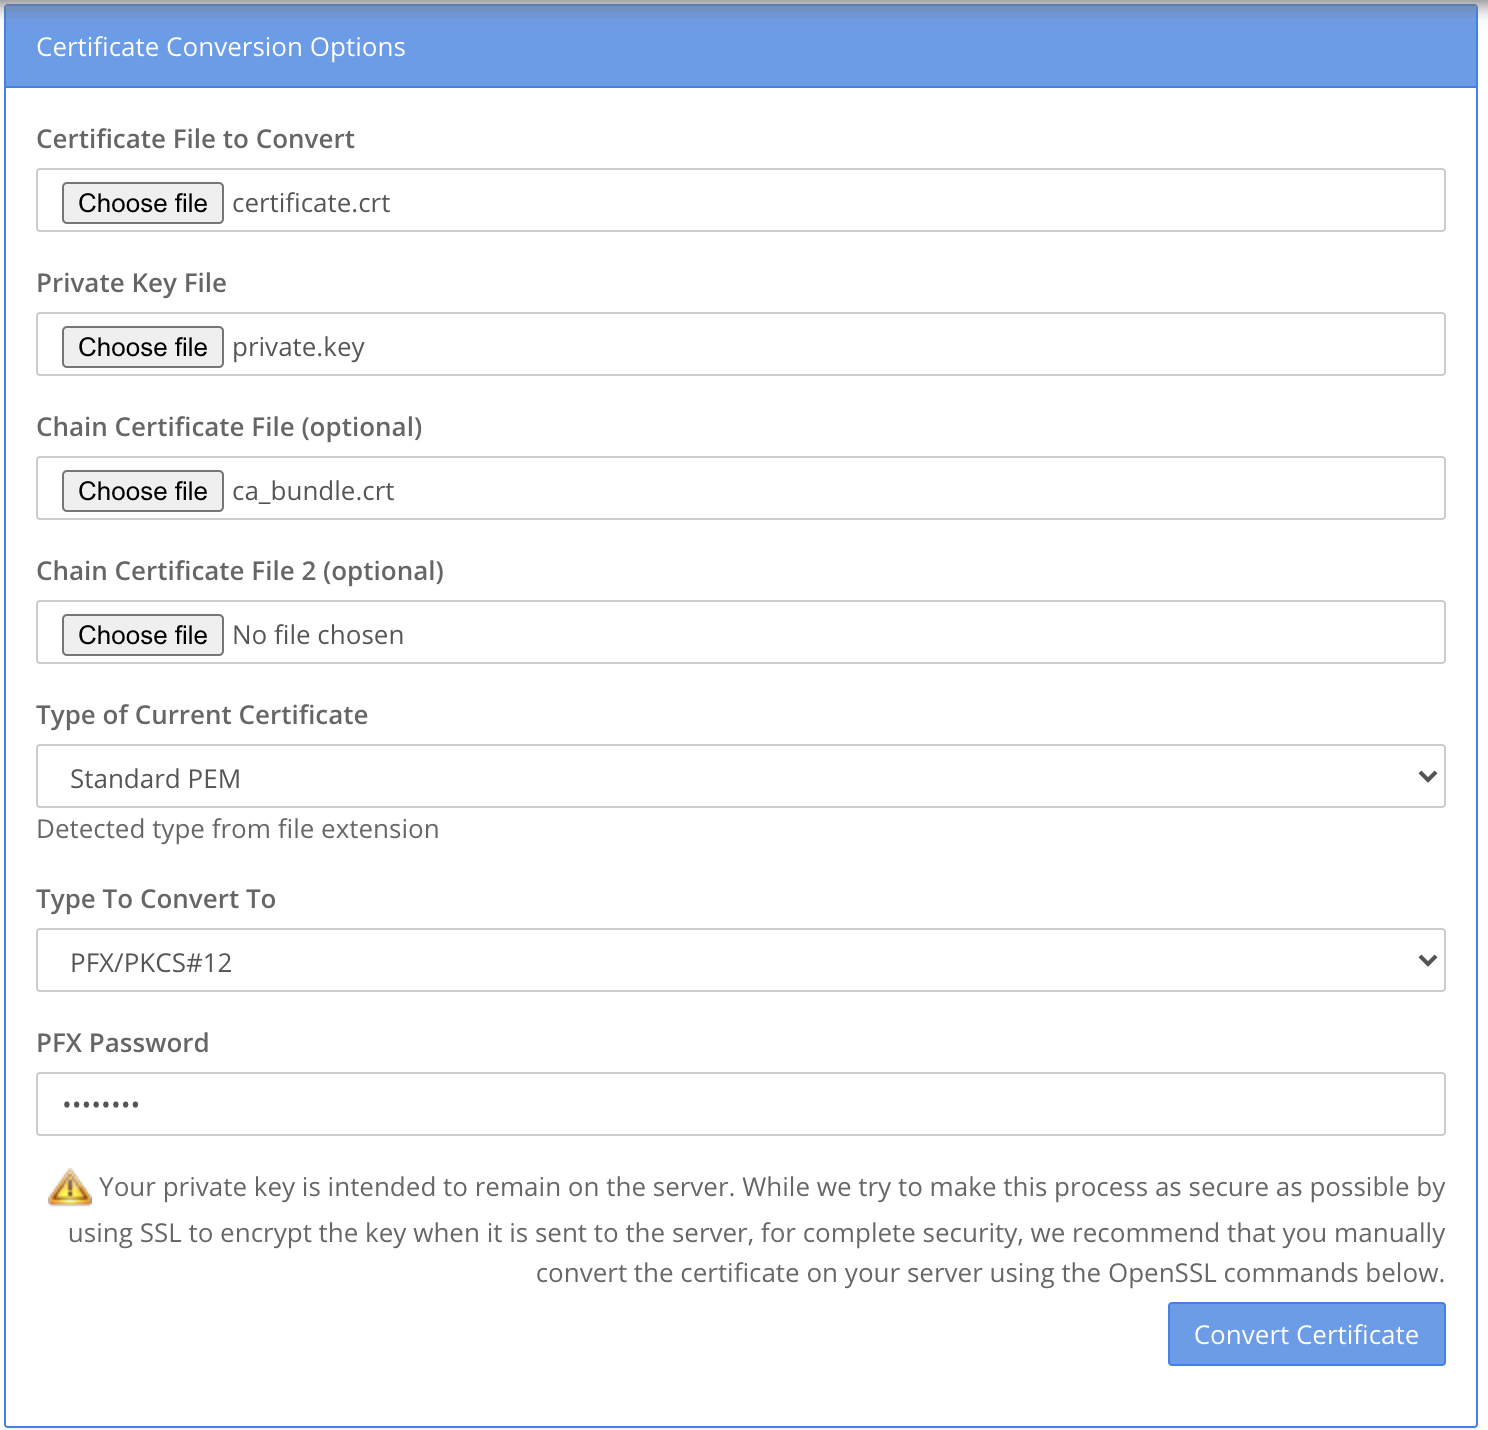
Visit SSL Shopper Converted and upload the received documents.
As output, you can choose PFX.
We need to provide the following details:
- Certificate file: certificate.crt
- Private key file: private.key
- Chain certificate file: ca_bundle.crt
- Type of current certificate: Standard PEM
- Type to convert to: PFX/PKCS#12
- PFX Password: {Whateveryouwant}
You must use a password to make it valid for Azure.
Now head back to Azure and click Upload PFX Certificate.
Choose the PFX certificate and password you used above.
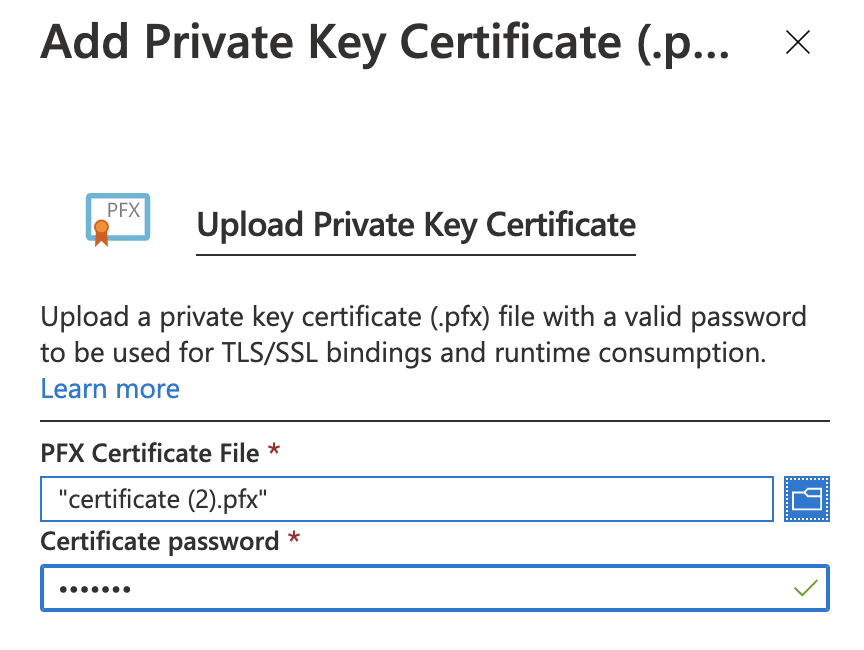
Be aware; It might take some time before it's valid (5-10 minutes)
On the next step, select the options from the dropdown.
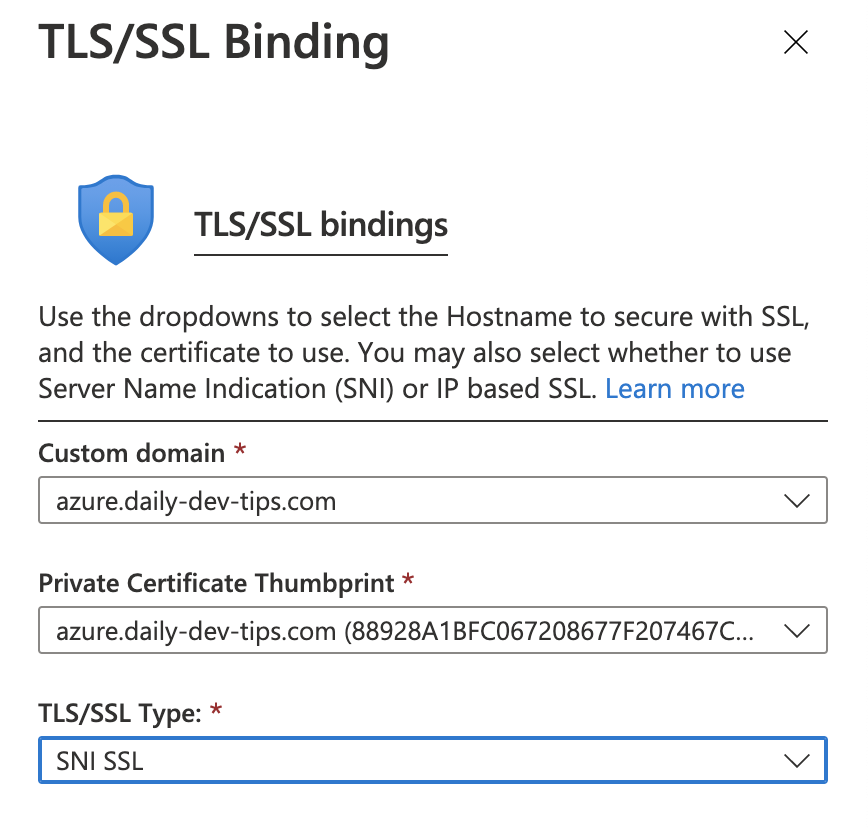
Now, if we click Finish, we have a secure domain!

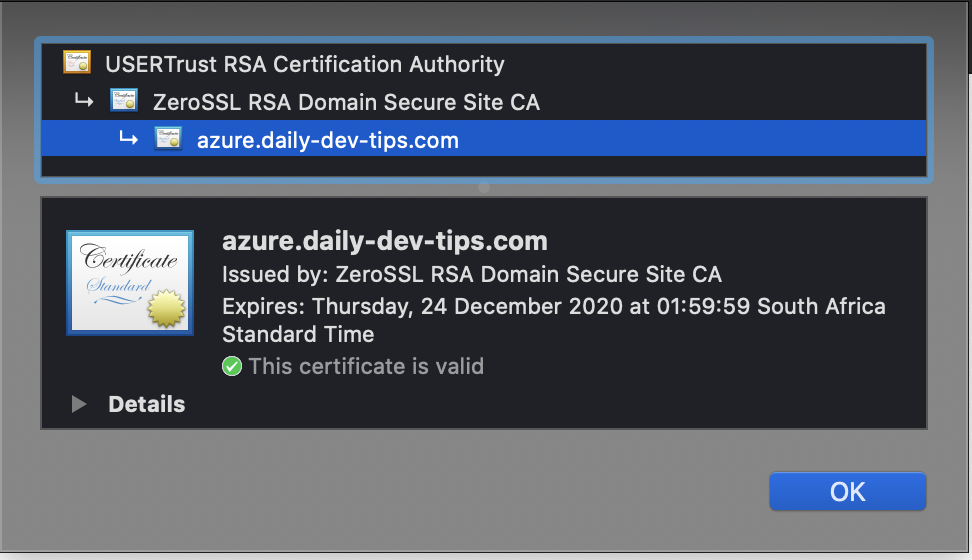
And if we visit our secure domain, we can inspect our certificate to see it works.
Thank you for reading, and let's connect!
Thank you for reading my blog. Feel free to subscribe to my email newsletter and connect on Facebook or Twitter



