
Ionic adding a side menu

The other day I had to make an Ionic application that had a tab bar and a side menu.
Today, I'll be showing you how to create this yourself.
As the starter template, we will be using the Ionic tabs, which you can find on my Ionic start GitHub repo.
The end result for today will look like this:
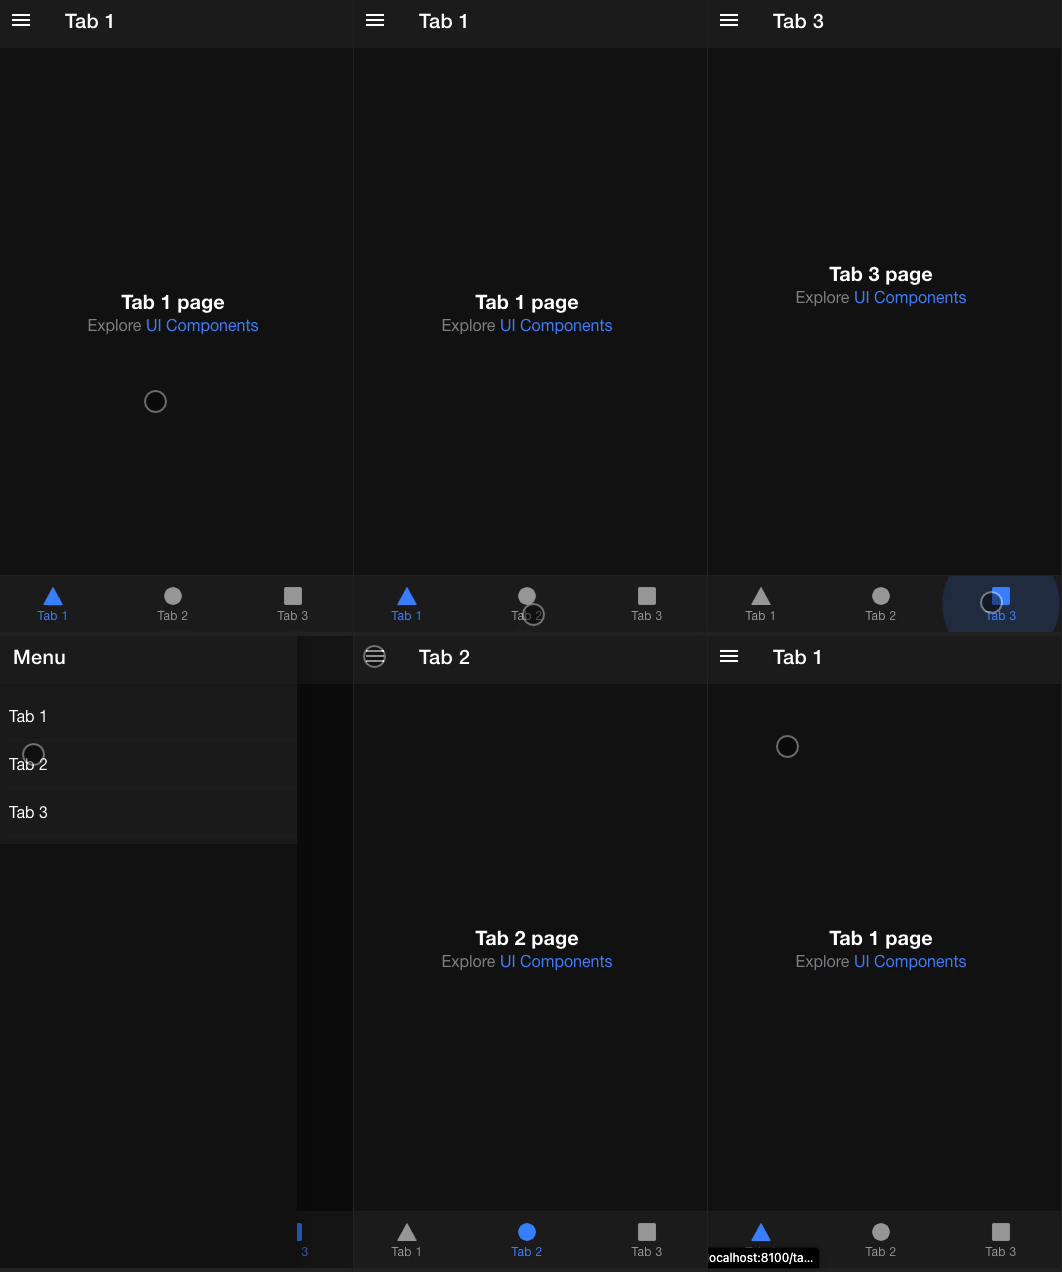
Adding the Menu component
We need to open up the app.component.html file this is the main wrapper for our application and currently it looks like this:
<ion-app>
  <ion-router-outlet></ion-router-outlet>
</ion-app>
Inside the ion-router-outlet, our pages get loaded, and yes, this includes even the tab bar.
So this is where we can extend with something called an ion-menu.
It will look like this:
<ion-app>
  <ion-menu side="start" contentId="content">
    <ion-header>
      <ion-toolbar>
        <ion-title class="menu-title">Menu</ion-title>
      </ion-toolbar>
    </ion-header>
    <ion-content>
      <ion-list>
        <ion-menu-toggle auto-hide="true">
          <ion-item routerLink="/tabs/tab1" routerDirection="forward">
            <ion-label>Tab 1</ion-label>
          </ion-item>
          <ion-item routerLink="/tabs/tab2" routerDirection="forward">
            <ion-label>Tab 2</ion-label>
          </ion-item>
          <ion-item routerLink="/tabs/tab3" routerDirection="forward">
            <ion-label>Tab 3</ion-label>
          </ion-item>
        </ion-menu-toggle>
      </ion-list>
    </ion-content>
  </ion-menu>
  <ion-router-outlet id="content"></ion-router-outlet>
</ion-app>
Wow, quite a change, right? But don't worry, it's more markup than anything else.
As you can see, we now added the <ion-menu> section above the router-outlet.
Inside this, we add a header, which is the menu's header, once it's open.
The next thing we have is an ion-content section which holds an ion-list with items that link to each tab.
Clicking each item will navigate to the specific page.
However, if we now run this, we don't see a menu icon. We can swipe the menu open. But that's not very clear to anyone.
Adding the menu icon in Ionic
To add the icon, we need to modify our existing headers to reflect the header toggle.
Now we can open each html file where the menu icon should be visible and add the following to the ion-toolbar.
<ion-header [translucent]="true">
  <ion-toolbar>
    <ion-buttons slot="start">
      <ion-menu-button></ion-menu-button>
    </ion-buttons>
    <ion-title>Tab 1</ion-title>
  </ion-toolbar>
</ion-header>
I've done this for the following pages:
- tab1.page.html
- tab2.page.html
- tab3.page.html
And there you have it. We can now navigate through the tabs as well as the menu!
You can find the full code for today's article on GitHub.
Thank you for reading, and let's connect!
Thank you for reading my blog. Feel free to subscribe to my email newsletter and connect on Facebook or Twitter
About the author
I'm a full-stack developer from South Africa 🇿🇦. I love writing about JavaScript, HTML and CSS.
Comments
Join the discussionNo comments yet. Be the first to comment.



