
GitHub automated deployments to Azure

I'm a full-stack developer from South Africa 🇿🇦. I love writing about JavaScript, HTML and CSS.
Yesterday we created an Azure account and published our very first Azure App Service 🥳.
We deployed using the Azure Visual Code extension, but how cool would it be to integrate automated deployments using GitHub?
Luckily Azure has a super cool workflow for this already, and we will be able to integrate easily.
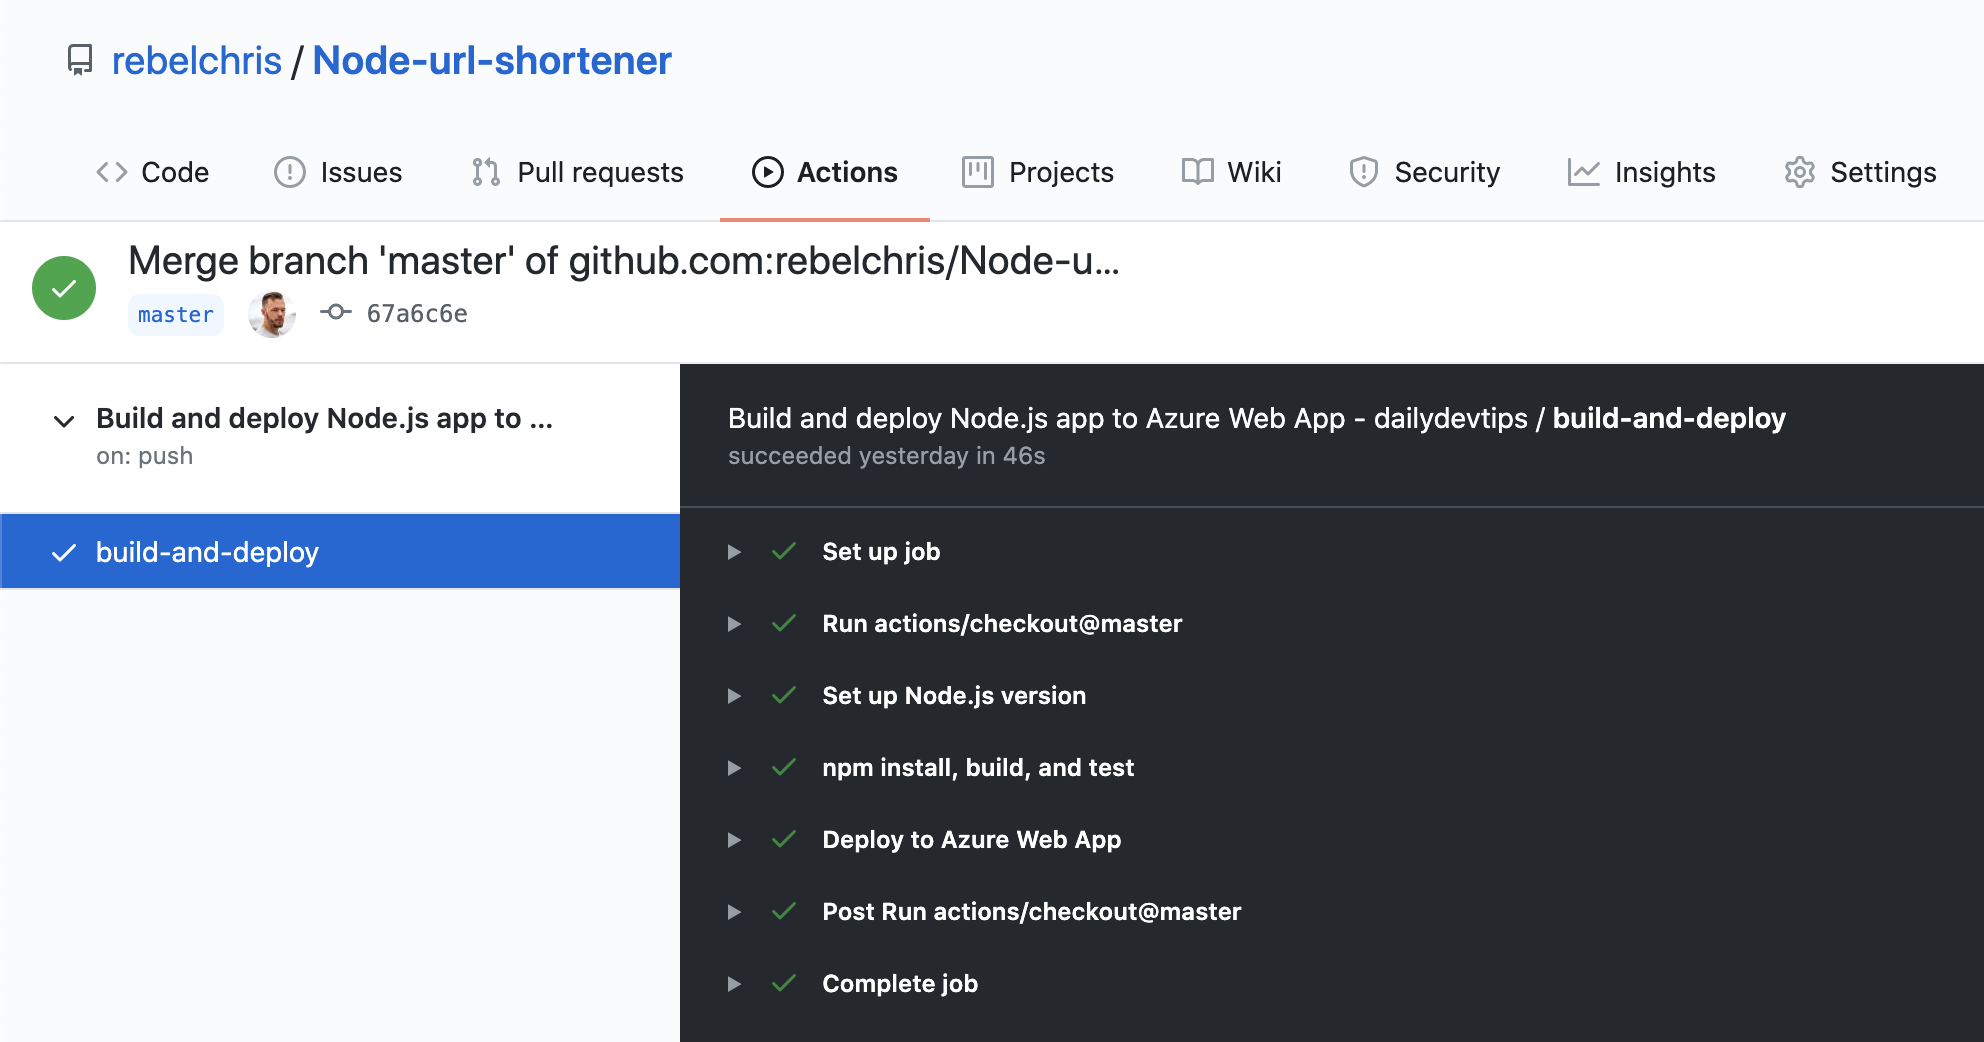
Azure connecting to GitHub
First, we need to connect our GitHub account to our Azure environment.
Login to Azure and find your created App Service, then click on the Deployment Center button.
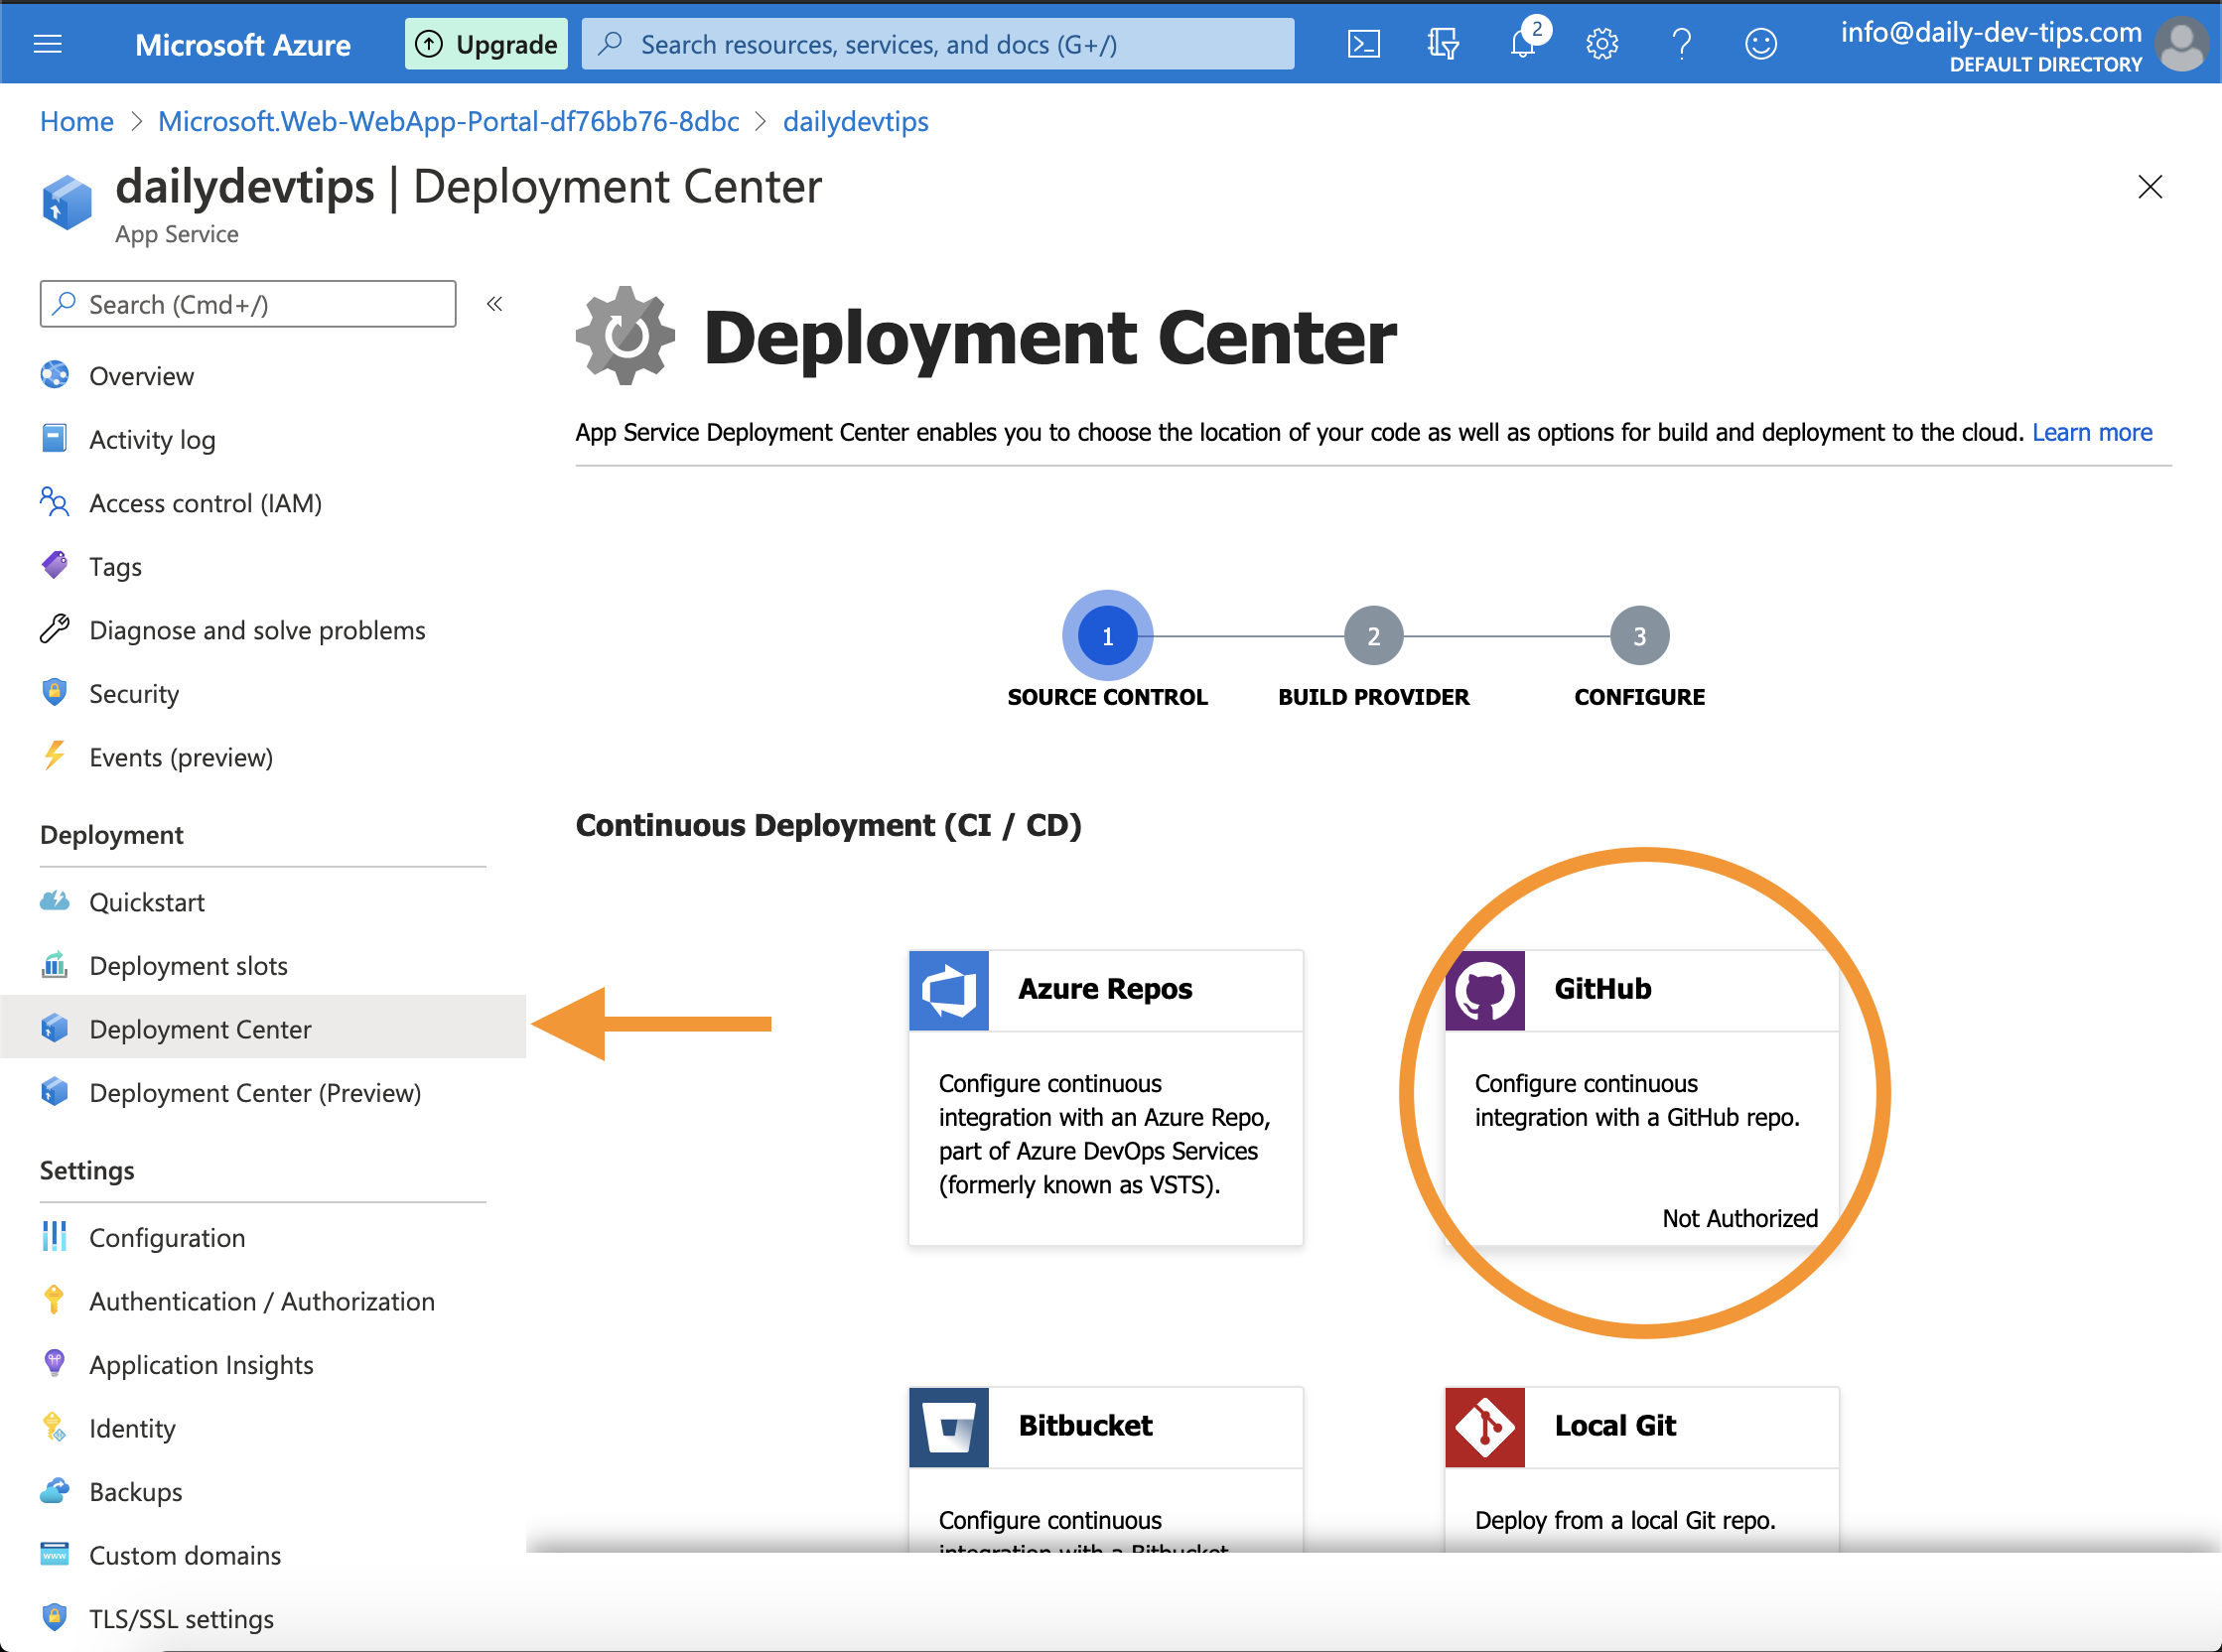
Step 1 Source Control
Click on the GitHub icon, as you can see circled in the screenshot above.
You will then be prompted with a GitHub authentication flow.
Step 2 Build provider
Once connected, we will go to a second step to choose what kind of Build provider we want to use.
You can choose GitHub Actions here.
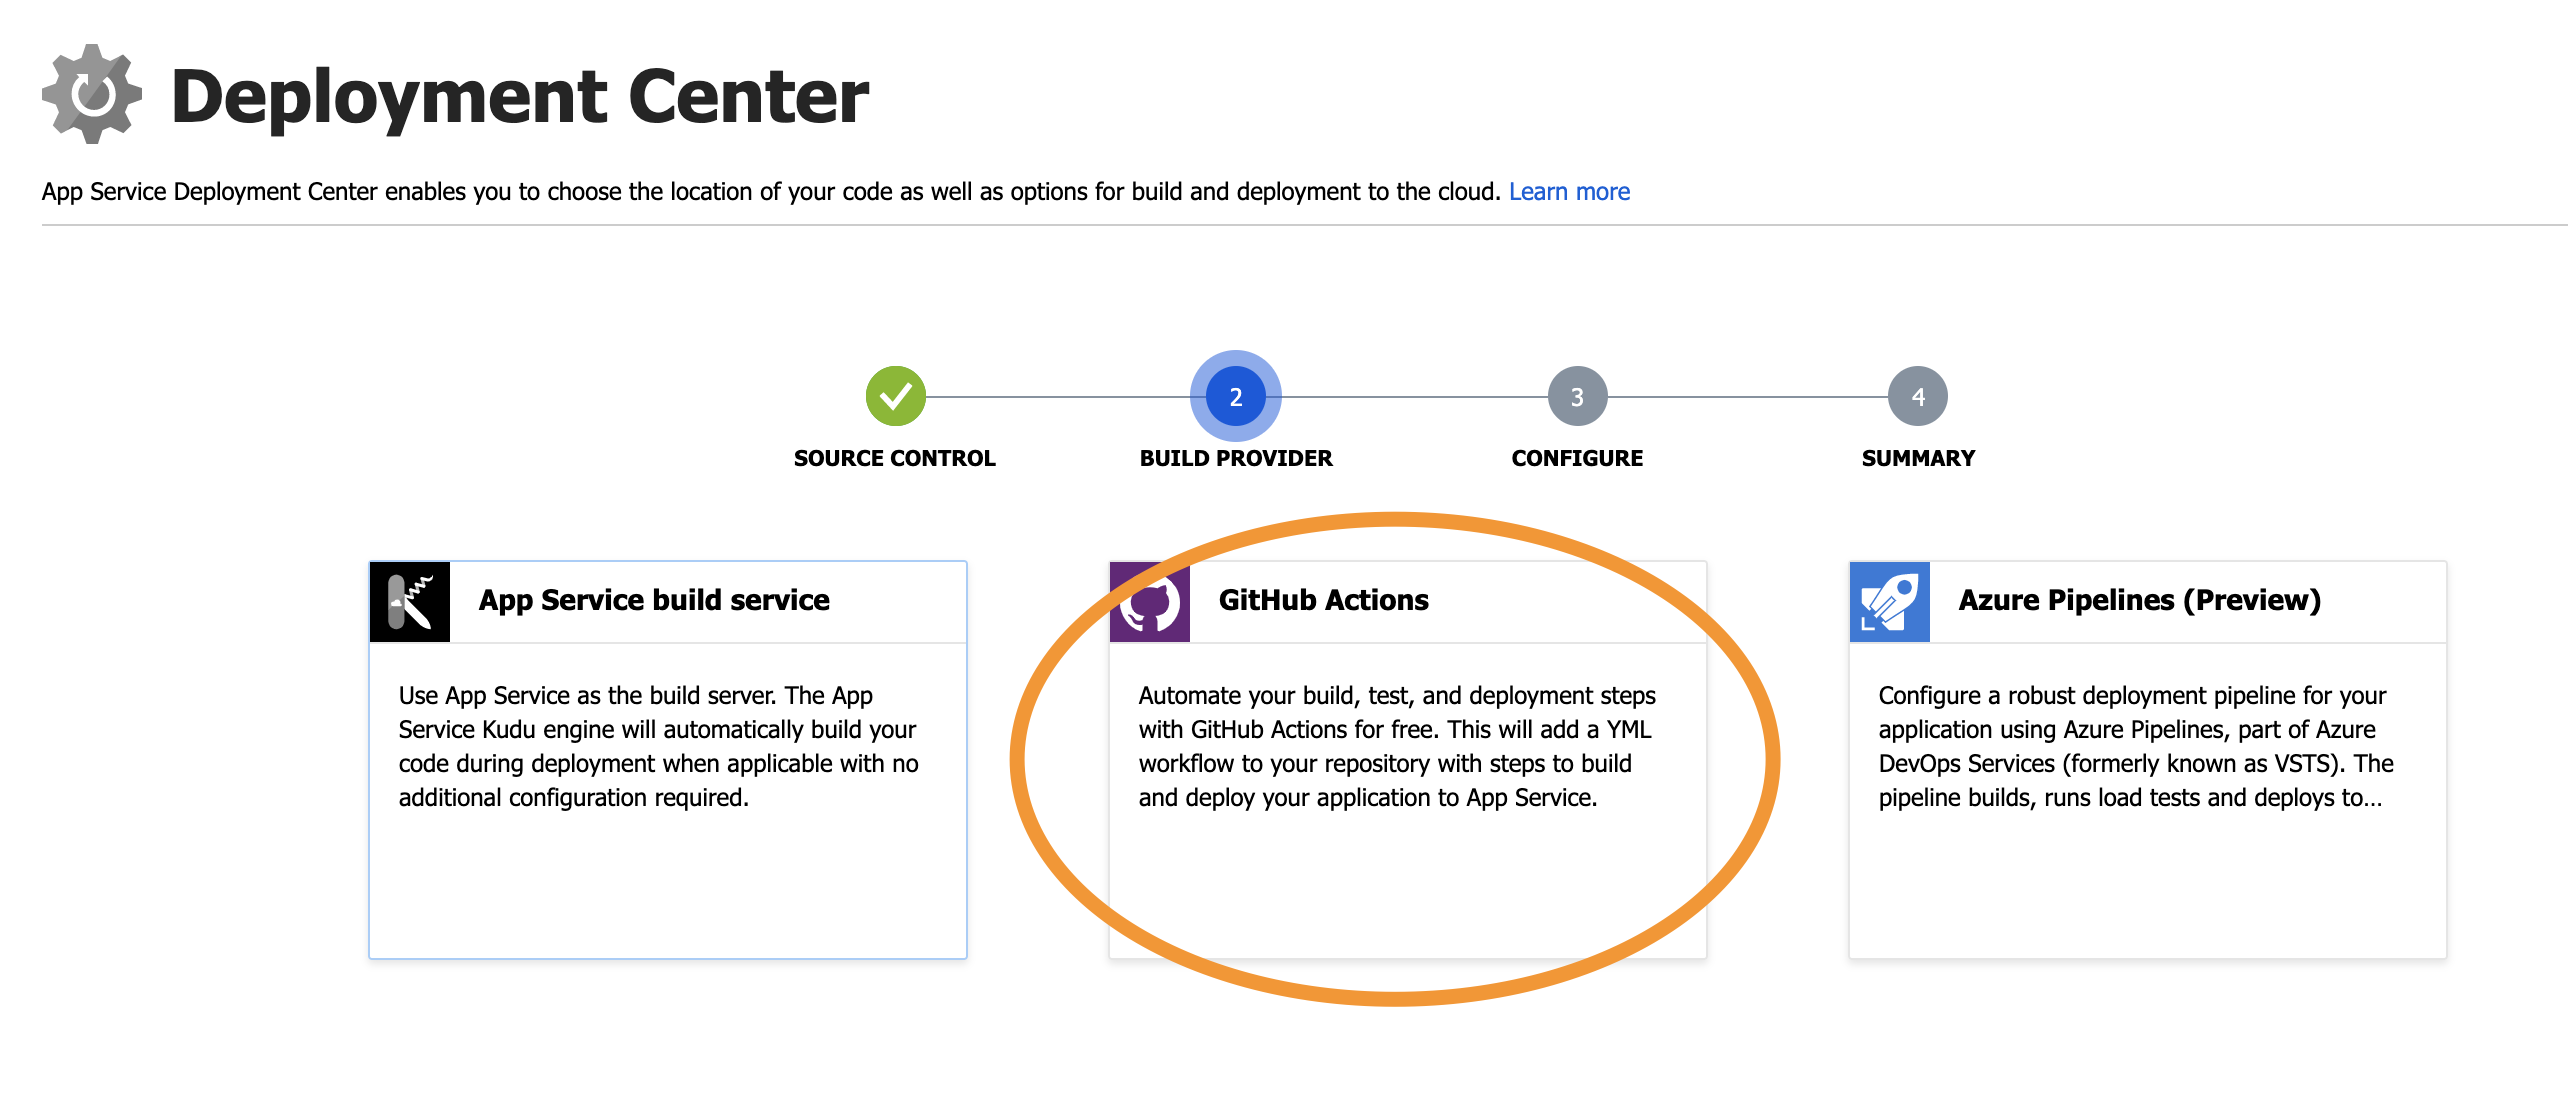
GitHub's actions are very useful and can be used to create automated workflows.
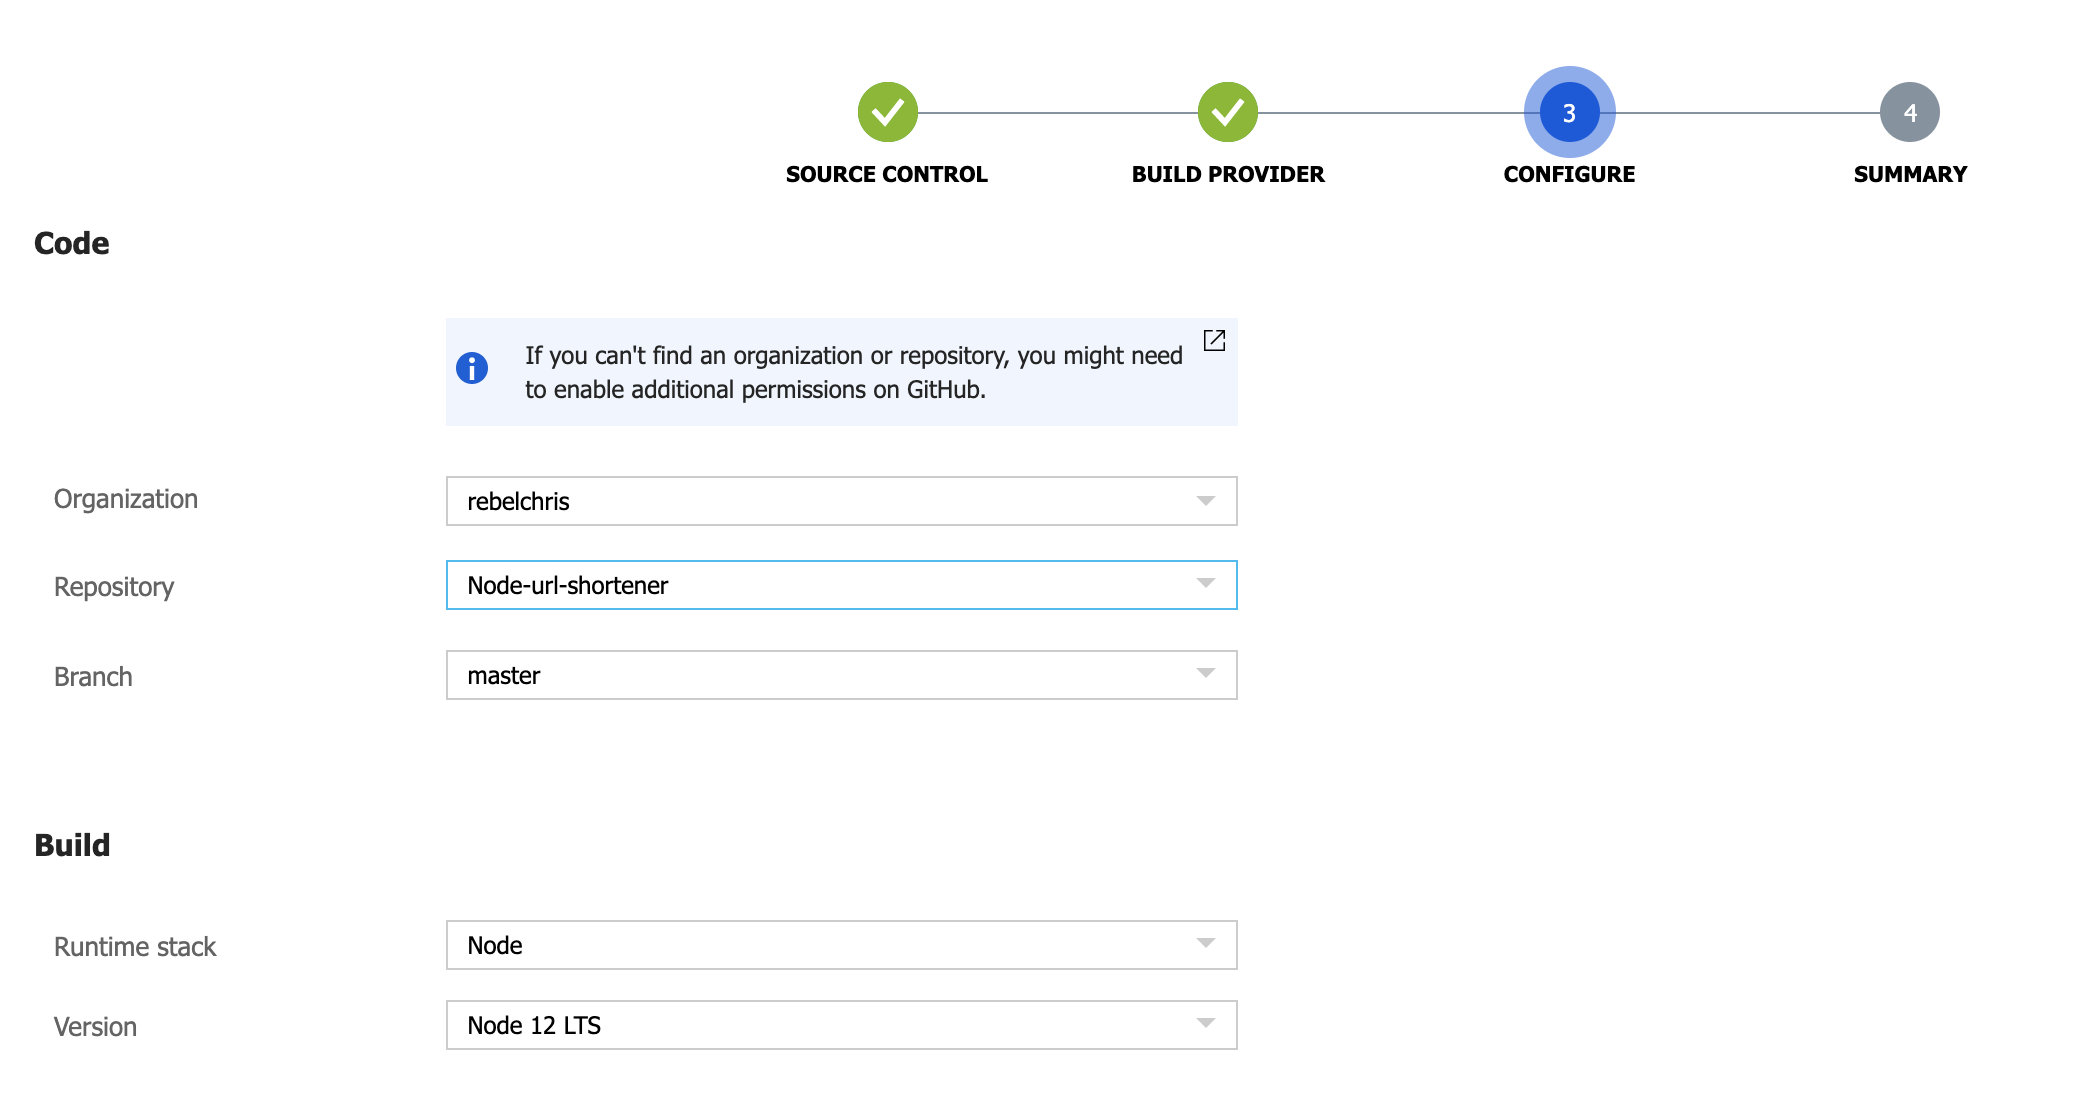
Step 3 Configure
On step three, we can configure our settings.
Select your repository and branch you want to publish from. In my case, this is the master branch.
I've set the Build to our Node environment.
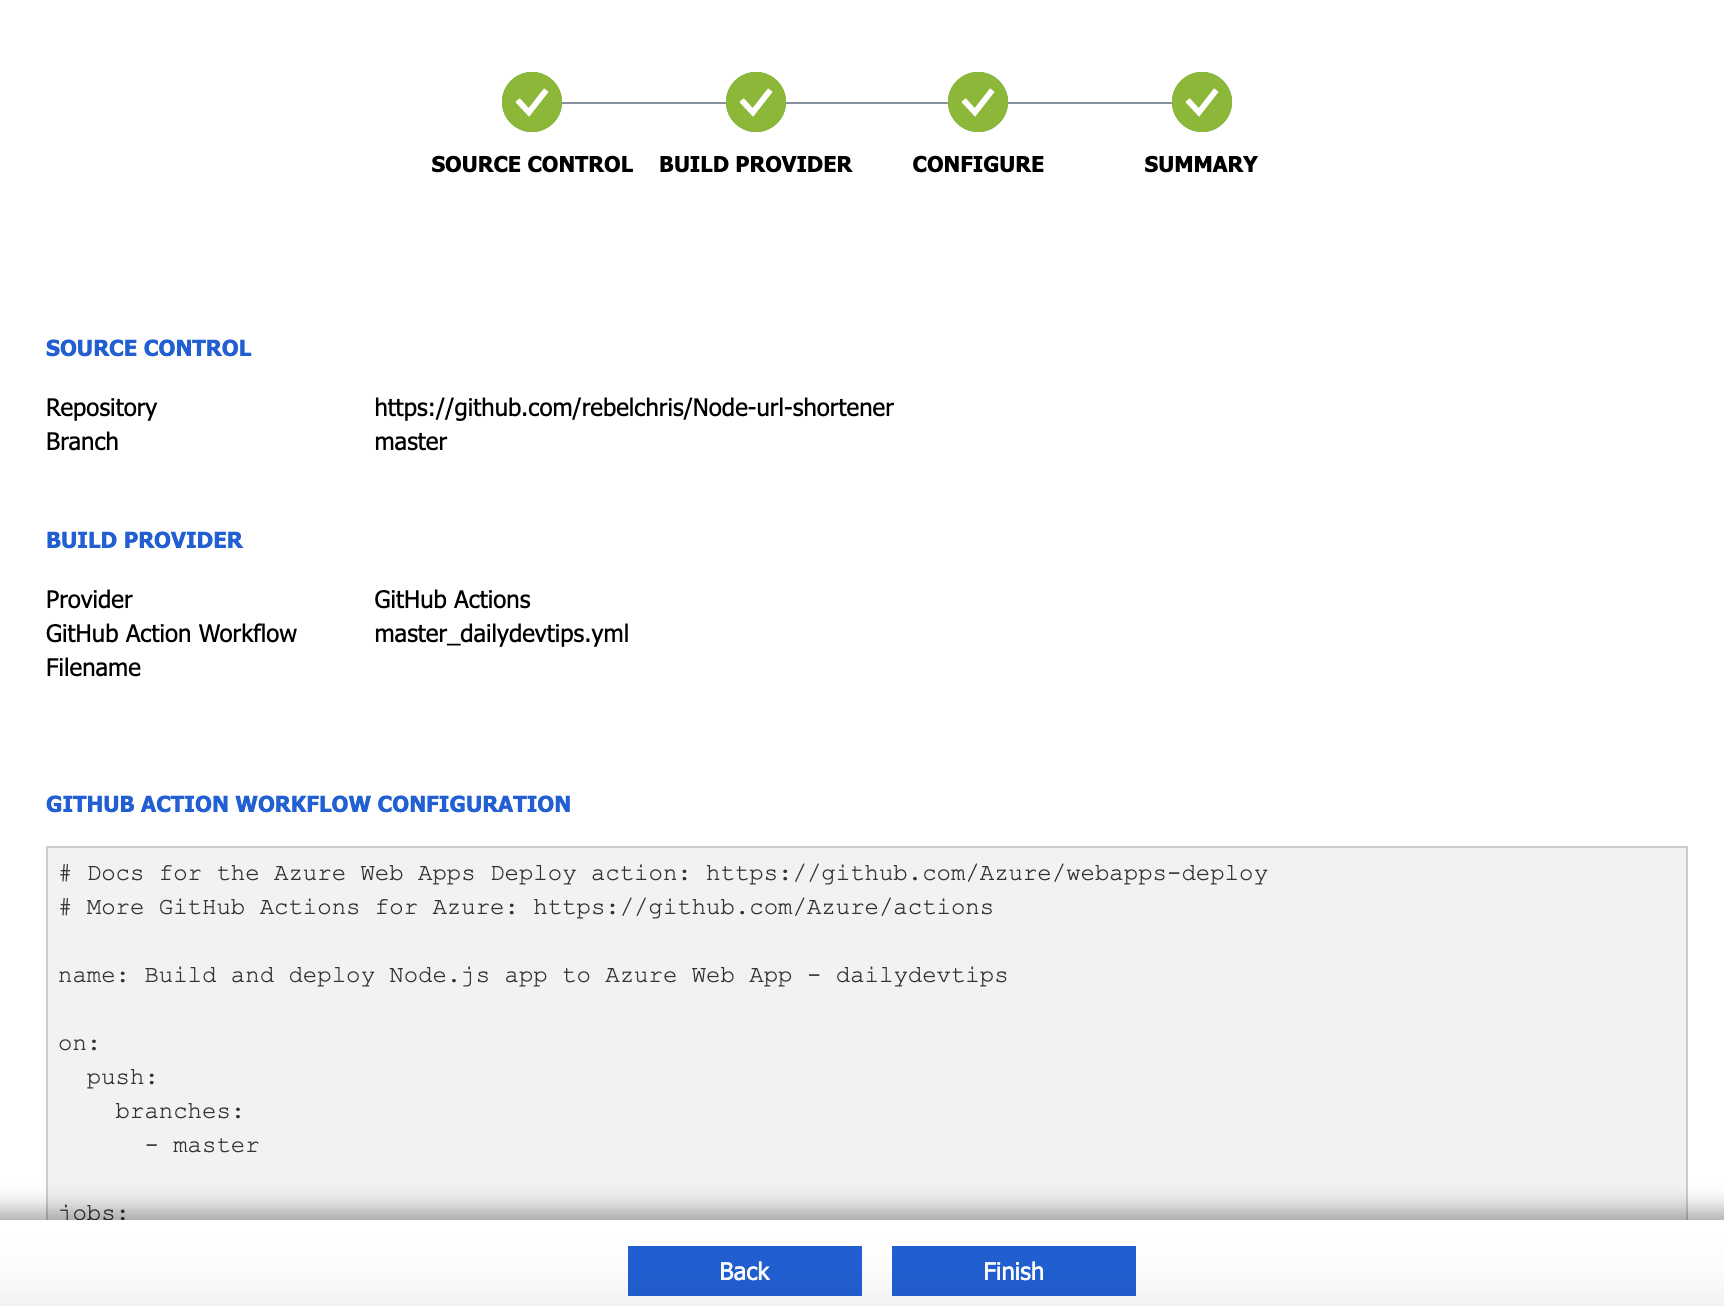
Step 4 Summary
On step four, you will see the summary of what we created, you will be able to see the GitHub action that will be made for us.
You can click the finish button, and it will add this to our repository and run the first deployment.
Checking our Actions in GitHub
The next step is to log in to our GitHub to see this newly created GitHub action.
Go to your repository and check the Actions tab.
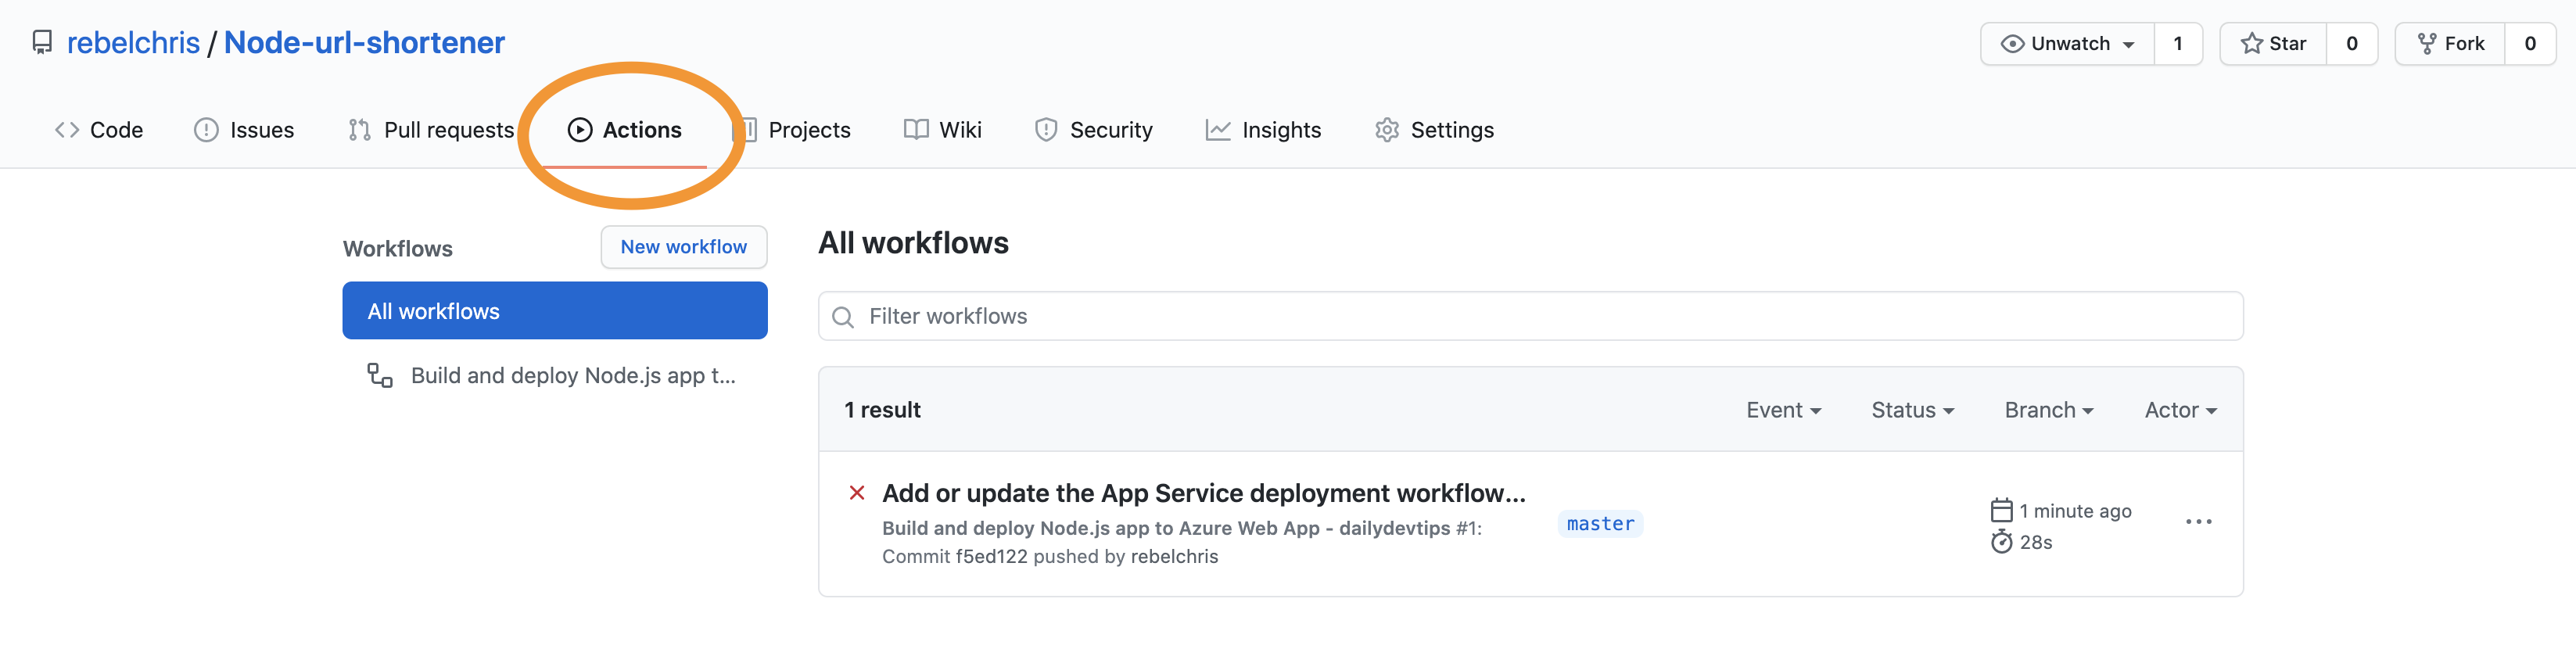
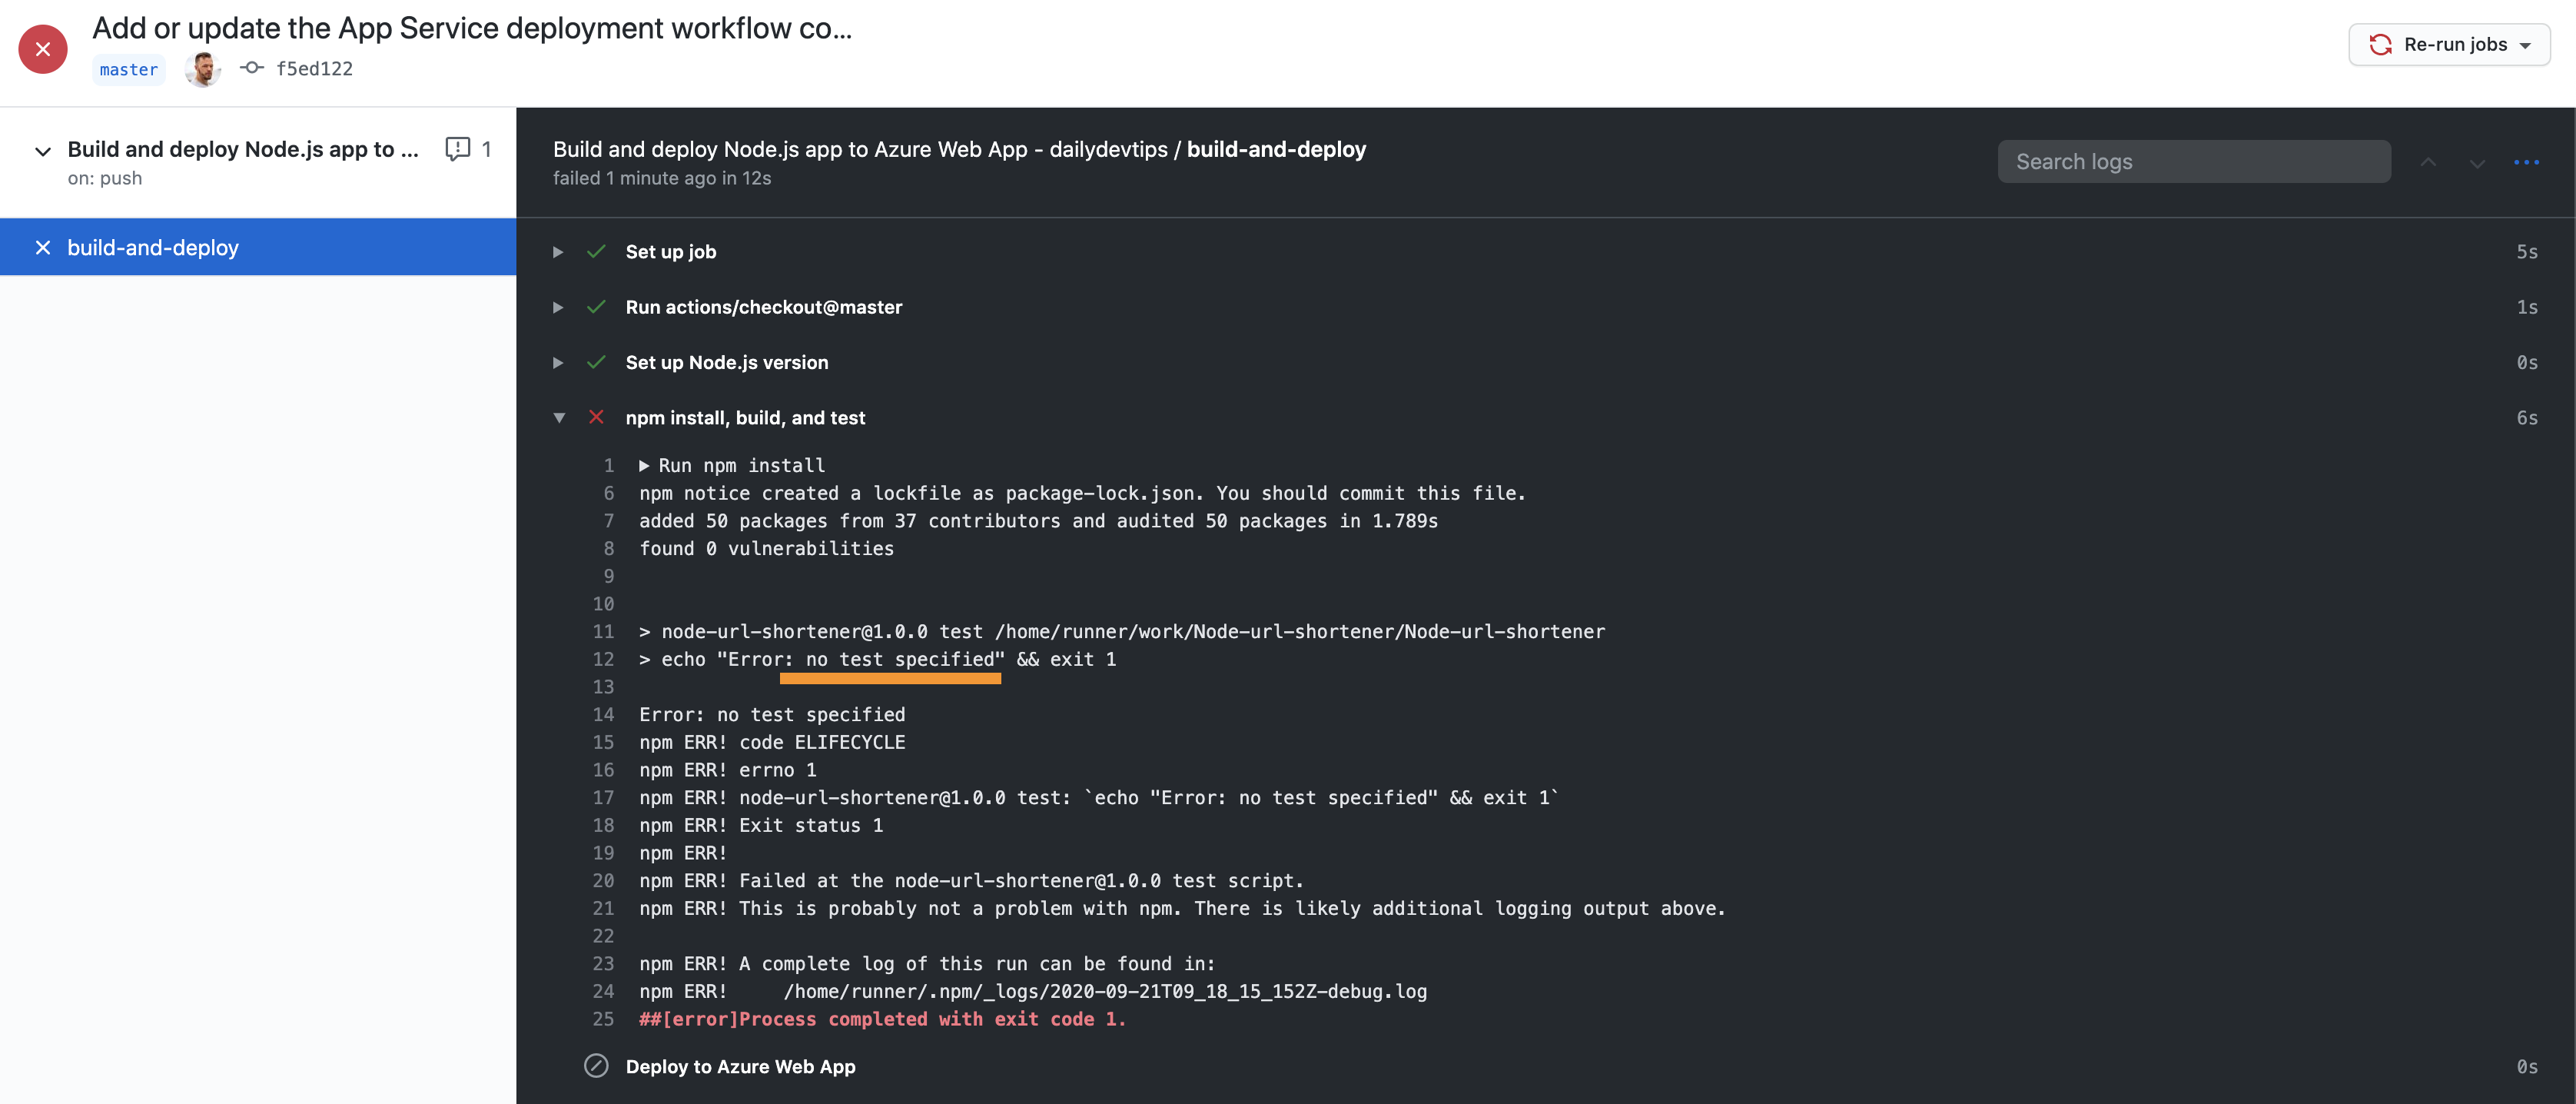
As you can see, our first deployment failed, so click on this row to inspect what went wrong.
As you can see in this screenshot, no test specified, which is correct because our app does not have a test.
If we now go back to our files and modify this GitHub workflow, we can remove the npm run test line for now.
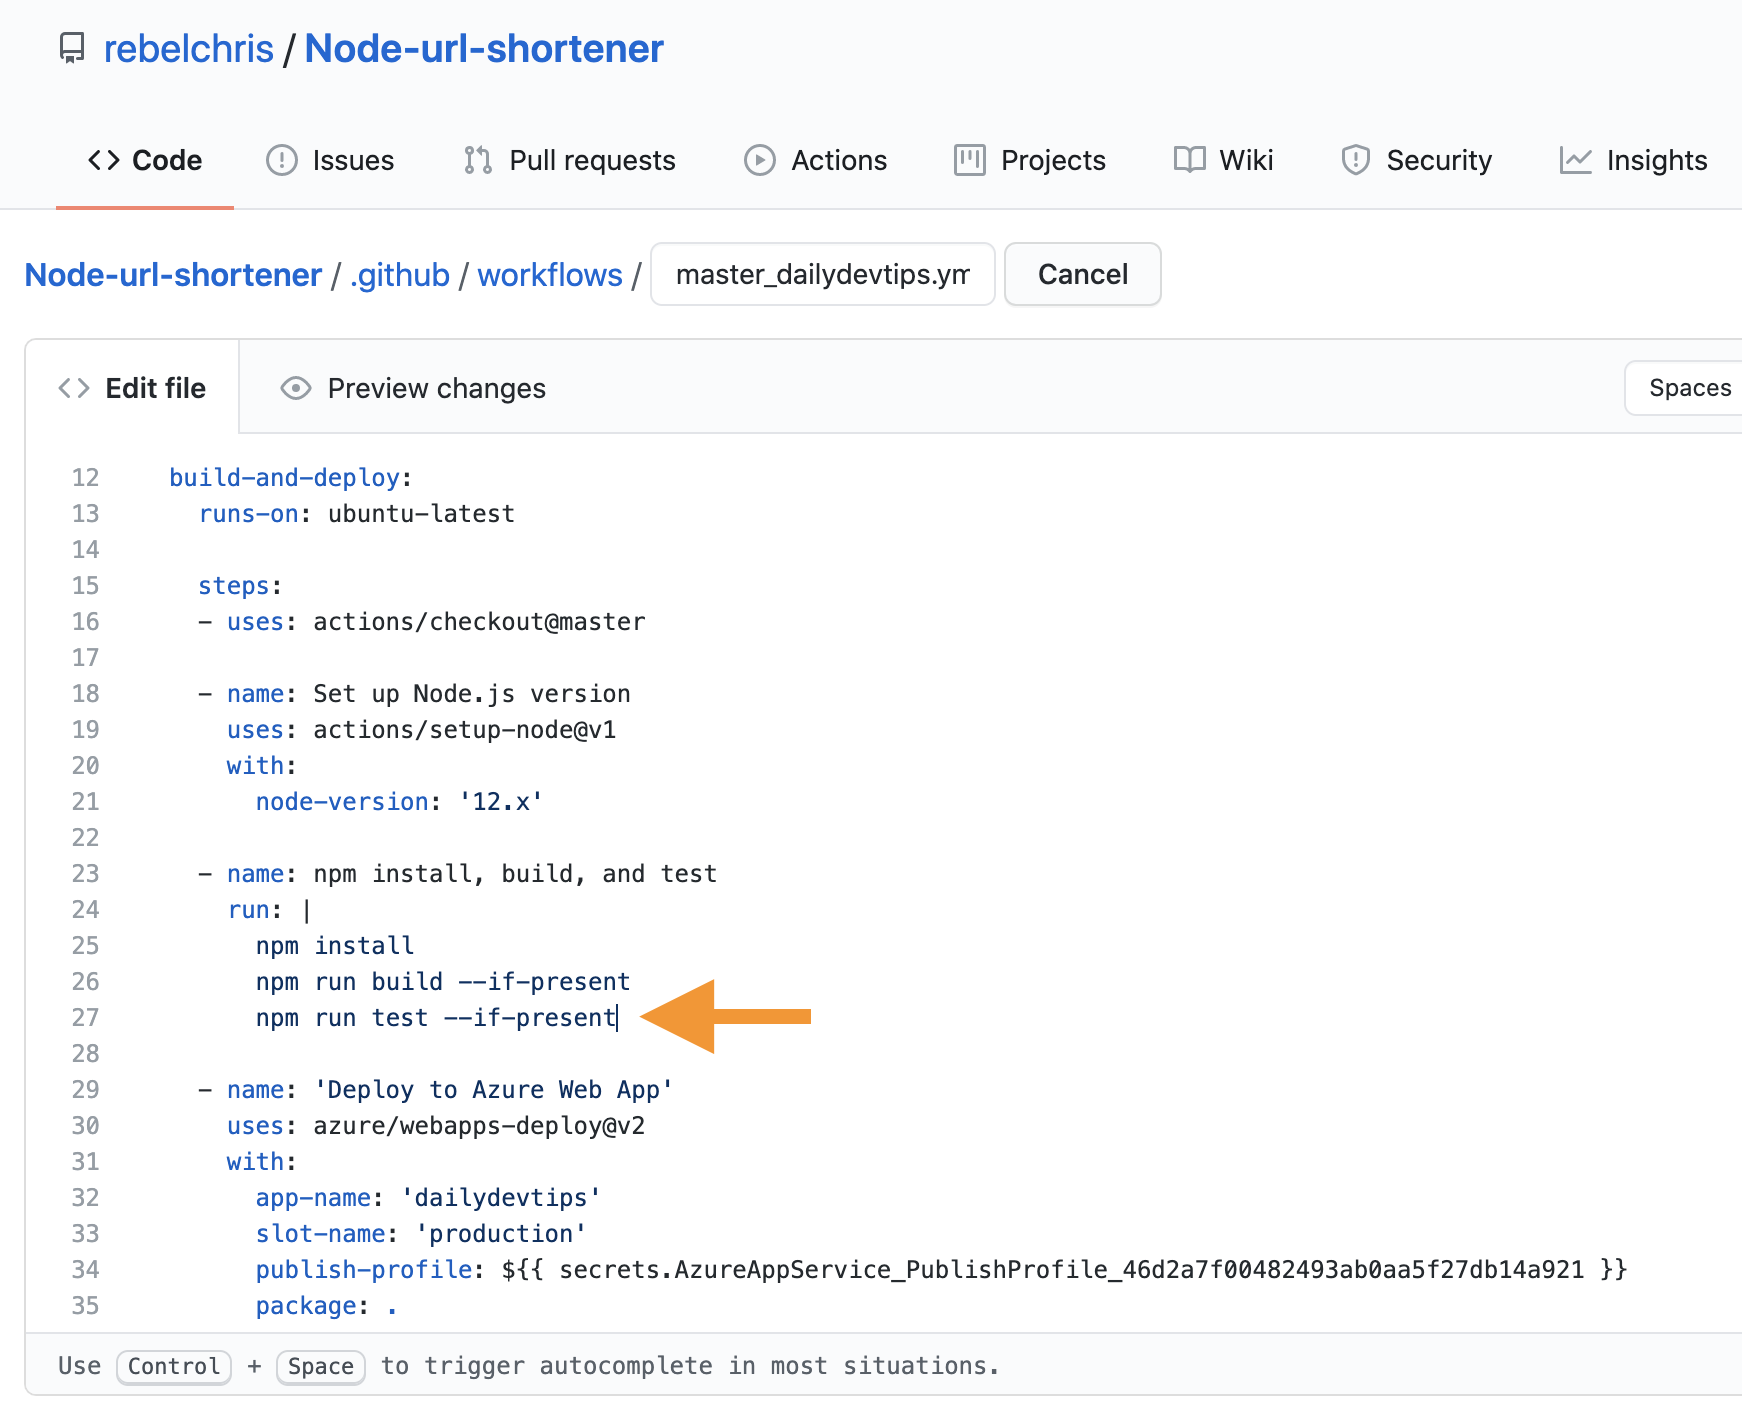
Once we save this file, a new Action will be triggered, so let's see if this fixes our deployment.
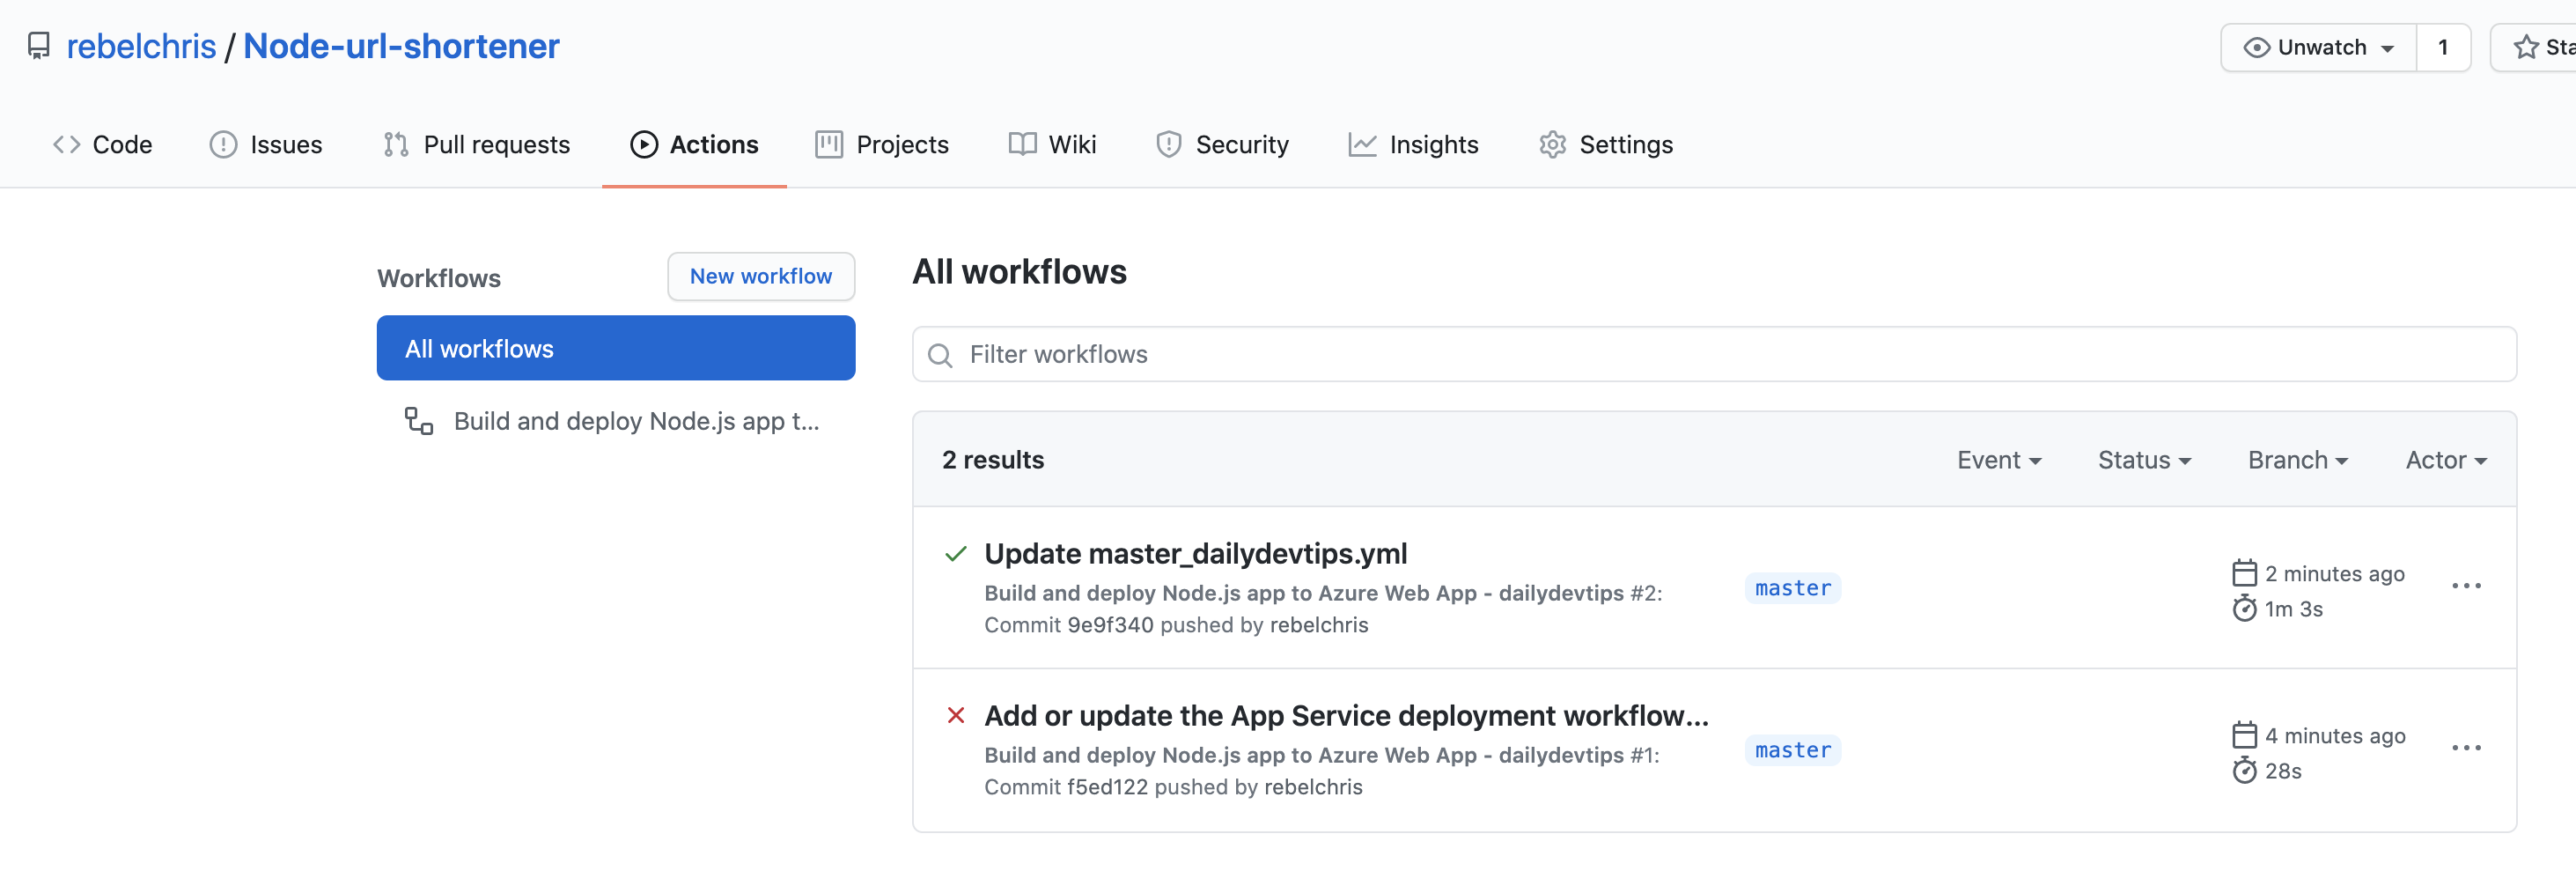
Yes, we got a successful workflow!
Pushing to GitHub Action via Visual Studio Code
Let's now try and change our project in Visual Studio Code.
We are going to add a new route called /chris and push that to our master branch.
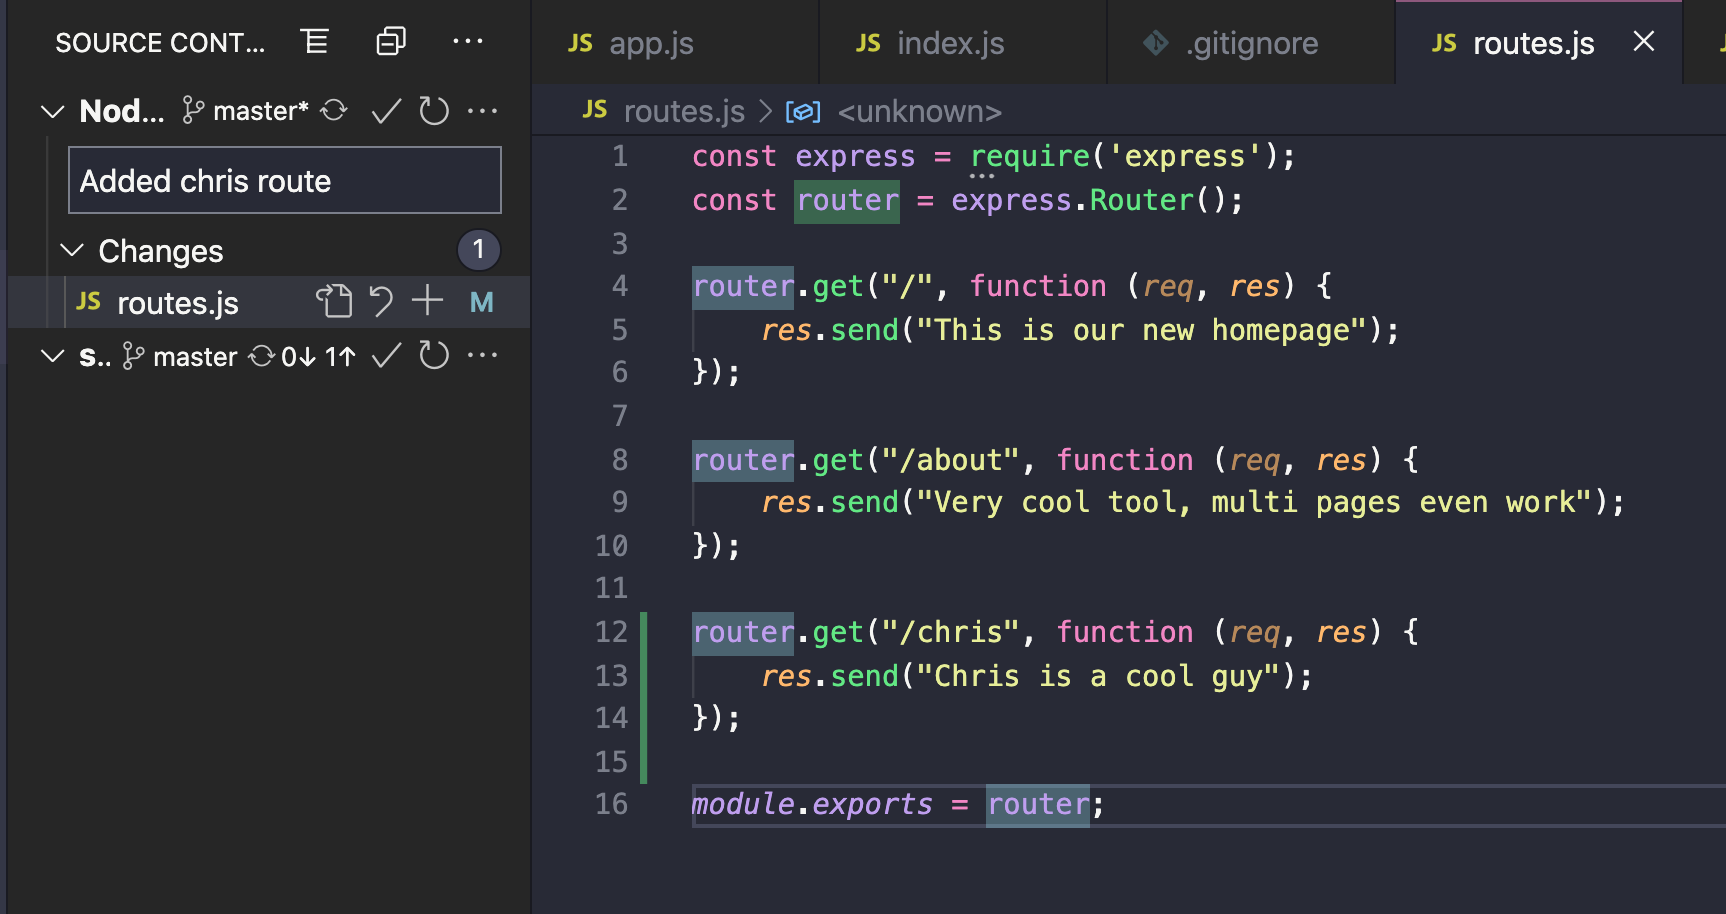
You can push this to the master, and then our web-app will show this /chris route!

Awesome!
You can find the full project on my GitHub or view it on Azure.
Thank you for reading, and let's connect!
Thank you for reading my blog. Feel free to subscribe to my email newsletter and connect on Facebook or Twitter



