
Git basics: Your first pull request

I'm a full-stack developer from South Africa 🇿🇦. I love writing about JavaScript, HTML and CSS.
Pull requests are a vital part of using Git. In this article, we'll look at making a pull request for our repository.
You should have a good understanding of how pull requests work and the steps needed to take. After this, we can look into creating pull requests for external repositories.
Making our feature
A pull request is a way to notify other people that a feature is done and ready to be merged into another branch.
You'll create a pull request, and generally, another developer will review your code and give you comments on the code.
Let's take the demo project we just created. It's a plain simple empty git project.
Let's add a new file to it called index.js.
const http = require('http');

const hostname = '127.0.0.1';
const port = 3000;

const server = http.createServer((req, res) => {
  res.statusCode = 200;
  res.setHeader('Content-Type', 'text/plain');
  res.end('Helo World');
});

server.listen(port, hostname, () => {
  console.log(`Server running at http://${hostname}:${port}/`);
});
This is just a super simple node server. It doesn't matter for this example. I did make a typo. (Did you spot it?)
Let's commit and push these changes to a new branch.
# Create a new branch
git checkout -b feature_node

# Add changes
git add .

# Commit the code
git commit -m "Added a node server"

# Push to the branch
git push origin feature_node
If we now head over to GitHub, we can see the branch there, and GitHub is already asking us if we want to create a new PR with this branch.
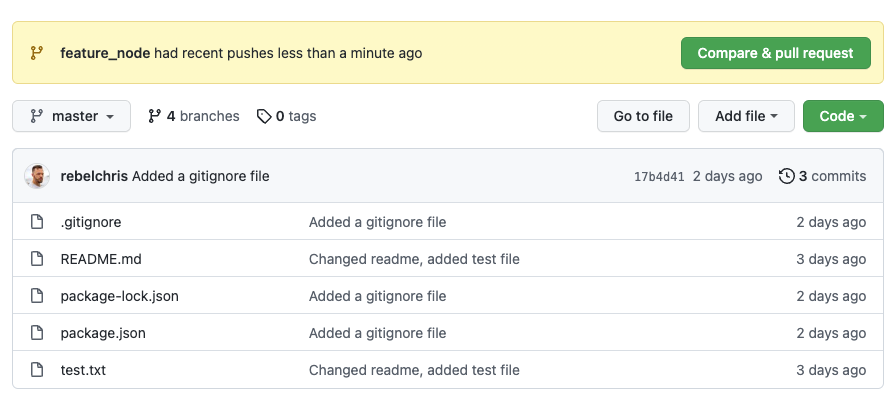
Creating the pull request
Click that green button to create a pull request.
A pull request always merges from one branch to another. In our case, we want to merge into the master branch.
You should add a descriptive title and some content about what this pull request is about.
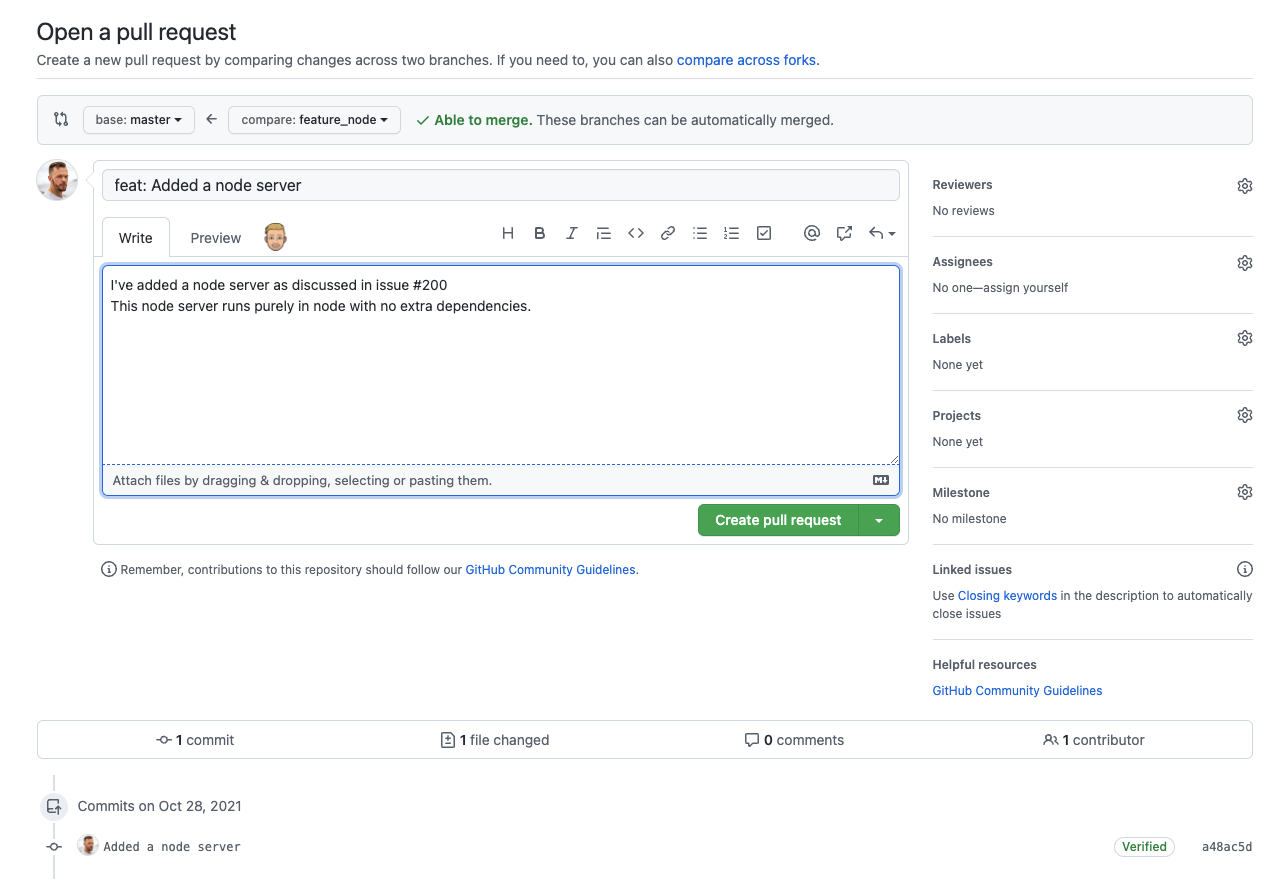
At the bottom, you can even see what files are changed to have a quick look to see if everything is fine. If that's the case press the green button to create a pull request.
Generally, you would assign one of your team members here.
The pull request is now created. It's up to your team member to evaluate what you made and add a review.
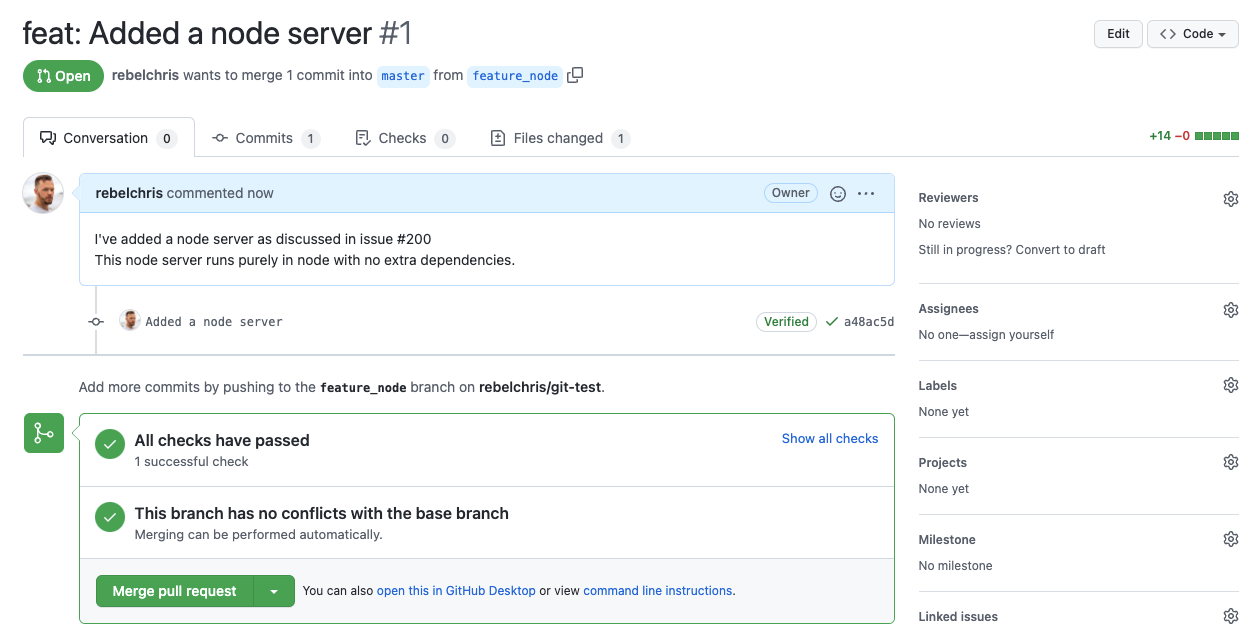
You can also review it yourself if you open up the files changed tab. In there, you can click on lines or select some lines to write comments.
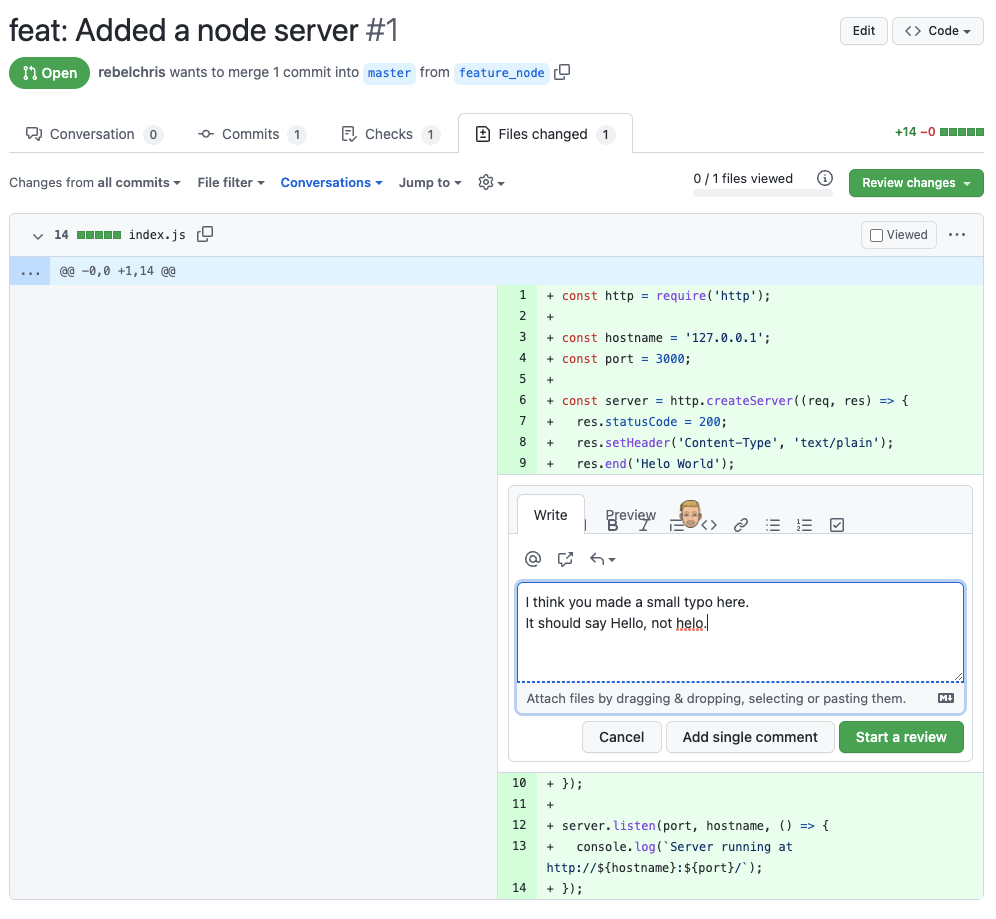
Don't forget to press the start review button. Once you are done with all the review items, you can press the "Finish your review" button to add a general remark and approval or change request.
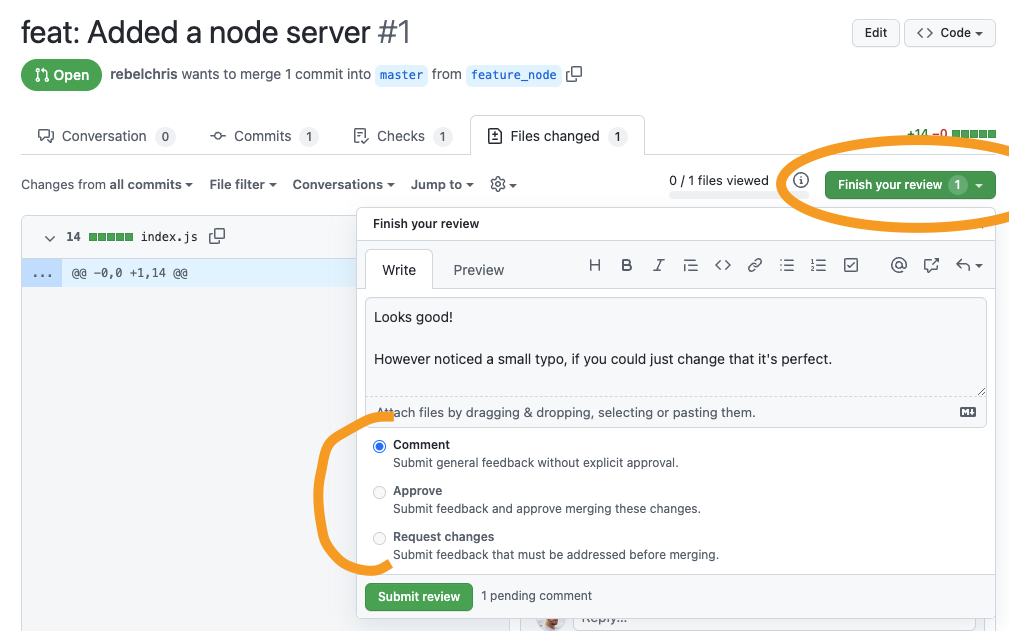
For your own PR's you can only comment, but when reviewing someone else, you can approve/request changes.
You will now be prompted to add these changes in the PR overview.
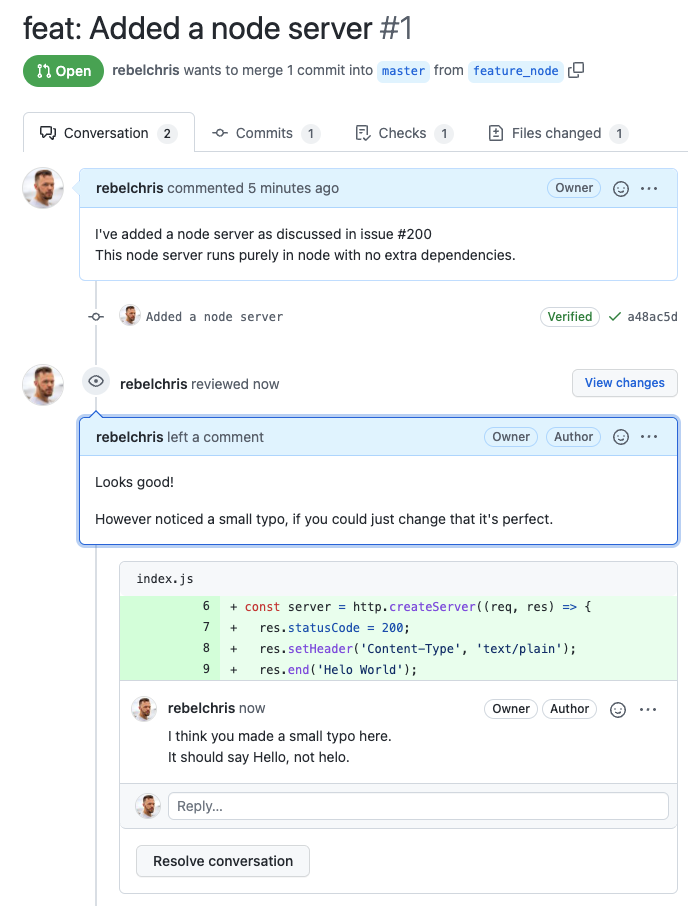
Head back over to your code and add the proposed change, after which you can resolve the issue and re-request a review.
Once the other reviewer approves your change, you can press this merge button, and the file will be merged into the main branch!
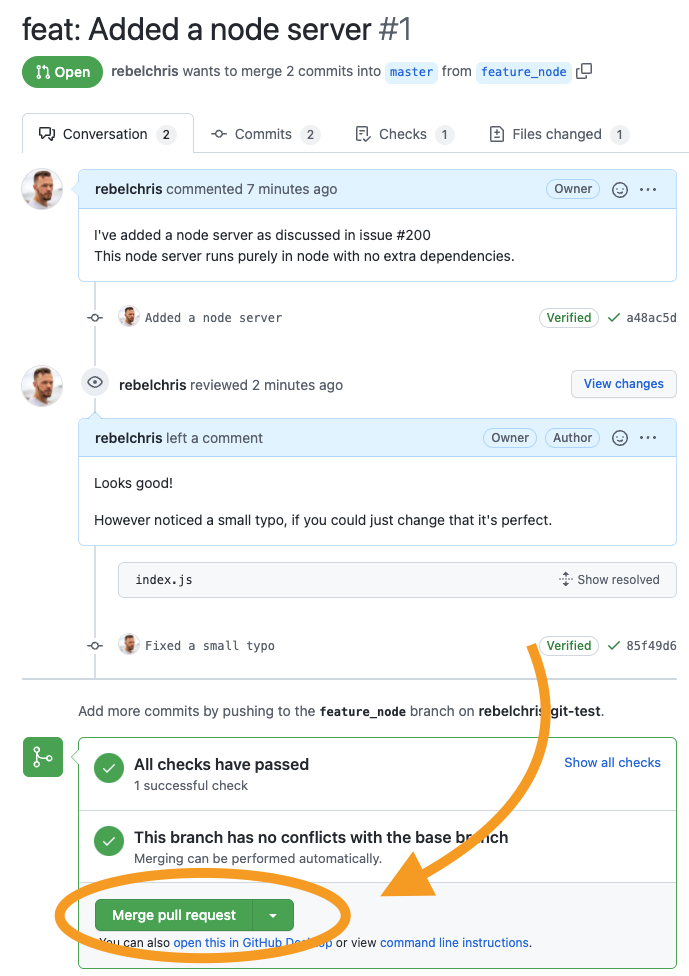
I left this pull request open so that you can view it on GitHub.
Thank you for reading, and let's connect!
Thank you for reading my blog. Feel free to subscribe to my email newsletter and connect on Facebook or Twitter



