

In the previous article, we looked at how you can create pull requests. We can put these in action when contributing to open source.
In this article, we'll go through the following steps.
- Fork an open-source repo
- Make changes to the repo
- Create a PR for the open-source team
By the end, we'll have contributed to an open-source project 🎉
Fork an open-source repo
Before we can start contributing to open source, we first have to find a project we wish to work on.
You might have a project in mind. If not, you can use these tools to find a good first issue to get started with.
Don't forget to comment on the issue if you can pick this up. To make sure someone else is not working on it already.
Once the ticket is assigned to you, you can start working on it.
In that repo, click the "Fork" button to create your fork for this project.
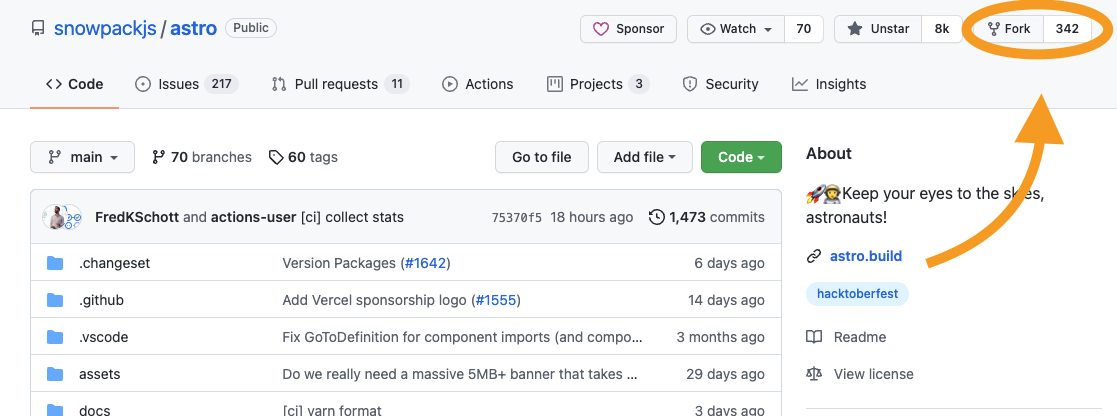
That copies the repo to your profile, so you can work on it without interfering with the original one.
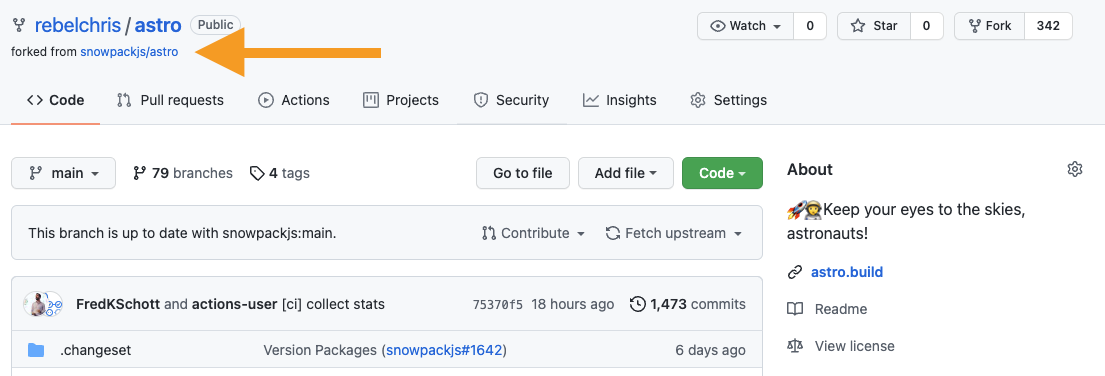
Make changes to the repo
Then you can set up this project locally and make sure you can run it on your system.
The simplest way is to clone the project and follow the steps in the readme.
Then make the change you discussed in the initial issue.
Some bigger repo's come with a contributing.md file. Keep an eye out for those or any specific contributing guidelines.
Once you are done, make sure to create a new branch for your local version of this project and commit the changes to that one.
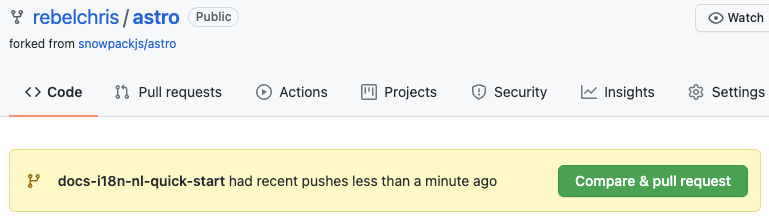
This branch should now show up in your version of the forked project like so:
Create a PR for the open-source team
If you click that big green button we see above saying "Compare and Pull request", we open a PR to the original repo.
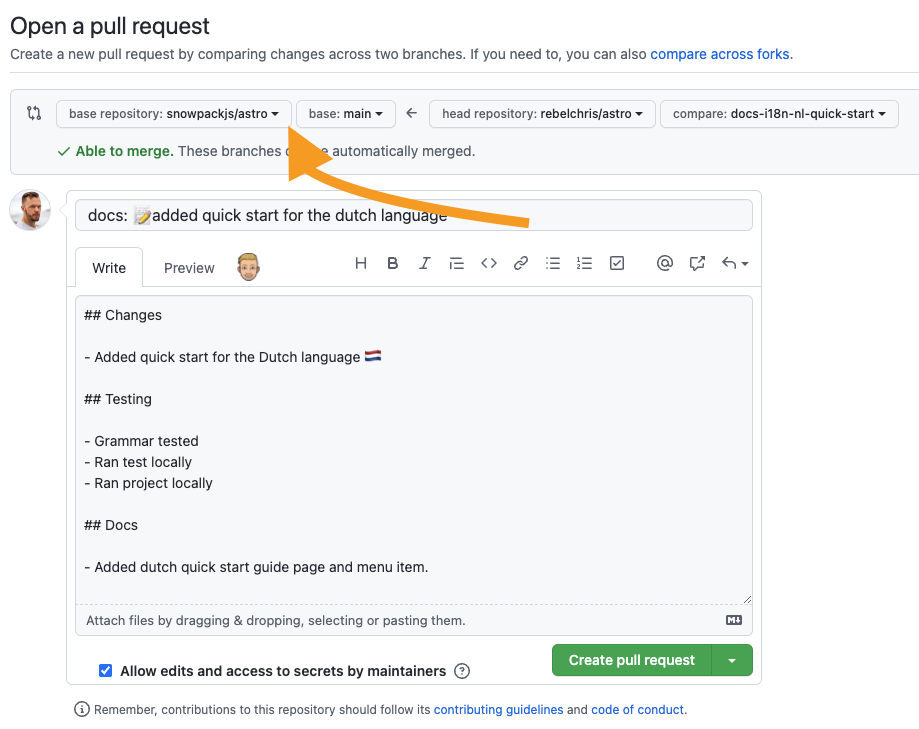
Make sure you fill out the template as the project provides it. Once you are happy with it, you can submit the PR.
Give the team some time to review it, as they might be swamped with PRs.
And there you go, you now contributed to open source! Great feeling, right?
Thank you for reading, and let's connect!
Thank you for reading my blog. Feel free to subscribe to my email newsletter and connect on Facebook or Twitter
About the author
I'm a full-stack developer from South Africa 🇿🇦. I love writing about JavaScript, HTML and CSS.
Comments
Join the discussionNo comments yet. Be the first to comment.
Git basics
In this series we'll cover some basic, but very important topics in Git, GitHub and Open source



