

Now that we learned the different types of extensions, let's see how we can create our first browser extension.
In this article, we'll create an extension that changes the body color on each page to pink. Because pink is a great color.
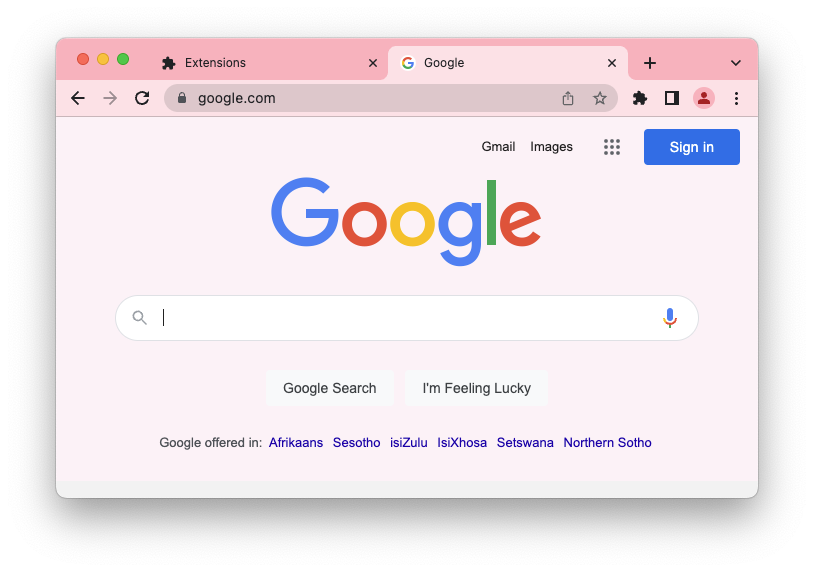
The browser extension wireframe
Browser extensions function through something called a manifest. This is a JSON file that contains all specific data about the extension.
It states the extension's metadata and the actual content it should run.
Let's create a new folder and navigate to it.
mkdir pinkify-extension && cd pinkify-extension
The next step is to create a manifest.json file which will become the brain of this operation.
Inside, place the following information.
{
  "manifest_version": 2,
  "name": "Pinkify",
  "version": "1.0",
  "description": "Convert any page to a pinkish page 💖",
  "icons": {
    "48": "icons/pinkify-48.png"
  },
  "content_scripts": [
    {
      "matches": ["<all_urls>"],
      "js": ["pinkify.js"]
    }
  ]
}
As you can see, it contains quite a lot of data about the application.
manifest_version: Which type of manifest to use? Three is recommended but not supported in Firefox yet, so I use two.name: The name of your extensionversion: The version of this extensiondescription: A small description of what it doesicons: You can add multiple icon files for your extensioncontent_scripts: This is the actual function that will be injected. We say on all URLs, add thepinkify.jsscript.
We'll dive into more details on the content_scripts later.
You can place a sample 48x48 pixels icon in the root directory.
Then you can add the script file, called pinkify.js, and put the following line of code in it.
document.body.style.setProperty('background', '#FDF2F7');
This will set the body background color to light pink.
Note: I didn't add any overwrites, so if a page already sets the body color, it won't be activated.
Testing your extension
We don't want to publish to the stores without testing our extension, so let's see what it takes to try it locally.
I prefer to use Chrome as it has a quicker interface for it.
In Chrome, click the plugins button and open up that page.
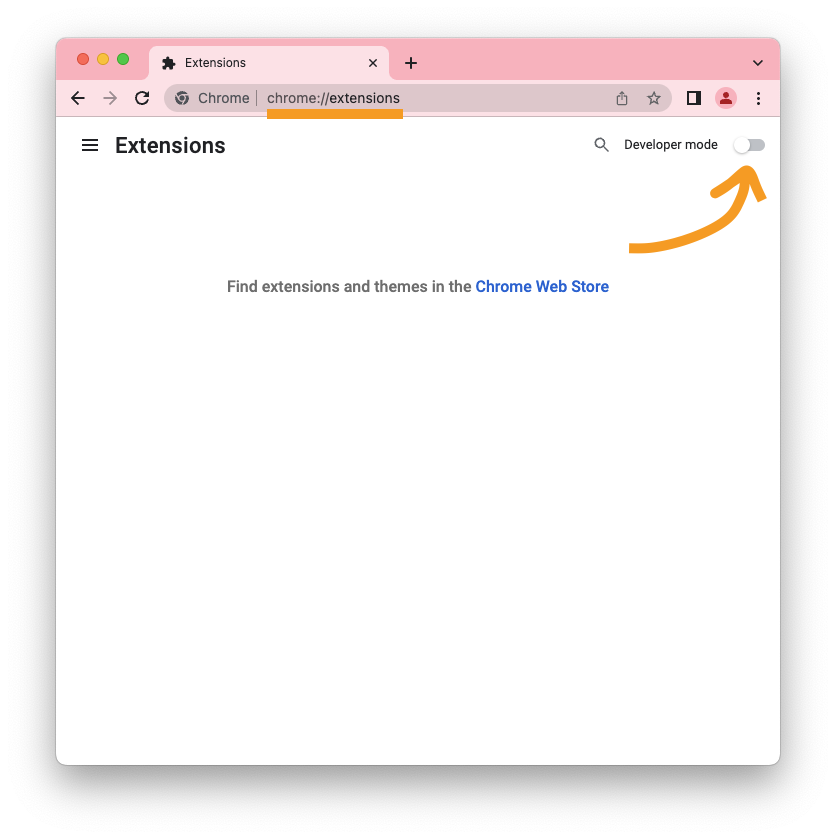
Next, toggle the developer mode on. You'll get another menu where you get the option to load unpacked extensions.
Click the load unpacked and navigate to the pinkify-extension folder.
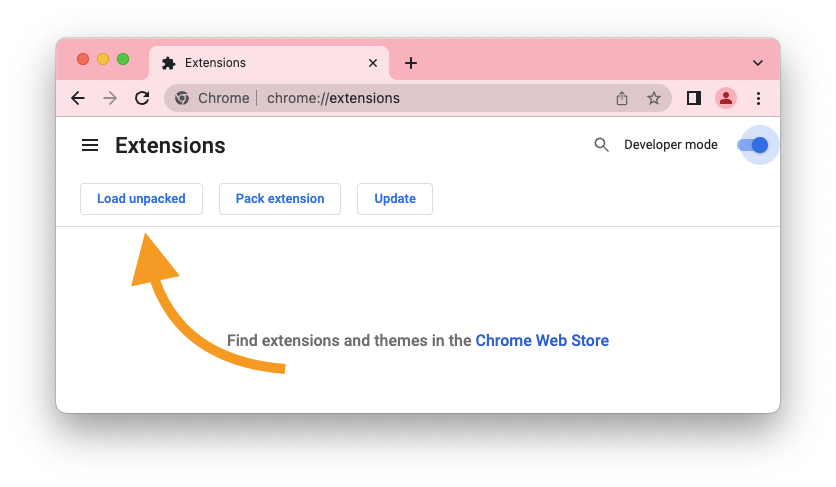
Once loaded, you should see something like this:

Now navigate to google.com or any webpage, and you should be able to see the pinkish background activated.
Amazing you made your first ever browser extension. As you can see, it's not as hard as one would think.
In the following articles, we'll create some more advanced extensions as well.
You can find today's code in the following GitHub repo.
Thank you for reading, and let's connect!
Thank you for reading my blog. Feel free to subscribe to my email newsletter and connect on Facebook or Twitter
About the author
I'm a full-stack developer from South Africa 🇿🇦. I love writing about JavaScript, HTML and CSS.
Comments
Join the discussionWell-explained, Thank you 😉
Glad you enjoyed it 🙏



