

In the previous article, we looked at creating our very first browser extension.
For this article, we'll be looking into making our very first theme as an extension!
The process will be very similar but easier.
The structure
As mentioned, the structure for a theme is easier.
We can use a manifest.json and additionally add some images.
Start by creating a new folder.
mkdir theme-extension && cd theme-extension
Then you can go ahead and add the manifest.json file.
I'll paste the full version of my manifest, and then we'll go into more detail on each option.
{
  "manifest_version": 3,
  "version": "2.6",
  "name": "daily dev tips theme",
  "theme": {
    "images": {
      "theme_frame": "images/frame-background.png",
      "theme_frame_overlay": "images/frame-background.png",
      "theme_tab_background": "images/tab-background.png",
      "theme_ntp_background" : "images/ntp-background.png"
    },
    "colors" : {
      "toolbar" : [0, 185, 232],
      "tab_background_text": [255, 255, 255],
      "tab_text": [255, 255, 255],
      "bookmark_text": [255,255,255],
      "ntp_text" : [218, 0, 96],
      "ntp_link" : [218, 0, 96],
      "ntp_section" : [255, 255, 255],
      "ntp_background": [255, 255, 255]
    },
    "tints" : {
      "buttons" : [1, 1, 1]
    },
    "properties" : {
      "ntp_logo_alternate": 0,
      "ntp_background_alignment" : "center"
    }
  }
}
Alright, let's go ahead and analyze each option. First, it's good to note that the color options are in RGB format.
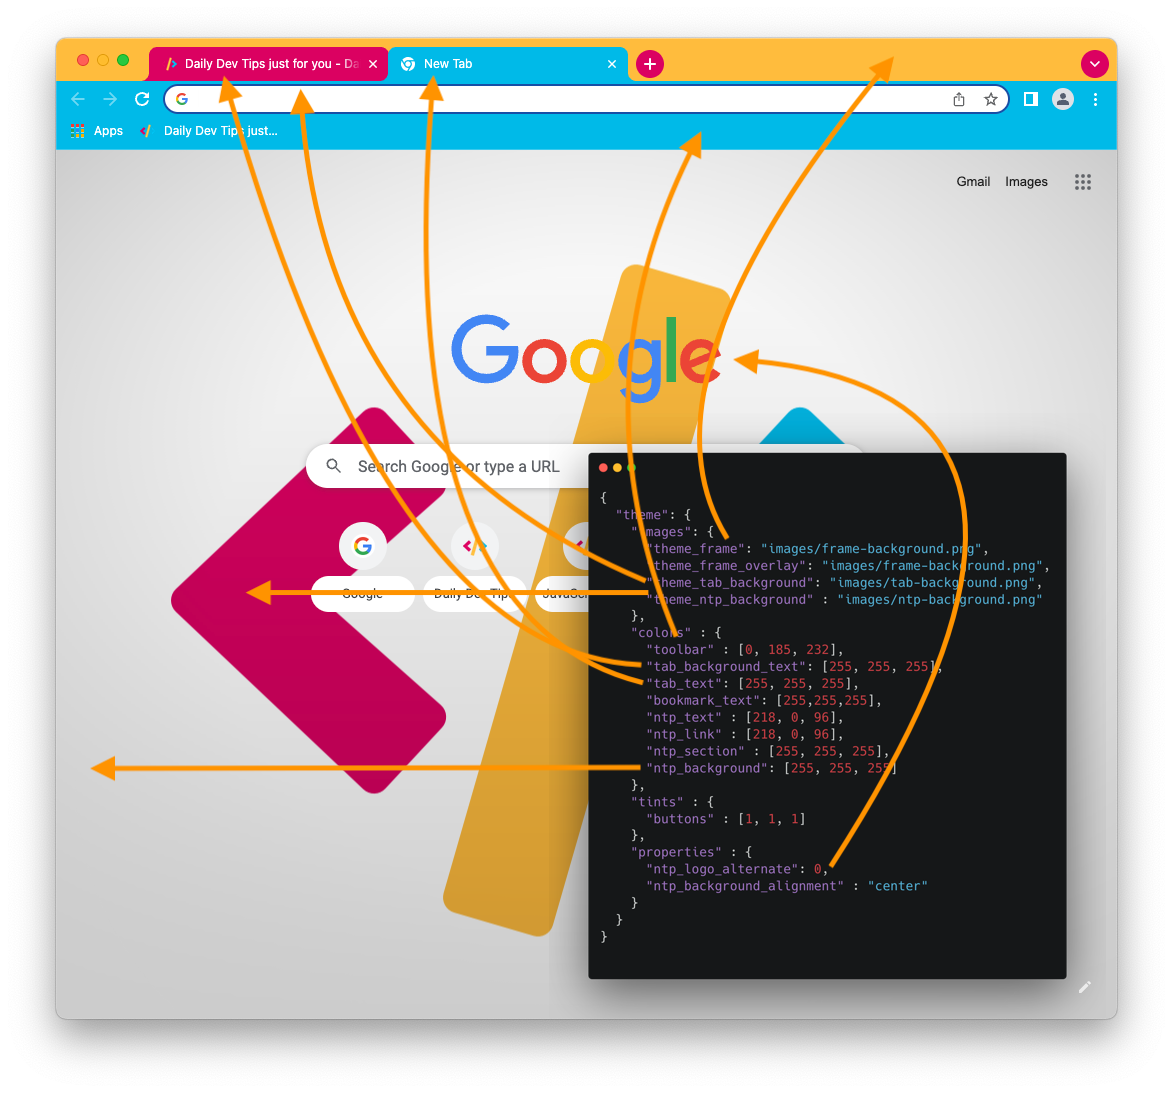
I've added this color reference image, so people can visualize what each option affects.
Images:
theme_frame: We can't set a color for the outer frame, but you can pick a 1x1 pixel image.theme_frame_overlay: It's the left top corner. I went for the same as the frame.theme_tab_background: This indicates the non-active tabs; again, we have to use an image to color these.theme_ntp_background: The actual center bit of the screen.
Colors:
toolbar: The color of the bookmark element on the new tab (bottom left corner)tab_background_text: Color of the text of the background tabstab_text: Color of the active tabbookmark_text: Color of the bookmarked itemsntp_text: Color of the center frame textntp_link: Color of links inside the center framentp_section: Color of the quick links in the center sectionntp_background: Background of the new tab page
Tints:
buttons: The tint color for the icons inside the toolbar (back, refresh, etc.)
Properties:
ntp_logo_alternate: Which logo to show, 0 is the colorful Google logo and 1 is the white Google logontp_background_alignment: If you added an NTP image, you can adjust the position
You can style many more small elements, and I found the following GitHub repo to be super helpful.
Testing your extension
We don't want to publish to the stores without testing our extension, so let's see what it takes to try it locally.
I prefer to use Chrome as it has a quicker interface for it.
In Chrome, click the plugins button and open up that page.
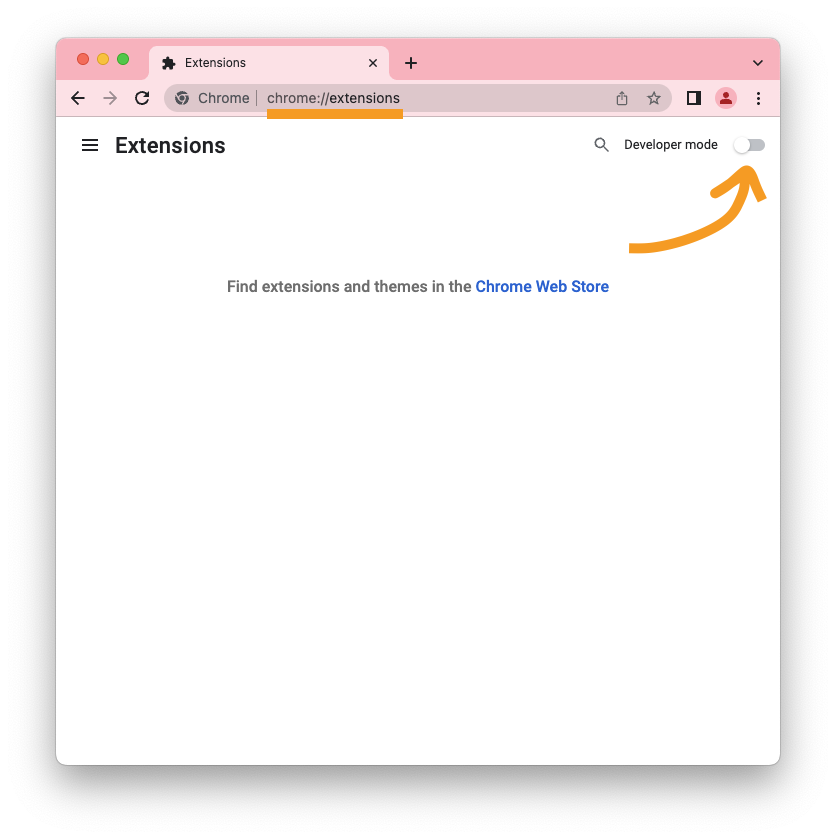
Next, toggle the developer mode on. You'll get another menu where you get the option to load unpacked extensions.
Click the load unpacked and navigate to the theme-extension folder.
Chrome will notify you that your theme is now active, and you should immediately see the colors in effect.
I also added my daily dev tips theme to GitHub. You can download it and install it via developer mode in Chrome.
Thank you for reading, and let's connect!
Thank you for reading my blog. Feel free to subscribe to my email newsletter and connect on Facebook or Twitter
About the author
I'm a full-stack developer from South Africa 🇿🇦. I love writing about JavaScript, HTML and CSS.
Comments
Join the discussionNo comments yet. Be the first to comment.



