

So far, our browser extensions have had quite a generic view. It showed plain text and some interactive counter.
Often with these things, you'll want to add some external data in them.
Let's change our new tab extension to load some weather information we can display.
Note: if you would like to follow along, use the following GitHub branch.
Adding external calls
In this article, we will use the OpenWeather API to get the current weather information for our location. We will base this on the lat and longitude we'll request via the browser.
First, head over to OpenWeather and signup. You get a massive free tier.
Once you are logged in, find the API key, as you'll need this in a bit.
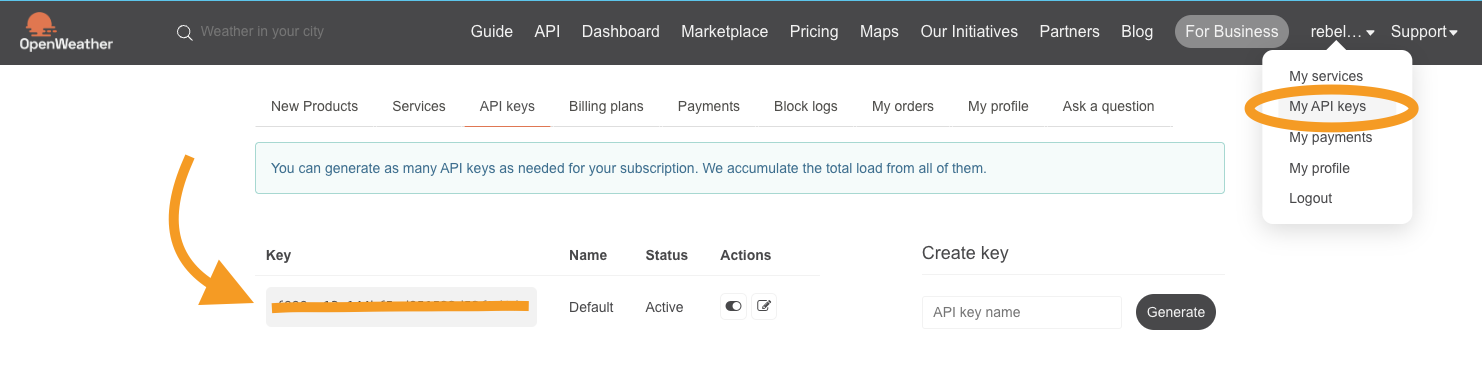
Add a .env file in the root of your project and add the API key you just retrieved in there.
VITE_APP_API_URL='https://api.openweathermap.org/data/2.5'
VITE_APP_API_KEY='YOUR_KEY'
Note: Since we are using Vite, we have to prefix the variables with
VITE_
Now open up the project, and let's add a new component called Weather.jsx.
Let's start with the wireframe:
export default function Weather() {
  return (
    <div>
      <h2>The weather today ☁️</h2>
    </div>
  );
}
We can add the component to our main App.jsx file.
import Counter from './Counter';
import Weather from './Weather';

export function App() {
  return (
    <div className='flex flex-col items-center justify-center w-screen h-screen bg-indigo-400 text-6xl font-bold text-white'>
      <p>Welcome 👋</p>
      <br />
      <Weather />
      <br />
      <Counter />
    </div>
  );
}
However, this won't do much more than show the static text.
We'll first have to create a state for the lat/long for the user and the actual weather data.
Add the following state to your Weahter.jsx file.
import {useEffect, useState} from "react";

export default function Weather() {
    const [latLng, setLatLng] = useState({});
    const [data, setData] = useState(null);
We will use these states to keep track of everything. To get the lat/long, we can use the navigator object. We'll do this call inside a useEffect.
useEffect(() => {
  if (!latLng.lat && !latLng.long) {
    navigator.geolocation.getCurrentPosition(function (position) {
      setLatLng({
        lat: position.coords.latitude,
        long: position.coords.longitude,
      });
    });
    return;
  }
}, [latLng]);
As you can see, we ensure that we don't have existing lat and long. If so, we query the navigator.geolocation for it.
Note: The first time, the browser will ask you to access this.
Once returned, we should go ahead and query the weather API. We can do this in the same useEffect to keep things neatly organized.
useEffect(() => {
  if (!latLng.lat && !latLng.long) {
    navigator.geolocation.getCurrentPosition(function (position) {
      setLatLng({
        lat: position.coords.latitude,
        long: position.coords.longitude,
      });
    });
    return;
  }
  if (!data) {
    fetch(
      `${import.meta.env.VITE_APP_API_URL}/weather/?lat=${latLng.lat}&lon=${
        latLng.long
      }&units=metric&APPID=${import.meta.env.VITE_APP_API_KEY}`
    )
      .then((res) => res.json())
      .then((result) => setData(result));
  }
}, [latLng]);
As you can see, we check if we didn't already load anything. If not, we query the weather API with this user's current lat and longitude. We then set the result in our data object.
Now we can modify our actual response output.
<div>
  <h2>The weather today ☁️</h2>
  <br />
  {!data ? (
    <p>Loading...</p>
  ) : (
    <>
      <p>Weather for: {data.name}</p>
      <p>
        Temp: {data.main.temp}° ({data.weather[0].main})
      </p>
    </>
  )}
</div>
This will show a loading state while loading the data and then show the location's name, temperature, and weather condition.
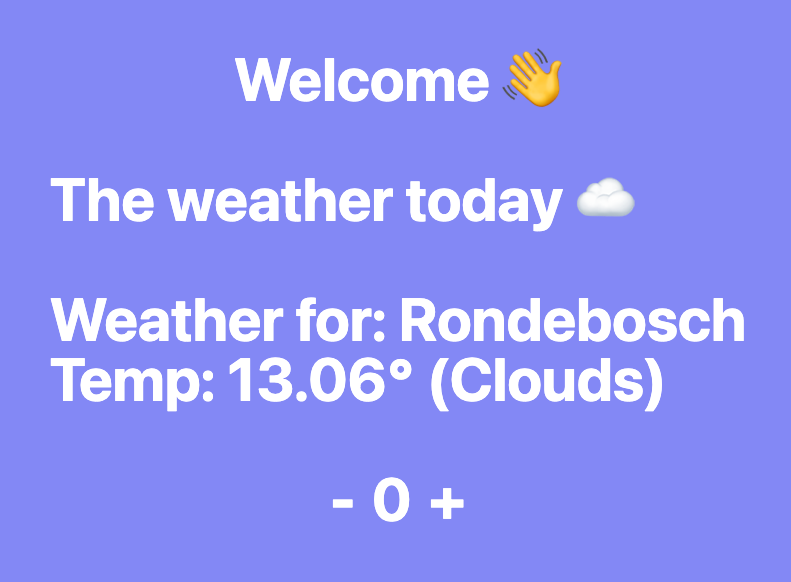
And that's it. We now have a way to load external data in our browser extension new tab.
I also uploaded this code to GitHub, so you can see the result.
Thank you for reading, and let's connect!
Thank you for reading my blog. Feel free to subscribe to my email newsletter and connect on Facebook or Twitter
About the author
I'm a full-stack developer from South Africa 🇿🇦. I love writing about JavaScript, HTML and CSS.
Comments
Join the discussionNo comments yet. Be the first to comment.



