
Browser extensions - Popup weather extension

I'm a full-stack developer from South Africa 🇿🇦. I love writing about JavaScript, HTML and CSS.
In the previous article, we created a new tab experience that could load the weather for our current location. This article will convert what we learned to make it work in a popup extension.
If you like to follow along, take the following branch as your starting point. (or read up on the article)
Creating the widget
The first thing we'll want to do is create our Weather widget. This will be the main component that shows the current weather.
Create a new file called Weather.jsx inside your src directory.
Start by bootstrapping the React component like this.
export default function Weather() {
  return (
    <div>
      <h2>The weather today ☁️</h2>
    </div>
  );
}
Let's open up our App.jsx file and load this component.
import Weather from './Weather';

export function App() {
  return (
    <div className='flex flex-col items-center justify-center w-screen h-screen bg-indigo-400 text-6xl font-bold text-white'>
      <Weather />
    </div>
  );
}
We must first ensure access to some external API to load weather data. I'm using the OpenWeather API because it has a generous free tier.
Let me show you how you can get an API key from there.
First, head over to OpenWeather and signup. You get a massive free tier.
Once you are logged in, find the API key, as you'll need this in a bit.
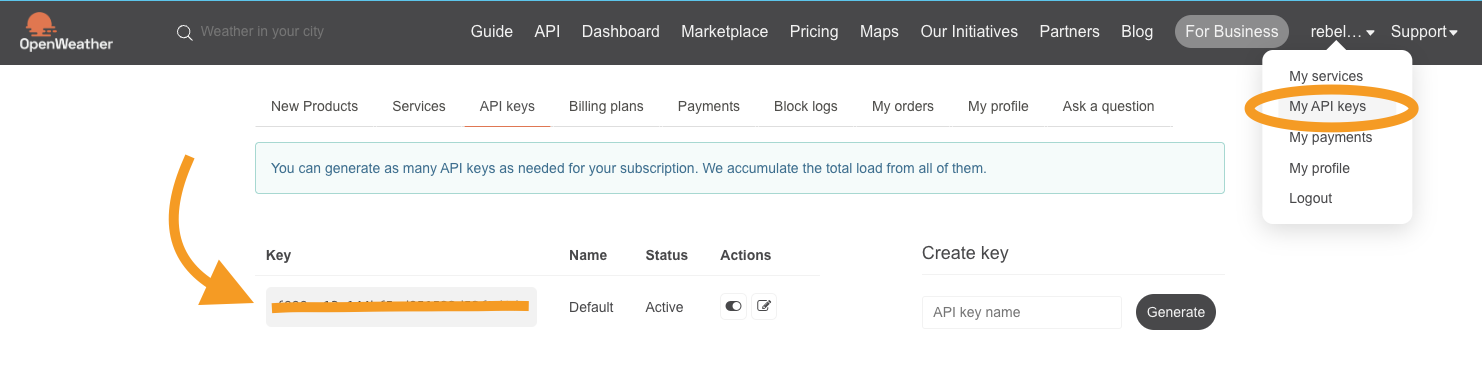
Once you have the key, head back to your project and create a .env file at the root of your project.
Inside we'll place our API key and the URL to the API.
VITE_APP_API_URL='https://api.openweathermap.org/data/2.5'
VITE_APP_API_KEY='YOUR_API_KEY'
Note: You can see they are prefixed with
VITE_as we use Vite as our build tool.
Now let's head back over to the weather component and call the API so we can fetch the data.
The first thing we'll need is a state to store the lat/long for the user and a state that will store the actual data returned by the API.
const [latLng, setLatLng] = useState({});
const [data, setData] = useState(null);
Then we'll want to add a useEffect that will take care of retrieving the geolocation from the user and fetching the API. The completed call will look like this.
useEffect(() => {
  if (!latLng.lat && !latLng.long) {
    navigator.geolocation.getCurrentPosition(function (position) {
      setLatLng({
        lat: position.coords.latitude,
        long: position.coords.longitude,
      });
    });
    return;
  }
  if (!data) {
    fetch(
      `${import.meta.env.VITE_APP_API_URL}/weather/?lat=${latLng.lat}&lon=${
        latLng.long
      }&units=metric&APPID=${import.meta.env.VITE_APP_API_KEY}`
    )
      .then((res) => res.json())
      .then((result) => setData(result));
  }
}, [latLng]);
The last thing we want to change is to render the data in our view. I added a loading text in case our app still loads the data.
return (
  <div>
    <h2>The weather today ☁️</h2>
    <br />
    {!data ? (
      <p>Loading...</p>
    ) : (
      <>
        <p>Weather for: {data.name}</p>
        <p>
          Temp: {data.main.temp}° ({data.weather[0].main})
        </p>
      </>
    )}
  </div>
);
And that's it. Our component is now ready to be used.
Create a new build and install the extension in developer mode.
If we now try to open the extension, you'll notice it's not loading!
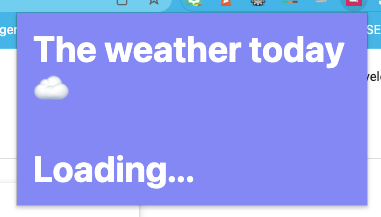
And if you right-click the popup extension and choose Inspect, you'll see the developer tools popup.
In the console, you will see a message stating we didn't ask for the proper permissions for the geolocation.
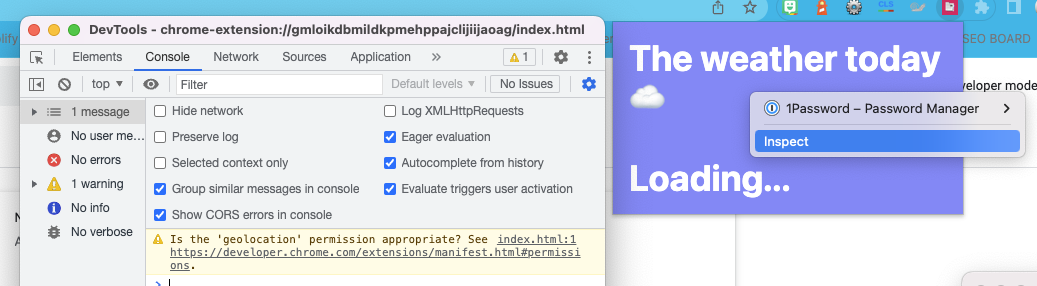
Let's open our manifest.json and add the following permission line.
"permissions": ["geolocation"]
Now build and rerun your application. You should now be able to get your current location weather!
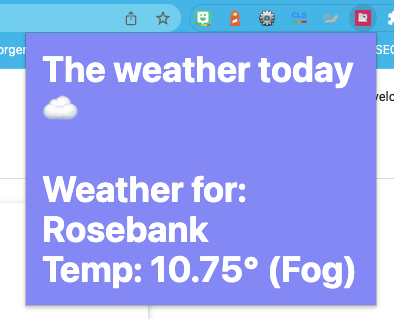
You can also see the complete code on this GitHub repo.
Thank you for reading, and let's connect!
Thank you for reading my blog. Feel free to subscribe to my email newsletter and connect on Facebook or Twitter



