
Vendure - Assets to an S3 bucket

I'm a full-stack developer from South Africa 🇿🇦. I love writing about JavaScript, HTML and CSS.
As my webshop serves a lot of images, I wanted to leverage a good CDN and quickly found a neat integration with S3 available for Vendure.
In this article, I'll show you how you can connect and leverage an S3 bucket as your asset storage.
Setting up Amazon
The first thing you'll need is an AWS account, which can be tedious. (Mainly quite long)
Head over to AWS and create your account.
Once you are set up and ready to go, it's time to create a new bucket. The steps for creating a bucket are extensive and might change over time, so it's best to follow Amazon's docs on this.
Eventually, your bucket should be ready like this:
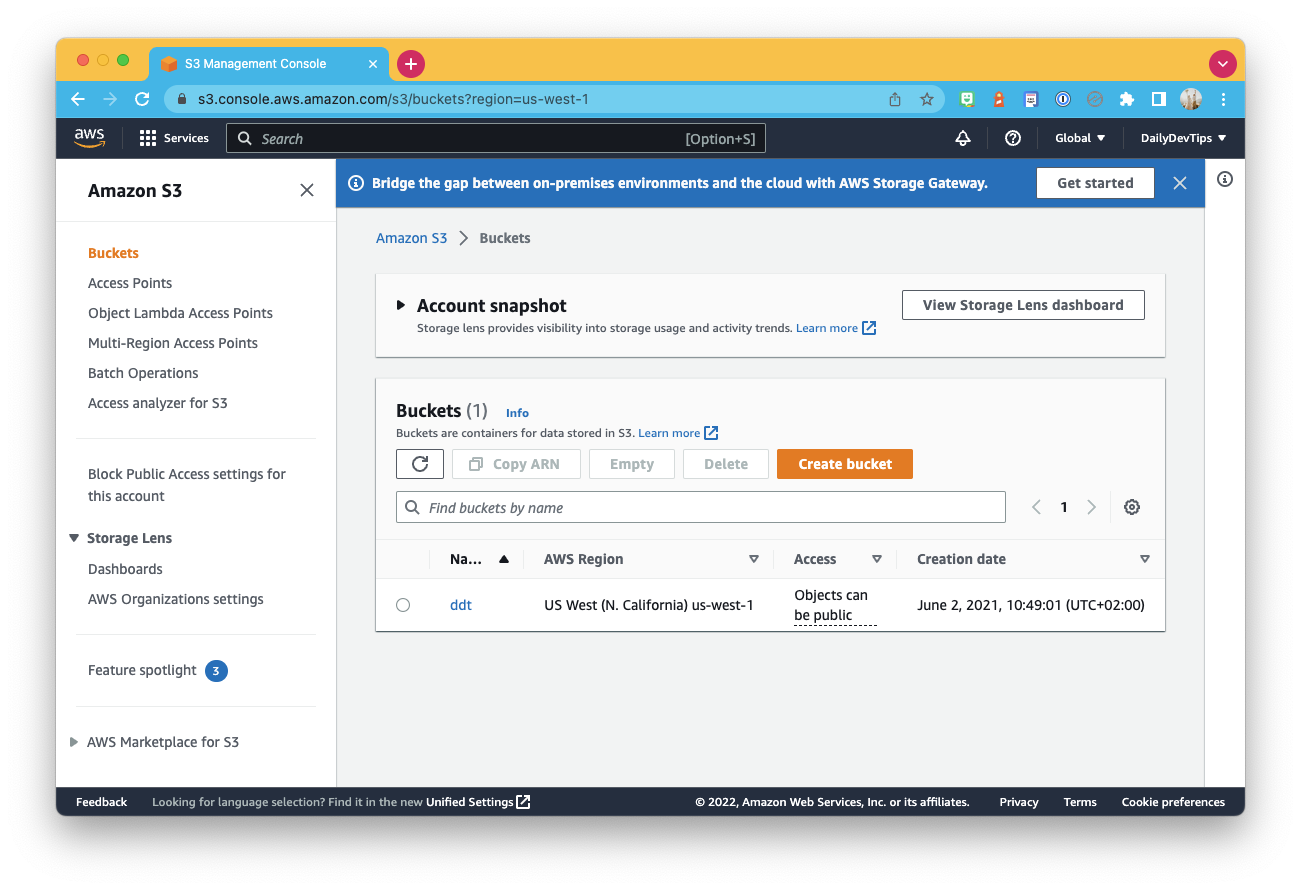
You'll also need to add new access credentials.
Head to AWS's IAM section and create a new user.
You can give it a name that represents the tool you will use and also choose to make it an Access key.
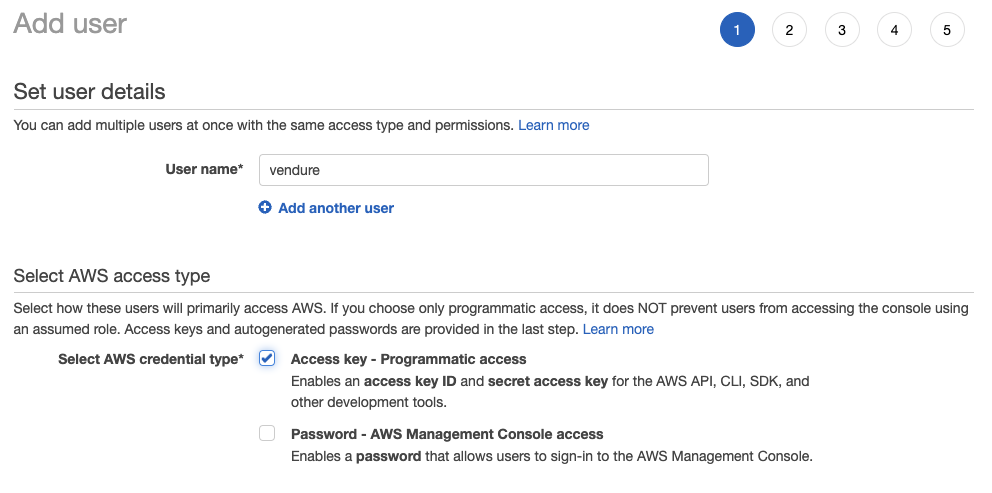
On the next screen, you'll need to attach the permissions. In our case, we can choose to connect them manually.
Search for AmazonS3FullAccess.
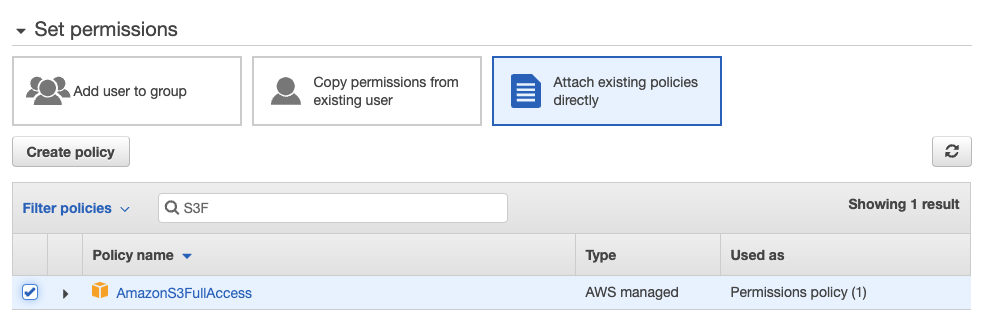
You can press next until you get to the actual keys in the next couple of steps. Copy the key and secret to a secure place.
Setting the bucket as storage
Now it's time to add some code.
First of all, we need to install the aws-sdk package.
npm install aws-sdk
I save my secrets in a .ENV file for maximum protection, so go ahead and add the following two keys.
AWS_ACCESS_KEY_ID={YOUR_KEY}
AWS_SECRET_ACCESS_KEY={YOUR_SECRET}
Next, we need to modify the vendure-config.ts file to use a new asset plugin.
Start by importing the S3 one.
import {
  AssetServerPlugin,
  configureS3AssetStorage,
} from '@vendure/asset-server-plugin';
And inside the config, add a new plugin.
export const config: VendureConfig = {
    # Your other config here
    plugins: [
        AssetServerPlugin.init({
            route: 'assets',
            storageStrategyFactory: configureS3AssetStorage({
                bucket: 'vendure',
                credentials: {
                    accessKeyId: process.env.AWS_ACCESS_KEY_ID,
                    secretAccessKey: process.env.AWS_SECRET_ACCESS_KEY,
                },
            }),
        }),
    ],
};
It's essential to change the bucket name to your bucket.
And now, any assets you upload via the admin UI or the import will be stored in the S3 bucket!
Thank you for reading, and let's connect!
Thank you for reading my blog. Feel free to subscribe to my email newsletter and connect on Facebook or Twitter



