
Vanilla JavaScript colouring our canvas elements 🌈

I'm a full-stack developer from South Africa 🇿🇦. I love writing about JavaScript, HTML and CSS.
So far, we have learned the basics of the canvas, and how to export it as an image. But it was all plain looking, so let's go ahead and explore our colouring options for the canvas.
Today we'll learn how to make the following;
Option for colouring
We have been using fillRect and stroke options.
If we want to add colour to this we can use the following two options:
- fillStyle => Colour for the inside of our element
- strokeStyle => Colour for the stroke
Let's say we want to make our block purple, all these options will result in the same result:
ctx.fillStyle = 'purple';
ctx.fillStyle = '#800080';
ctx.fillStyle = 'rgb(128, 0, 128)';
ctx.fillStyle = 'rgba(128, 0, 128, 1)';
Let's try this out on our basic square in Codepen.
The same can be used for our strokeStyle as such:
ctx.strokeStyle = 'purple';
ctx.strokeStyle = '#800080';
ctx.strokeStyle = 'rgb(128, 0, 128)';
ctx.strokeStyle = 'rgba(128, 0, 128, 1)';
And that will result in the following Codepen.
Using transparency on canvas elements
The cool part, which you might have spotted, is the rgba method.
We can set our transparency and have overlapping elements like this:
ctx.fillStyle = 'rgba(46, 196, 182, 0.5)';
ctx.fillRect(25,25,100,100);

ctx.fillStyle = 'rgba(231, 29, 54, 0.5)';
ctx.fillRect(75,75,100,100);
This will result in the following Codepen.
Browser Support
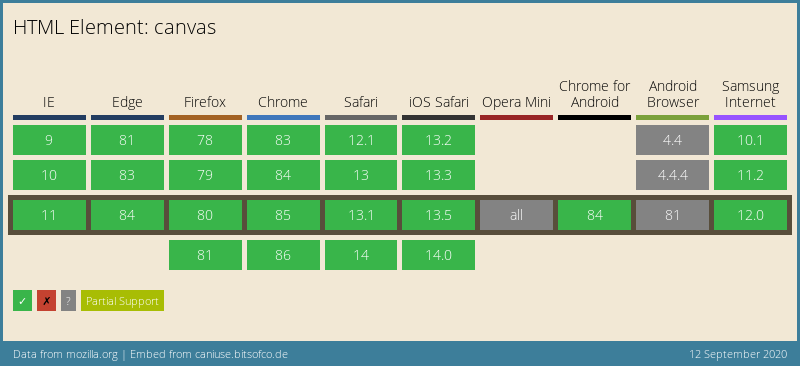
The canvas element is well supported these days and is defiantly a good option if you want to draw vectors on screen.
Thank you for reading, and let's connect!
Thank you for reading my blog. Feel free to subscribe to my email newsletter and connect on Facebook or Twitter



