
Using Bootstrap in Next.js + free starter

I'm a full-stack developer from South Africa 🇿🇦. I love writing about JavaScript, HTML and CSS.
I'll be completely honest with you. I haven't used Bootstrap in a while. But that doesn't take away that it's still widely used by a lot of people.
A loyal reader Neeraj asked me to write down a tutorial on integrating Bootstrap with Next.js (Thank you, Neeraj, for this request ❤️).
So today, we'll have a look at how you can set up Bootstrap to work in a Next.js project.
Adding Bootstrap to Next.js
Let's start from scratch so everyone can follow along.
First, we'll create a new Next.js application, which is as simple as running the following command:
npx create-next-app
All you have to do is pick a name 🥳
Then let's add the Bootstrap NPM package. By loading it with NPM, we can more easily update it later on.
npm install bootstrap
To load Bootstrap in our project, we only need to load the stylesheet in our _app.js file like so:
import 'bootstrap/dist/css/bootstrap.css';

function MyApp({ Component, pageProps }) {
  return <Component {...pageProps} />;
}

export default MyApp;
Be aware this will load the complete bootstrap file! Unfortunately, there is no super-easy way to purge Bootstrap as Tailwind has.
Styling a basic Bootstrap template in Next.js
Let's put it to the test and create a simple template.
Open up your index.js page and modify it so it looks like this:
import Head from 'next/head';

export default function Home() {
  return (
    <main className='d-flex flex-column min-vh-100'>
      <Head>
        <title>Create Next App</title>
        <meta name='description' content='Generated by create next app' />
        <link rel='icon' href='/favicon.ico' />
      </Head>
      <div className='px-4 py-5 my-5 text-center flex-grow-1'>
        <h1 className='display-5 fw-bold'>Next.js + Bootstrap ❤️</h1>
        <div className='col-lg-6 mx-auto'>
          <p className='lead mb-4'>
            Quickly design and customize responsive mobile-first sites with
            Bootstrap, the world’s most popular front-end open source toolkit,
            featuring Sass variables and mixins, responsive grid system,
            extensive prebuilt components, and powerful JavaScript plugins.
          </p>
          <div className='d-grid gap-2 d-sm-flex justify-content-sm-center'>
            <button type='button' className='btn btn-primary btn-lg px-4 gap-3'>
              Primary button
            </button>
            <button
              type='button'
              className='btn btn-outline-secondary btn-lg px-4'
            >
              Secondary
            </button>
          </div>
        </div>
      </div>
    </main>
  );
}
This should render a Bootstrap hero header:
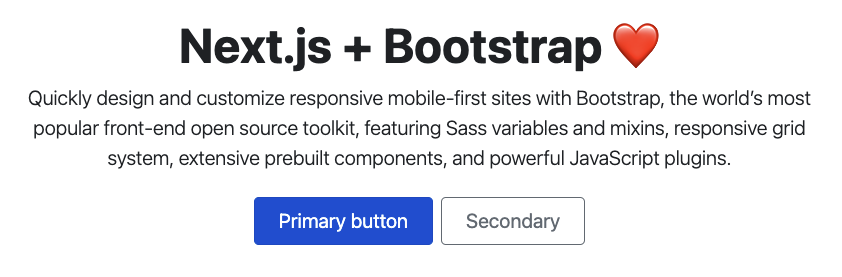
It works, yes 🎉.
But does it also work for components?
Let's create a components directory and add a file called Header.js.
const Header = () => {
  return (
    <header className='p-3 bg-dark text-white'>
      <div className='container'>
        <div className='d-flex flex-wrap align-items-center justify-content-center justify-content-lg-start'>
          <a
            href='#'
            className='d-flex align-items-center mb-2 mb-lg-0 text-white text-decoration-none'
          >
            LOGO
          </a>

          <ul className='nav col-12 col-lg-auto me-lg-auto mb-2 justify-content-center mb-md-0'>
            <li>
              <a href='#' className='nav-link px-2 text-secondary'>
                Home
              </a>
            </li>
            <li>
              <a href='#' className='nav-link px-2 text-white'>
                Features
              </a>
            </li>
            <li>
              <a href='#' className='nav-link px-2 text-white'>
                Pricing
              </a>
            </li>
            <li>
              <a href='#' className='nav-link px-2 text-white'>
                FAQs
              </a>
            </li>
            <li>
              <a href='#' className='nav-link px-2 text-white'>
                About
              </a>
            </li>
          </ul>

          <form className='col-12 col-lg-auto mb-3 mb-lg-0 me-lg-3'>
            <input
              type='search'
              className='form-control form-control-dark'
              placeholder='Search...'
              aria-label='Search'
            />
          </form>

          <div className='text-end'>
            <button type='button' className='btn btn-outline-light me-2'>
              Login
            </button>
            <button type='button' className='btn btn-warning'>
              Sign-up
            </button>
          </div>
        </div>
      </div>
    </header>
  );
};
export default Header;
And let's create another component called Footer.js.
const Footer = () => {
  return (
    <div className='container'>
      <footer className='py-3 my-4'>
        <ul className='nav justify-content-center border-bottom pb-3 mb-3'>
          <li className='nav-item'>
            <a href='#' className='nav-link px-2 text-muted'>
              Home
            </a>
          </li>
          <li className='nav-item'>
            <a href='#' className='nav-link px-2 text-muted'>
              Features
            </a>
          </li>
          <li className='nav-item'>
            <a href='#' className='nav-link px-2 text-muted'>
              Pricing
            </a>
          </li>
          <li className='nav-item'>
            <a href='#' className='nav-link px-2 text-muted'>
              FAQs
            </a>
          </li>
          <li className='nav-item'>
            <a href='#' className='nav-link px-2 text-muted'>
              About
            </a>
          </li>
        </ul>
        <p className='text-center text-muted'>© 2021 Company, Inc</p>
      </footer>
    </div>
  );
};

export default Footer;
If we head back to our index.js we can import these two components to see what happens.
import Header from '../components/Header';
import Footer from '../components/Footer';

export default function Home() {
  return (
    <main className='d-flex flex-column min-vh-100'>
      <Header />
            <!-- Hero code -->
      <Footer />
    </main>
  );
}
Let's refresh our page and see what we have.
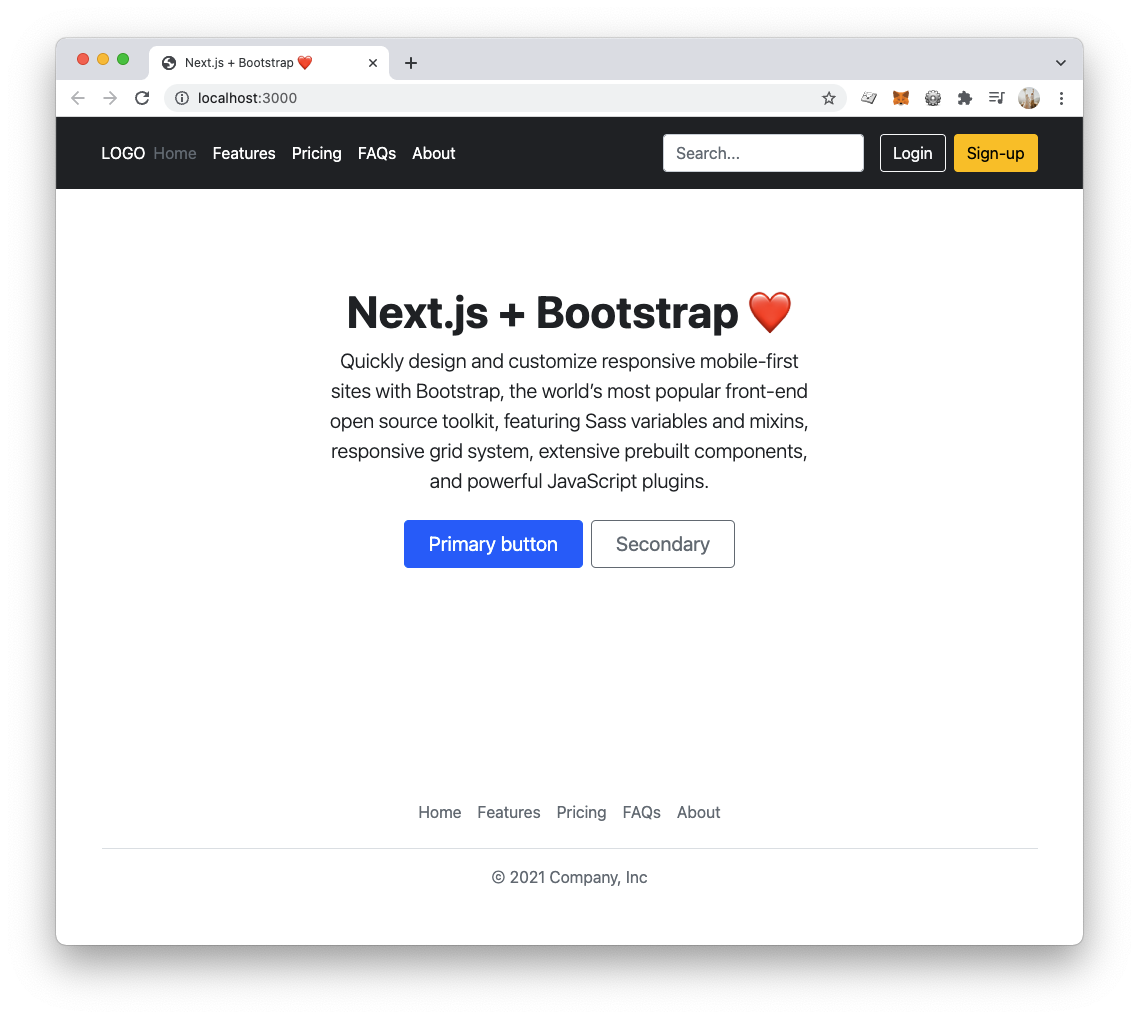
And there you go, a super-easy way to include Bootstrap in your Next.js application.
You can find the complete starter code on GitHub.
Thank you for reading, and let's connect!
Thank you for reading my blog. Feel free to subscribe to my email newsletter and connect on Facebook or Twitter



