
Upgrading to React 18

Now that we had a brief introduction to React 18, let's see how we can upgrade to it.
If you like a starter to work from, download the following React 17 starter from GitHub.
Upgrading from React 17 to 18
The current version we build this starter on is made with React 17, so the first thing we need to do is update to use the latest version:
npm install react@latest react-dom@latest
This will upgrade your react and react-dom versions to at least 18.
I'm using @latest because we are on an existing project. If not, it won't upgrade as it already has locked dependencies on 17. (Alternatively, you can use @18)
Now that we upgraded React itself to version 18 let's see what happens when we try and run the application.
Our app spools up, but we can see the following error pop-up if we look at our console.

React introduced a new root API to support the concurrent rendering. To enable it, we have to change our entry point render.
Before, we used to invoke it like this:
import ReactDOM from 'react-dom';

ReactDOM.render(
  <React.StrictMode>
    <App />
  </React.StrictMode>,
  document.getElementById('root')
);
In React 18, we have to change this to be a create root function.
import { createRoot } from 'react-dom/client';

const container = document.getElementById('root');
const root = createRoot(container);
root.render(
  <React.StrictMode>
    <App />
  </React.StrictMode>
);
Basically, we have to add a second step of creating a root container, which will render our existing app.
If we now re-run the application, our error is gone.
Other notable changes
If you are using server-side rendering, you might bump into a couple more issues. They instead favor the use of Suspense for their old server implementation.
If you are using any of the following APIs, please refactor to the ones mentioned after them.
renderToNodeStream=>renderToPipeableStreamrenderToString=> With limited supportrenderToStaticMarkup=> With limited support
Another thing to keep in mind is TypeScript. If you use it, update @types/react and @types/react-dom to their latest versions.
The types have been updated to be safer and catch issues that might arise on React 18.
What about my tests?
If you followed along with my latest testing articles you might have started to add tests to your application.
Let's first see what happens when we run our test.
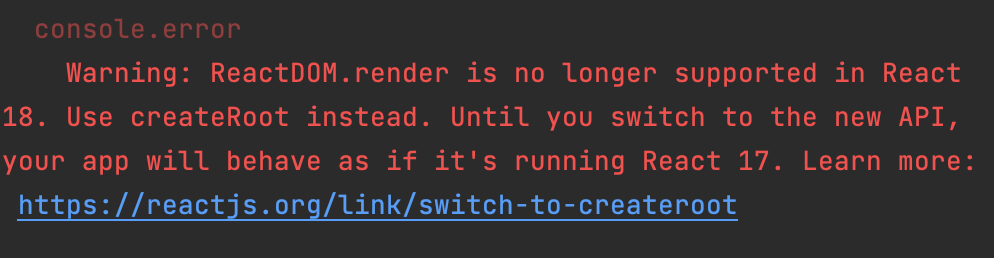
And again, we see the error we had before in our browser. To fix this, we need to upgrade the testing library:
npm install @testing-library/react@latest
With the testing library updated, we should now be able to run the application without any issues.
You can find the changed code for this starter project on GitHub.
Conclusion
For basic applications, it's a very straightforward process. When you use a lot of server-side rendering or rely heavily on effect timing, you might need to debug a bit more.
It's a good idea to read up on the changes first, as they involve a lot of how rendering is done.
Thank you for reading, and let's connect!
Thank you for reading my blog. Feel free to subscribe to my email newsletter and connect on Facebook or Twitter
About the author
I'm a full-stack developer from South Africa 🇿🇦. I love writing about JavaScript, HTML and CSS.
Comments
Join the discussionNo comments yet. Be the first to comment.



