
Scheduling Cloudflare builds on a cron job

I'm a full-stack developer from South Africa 🇿🇦. I love writing about JavaScript, HTML and CSS.
Let me start by explaining my background in building scripts for my websites.
I've used many different build systems for this blog, and somehow they always seem to be able to improve and become easier.
The history of this blog build systems:
- Manual builds and uploads
- IFTT hook to trigger Netlify build
- GitHub action build and upload step to Netlify
- GitHub actions cron and upload to Netlify
- GitHub cron upload to Cloudflare
And the latest:
- Cloudflare worker on a cron
These are a lot of different systems, and each one has its strong points.
What is the goal here?
To determine what is needed, it's good to check out the actual goal of the build system.
For me, it's about being able to trigger the build every morning, so the latest article becomes active. Then I also want it to build every time I push new changes.
With this being said, the last part is the easier one. Cloudflare pages automatically build every time you push to the master branch, so that's already good to go.
For the cron, they introduced something cool called Deploy hooks. This is a hook we can enable on each project.
The hook will give you a URL you can use to trigger a build.
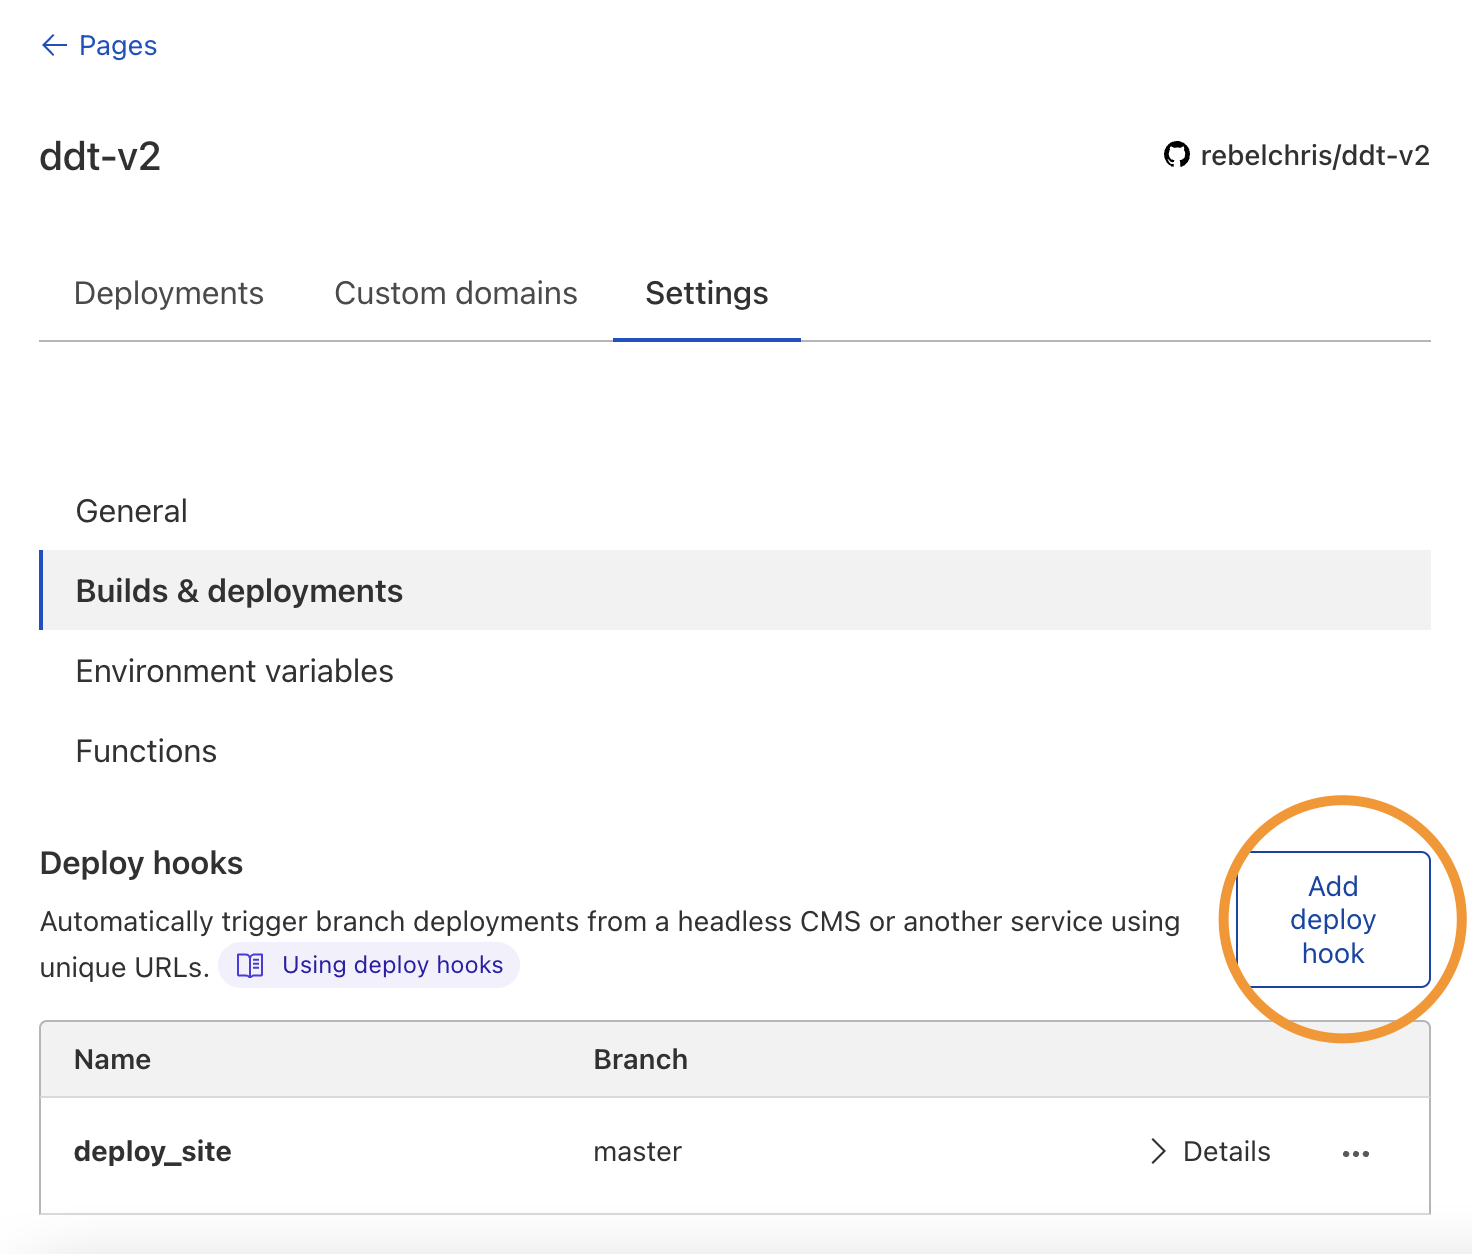
You can give this deploy hook a new and which branch it should build.
Once done, you'll get a URL you can copy.
From here, there are several ways of triggering the URL, but since we are already in Cloudflare, we can create a cron worker to start the deploy hook.
A Cloudflare cron worker
First, open up the worker's section in Cloudflare. Then click to add a new Service.

I used an HTTP handler function, as we'll be creating a scheduled one.
Once you follow the steps, you'll get to the actual code for the worker.
I used one of the default examples to post to a specific URL.
async function gatherResponse(response) {
  const { headers } = response;
  const contentType = headers.get('content-type') || '';
  if (contentType.includes('application/json')) {
    return JSON.stringify(await response.json());
  } else if (contentType.includes('application/text')) {
    return response.text();
  } else if (contentType.includes('text/html')) {
    return response.text();
  } else {
    return response.text();
  }
}

async function handleRequest() {
  const init = {
    method: 'POST',
    headers: {
      'content-type': 'application/json;charset=UTF-8',
    },
  };
  const response = await fetch('{YOUR_DEPLY_HOOK}', init);
  const results = await gatherResponse(response);
  return new Response(results, init);
}

addEventListener('fetch', (event) => {
  return event.respondWith(handleRequest());
});
This setup will add a listener to the fetch request and execute the handleRequest function.
That, in return, will be logged as the response (optional step).
The thing to note here is the addEventListener. This is what triggers the hook.
Setting this to fetch makes it available as a URL endpoint, so you should be able to run open the worker's URL and trigger the build.
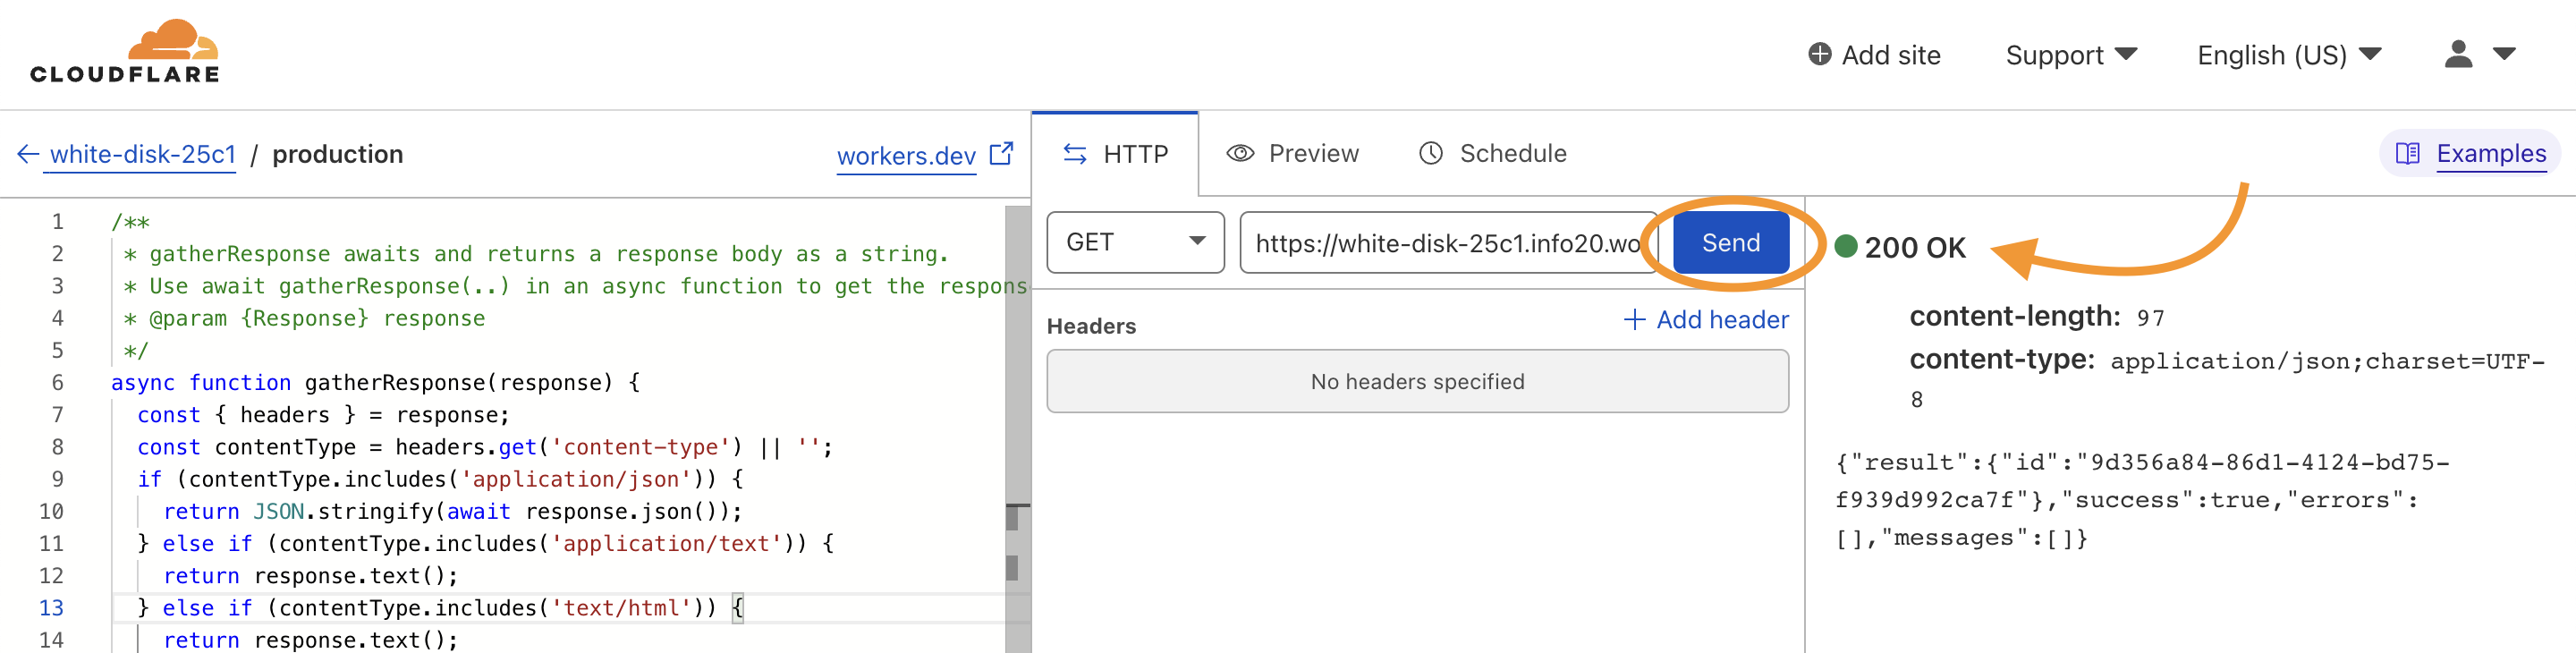
Pressing the button, you see in the screenshot above will trigger this webhook. You should see the deploy triggered if you go to your deploys now.
To make this whole thing work on a schedule, you can simply add a new trigger.
Click Triggers at the top within the worker's detail screen and add a new Cron trigger.
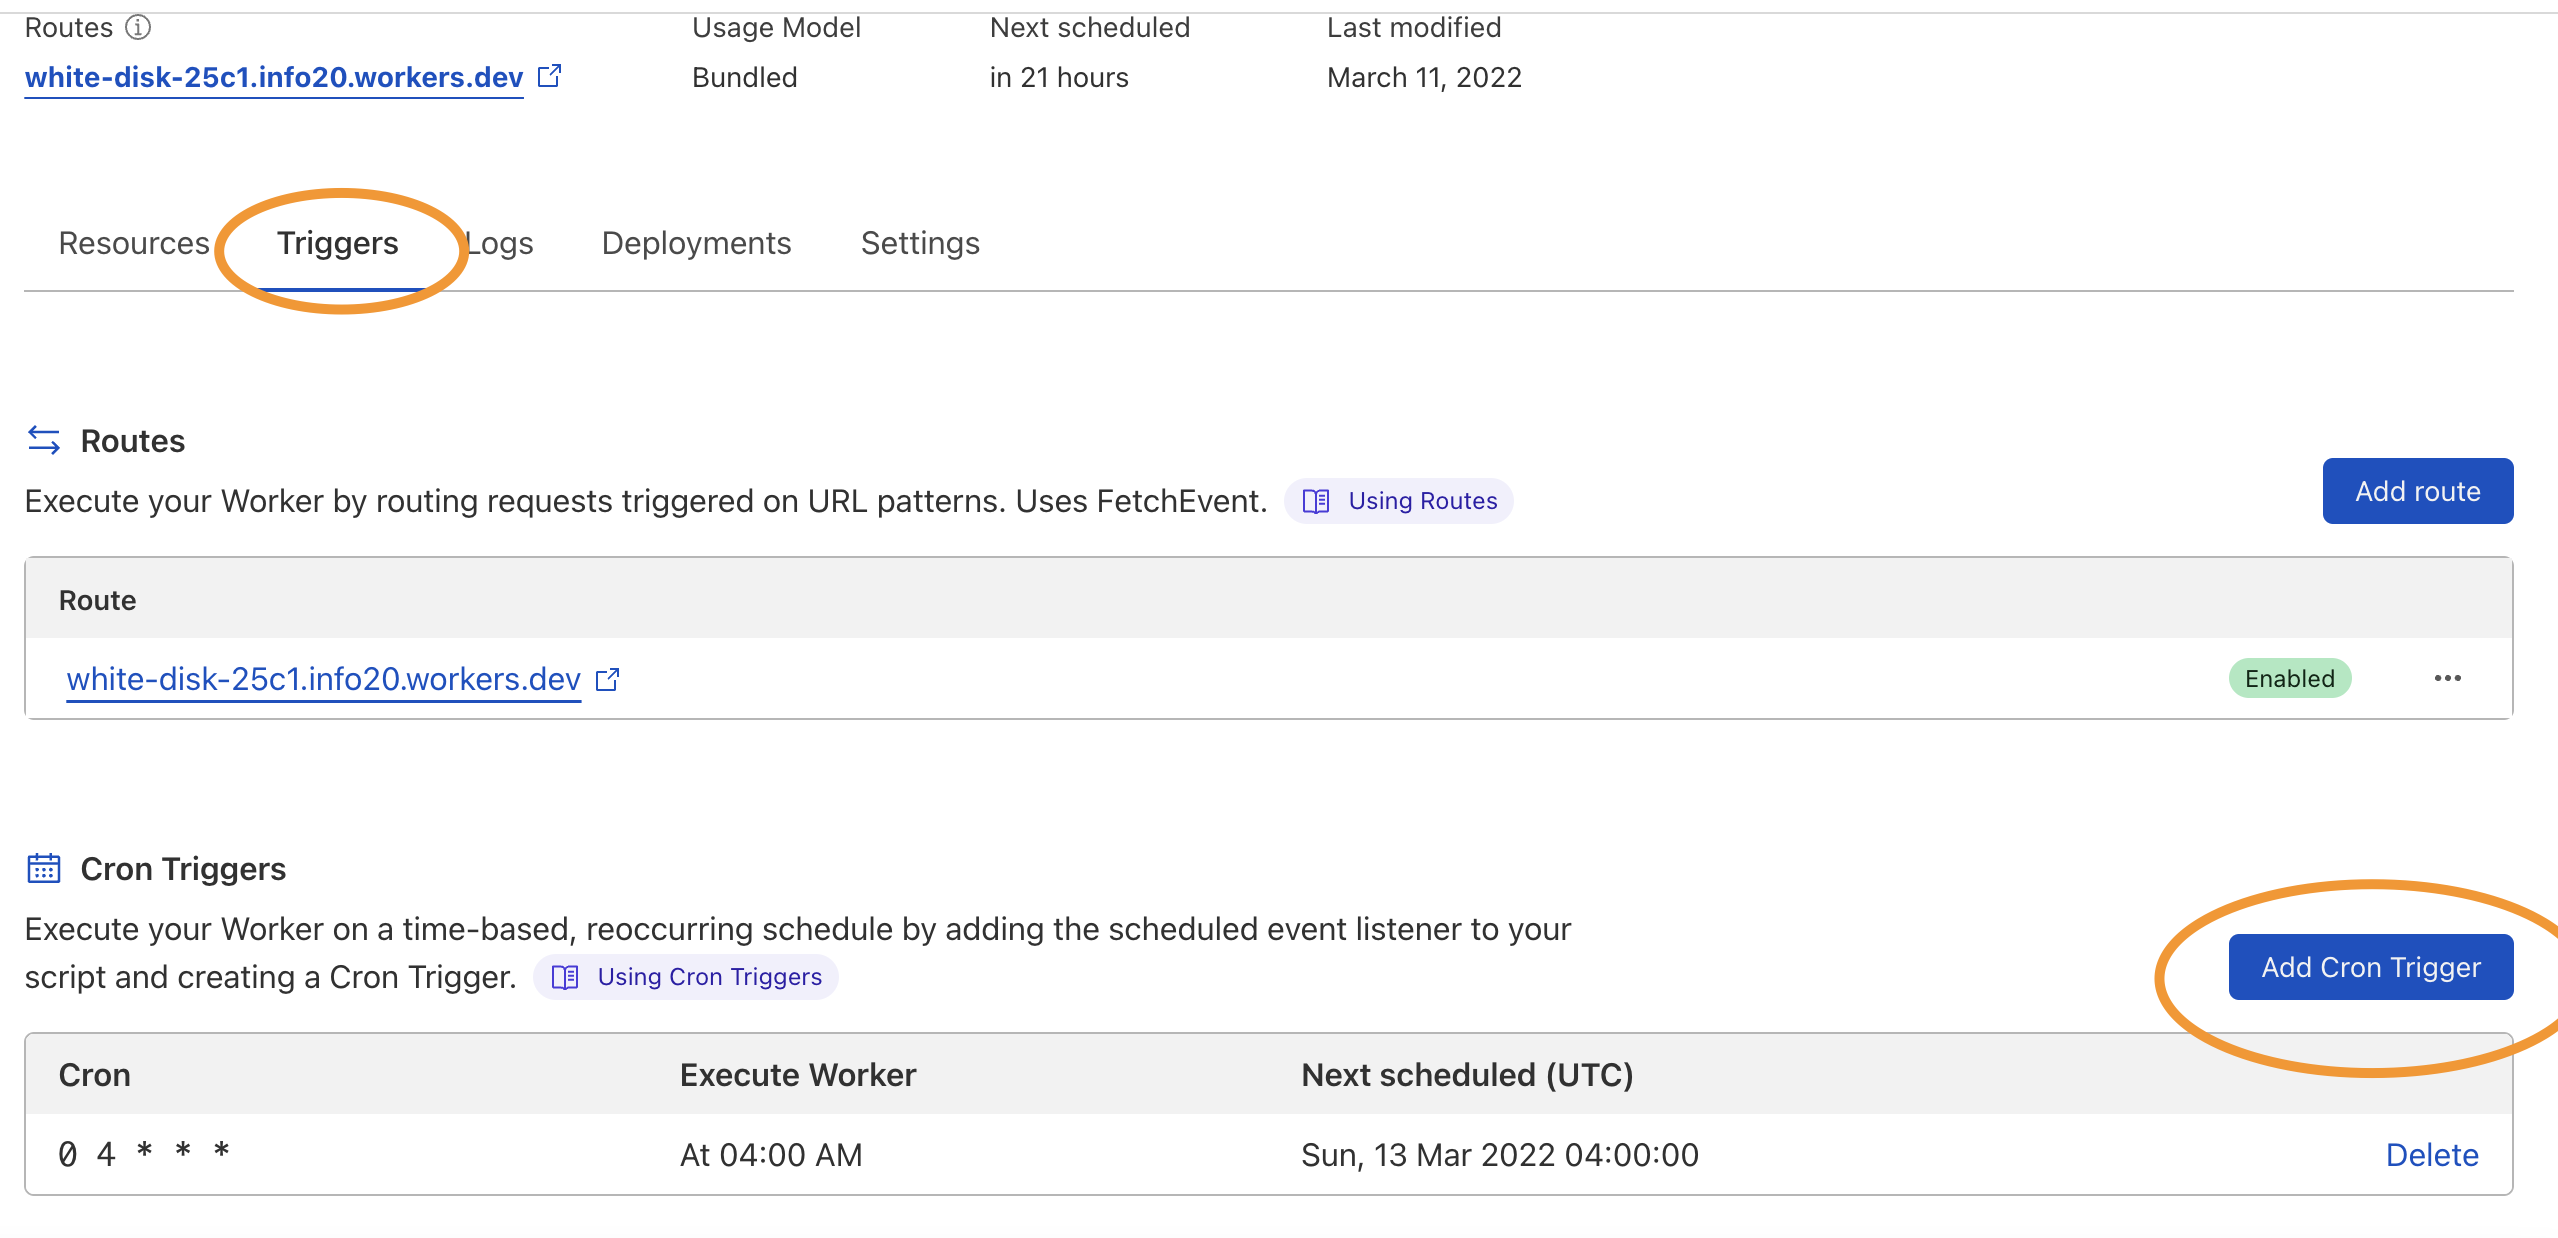
With this in place, we have to go back and edit our worker's code to accept this trigger.
Remember how we used fetch as an option before?
To work with a cron, you have to use scheduled as an option.
Note: You can still use both if you'd like too
addEventListener('scheduled', (event) => {
  event.waitUntil(handleRequest());
});

addEventListener('fetch', (event) => {
  return event.respondWith(handleRequest());
});
And that's it, we now have a cron triggered worker!
This whole process took super quickly and was a breeze. So far the easiest and quickest build system I've used.
Thank you for reading, and let's connect!
Thank you for reading my blog. Feel free to subscribe to my email newsletter and connect on Facebook or Twitter



