
Running a node script continuously on Heroku

I'm a full-stack developer from South Africa 🇿🇦. I love writing about JavaScript, HTML and CSS.
Yesterday we had an extended tutorial on creating a dynamic Twitter header. However, we can't have this script running locally forever.
So a good free alternative is to host it on Heroku! Heroku is a platform as a service (PaaS) and allows developers to build, run, and operate applications in the cloud.
Hosting a node.js script on Heroku
To get started, let's head over to the Heroku website.
Sign up for a new account, or log in if you already have one.
Once you are logged in, let's create a new app.
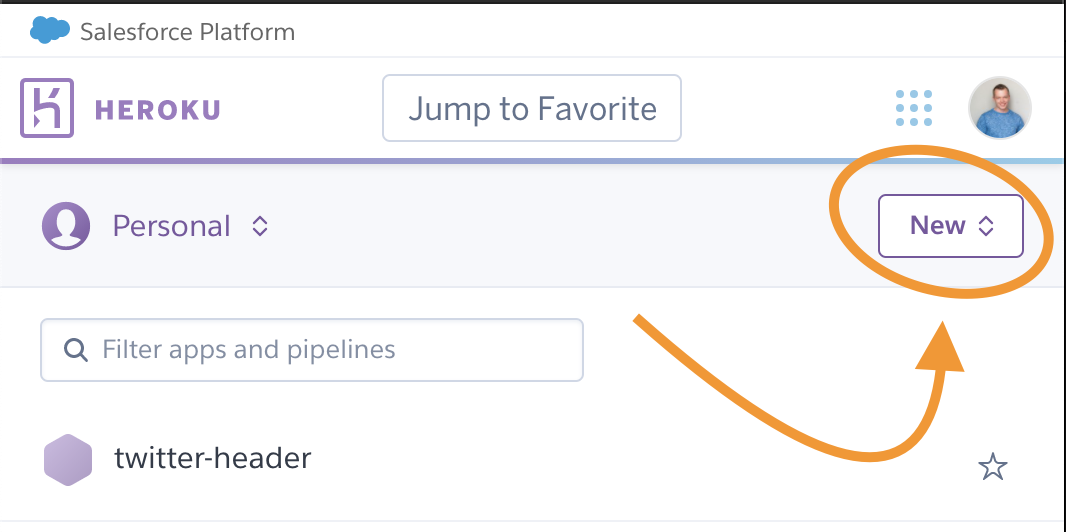
Give your app a descriptive name, and choose a region. The region doesn't matter for this application.
Once the app is done, we can connect it to GitHub for auto deployments. I think this is the most maintainable way of using Heroku.
From the Deploy tab, click GitHub. It will prompt you to connect and ask for access on the first go.
Then we should be able to search for our project and connect to it.
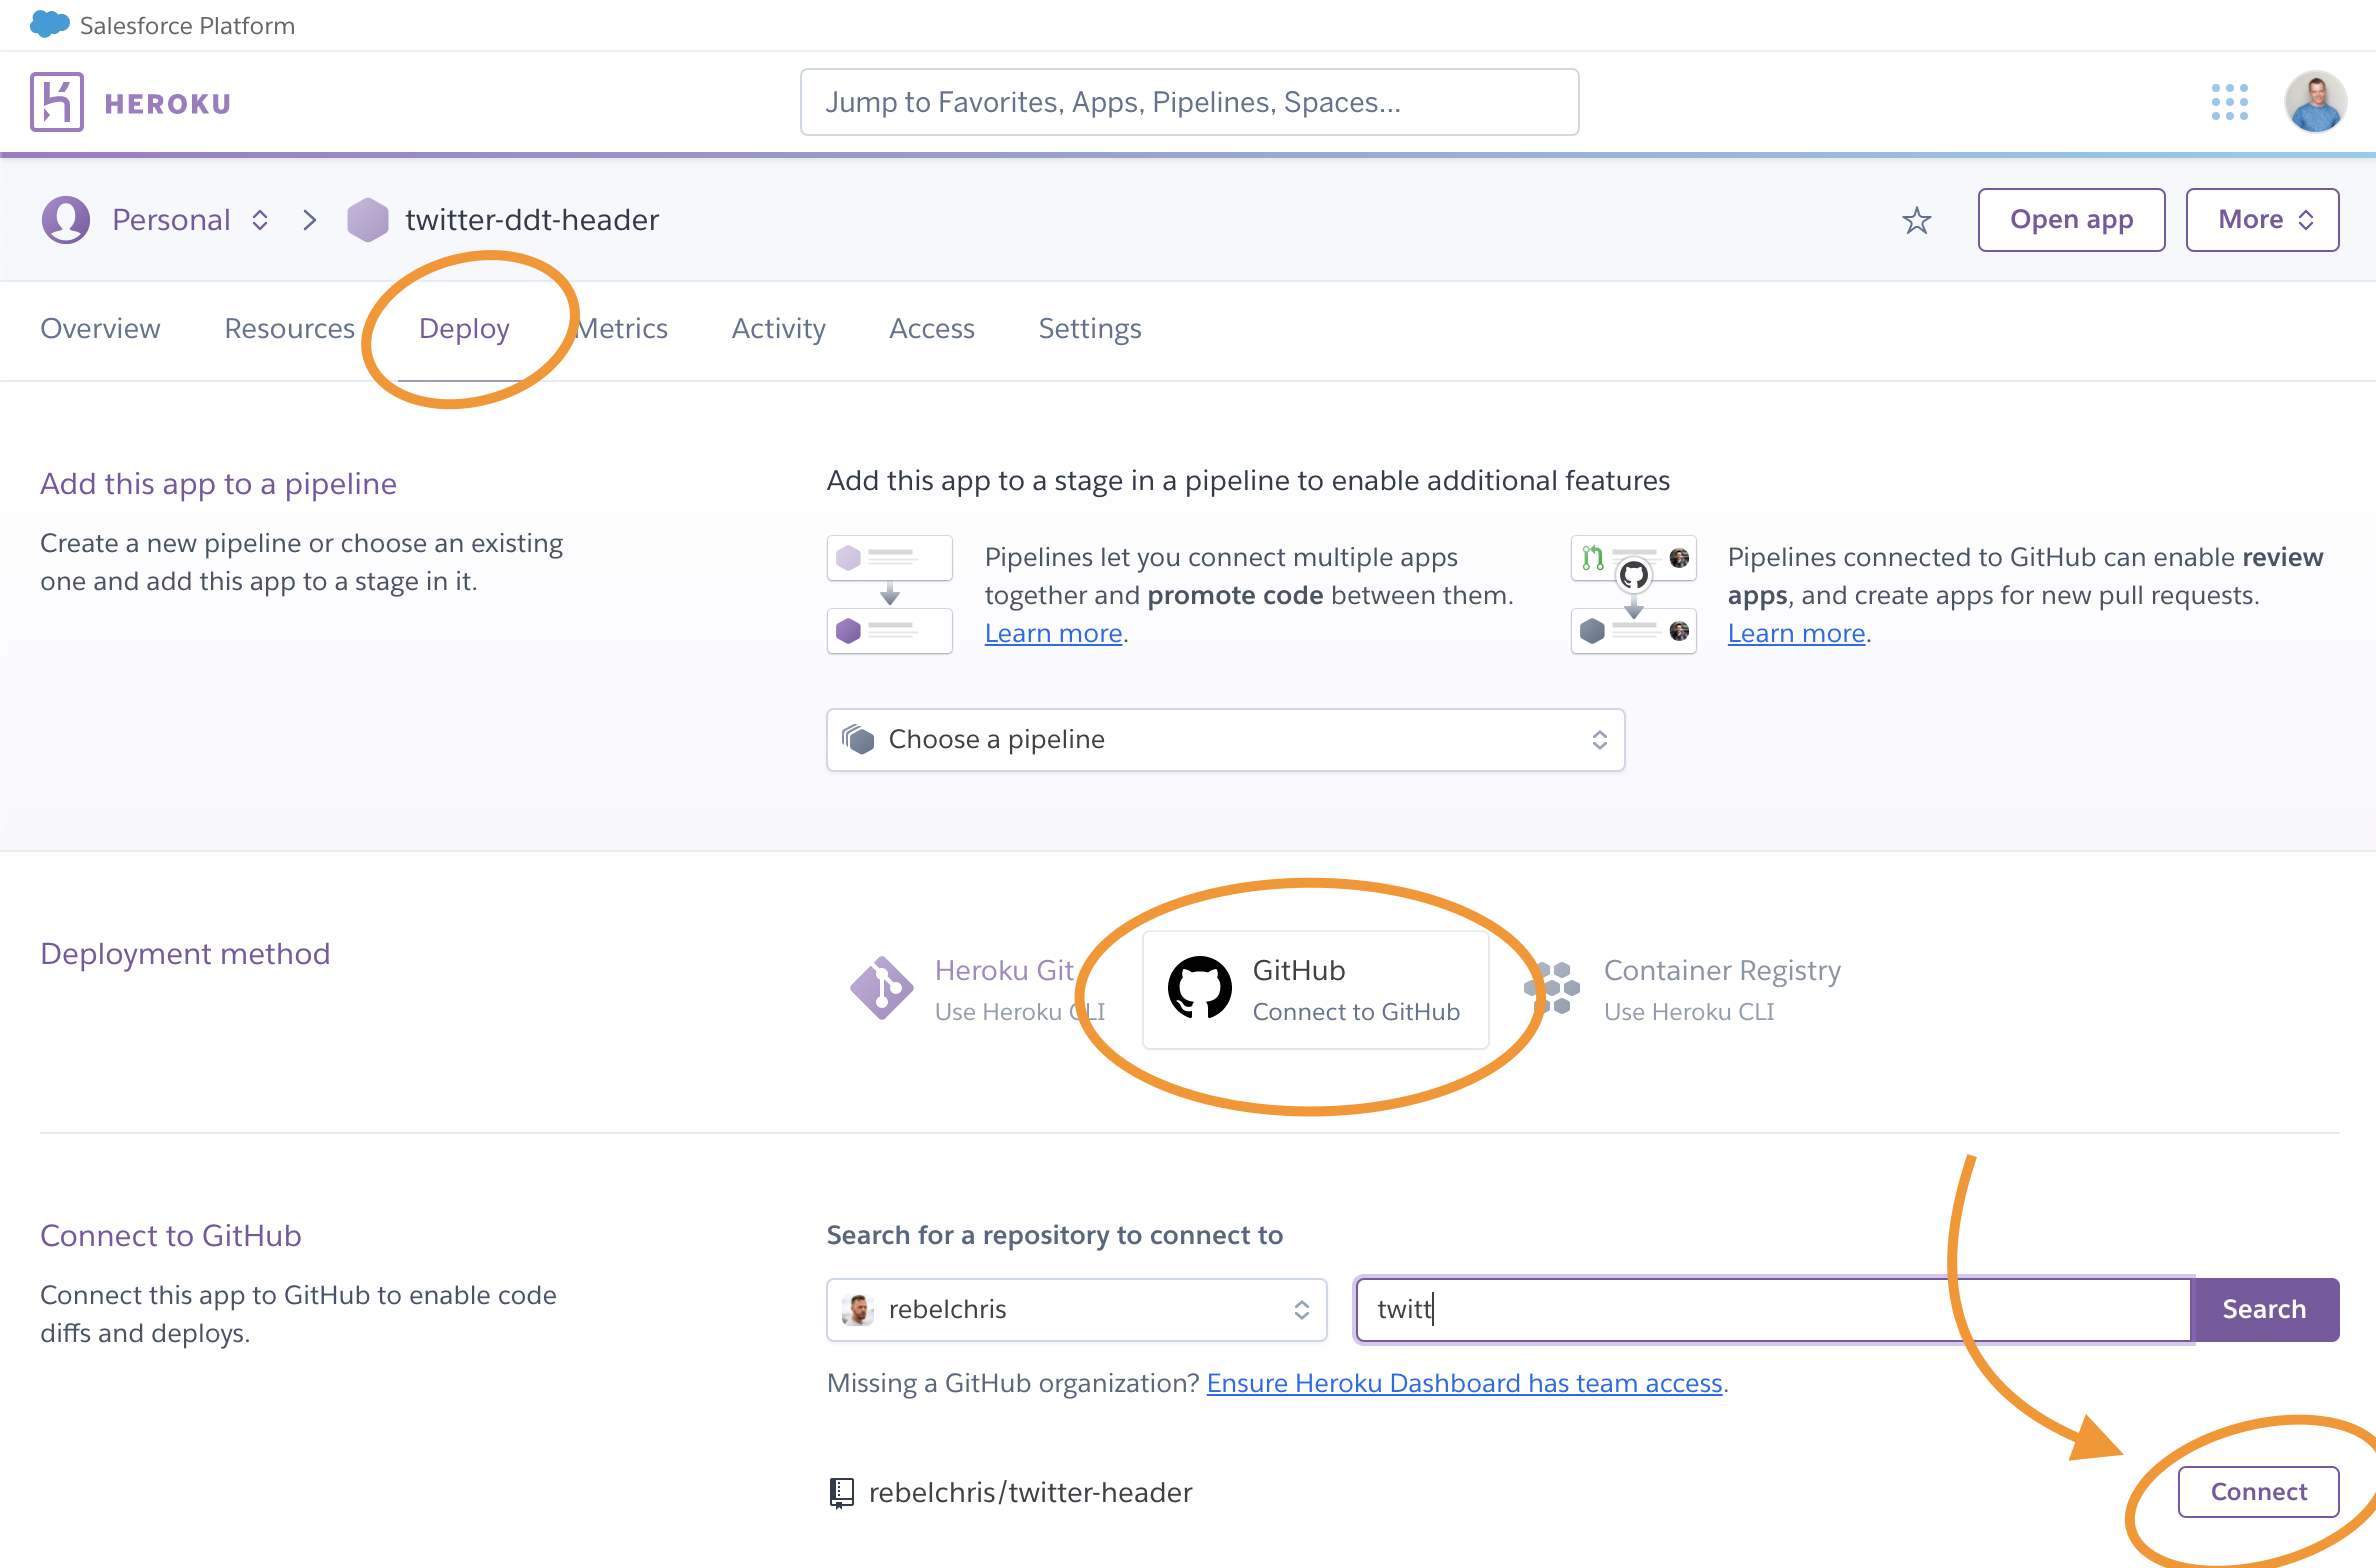
Once connected, you can choose the branch you want to have deployed, and you can even select automatic deployments.
You can then start the initial deployment. Heroku is quite intelligent and can decide the stack you are using, so we don't have to worry about that.
We do, however, need to do two things to make sure everything works.
Let's first make sure we have a Procfile in our git repo. This file tells Heroku what type of application to run.
By default, it will run a web type, but our script is a worker. A worker doesn't need a view endpoint.
The content of this Procfile can be as follows:
worker: npm start
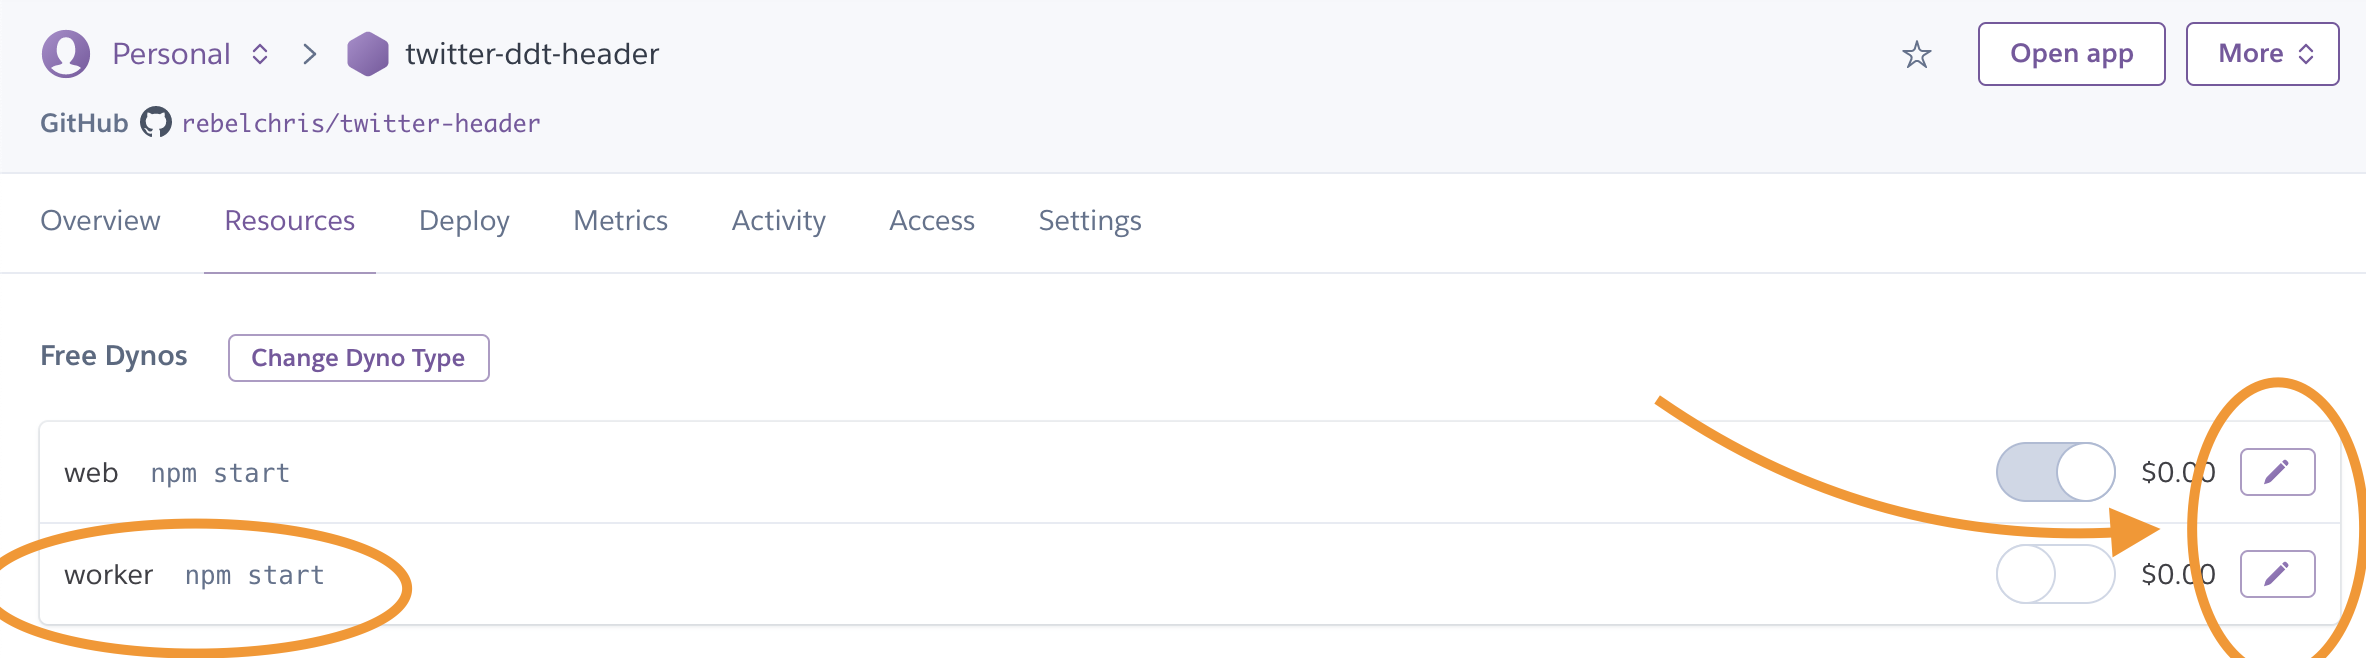
This tells Heroku to make the app a worker type. If you already deployed once, don't worry. You can change these types in the resource overview.
Click edit on the web type and turn that one off. Next, click edit on the worker and turn that one on.
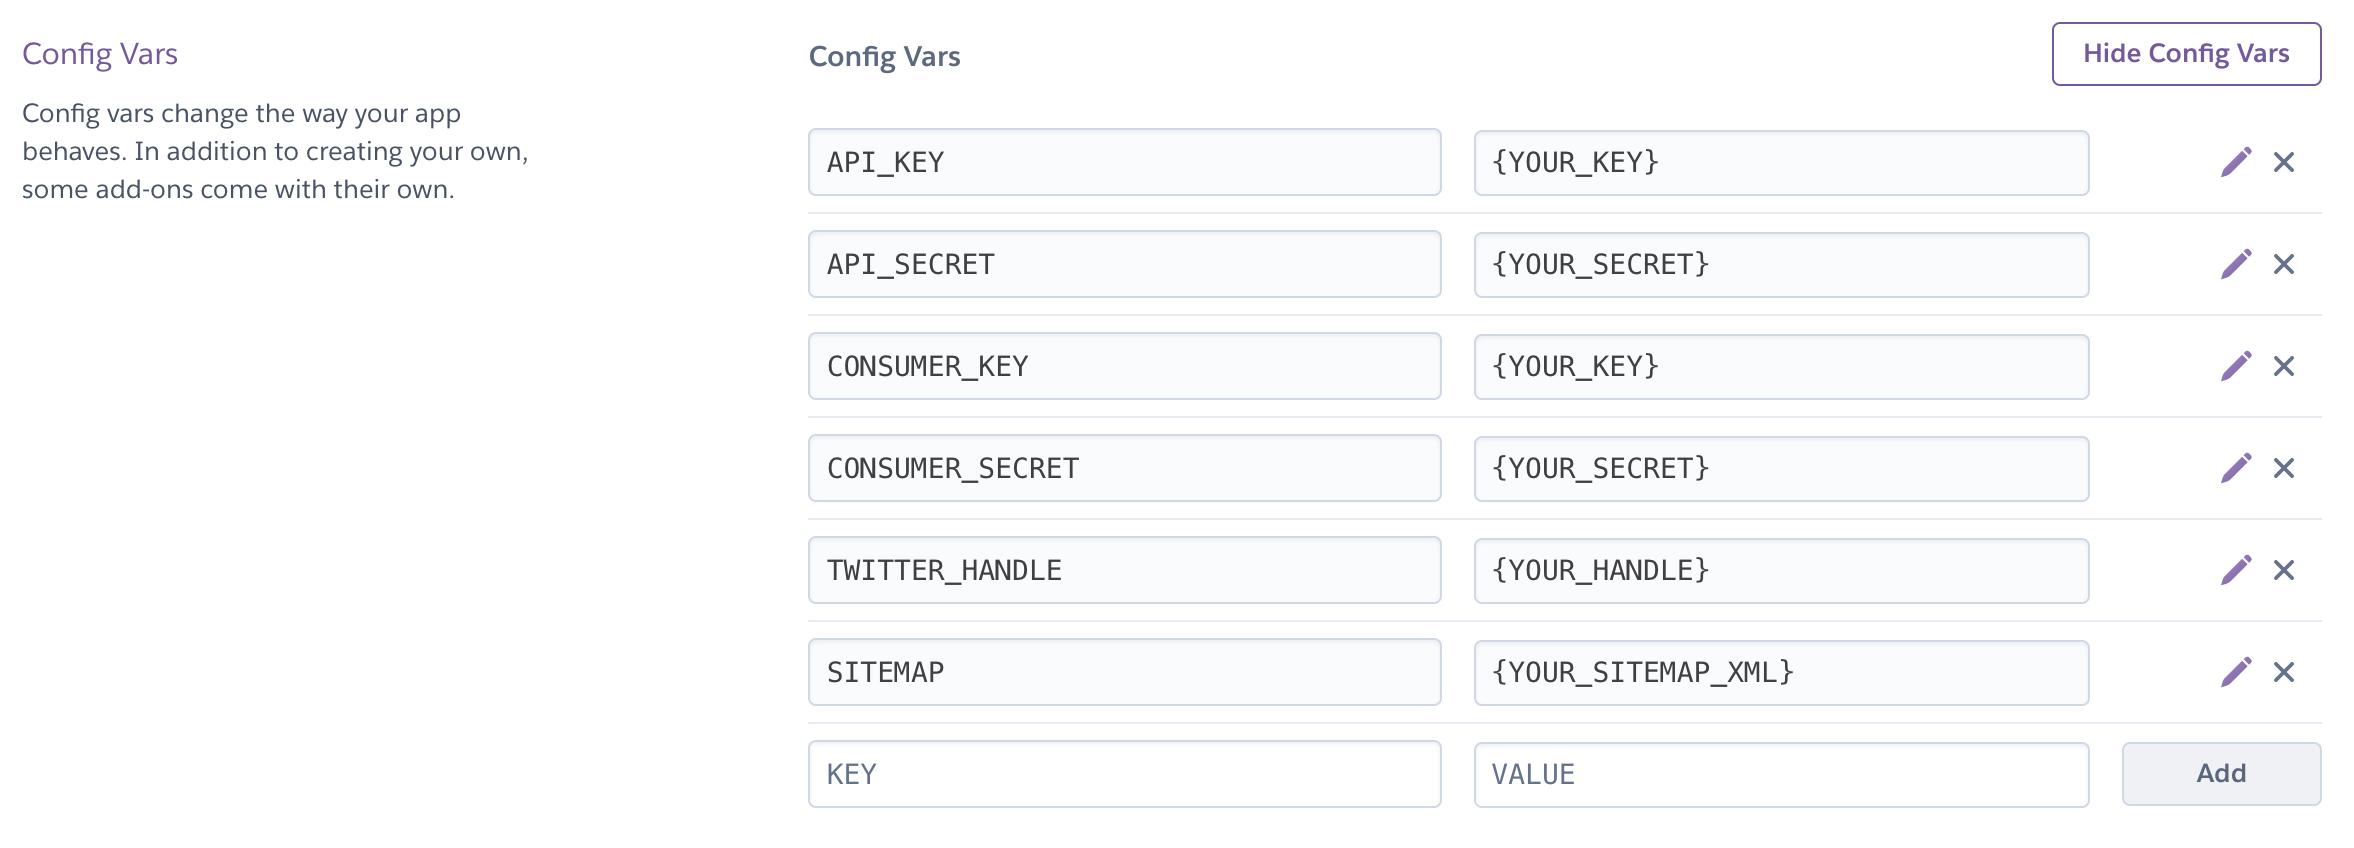
The last thing we need are our variables, we have our script that uses a .env file, but of course, Heroku doesn't know about these variables yet.
Head over to the Settings tab in Heroku and find the "Config Vars" section.
Here you can add the config vars as they were in your .env file.
We now have everything in place for our script to work. You can check what's going on by opening the logs.
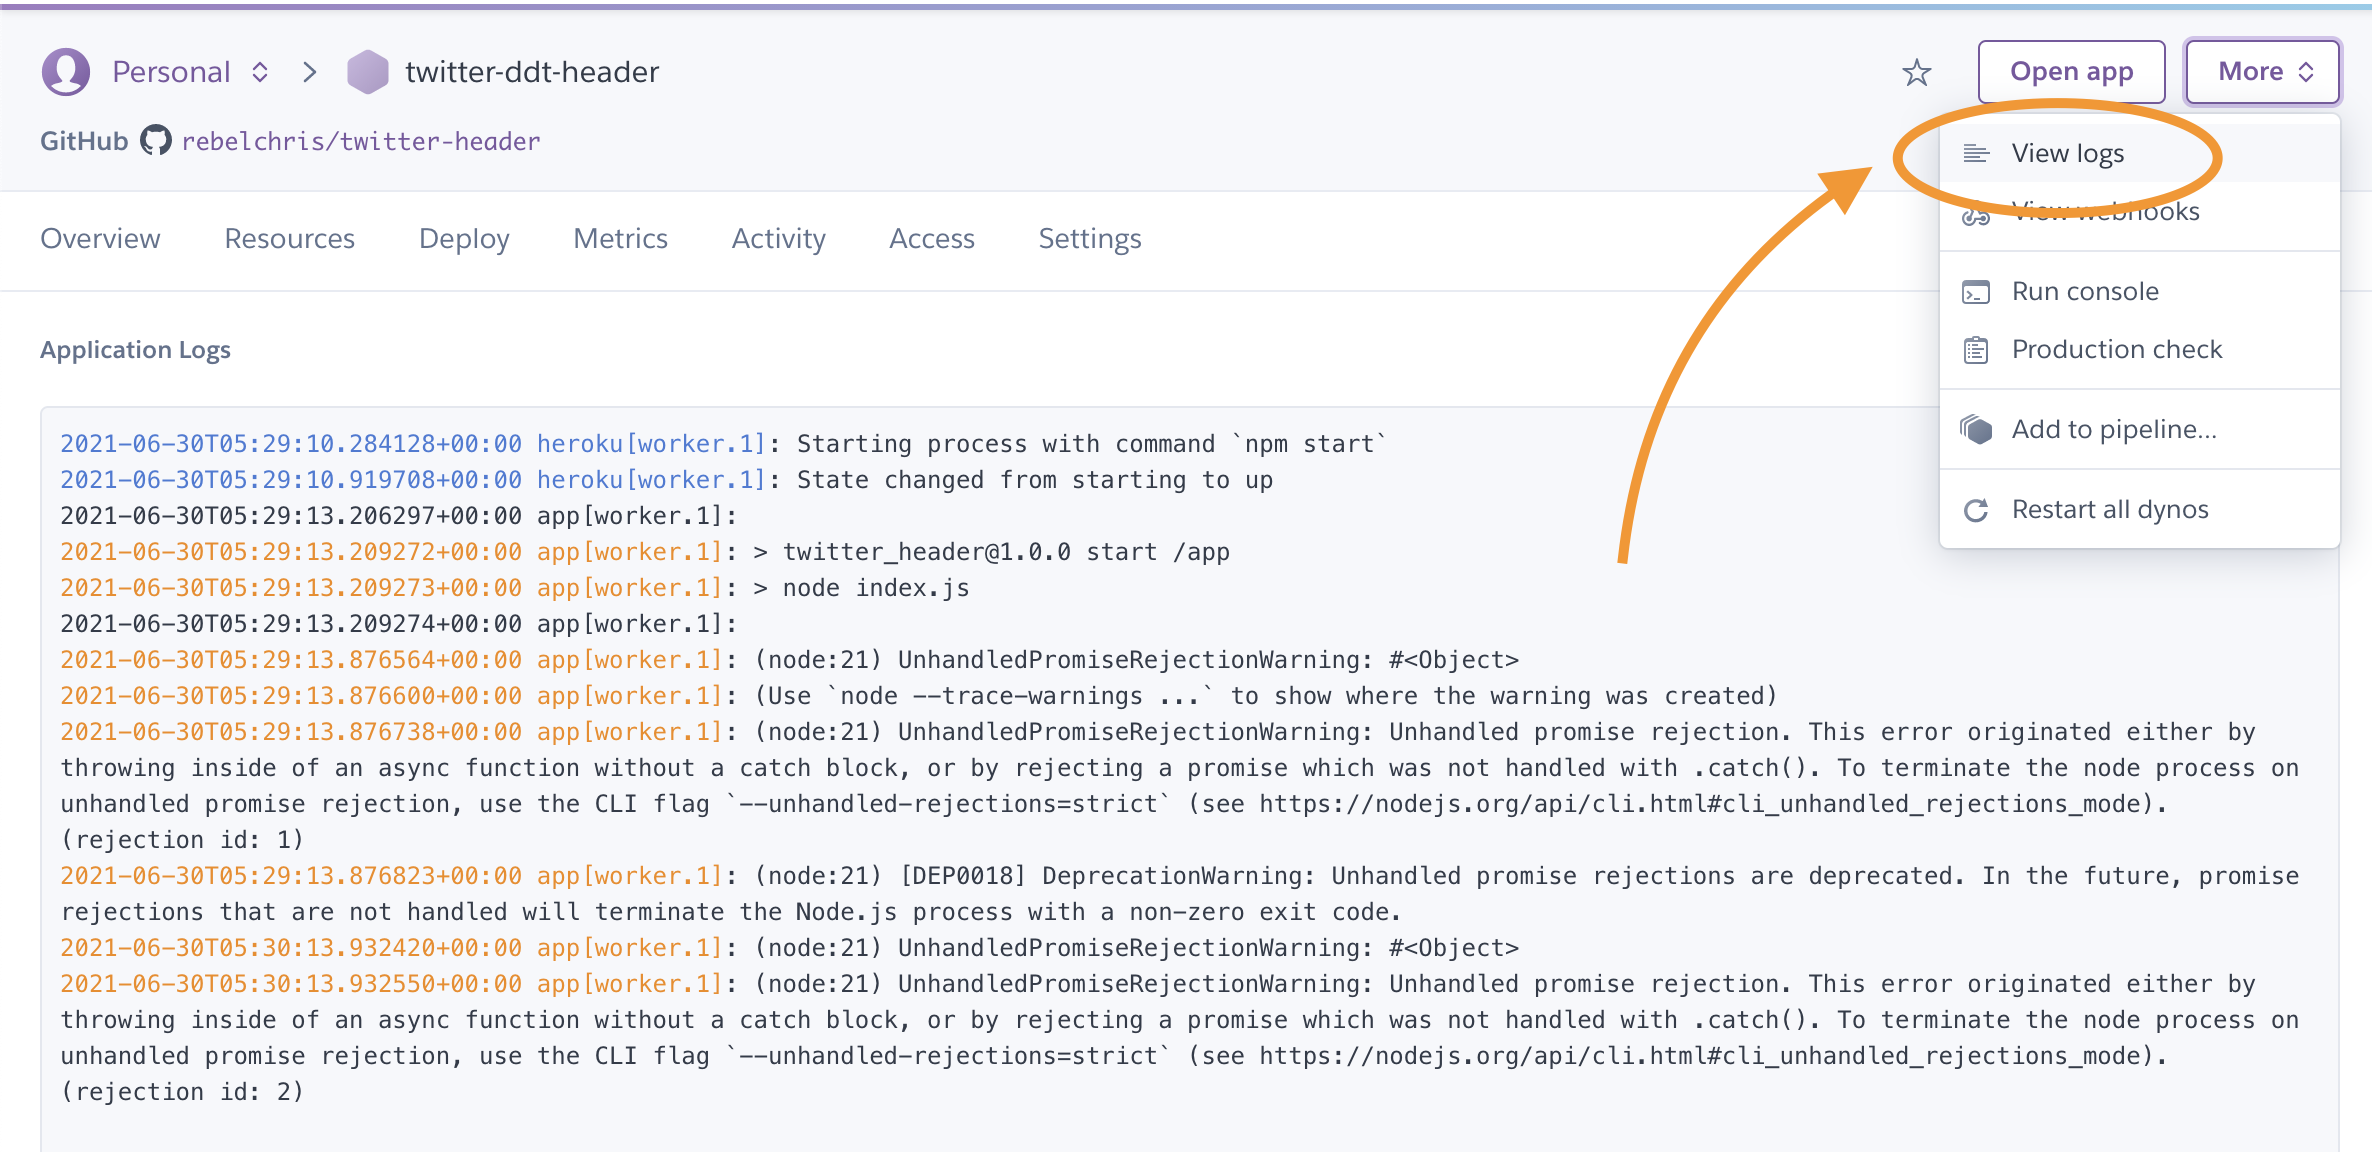
As you can see, my app is still giving errors since I didn't use the correct config vars. This shows you the log option is an excellent place to debug your app. It will also show the console.log we have in our code.
I do hope you had some fun uploading and running your script on Heroku.
I'm looking forward to seeing all these fantastic dynamic header creations.
Thank you for reading, and let's connect!
Thank you for reading my blog. Feel free to subscribe to my email newsletter and connect on Facebook or Twitter



