
Retrieving the primary WordPress menu in Next.js

I'm a full-stack developer from South Africa 🇿🇦. I love writing about JavaScript, HTML and CSS.
By now, we have the option to get all post from WordPress, and pages from WordPress in our Next.js website.
A big thing I wanted to automate in this process has the primary menu to load in our Next.js website automatically.
Setting up the primary menu in WordPress
Let's have a look at how we can set up the primary menu in WordPress.
Head over to the Appearance > Menus section of WordPress.
Add a new menu. You can choose the menu name you would like. This doesn't matter.
As the display location pick Primary menu, this will make this menu set up the main menu for our website.
You can then go ahead and add menu items as you wish.
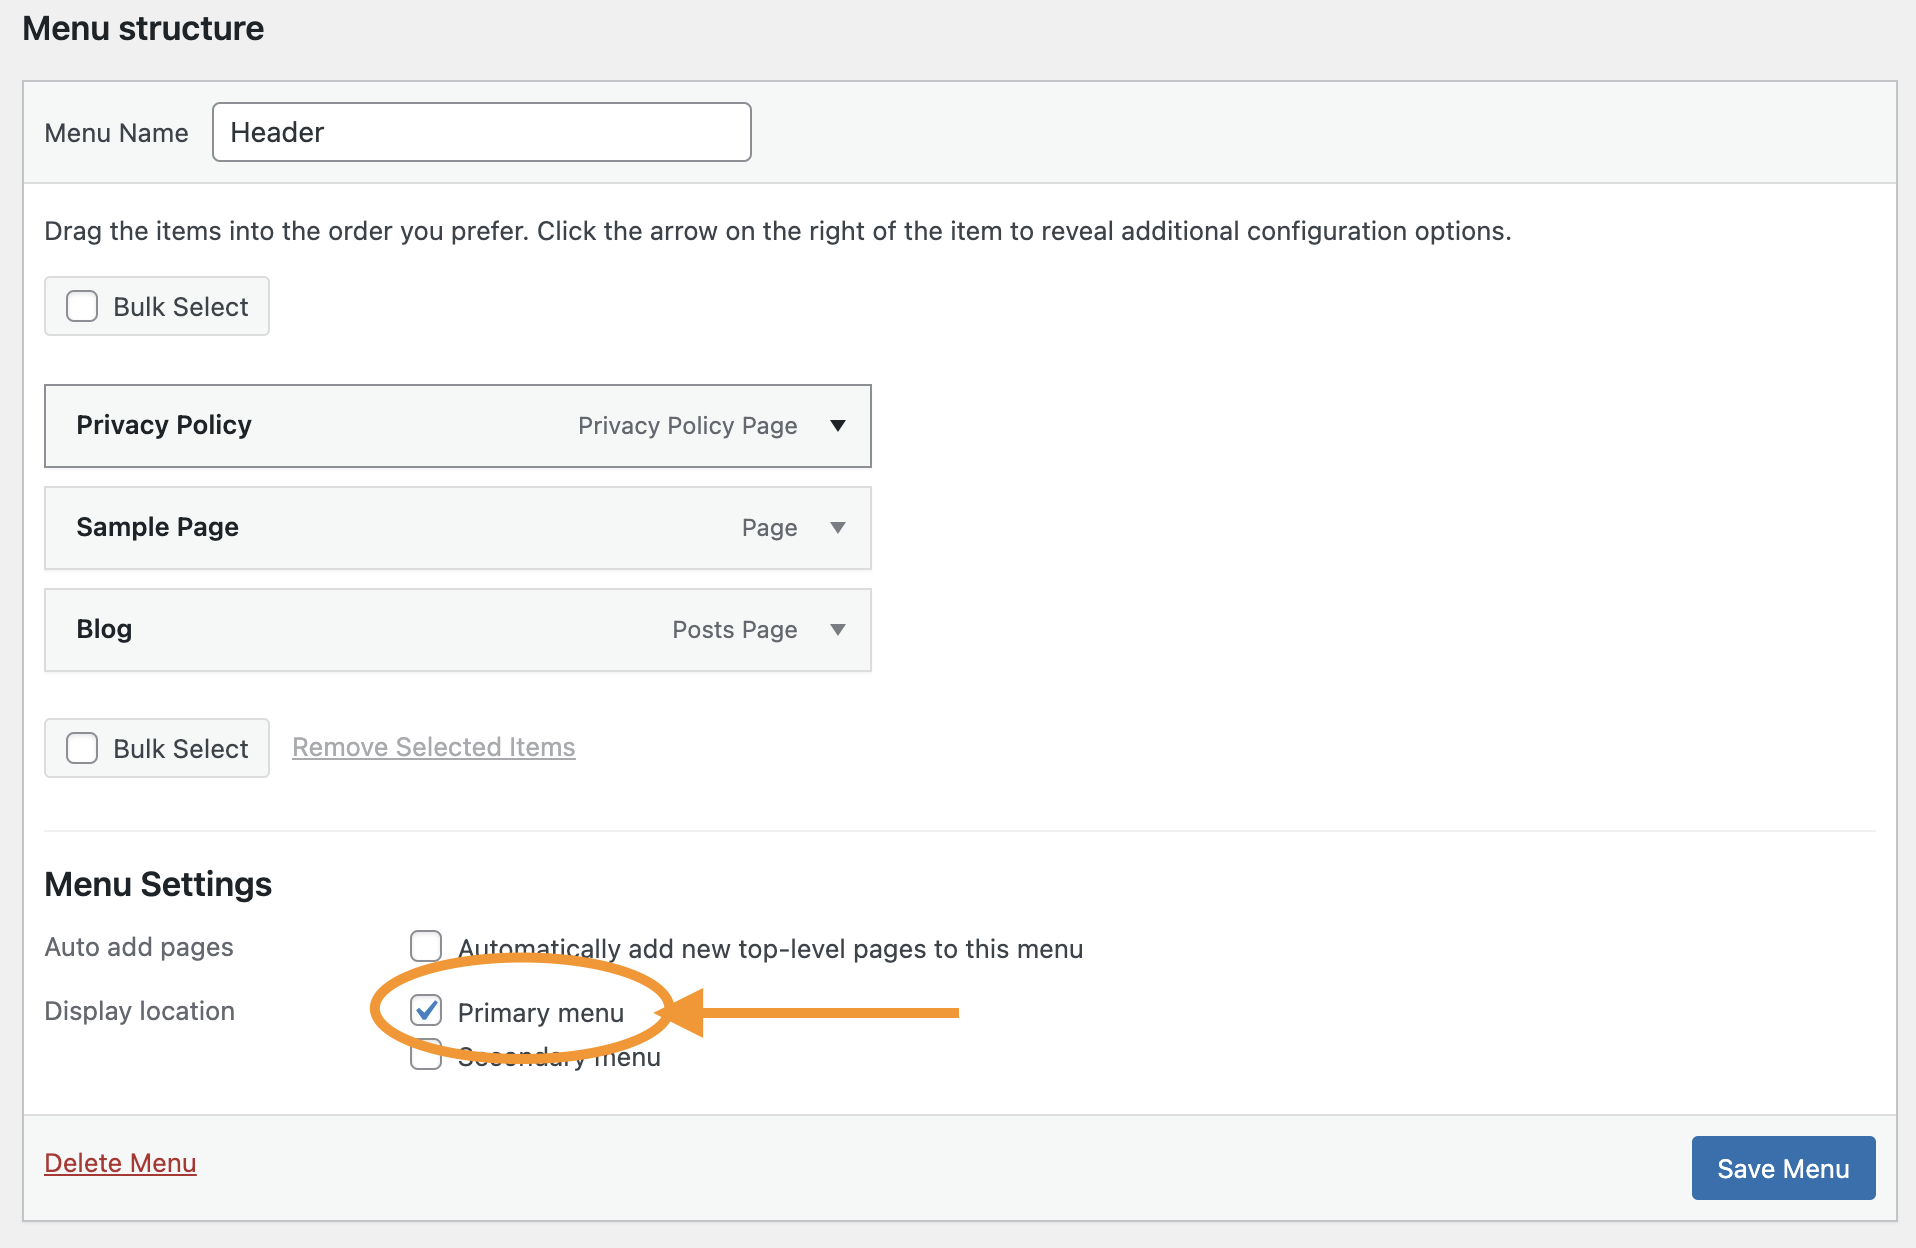
Query the WordPress menu in Next.js
Now let's head over to our Next.js website and open the lib/api.js file.
We'll start by adding our query to get this primary menu.
export async function getPrimaryMenu() {
  const data = await fetchAPI(`
  {
    menus(where: {location: PRIMARY}) {
      nodes {
        menuItems {
          edges {
            node {
              path
              label
              connectedNode {
                node {
                  ... on Page {
                    isPostsPage
                    slug
                  }
                }
              }
            }
          }
        }
      }
    }
  }
  `);
  return data?.menus?.nodes[0];
}
This query will get the menu set as the PRIMARY location menu and retrieve all nodes connected to it.
For the Page type, we get the slug and the boolean value for isPostsPage, which tells us if the page is our blog.
Showing the menu
The next step will be to show the menu on the front end. Let's create a new component for that.
We'll call this component the Header component. Go ahead and create a components folder in the main project, and inside, create a Header.js file.
Inside this file, we will receive the menu items from our parent file, including the header. As well as render each item.
const Header = ({menuItems: {menuItems}}) => {
  return (
    <nav className="flex flex-wrap items-center justify-between p-6 bg-blue-500 shadow-lg">
      <ul className="flex items-center justify-end flex-grow w-full">
        {menuItems.edges.map((item) => (
          <li key={item.node.path}>
            <a
              className="p-4 ml-2 text-white hover:underline"
              href={item.node.connectedNode.node.slug}
            >
              {item.node.label}
            </a>
          </li>
        ))}
      </ul>
    </nav>
  );
};

export default Header;
Using the header
For now, let's see how this will work by adding this header to our main index.js page.
We'll look at improving this in another article.
First let's fix the imports we need:
import {getLatestPosts, getPrimaryMenu} from '../lib/api';
import Header from '../components/Header';
Then we can modify the getStaticProps function to include the menu as well.
export async function getStaticProps() {
  const latestPosts = await getLatestPosts();
  const menuItems = await getPrimaryMenu();
  return {
    props: {latestPosts, menuItems},
  };
}
And lastly, we can introduce the header so we can see what it will look like:
export default function Home({latestPosts: {edges}, menuItems}) {
  return (
    <>
      <Header menuItems={menuItems} />
      // Other code
    </>
  );
}
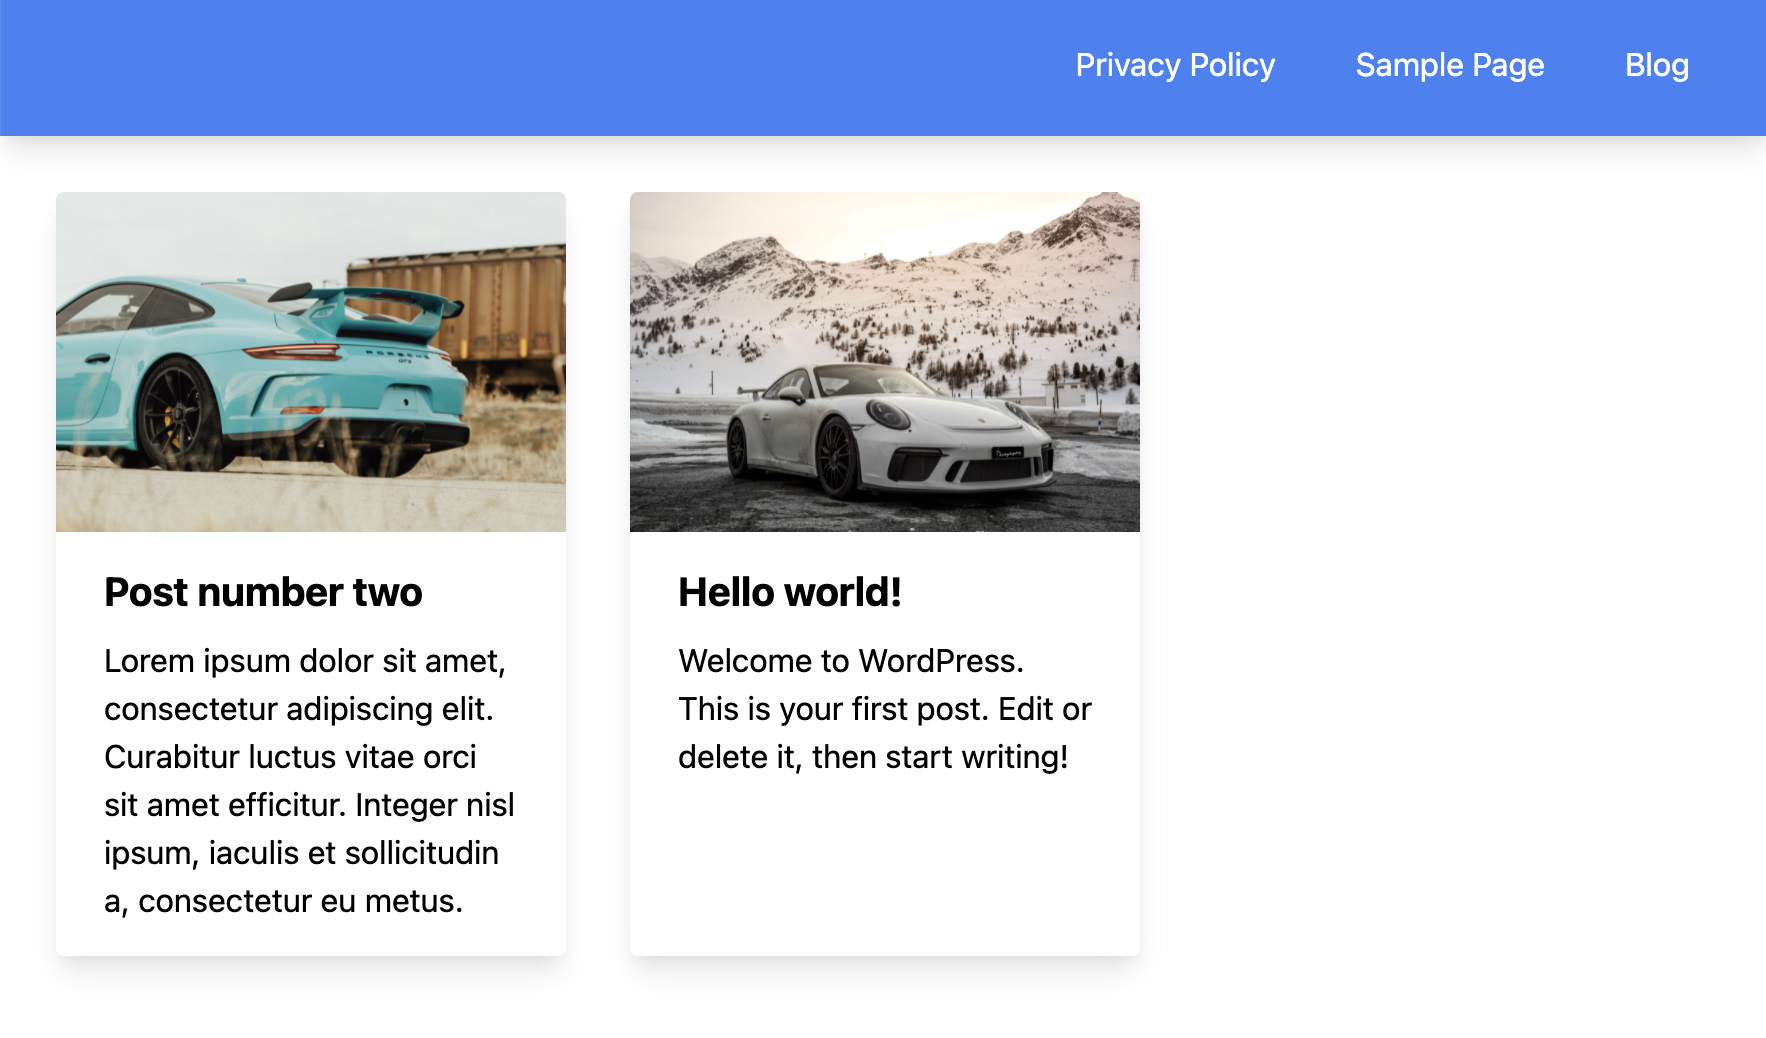
And there you go, we loaded our primary WordPress menu into our Next.js website. However, this is not the final implementation, so keep an eye out for the next article set.
You can find today's code on GitHub as well.
Thank you for reading, and let's connect!
Thank you for reading my blog. Feel free to subscribe to my email newsletter and connect on Facebook or Twitter



