
Remix shared layouts, a first look

One super cool aspect of Remix is that it can support multiple layouts and even sub layouts.
Let's take a look at what that means. The basic essence is that you can support certain outlets (almost like React children), which can be the wrappers of your app.
Roughly:
- app
- app -> admin
- app -> admin -> posts
- app -> admin -> posts -> new
And these will all work top-level-down, so anything you design and add to your app will be available in admin. Anything added in admin will be available in posts and so on.
This concept is not new but super strong in making reusable elements.
Adding our first router outlets in Remix
Let us change what we created yesterday to reflect this. We can change the admin post section to work via a shared template.
We want to design something like this:
[sidebar][outlet]
Where the sidebar is our post admin part, and the outlet is the detailed page (the new post form).
The first thing we want to add is a file called admin.tsx in our posts folder.
This file will act as the main wrapping template for our admin post-panel.
Note: There are multiple design solutions here. This is one of them (You could also create a global admin folder, which might be better for your app)
In this admin file we want to return a layout as we described above:
export default function PostAdmin() {
  return (
    <div className='mx-auto max-w-4xl'>
      <h1 className='my-6 mb-2 border-b-2 text-center text-3xl'>
        My super cool admin
      </h1>
      <div className='grid grid-cols-4 gap-6'>
        <nav className='col-span-4 md:col-span-1'>Sidebar</nav>
        <main className='col-span-4 md:col-span-3'>Main section</main>
      </div>
    </div>
  );
}
However, this still doesn't do much. Let's always add our posts in the sidebar to have a quick navigation method.
We can use the same loader we previously created.
import { json } from "@remix-run/node";
import { Link, useLoaderData } from "@remix-run/react";
import { getPosts } from "~/models/post.server";
import { LoaderFunction } from "@remix-run/node";

type LoaderData = {
  posts: Awaited<ReturnType<typeof getPosts>>;
};

export const loader: LoaderFunction = async () => {
  return json({ posts: await getPosts() });
};

export default function PostAdmin() {
  const { posts } = useLoaderData() as LoaderData;

  return (
    <div className="mx-auto max-w-4xl">
      <h1 className="my-6 mb-2 border-b-2 text-center text-3xl">
        My super cool admin
      </h1>
      <div className="grid grid-cols-4 gap-6">
        <nav className="col-span-4 md:col-span-1">
          <ul>
            {posts.map((post) => (
              <li key={post.slug}>
                <Link
                  to={`/posts/${post.slug}`}
                  className="text-blue-600 underline"
                >
                  {post.title}
                </Link>
              </li>
            ))}
          </ul>
        </nav>
        <!-- Other code -->
      </div>
    </div>
  );
}
We can spool up our app and visit the /posts/admin link.
Already pretty cool.
Now let's add the router outlet so we can provide the detailed screens on top of this layout.
import {Outlet, [...others] } from "@remix-run/react";

export default function PostAdmin() {
  return (
    <div className="mx-auto max-w-4xl">
      <div className="grid grid-cols-4 gap-6">
        <!-- other stuff -->
        <main className="col-span-4 md:col-span-3">
          <Outlet />
        </main>
      </div>
    </div>
  );
}
Anything we define after this route will be in the <Outlet> part.
For instance, let's create a new folder called admin inside our posts folder.
In there, create an index.tsx file, for which we'll render the basic starting page.
import { Link } from '@remix-run/react';

export default function AdminIndex() {
  return (
    <p>
      <Link to='new' className='text-blue-600 underline'>
        Create a New Post
      </Link>
    </p>
  );
}
The index is pretty simple as we only show a link to the new form.
This will render the following output.
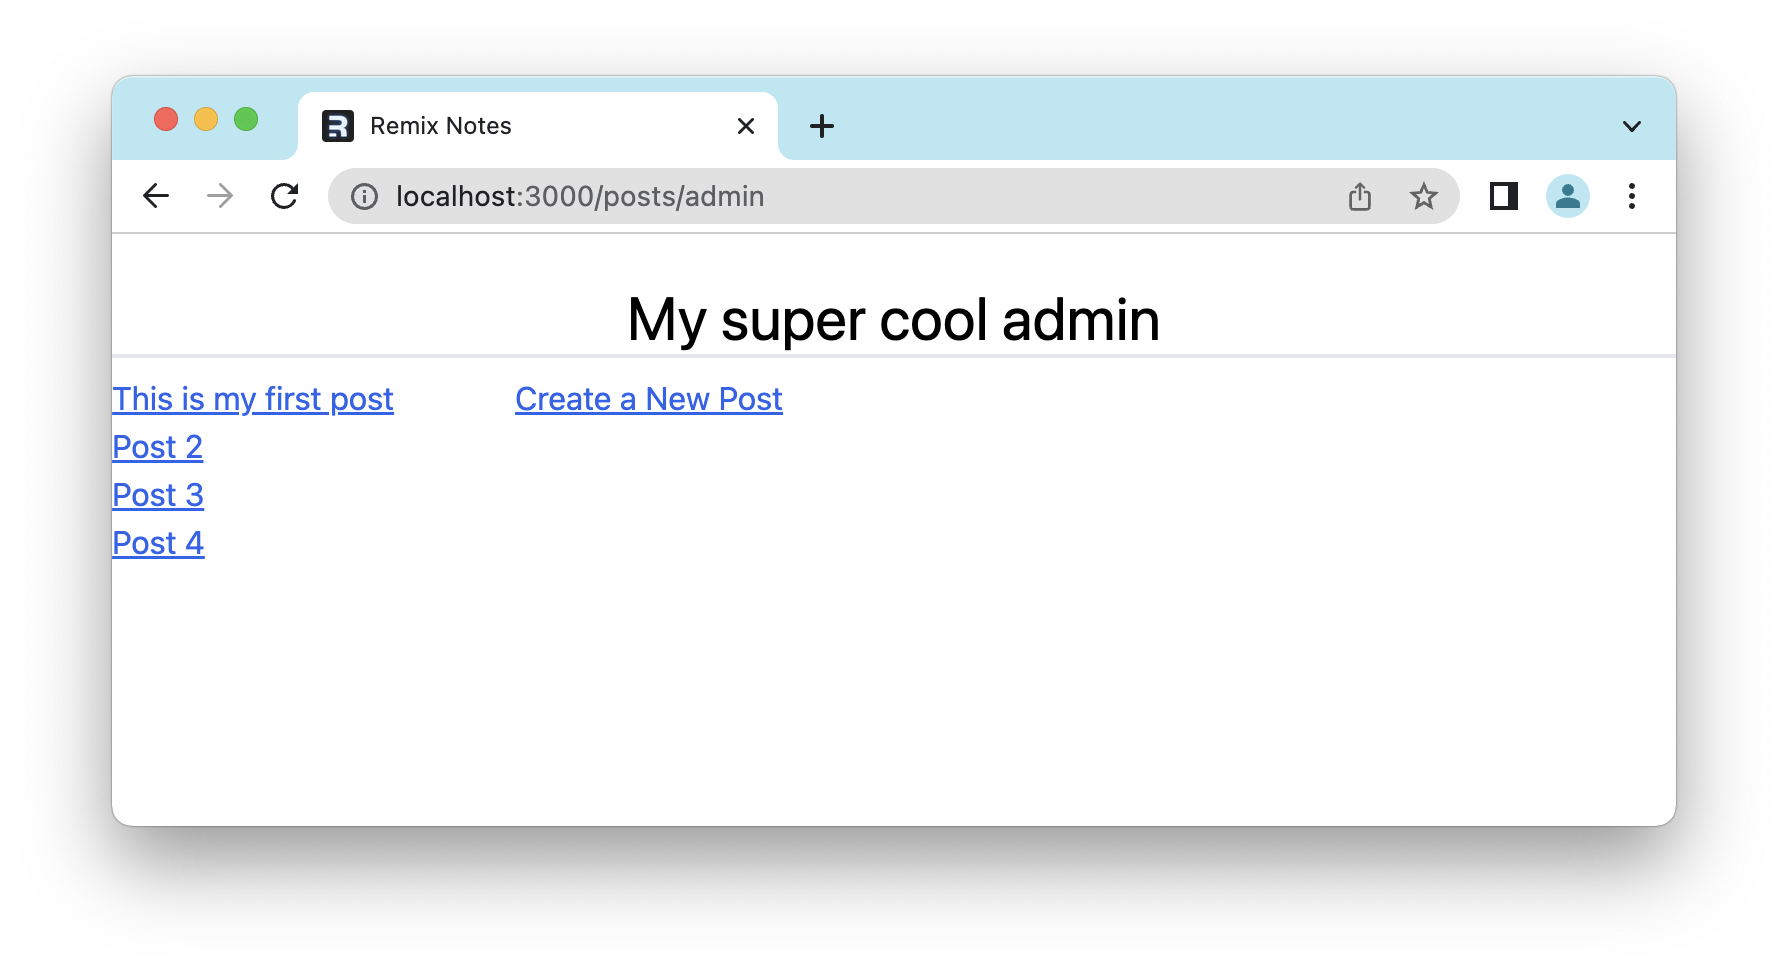
Pretty cool how this outlet can overwrite even the default page.
Now let's move our new.tsx file into this admin folder and see what changes.
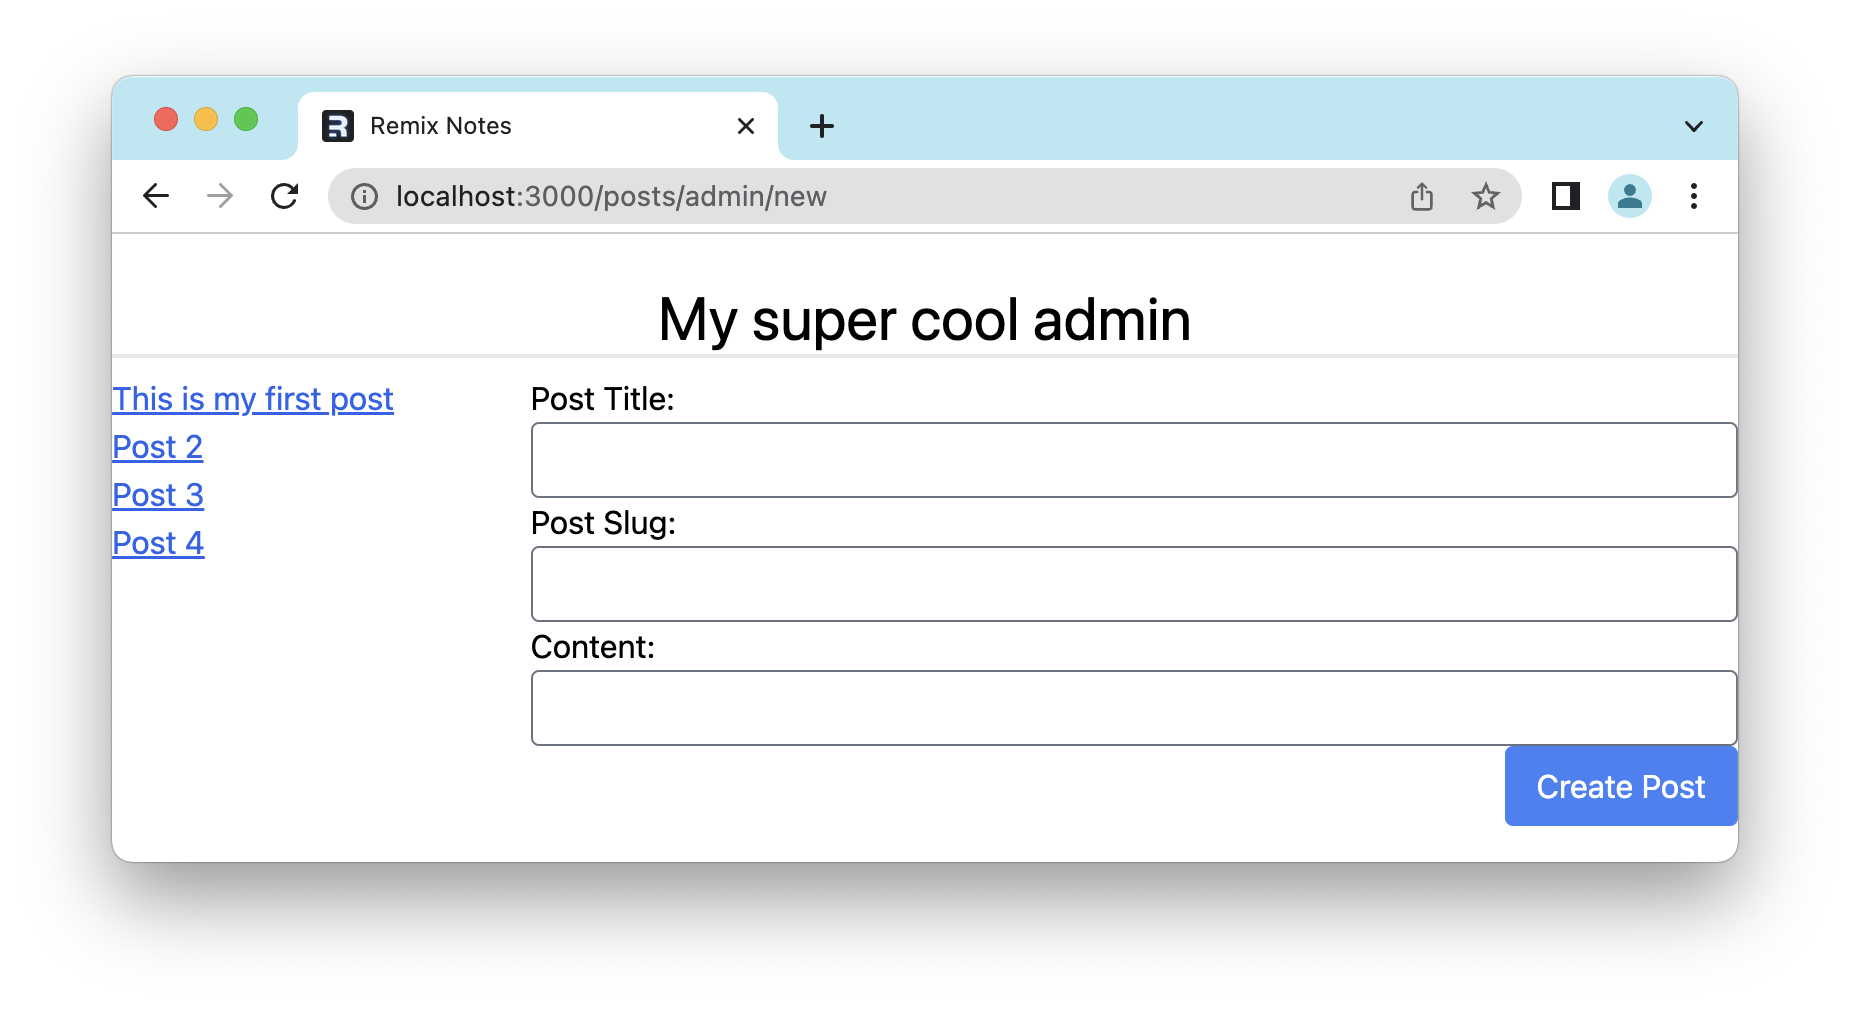
And even better, if we add a new post, we get to see it in the sidebar right away!
You can find the complete code on GitHub.
Thank you for reading, and let's connect!
Thank you for reading my blog. Feel free to subscribe to my email newsletter and connect on Facebook or Twitter
About the author
I'm a full-stack developer from South Africa 🇿🇦. I love writing about JavaScript, HTML and CSS.
Comments
Join the discussionNo comments yet. Be the first to comment.



