
Reactive forms in Angular the way to go

I'm a full-stack developer from South Africa 🇿🇦. I love writing about JavaScript, HTML and CSS.
When you are using Angular and need to have forms in your application, use reactive forms, they are so powerful.
They are a model-driven way of using forms in Angular.
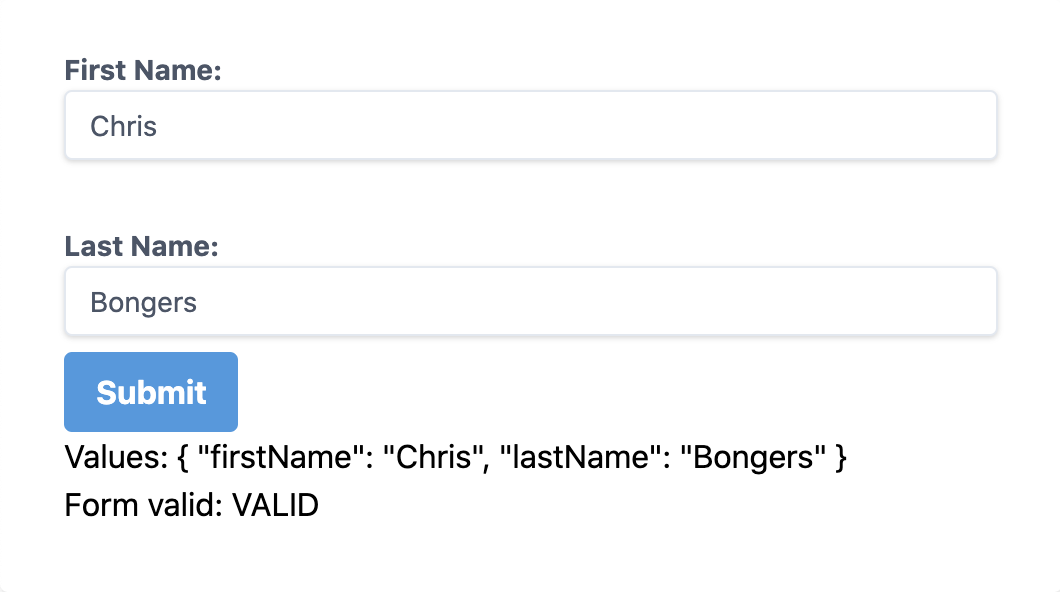
The instance I'm using for reactive forms is a create/update component. One component that can do both based on what it receives.
Making our app ready for reactive forms
First, we need to register the ReactiveFormsModule to our app.module.ts.
// Other imports
import { ReactiveFormsModule } from '@angular/forms';

@NgModule({
  imports: [
    // Other import
    ReactiveFormsModule
  ],
  providers: [],
  bootstrap: [AppComponent]
})
export class AppModule { }
That's it. We can now use reactive forms in our application.
Let's use our welcome.component to populate a form.
Adding our first form
Within reactive forms, we have a concept of using FormGroup that will have controls in them. One form can then have multiple FormGroups.
So let's start by adding a basic form.
import { Component } from '@angular/core';
import { FormGroup, FormControl } from '@angular/forms';
import { Validators } from '@angular/forms';

@Component({
  selector: 'app-welcome',
  templateUrl: './welcome.component.html',
  styleUrls: ['./welcome.component.scss']
})

export class WelcomeComponent {
  ourForm = new FormGroup({
    firstName: new FormControl('', Validators.required),
    lastName: new FormControl(''),
  });
}
As you can see, we build a new form-group that holds two fields, a firstname, and a lastname. We then also add a required validator, which comes from angular forms. The basic required will just check if the field has any value.
Then we can add this to our welcome.component.html.
<form [formGroup]="ourForm" class="px-8 pt-6 pb-8 mb-4 bg-white rounded shadow-md">

  <label class="block mb-2 text-sm font-bold text-gray-700">
    First Name:
    <input type="text" formControlName="firstName" class="w-full px-3 py-2 leading-tight text-gray-700 border rounded shadow appearance-none focus:outline-none focus:shadow-outline">
  </label>

  <br />

  <label class="block mb-2 text-sm font-bold text-gray-700">
    Last Name:
    <input type="text" formControlName="lastName" class="w-full px-3 py-2 leading-tight text-gray-700 border rounded shadow appearance-none focus:outline-none focus:shadow-outline">
  </label>

    <p>
    Values: {{ ourForm.value | json }}<br />
    Form valid: {{ ourForm.status }}
    </p>

</form>
We are using some simple tailwind classes to style our form.
Then we put our [formGroup] on the form element.
And render our two input fields, they are connected to our form by using the formControlName="firstName" which has to be the same as defined in our ts file.
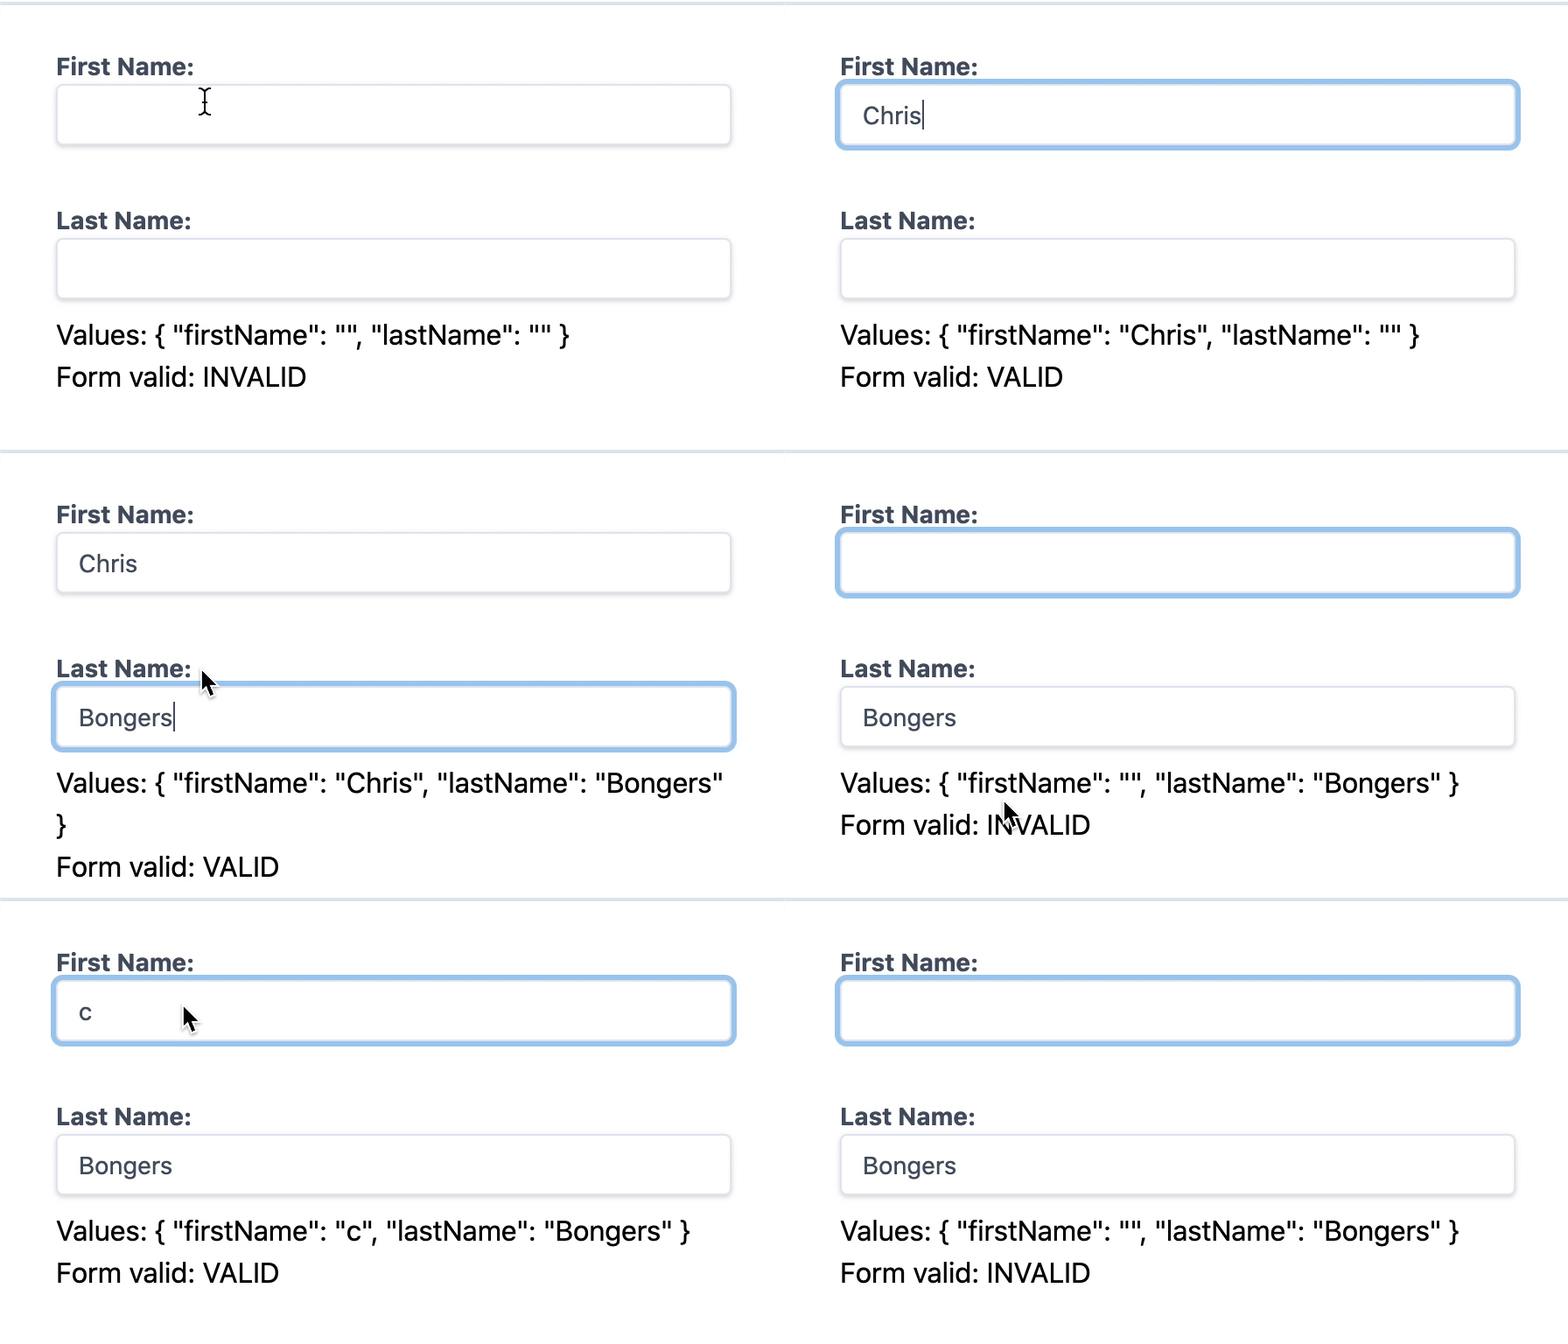
Then at the bottom, we render the form values and if the form is valid or not.
If you now run this, you will see the two inputs and have the option to see the values.
Connecting a submit button
This is cool, but of course, we wish to capture this data when we click the button.
Let's start by adding a submit handler to our form.
<form [formGroup]="ourForm" (ngSubmit)="onSubmit()" class="px-8 pt-6 pb-8 mb-4 bg-white rounded shadow-md">
This will call the onSubmit function.
Let's add this function to our welcome.component.ts.
onSubmit() {
    console.log(this.ourForm.value);
}
Now let's add a button that will act as our submit.
<button type="submit" [disabled]="!ourForm.valid" class="px-4 py-2 font-bold text-white bg-blue-500 rounded hover:bg-blue-700 focus:outline-none focus:shadow-outline">Submit</button>
As you can see, we can add this [disabled] element if our form is not valid.
Now, if you run this code, you will see the form values in your console and process the data!
You can download the full code to this article on GitHub.
Thank you for reading, and let's connect!
Thank you for reading my blog. Feel free to subscribe to my email newsletter and connect on Facebook or Twitter



