
Next.js Supabase adding a GitHub login

Now that we have our basic Supabase auth setup with our magic link login let's see how we can add GitHub as a login provider.
That way, users can also sign up by using their GitHub account.
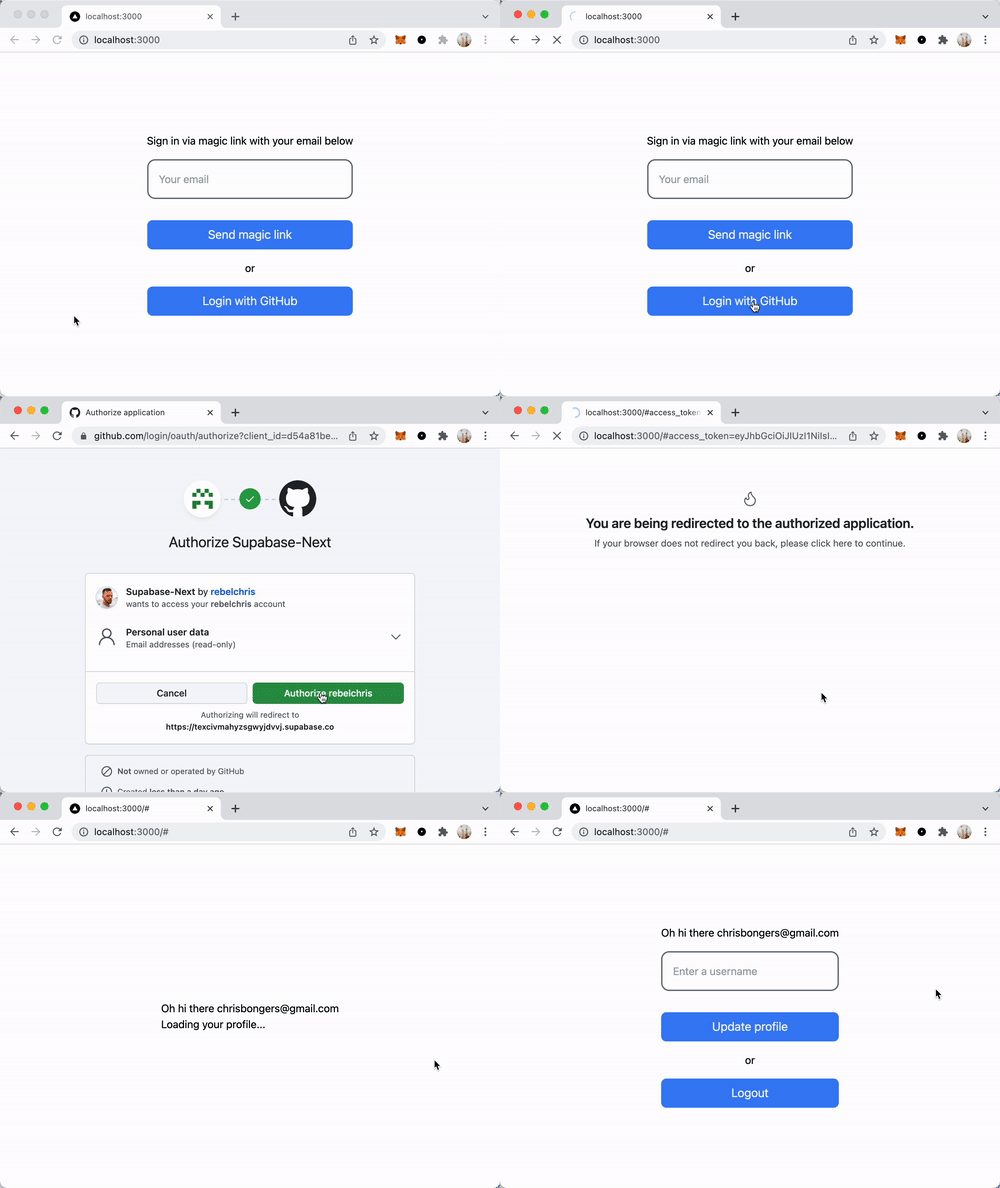
The end result will be the following flow:
Getting the GitHub tokens
The first thing we need to do is create an app on GitHub to get the API token from there.
Go to the GitHub developer center and create a new OAuth app.
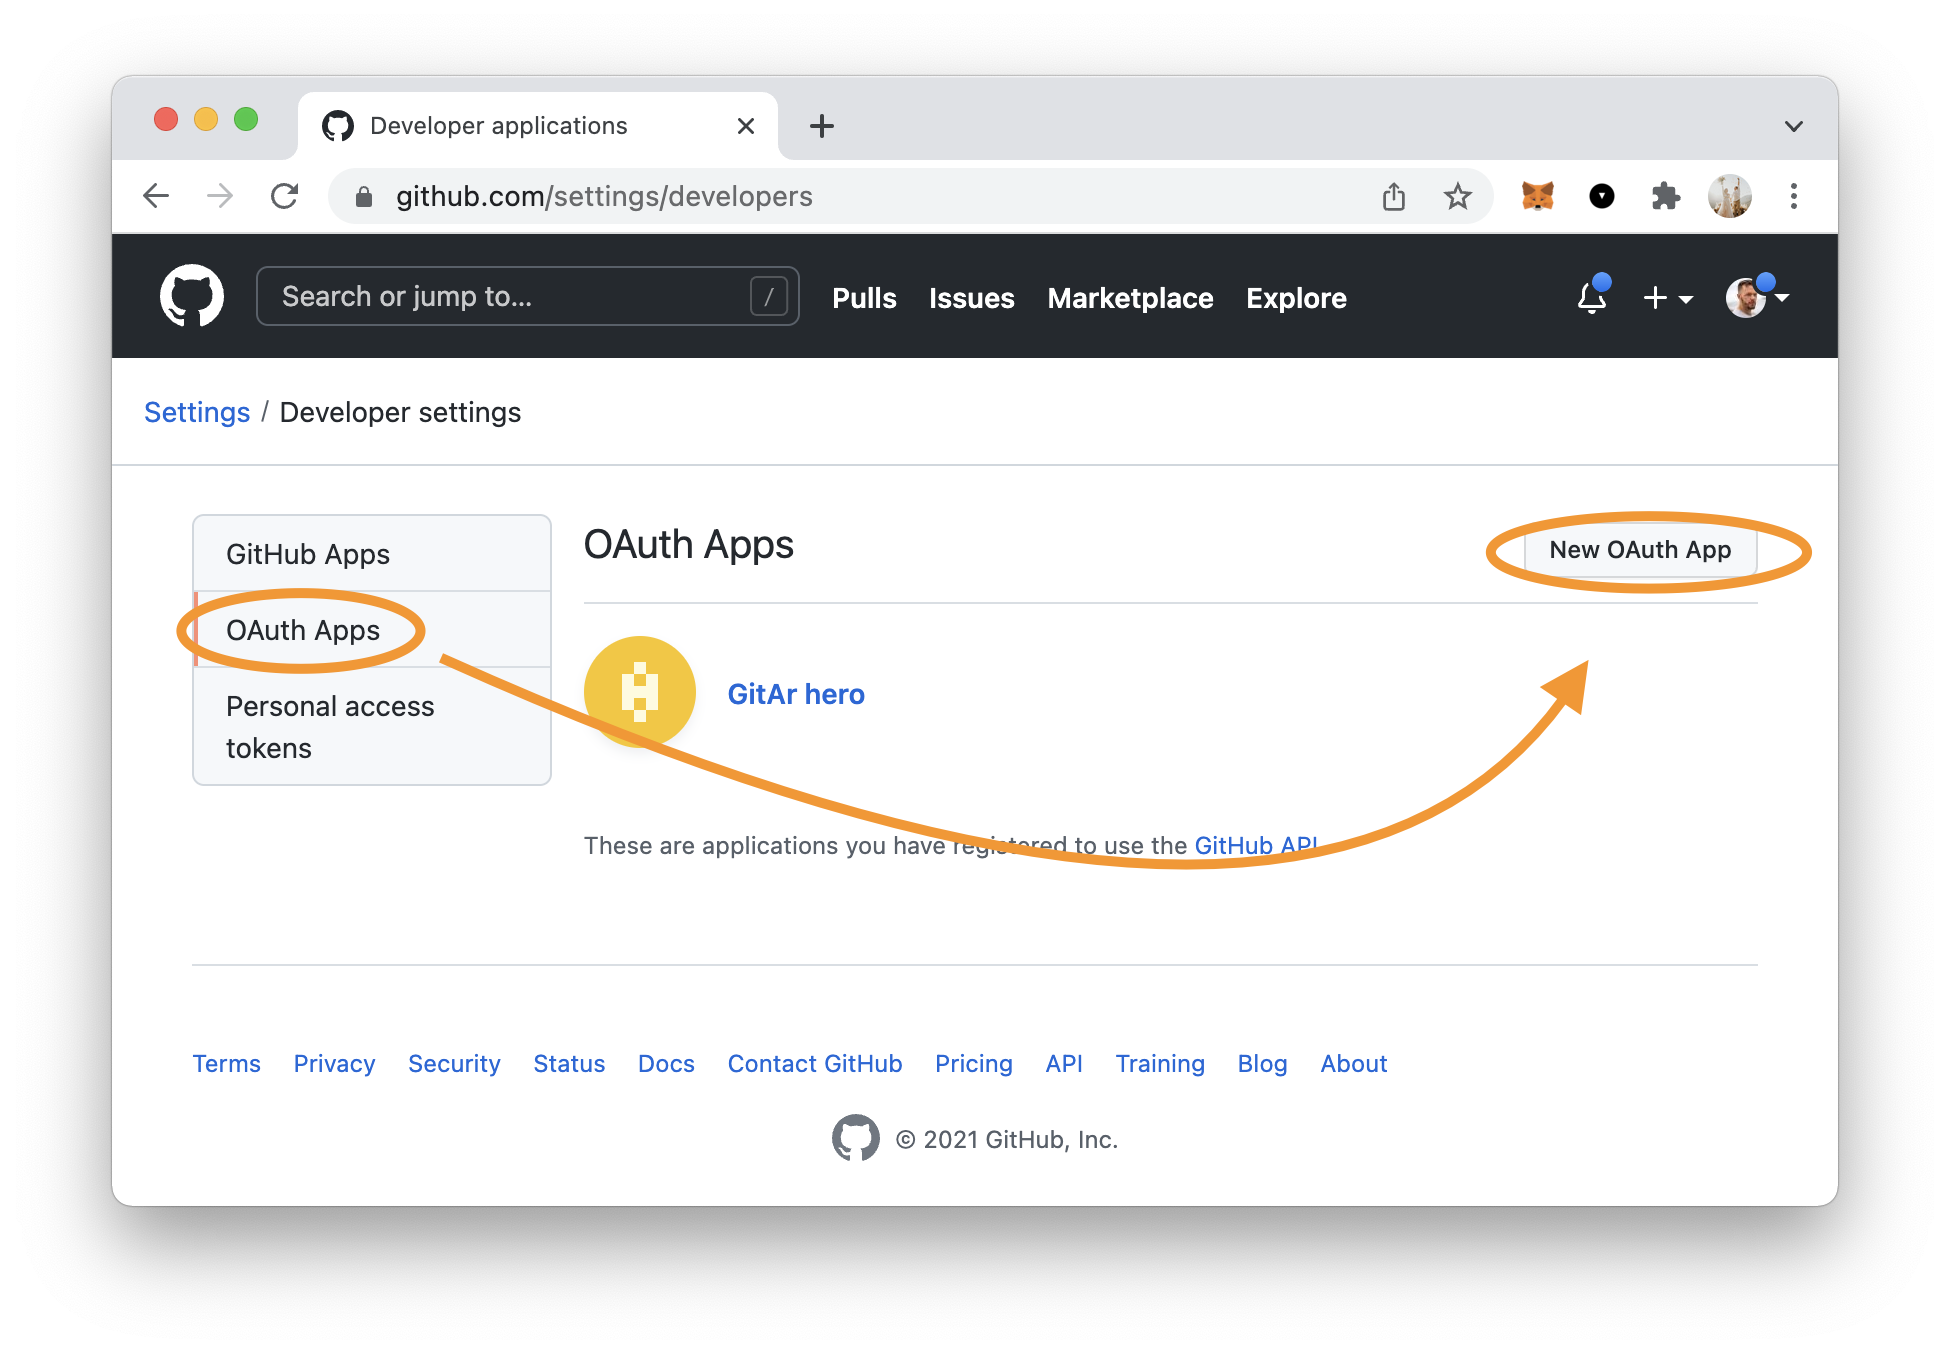
You'll need to fill out the details on the next step. To find your Authorization callback URL visit the Supabase interface.
The URL we need is the following one:
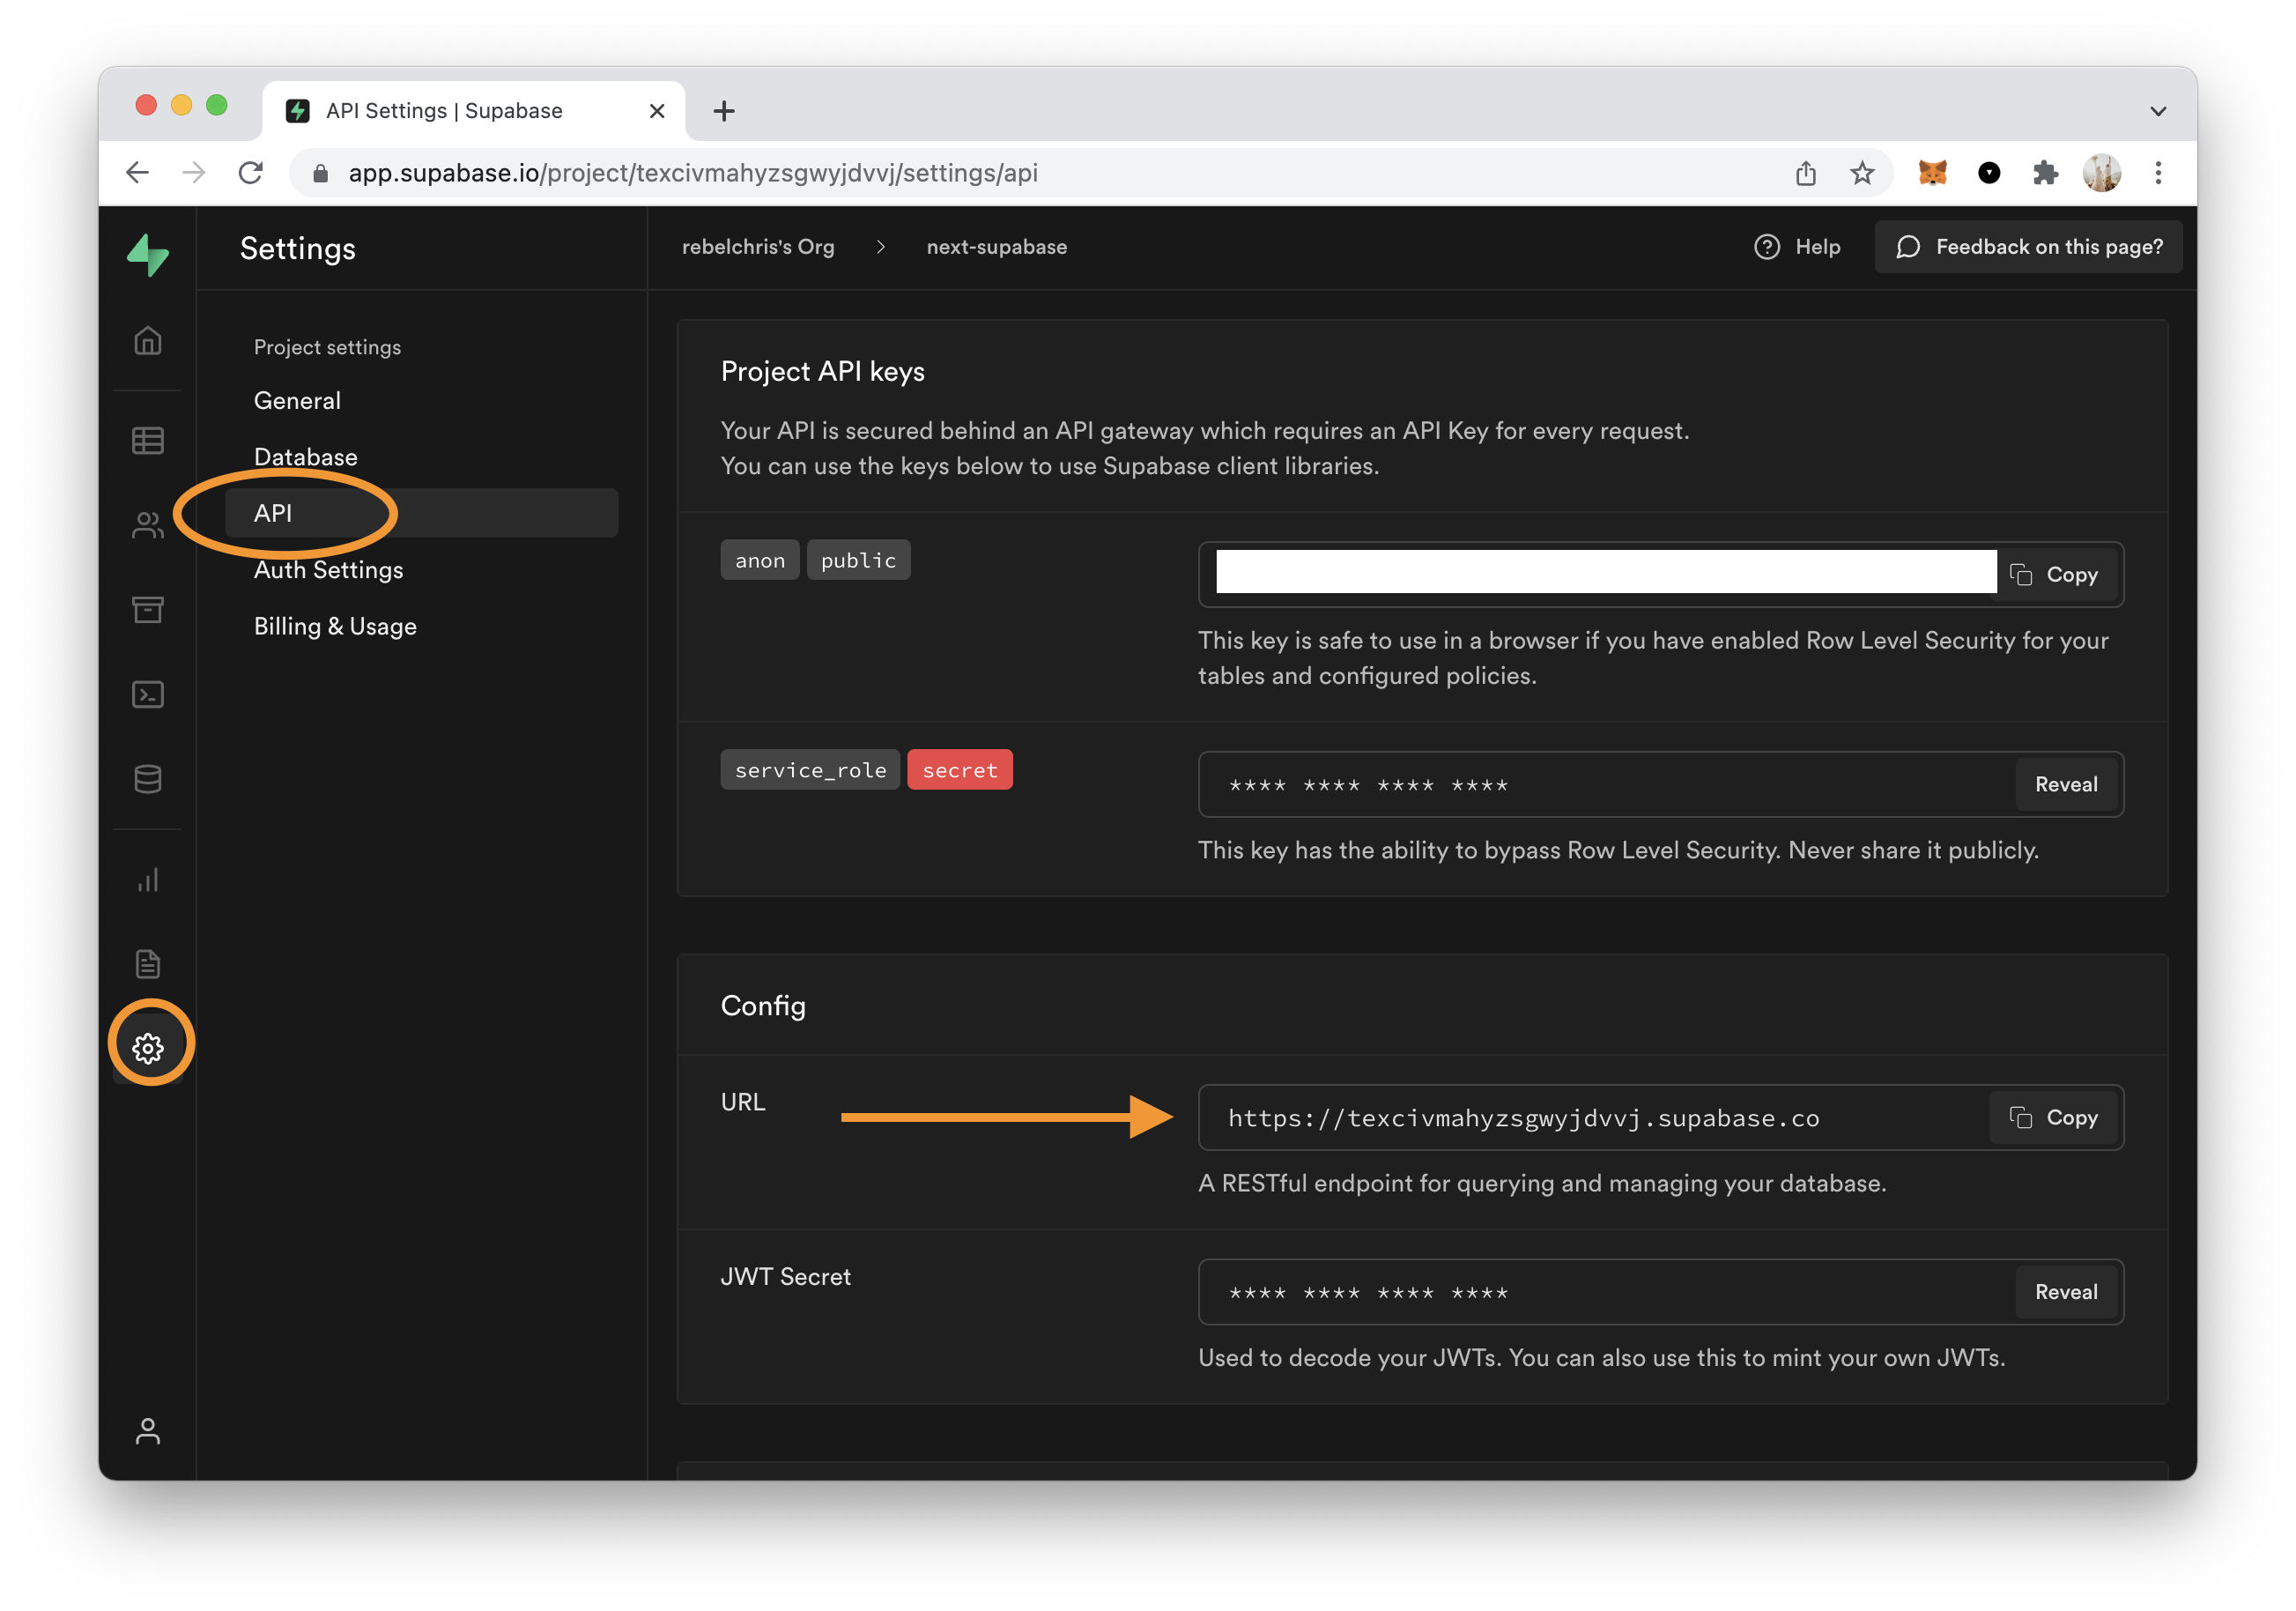
However, you'll have to add the following to the end of this URL: /auth/v1/callback.
My end URL looks like this:
https://texcivmahyzsgwyjdvvj.supabase.co/auth/v1/callback
Finish creating this OAuth app in GitHub, now you should get a page where you have to generate a new secret.
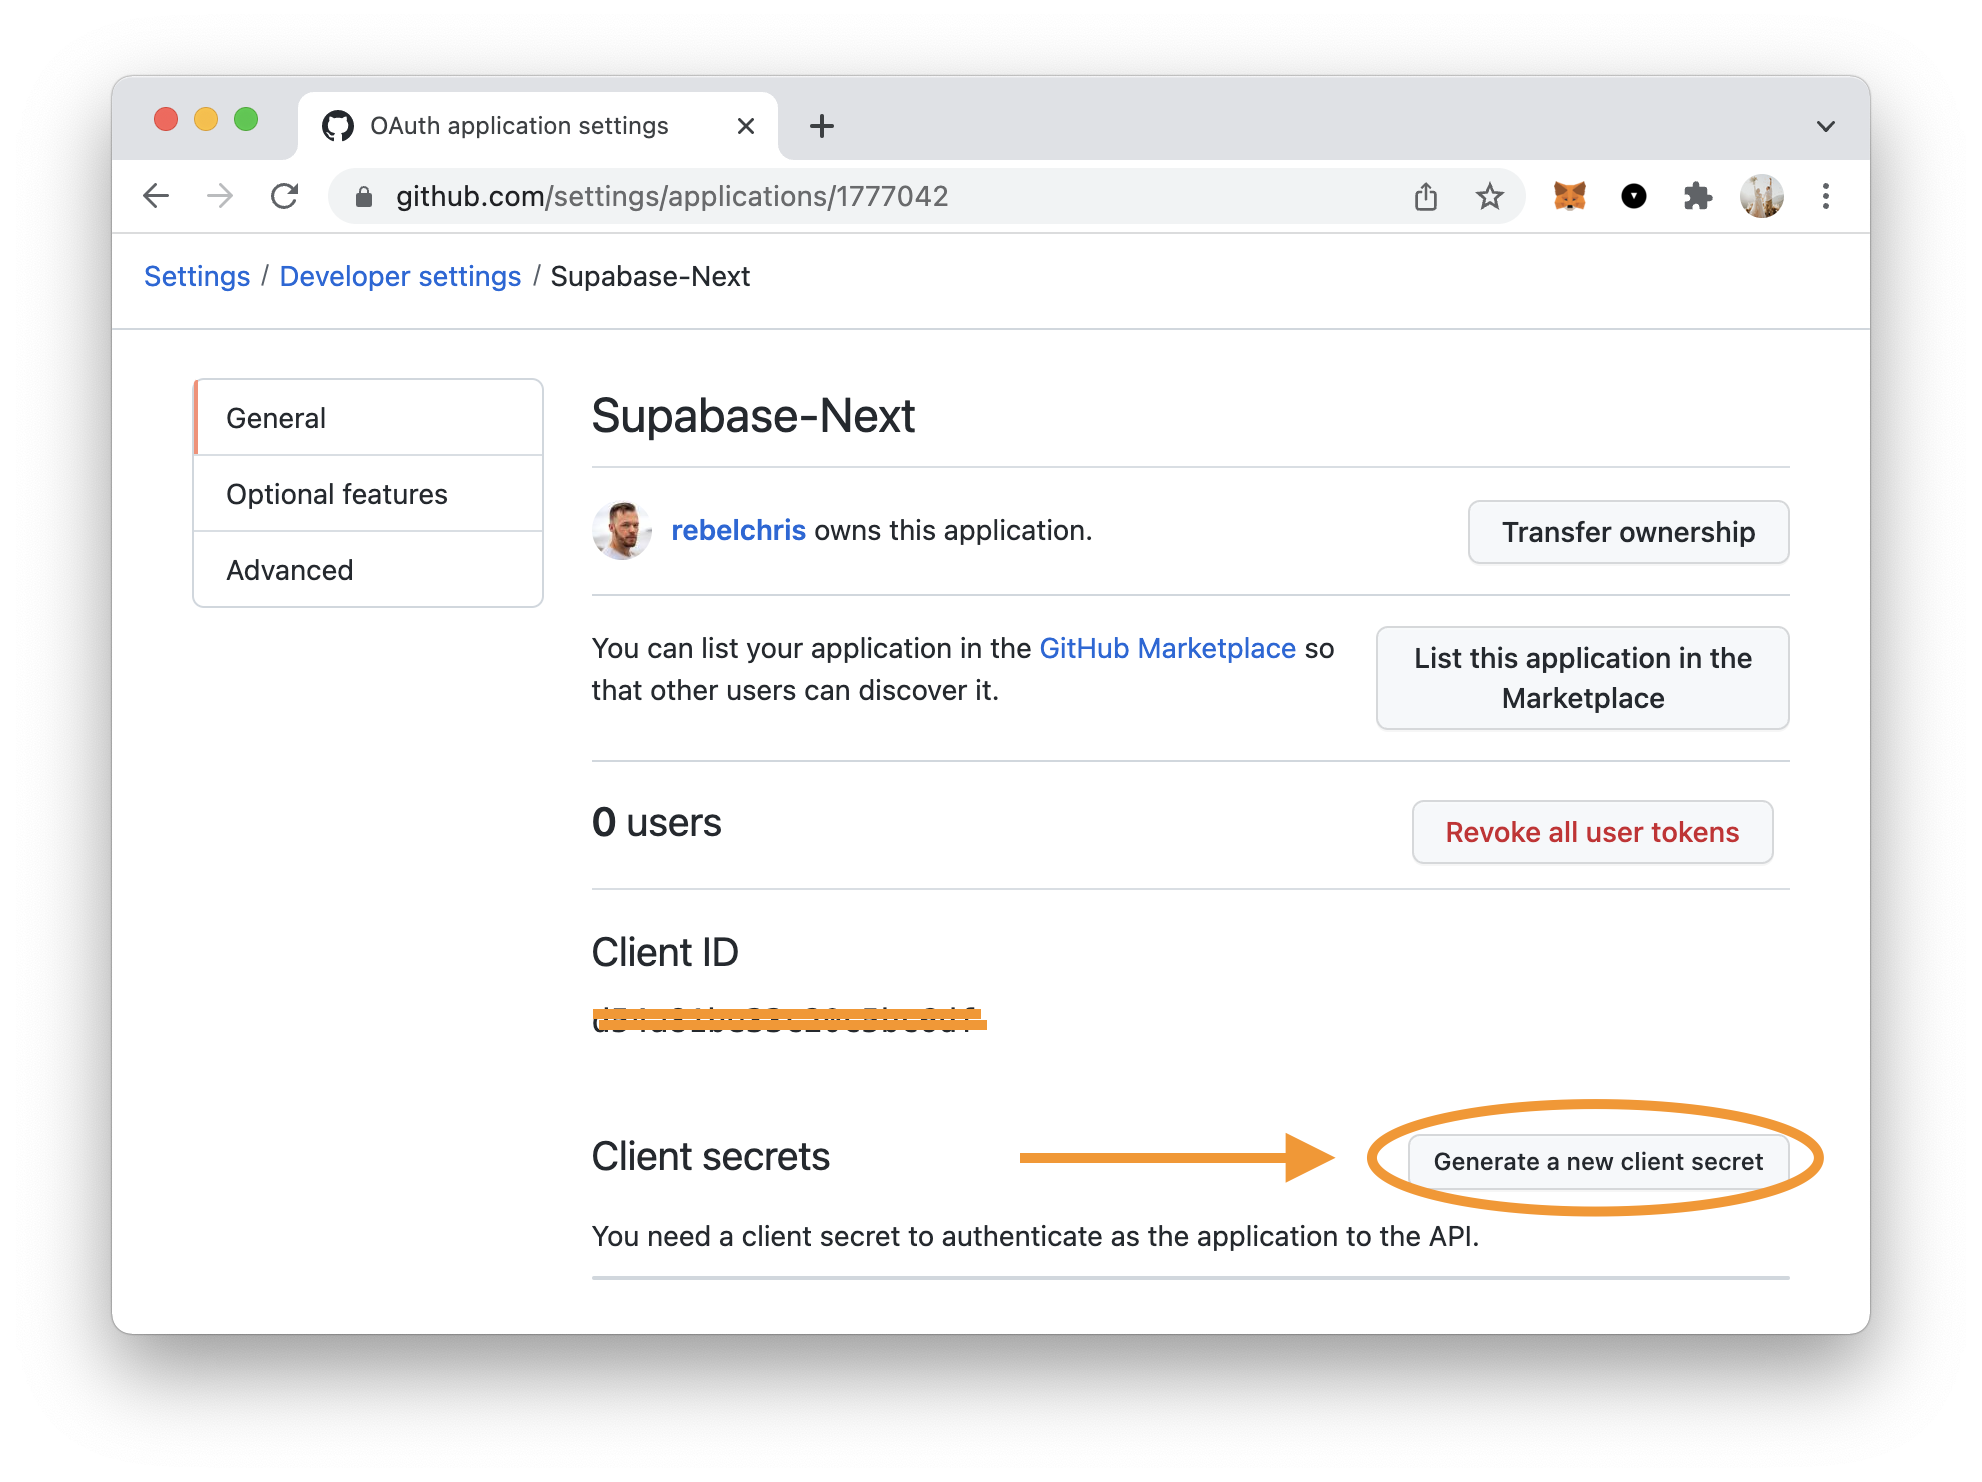
Once you generate the secret, note this down as well as the client id.
And then head back over to Supabase. Click the Authentication menu and visit the settings.
Here you can enable all separate providers. In our case, we want GitHub.
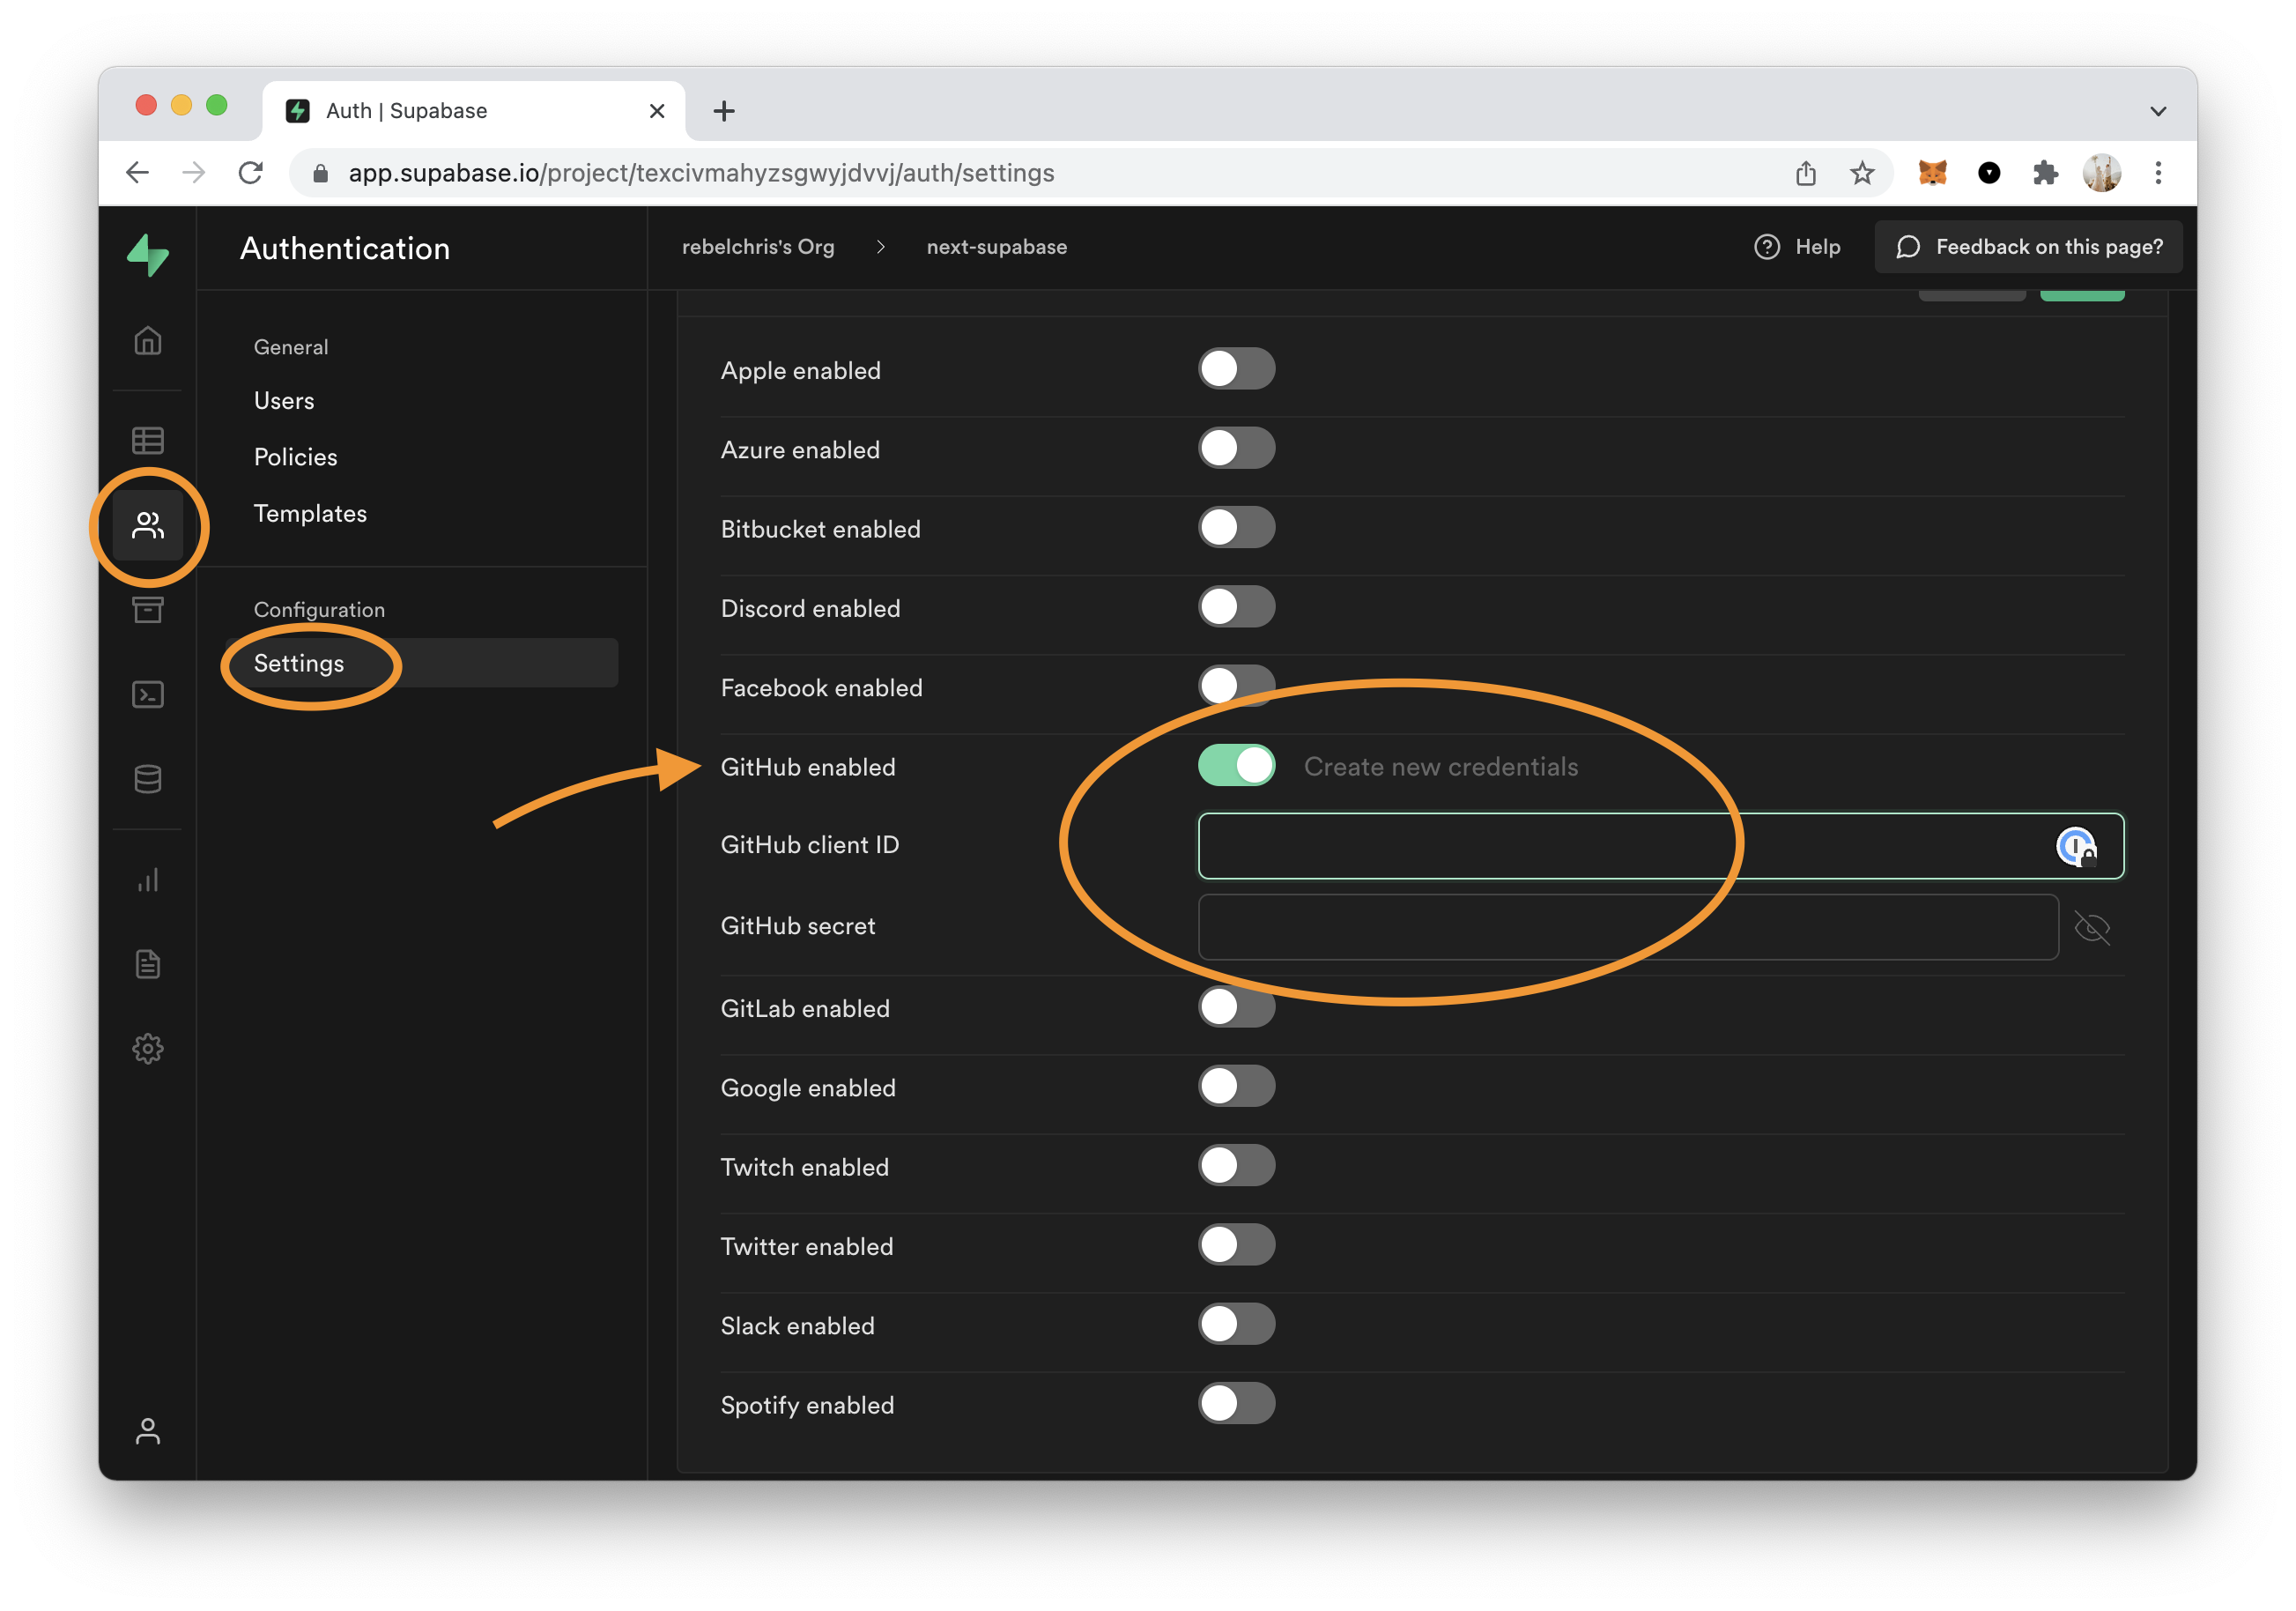
Fill out the client id and secret as you just retrieved them from GitHub.
Adding the GitHub login to Next.js
Now it's finally time to open our Next.js application. We'll be using the one we made before. Which you can find on GitHub.
Open up the components/Login.js component.
Let's start by adding the function that will authenticate the user.
We can make use of the loading state we created before.
const handleGitHubLogin = async () => {
    try {
      setLoading(true);
      const { error } = await supabase.auth.signIn({
        provider: 'github',
      });
      if (error) throw error;
    } catch (error) {
      alert(error.error_description || error.message);
    } finally {
      setLoading(false);
    }
};
And now, all we need to do is render the button in our HTML.
<button
    className='mt-4 p-2 pl-5 pr-5 bg-blue-500 text-gray-100 text-lg rounded-lg focus:border-4 border-blue-300'
    onClick={() => handleGitHubLogin()}
    disabled={loading}
>
    {loading ? 'Logging in' : 'Login with GitHub'}
</button>
And that's it! We can now log in through GitHub and still enrich our profile.
You can download the complete code on GitHub.
Thank you for reading, and let's connect!
Thank you for reading my blog. Feel free to subscribe to my email newsletter and connect on Facebook or Twitter
About the author
I'm a full-stack developer from South Africa 🇿🇦. I love writing about JavaScript, HTML and CSS.
Comments
Join the discussionNo comments yet. Be the first to comment.



