
Next.js page options and how they work

Creating pages is an integral part of any framework. Today we'll be looking at three different types of pages that we can leverage in Next.js.
- Static pages (
/about,/contact) - Dynamic page content (
/posts/all) - Dynamic page paths (
/posts/1,posts/2)
Let's take a closer look at how we can create these in Next.js.
Static pages in Next.js
To create static pages, we can simply create a file in our pages folder.
This file can be a variety of extensions: .js, .jsx, .ts, .tsx.
Let's create a simple static contact page for our Next.js tailwind starter.
Create a file called contact.js in your pages folder.
import Head from 'next/head';

export default function Contact() {
  return (
    <div className="flex items-center justify-center min-h-screen">
      <Head>
        <title>Contact page</title>
        <meta name="description" content="Contact us" />
        <link rel="icon" href="/favicon.ico" />
      </Head>

      <div className="max-w-xs my-2 overflow-hidden rounded shadow-lg">
        <div className="px-6 py-4">
          <div className="mb-2 text-xl font-bold">Contact us</div>
          <p className="text-base text-grey-darker">
            This will be the place to contact us later on.
          </p>
        </div>
      </div>
    </div>
  );
}
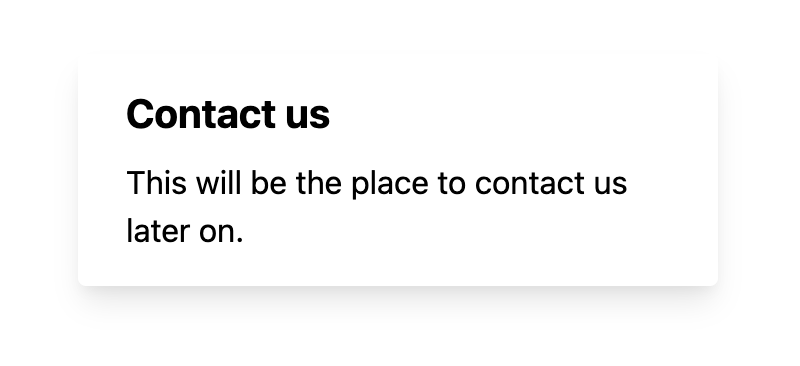
And now if we run our script again npm run dev we can visit http://localhost:3000/contact.
This should now show the page we just created.
Creating dynamic based pages
Very often, however, we want our page to contain data from an external resource.
Let's take the Anime API we used before as an example.
The API endpoint we'll be using: https://api.jikan.moe/v3/top/anime/1.
But let's first create a file called shows.js that should list all the top anime shows.
For this to work, we need to use the getStaticProps function. This function will fire and fetch data from an API.
Then passes it to the actual view.
So let's break it up into sections and fill those out one by one.
function Shows({ shows }) {
  return (
    // HTML CODE
  );
}

export async function getStaticProps() {
    const shows = // TODO;
  return {
    props: {
        shows,
    },
  };
}

export default Shows;
So this is the main wireframe. We have our function that contains the JSX code (HTML), then we have the getStaticProps function, which fires on build time.
This can do API calls while we await it. And we can then return them as props.
These props are passed to our primary function (Shows).
So let's see how we can fetch data inside the getStaticProps function.
const res = await fetch('https://api.jikan.moe/v3/top/anime/1');
const shows = await res.json();
As you can see, top-level awaits are supported out of the box, which is super handy! We call the API, await the response, and then convert it into a JSON object.
Then as for our HTML, we can now use this shows object since we passed it to our function.
function Shows({shows}) {
  return (
    <div className="grid min-h-screen grid-cols-5 gap-4 p-5">
      {shows.top.map((show) => (
        <div key={show.id} className="max-w-xs my-2 overflow-hidden rounded shadow-lg ">
          <img
            className="flex-1 object-cover w-full h-80"
            src={show.image_url}
            alt={show.title}
          />
          <div className="px-6 py-4">
            <div className="mb-2 text-xl font-bold">{show.title}</div>
          </div>
        </div>
      ))}
    </div>
  );
}
We create a simple render of each show is its own card, with an image and title of the anime show.

Creating dynamic page paths
With the above example, we still only have one page that loads dynamic data. Let's say we want to create a single page for each of the shows.
These pages could host more detailed information about the show.
In Next.js, we can create dynamic pages by wrapping them in brackets like show/[id].js where the [id] is dynamic.
For this, we can leverage the getStaticPaths method.
This can pre-fetch our endpoints.
And we can still include the getStaticProps to retrieve the data on build time.
Let's put this together.
function Show(show) {
  return <h1>{show.title}</h1>;
}

export async function getStaticPaths() {
  const res = await fetch('https://api.jikan.moe/v3/top/anime/1');
  const shows = await res.json();
  const paths = shows.top.map((show) => {
    return {
      params: {id: show.mal_id.toString()},
    };
  });

  return {paths, fallback: false};
}

export async function getStaticProps({params}) {
  const res = await fetch(`https://api.jikan.moe/v3/anime/${params.id}`);
  const show = await res.json();
  return {props: show};
}

export default Show;
Wow, quite a lot going on, right?
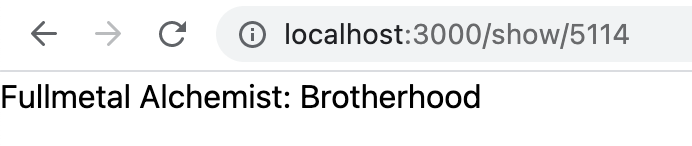
First, we have a simple view to keep things easy. We use an h1 to return the title of the single page.
Then we use getStaticPaths to create a path for each of the top shows.
We use the mal_id to generate unique ID pages.
Then we use the getStaticProps function to retrieve these IDs from the URL and fetch the detailed view for each show.
It results in a single page for each show.
And that's it. We now have explored these three ways of creating pages in Next.js. I hope you found this helpful article. You can also find the complete code on GitHub.
Thank you for reading, and let's connect!
Thank you for reading my blog. Feel free to subscribe to my email newsletter and connect on Facebook or Twitter
About the author
I'm a full-stack developer from South Africa 🇿🇦. I love writing about JavaScript, HTML and CSS.
Comments
Join the discussionThis seems like a great feature Chris!
Btw, while mapping through the shows, you set the key to a string.

It should be key={show.id}
You are completely right there Usman! Mistake on my side 😅



