
Next portfolio - Filter by category

I'm a full-stack developer from South Africa 🇿🇦. I love writing about JavaScript, HTML and CSS.
A while ago I did the series on the Next portfolio, and one of the people following along the series asked me how to filter by category.
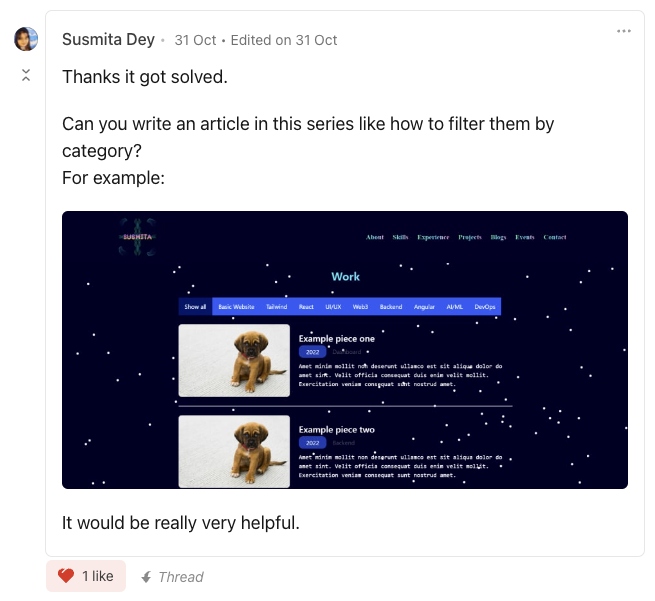
This is a great question and something I didn't dive into during the series. So here is a follow up on how to achieve it.
I will be focussing on making our blog items filtered by tags, you can take this same learning and pattern to include it in your works page as well.
If you do want to follow along, you can use this branch as your starting point
Creating the links
Let's start by modifying our Article component, so it will render links to each specific tag.
I decided to create a little helper function to make the code a bit more readable in the component itself.
const getTagLink = (tag) => {
  return (
    <Link href={`/blog/tag/${tag}`}>
      <a className='underline'>{tag}</a>
    </Link>
  );
};
As you can see our URL structure will become /blog/tag/{tag}.
Now in the loop for the tags we can simply call this function, however since we now return a object we can no longer use the join function and have to resort to using a manual reduce function for the comma's in between.
{
  post.tags
    .map((tag) => getTagLink(tag))
    .reduce((prev, curr) => [prev, ', ', curr]);
}
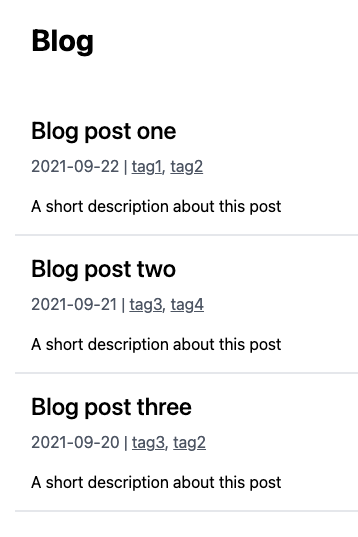
If we now look at our articles we can see the links being added.
Creating the tag overview page
Now we'll have to create the actual tag overview page. It will work very similar to our index file for the blog, however with some tricks applied to it.
You can go ahead and create the following file and structure: pages/blog/tag/[tag].js.
The [tag] will ensure we can use dynamic URLs so the first thing we'll have to do is generate all the possible paths.
We can use the getStaticPaths method to achieve this.
export async function getStaticPaths() {
  const posts = getAllPosts();
  const tags = new Set(posts.flatMap((post) => post.tags));

  return {
    paths: [...tags].map((tag) => {
      return {
        params: {
          tag,
        },
      };
    }),
    fallback: false,
  };
}
As you can see we actually get all the posts, but then flatmap all the tags, this will result in a array of all the tags, but it will include duplicates. So we wrap the whole things in a new Set, which will filter it to be unique ones only.
Once done we can loop over the set and return each unique tag as a page.
With this Next will know of all the pages, so now we can get the data for each of the tag pages.
The idea is to retrieve all posts that match the given tag.
And for this we use the getStaticProps function.
export async function getStaticProps({ params: { tag } }) {
  const posts = getAllPostsByTag({ tag });

  return {
    props: {
      posts,
      tag,
    },
  };
}
You can see we introduced a new function, which we'll create in a second. Then we simply return all matching posts and the tag the user clicked on.
Let's open up the api.js file and add this new function.
export function getAllPostsByTag({ tag }) {
  const posts = getAllPosts();
  return posts.filter((post) => post.tags.includes(tag));
}
The function is quite a lazy one, as it simply gets all posts, and then filters our the ones that match the given tag.
The last part is to create the actual render for the page, which looks like a copy of the main blog index file.
export default function Tag({ posts, tag }) {
  return (
    <div>
      <Head>
        <title>NextJS Blog</title>
        <meta name='description' content='Generated by create next app' />
        <link rel='icon' href='/public/favicon.ico' />
      </Head>
      <section className='px-6'>
        <div className='max-w-4xl mx-auto'>
          <h1 className='text-3xl font-bold mb-6 p-4'>All `{tag}` posts</h1>
          {posts.map((post) => (
            <Article key={post.slug} className='border-b-2' post={post} />
          ))}
        </div>
      </section>
    </div>
  );
}
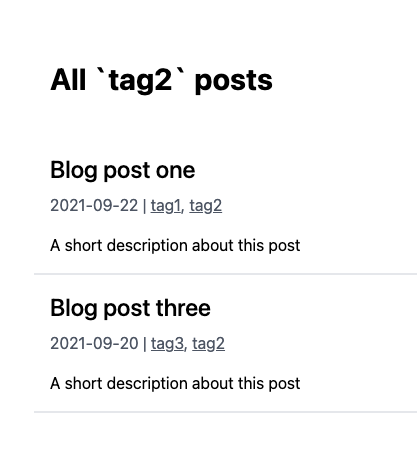
And that's it we now have a tag page with all relevant posts for that tag.
You can also find the completed code on GitHub
Thank you for reading, and let's connect!
Thank you for reading my blog. Feel free to subscribe to my email newsletter and connect on Facebook or Twitter



