
Make your life easier with React Query DevTools

When it comes to using React Query and especially the more advanced topics, it can be pretty hard to debug what's going on.
Or sometimes, you just want to invalidate a query to see if everything works fine quickly.
That's exactly where React Query DevTools come in handy 🥳.
This is what it looks like when enabled:
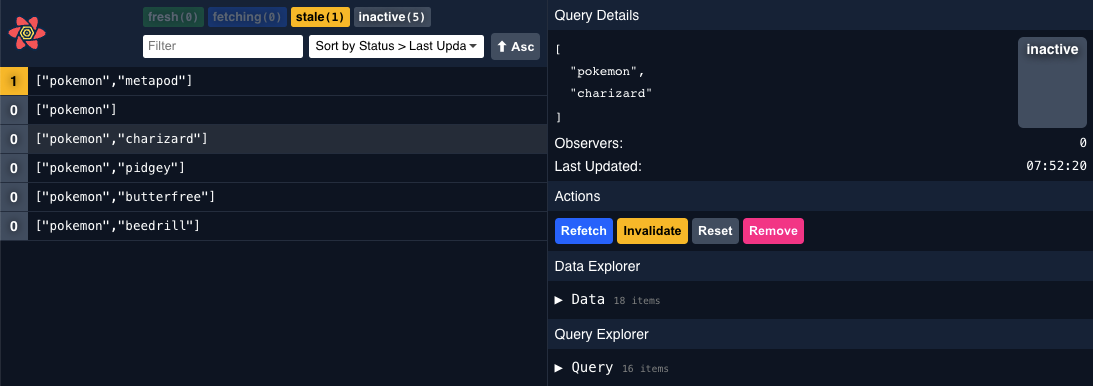
Enabling React Query DevTools
If you want to use the DevTools, installing them in your main app wrapper is recommended. This way, they will be visible everywhere.
And don't worry, by default, they will only show up when your env is in development mode.
Open up your App.js file and import the DevTools.
import {ReactQueryDevtools} from 'react-query/devtools';
To import it, we should place it inside the QueryClientProvider block like so:
function App() {
  return (
    <QueryClientProvider client={queryClient}>
      # Your app components
      <ReactQueryDevtools />
    </QueryClientProvider>
  );
}
For this mode, we can pass the following optional properties.
initialIsOpen: You can set this totrueif you want it to default show as openposition: Can be one of the following:top-left,top-right,bottom-left,bottom-right, and it determines the position of the React Query logo.
Then we get some options that can be used to extend default styles or click handlers.
All of these can be used to override defaults like: className, style and onClick where applicable:
panelPropscloseButtonPropstoggleButtonProps
Alternatively you can render it as a plain component when used in embedded mode:
import {ReactQueryDevtoolsPanel} from 'react-query/devtools';

function App() {
  return (
    <QueryClientProvider client={queryClient}>
      <ReactQueryDevtoolsPanel />
    </QueryClientProvider>
  );
}
Using the React Query DevTools
Once you spool up your application with the DevTools setup, you can quickly keep track of all the fired queries.
By clicking on one of them, you get to see a lot of information for this query.
- Query key
- Current status
- Last updated
- Data inside the cache
And you can quickly choose any of the following actions:
- Refetch
- Invalidate
- Reset
- Remove
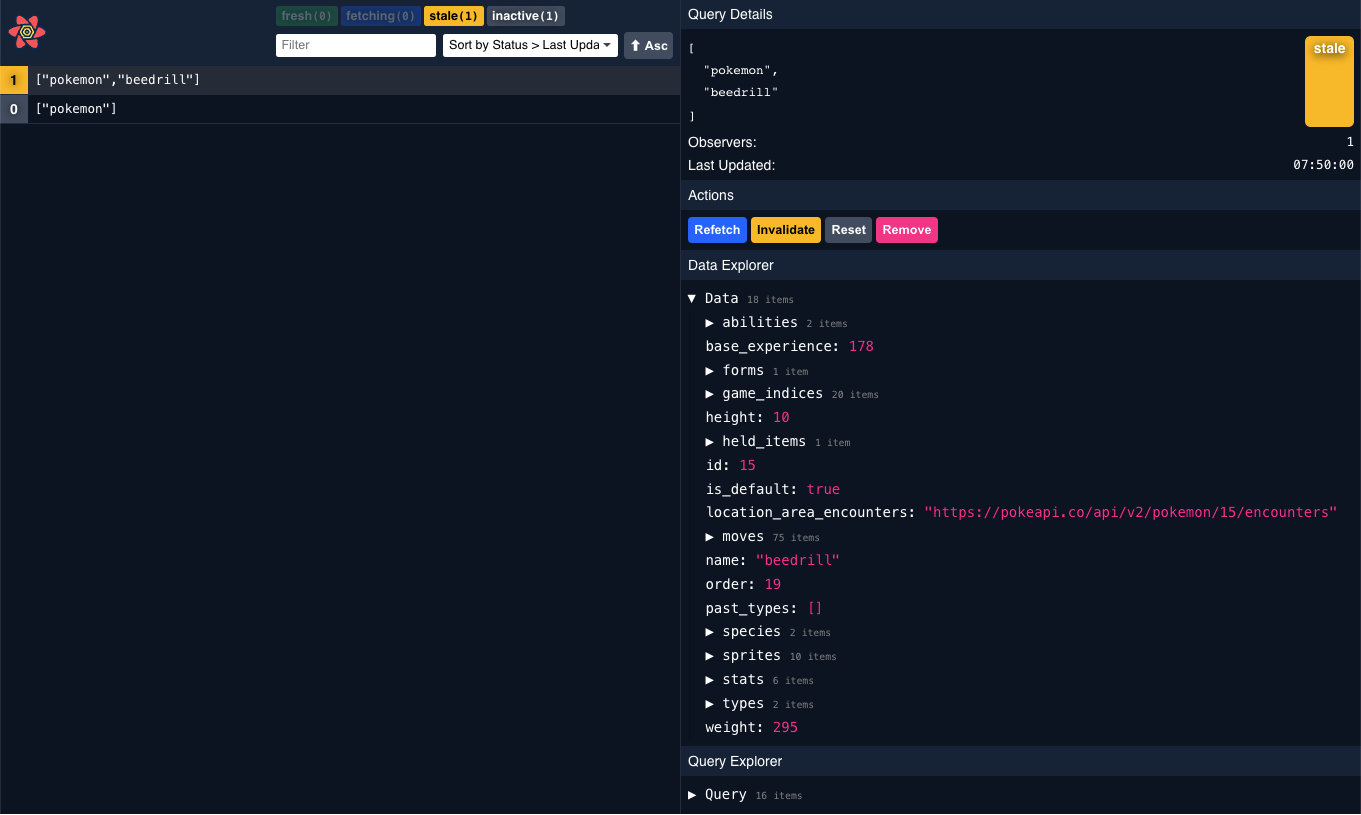
Trust me. React Query DevTools can make your life a lot easier. Knowing when a query is refetched, what data it has, or how many times it retried fetching it is such a win.
Thank you for reading, and let's connect!
Thank you for reading my blog. Feel free to subscribe to my email newsletter and connect on Facebook or Twitter
About the author
I'm a full-stack developer from South Africa 🇿🇦. I love writing about JavaScript, HTML and CSS.
Comments
Join the discussionNo comments yet. Be the first to comment.



