
Ionic skeleton loader

I'm a full-stack developer from South Africa 🇿🇦. I love writing about JavaScript, HTML and CSS.
Skeleton loaders are super cool temporary placeholders for when your content is loading. Pretty sure you have seen them around on Facebook or Instagram.

Today we'll be looking at how to create this cool skeleton loader in Ionic.
First of all, we'll start by using the Ionic starter app we built a while ago. You can find the starter on GitHub.
Adding a skeleton loader in Ionic
For our example, we'll be adding a skeleton loader on our tab1 page.
Open up the tab1.page.html and add the following:
<ion-list>
  <ion-list-header>
    <ion-skeleton-text animated style="width: 80px"></ion-skeleton-text>
  </ion-list-header>
  <ion-item>
    <ion-thumbnail slot="start">
      <ion-skeleton-text></ion-skeleton-text>
    </ion-thumbnail>
    <ion-label>
      <h3>
        <ion-skeleton-text animated style="width: 80%"></ion-skeleton-text>
      </h3>
      <p>
        <ion-skeleton-text animated style="width: 60%"></ion-skeleton-text>
      </p>
    </ion-label>
  </ion-item>
</ion-list>
This will be roughly the same format as our data, and you can see we render a full list with a header and one item in this case. It's up to you to create multiple items if needed. Furthermore, the skeletons will fill up the areas at hand. You can see we offset some by making them partial widths. They also come with the animated attribute. This will give them the remarkable moving aspect.
Now we need to stop showing this once our actual data is loaded.
Let's first head over to the tab1.page.ts file to load some delayed data.
data = [];

constructor() {
    setTimeout(() => {
      this.data.push({
          thumbnail: "URL",
        title: "Chris Bongers",
        description: "Some cool description about this person",
      });
    }, 2000);
}
This will load our data array with one person but be delayed by 2000 milliseconds.
Now we can modify our html file to reflect this data.
<ion-list *ngIf="data.length">
  <ion-list-header> Famous people </ion-list-header>
  <ion-item *ngFor="let item of data">
    <ion-thumbnail slot="start">
      <img [src]="item.thumbnail" />
    </ion-thumbnail>
    <ion-label>
      <h3>{{item.title}}</h3>
      <p>{{item.description}}</p>
    </ion-label>
  </ion-item>
</ion-list>
And the last element we need to add is a ngIf on our skeleton list.
<ion-list *ngIf="!data.length"></ion-list>
This will make sure the skeleton doesn't show when the data is loaded.
All and all, we should now have this cool effect:
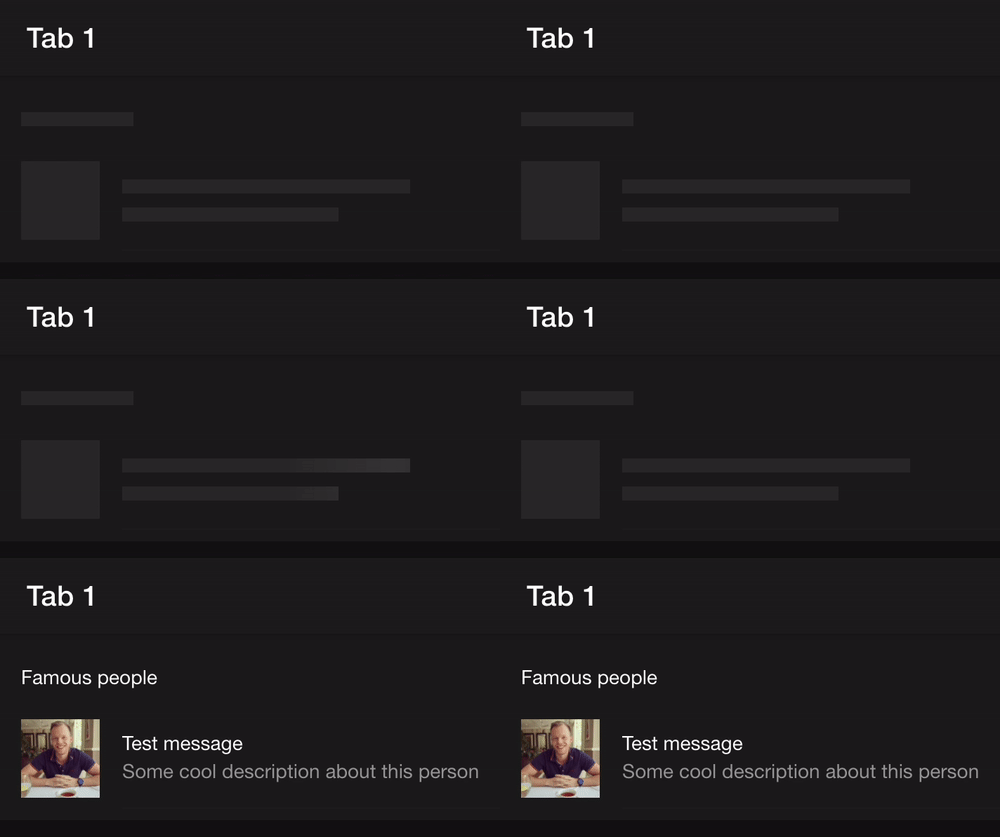
You can find the full demo code on the following GitHub repo.
Thank you for reading, and let's connect!
Thank you for reading my blog. Feel free to subscribe to my email newsletter and connect on Facebook or Twitter



