
How I created a stack guessing tool using Next.js

I'm all about creating funny tools just for the sole purpose of learning things.
In this article, I'll guide you through the process of creating this Stack guessing website I built in Next.js.
The stack guessing website works as follows:
- Person enters their name
- App redirects the user to their name page
- Script extracts unique letters for their name and finds programming-related tools for each letter
- User can view their stack
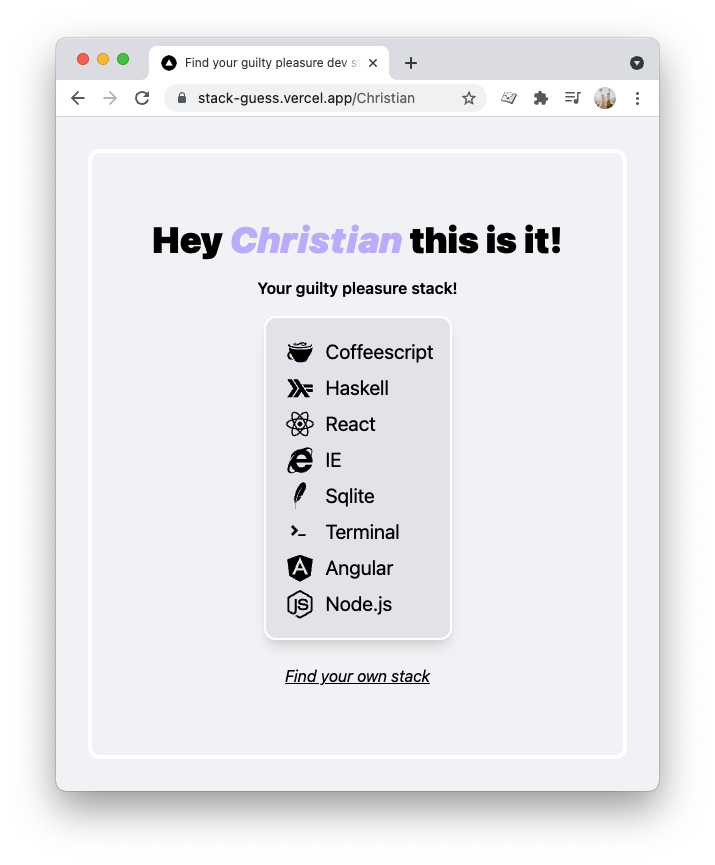
Find your guilty pleasure stack
Setting up the project
Let's start with the basics. We'll need a boilerplate Next.js application with the following dependencies:
I won't go into detail for each installation, but you'll get a detailed article by clicking on the above links.
Let's start by creating a new Next.js project:
npx create-next-app
Then navigate to the project you just created and add the following Tailwind related dependencies:
npm install -D tailwindcss@latest postcss@latest autoprefixer@latest
While we are here, let's initialize Tailwind.
npx tailwindcss init -P
And react icons as well:
npm i react-icons
Head over to your tailwind.config.js file and add the following to it:
module.exports = {
  mode: 'jit',
  purge: ['./pages/**/*.{js,ts,jsx,tsx}', './components/**/*.{js,ts,jsx,tsx}'],
  darkMode: false, // or 'media' or 'class'
  theme: {
    extend: {},
  },
  variants: {
    extend: {},
  },
  plugins: [],
};
Now open the styles/global.css and modify so it looks like this:
@import 'tailwindcss/base';
@import 'tailwindcss/components';
@import 'tailwindcss/utilities';
Creating the homepage
Alright, so the homepage consists of a Next.js form where the user can input a first name.
Let's set up the HTML part for this.
import Head from 'next/head';

export default function Home() {
  return (
    <div className='p-8 min-h-screen bg-gray-100 flex'>
      <Head>
        <title>Find your guilty pleasure dev stack</title>
        <meta name='description' content='Find your guilty pleasure dev stack based on your name' />
        <link rel='icon' href='/favicon.ico' />
      </Head>
      <main className='flex flex-col justify-center h-auto w-full items-center    rounded-xl border-4 border-white p-8'>
        <h1 className='text-4xl mb-4 font-black'>Find your <span className='italic text-purple-300'>guilty pleasure</span> dev stack</h1>
        <p className='mb-4 font-semibold'>We all know you got one 😏</p>
        <form className='shadow-lg rounded-2xl p-6' onSubmit={findDevStack}>
          <input name='name' placeholder='Enter your firstname' className='p-4 mr-2 rounded-xl' required autoComplete='name' />
          <button type='submit' className='bg-purple-600 font-semibold text-white p-2 w-32 rounded-full hover:bg-purple-700 focus:outline-none focus:ring shadow-lg hover:shadow-none transition-all duration-300 m-2 uppercase'>
            Find it
          </button>
        </form>
      </main>
    </div>
  );
}
This will render a basic form. As you can see, we attached an onSubmit handler to the form.
Once submitted, the findDevStack method is called.
Once submitted, the page should redirect to http://ourwebsite/{first name} where the first name is dynamic.
import { useRouter } from 'next/router';

export default function Home() {
  const router = useRouter();

  const findDevStack = async (event) => {
    event.preventDefault();
    const name = event.target.name.value;
    router.push(name);
  };

  return ();
}
Let's see how this looks:
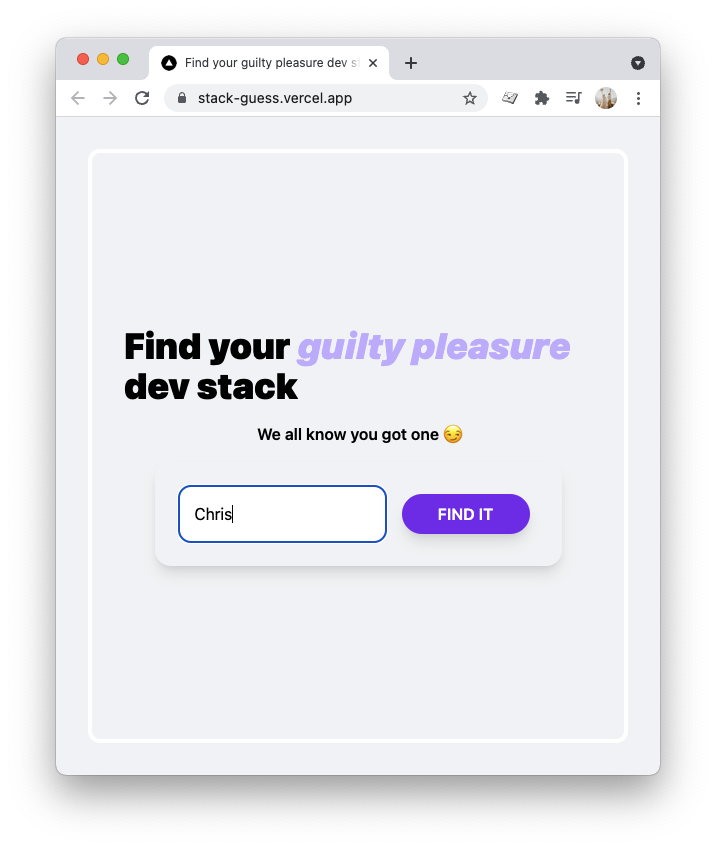
Once submitted, we get redirected to /chris; however, this route does not exist yet.
Creating the stack guessing page
As you can see above, this route can be any name.
To make this work in Next.js pages we need to use the [name].js format.
Go ahead and create the [name].js file in your pages directory.
This page needs to use the getStaticPaths function, but in our case, we want a blocking fallback to wait for our results.
export async function getStaticPaths() {
  return { paths: [], fallback: 'blocking' };
}
We also want to use the getStaticProps function, which does the actual data loading.
export async function getStaticProps({ params }) {
  const { name } = params;
  const stack = await getStack(name);
  return { props: { stack: stack, name: name } };
}
What we do here is extract the name from the parameters (URL). And call a function called getStack. We'll create this function in a bit.
Then we return the stack and the name to the actual page. The stack will be an array of items.
Creating the getStack function
Let's first go ahead and create this getStack function.
I created a lib folder and placed a getStack.js file inside of it.
Then I defined an array of alphabet letters like so:
const devABC = {
  a: {
    title: 'Angular',
    icon: 'DiAngularSimple',
  },
  b: {
    title: 'Bootstrap',
    icon: 'DiBootstrap',
  },
  // etc
};
And below that start the function export like so:
export default async function getStack(name) {
  // Todo code
}
There are a couple of things we need to do.
- We need to remove all numeric characters and weird characters and lowercase the input.
name = name.toLowerCase().replace(/[^a-z]/gi, '');
- We need only to have unique letters, so remove all duplicates using the
Setmethod
const nameSet = new Set(name);
- We need to map each unique letter and return the letter object we created above for each letter.
const output = [...nameSet].map((abc) => devABC[abc]);
- We need to filter out any undefined values
const output = [...nameSet].map((abc) => devABC[abc]).filter(Boolean);
- We need to return the output.
return output;
Making the complete function look like this:
export default async function getStack(name) {
  name = name.toLowerCase().replace(/[^a-z]/gi, '');
  const nameSet = new Set(name);
  const output = [...nameSet].map((abc) => devABC[abc]).filter(Boolean);
  return output;
}
Head back over to the [name].js file and import this function in the top section of the file.
import getStack from '../lib/getStack';
Rendering the actual page
Now we can work on the actual return of the page.
Let's start by importing the rest of the stuff we need.
import Head from 'next/head';
import * as Devicons from 'react-icons/di';
import Link from 'next/link';
Our page then again can have the stack, and name as properties like so:
export default function Name({ stack, name }) {

}
Let's set up the main render for this page:
export default function Name({ stack, name }) {
  return (
    <div className='flex min-h-screen p-8 bg-gray-100'>
      <Head>
        <title>Find your guilty pleasure dev stack</title>
        <meta
          name='description'
          content='Find your guilty pleasure dev stack based on your name'
        />
        <link rel='icon' href='/favicon.ico' />
      </Head>
      <main className='flex flex-col items-center justify-center w-full h-auto p-8 border-4 border-white rounded-xl'>
        <h1 className='mb-4 text-4xl font-black'>
          Hey <span className='italic text-purple-300'>{name}</span> this is it!
        </h1>
        <p className='mb-4 font-semibold'>Your guilty pleasure stack!</p>
        <div className='p-4 mb-6 bg-gray-200 border-2 border-white shadow-lg rounded-xl'>
          <ul>
            {stack.map((item, index) => (
              // Todo render a item
            ))}
          </ul>
        </div>
        <Link href='/'>
          <a className='italic underline'>Find your own stack</a>
        </Link>
      </main>
    </div>
  );
}
As you can see, I left out the render we are doing for each item.
Each item should show an icon and the name of the tool. As we need to render dynamic icons, I thought it would make more sense to extract this into it's own component like so:
export default function Name({ stack, name }) {
  const DevItem = ({ item }) => {
    const ICON = Devicons[item.icon];
    return (
      <li className='flex items-center text-xl'>
        <ICON className='mr-2 text-4xl' />
        {item.title}
      </li>
    );
  };

    return ()
}
That will dynamically load each icon and render it. We can then go back to our render and add a DevItem for each stack item.
<ul>
    {stack.map((item, index) => (
      <DevItem key={index} item={item} />
    ))}
</ul>
And there you go, we now get the stack rendered for a unique name like seen in the example!
You can also find the complete code on GitHub or view the result here.
Thank you for reading, and let's connect!
Thank you for reading my blog. Feel free to subscribe to my email newsletter and connect on Facebook or Twitter
About the author
I'm a full-stack developer from South Africa 🇿🇦. I love writing about JavaScript, HTML and CSS.
Comments
Join the discussionNo comments yet. Be the first to comment.



