
Getting started with the HTML canvas

I'm a full-stack developer from South Africa 🇿🇦. I love writing about JavaScript, HTML and CSS.
My confession: I've never used canvas before this article.
I just have a cool idea in my head, which needs Canvas, so why not document my explorations using the HTML canvas element.
<canvas> is an HTML element which can be used to draw graphics via JavaScript.
It can do quite a lot of cool things, including;
- Draw shapes
- Animations
- Combine photos
- User drawings
Today, we'll get started by exploring some of it's basic options.
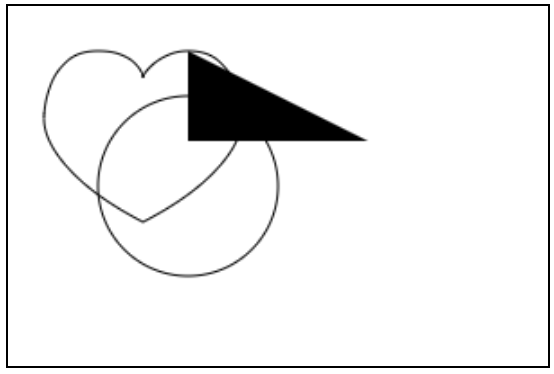
It will look like this:
Creating our first HTML Canvas
To create our first canvas, we don't need to do much:
<canvas id="canvas">
This will create a default canvas element, which is 300x150 pixels. We can set the width and height on a canvas element, or style it via CSS.
It doesn't look like much, since we haven't rendered anything on it.
Creating our first shape on the HTML Canvas
To add our first shape we need to use JavaScript to first get our canvas element.
const canvas = document.getElementById('canvas');
Now we have our actual canvas element, we need to specify it's context:
const ctx = canvas.getContext('2d');
We can also get the 3D Engine, but that's for a later article.
Ok, let's add a square, maybe?
ctx.fillRect(50, 50, 100, 100);
The parameters we are sending are as follows (x, y, width, height).
Cool, so now we see our first rectangle!
Other shapes
There are quite a lot of shapes we can make with the Canvas;
- Rectangles
- Paths
- Arcs
- Curves (Quadratic & Bezier)
With that, we can create any shape. Here are some examples:
Canvas Circle
// Cirlce
ctx.beginPath();
ctx.arc(100, 100, 50, 0, 2 * Math.PI);
ctx.stroke();
The parameters for arc are (x, y, Radius, startingAngle, endAngle)
Canvas Triangle
// Triangle
ctx.beginPath();
ctx.moveTo(200, 75);
ctx.lineTo(100, 75);
ctx.lineTo(100, 25);
ctx.fill();
As for the move argument is accepts the (x, y) coordinates. And the lineTo (x, y) from where ever the moveTo is set.
Canvas Heart
// Hearth
ctx.beginPath();
ctx.moveTo(75, 40);
ctx.bezierCurveTo(75, 37, 70, 25, 50, 25);
ctx.bezierCurveTo(20, 25, 20, 62.5, 20, 62.5);
ctx.bezierCurveTo(20, 80, 40, 102, 75, 120);
ctx.bezierCurveTo(110, 102, 130, 80, 130, 62.5);
ctx.bezierCurveTo(130, 62.5, 130, 25, 100, 25);
ctx.bezierCurveTo(85, 25, 75, 37, 75, 40);
ctx.stroke();
The bezierCurveTo accepts (x of control point 1, y of control point 1, x of control point 2, y of control point 2, x ending, y ending)
Find these on the following Codepen.
Note: We will continue exploring in other articles!
Browser Support
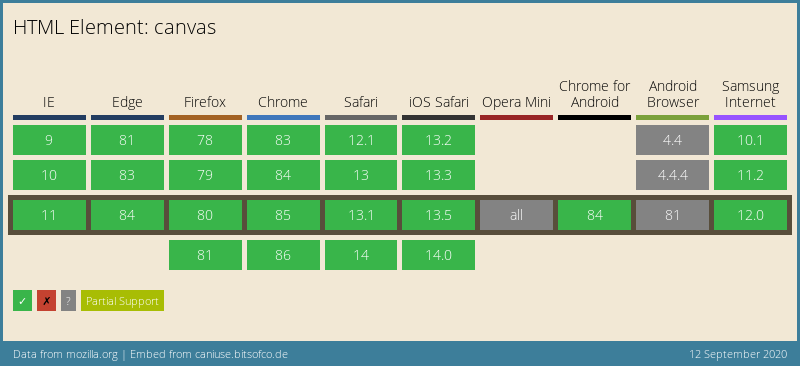
The canvas element is well supported these days and is defiantly a good option if you want to draw vectors on screen.
Thank you for reading, and let's connect!
Thank you for reading my blog. Feel free to subscribe to my email newsletter and connect on Facebook or Twitter



