
Flutter create a search bar for a list view

I'm a full-stack developer from South Africa 🇿🇦. I love writing about JavaScript, HTML and CSS.
In this article, we'll learn how to add a search bar to a list view. This is a common practice as we can have long lists. It can be super helpful to have a search bar on top.
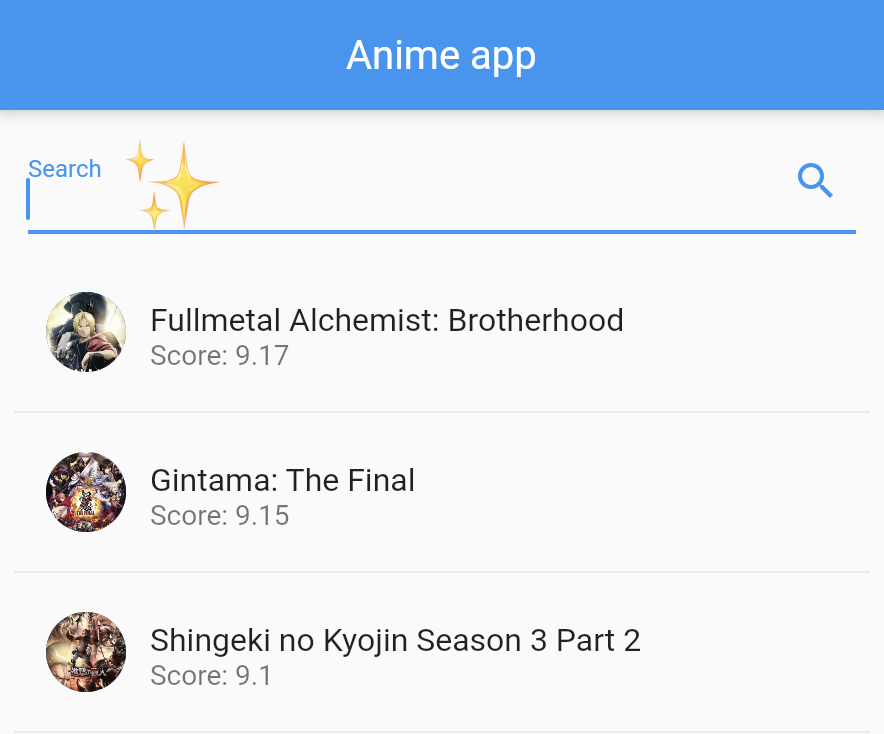
The end result for this article will look like this:

As a starting point, I'm using the Flutter anime app we build before.
This app already has a list view and data assigned to it, so we can focus on adding the search bar.
Adding a search bar in the Flutter UI
Let's wrap our existing list view into a column layout to have the input field above it.
body: Column(
  mainAxisSize: MainAxisSize.max,
  mainAxisAlignment: MainAxisAlignment.start,
  crossAxisAlignment: CrossAxisAlignment.start,
  children: [
    SizedBox(height: 10),
    Padding(
      padding: const EdgeInsets.symmetric(horizontal: 15.0),
      child: TextField(
        onChanged: (value) {
          setState(() {
            searchString = value.toLowerCase();
          });
        },
        decoration: InputDecoration(
            labelText: 'Search',
            suffixIcon: Icon(Icons.search),
        ),
      ),
    ),
    SizedBox(height: 10),
    Expanded(
      child: FutureBuilder(
          // Our existing list code
      ),
    ),
  ],
)
As you can see, I wrapped the body in a column to have multiple children rendered. Next, I've added some sized boxes for space between the search bar. The search bar itself is a text field with an onChanged function. In our case, it will save the value into a searchString variable.
I save the value in lowercase. This makes it more versatile to search with.
Let's also add the search string variable so that part is finished.
String searchString = "";
So by now, if we run our code, we have a search bar above our list. When we type something in this search, it's saved to this search string.
Implementing the search query
Now for a static list, we could choose to have a duplicated array to search from. However, since we are using the future builder, we don't have the data before, so we can't compare it with a search list.
However, we can modify our builder to render items based on the search string conditionally.
Since the state is being changed every time we type a letter, the list is also re-evaluated.
Let's change the return function of the builder.
itemBuilder: (BuildContext context, int index) {
  return snapshot.data![index].title
          .toLowerCase()
          .contains(searchString)
      ? ListTile(
        // List tile widget data
      )
      : Container();
},
separatorBuilder: (BuildContext context, int index) {
  return snapshot.data![index].title
          .toLowerCase()
          .contains(searchString)
      ? Divider()
      : Container();
},
So inside the item builder, we evaluate if that item's title matches our search string by using the contains query. This makes it a partial match, so we can also search for a word in the middle of the title.
The partial match works like this:
return condition ? true return : false return;
If this match returns true, we return a list tile. Else we return an empty container.
Since we used a separator builder, we also need to add this code to the separator builder. Else we would get empty dividers.
And with that, we can now search in our list view.
If you are looking for the complete code example, you can find it in this GitHub repo.
Thank you for reading, and let's connect!
Thank you for reading my blog. Feel free to subscribe to my email newsletter and connect on Facebook or Twitter



