
Easy way to create API documentation in Laravel

I'm a full-stack developer from South Africa 🇿🇦. I love writing about JavaScript, HTML and CSS.
For today's article, I want to illustrate how easy it is to create API documentation in Laravel. We just created our first API, and know the importance of having good documentation.
The goal for today is to have a primary documentation endpoint, we won't add all the details, but I'll show you how to get started with it.
Installing Scribe for Laravel
First of all, we need to install Scribe, the documentation generator we will use for Laravel 8.
composer require --dev knuckleswtf/scribe
Next up, we need to publish the vendor.
php artisan vendor:publish --provider="Knuckles\Scribe\ScribeServiceProvider" --tag=scribe-config
This will create a config file for Scribe that we can potentially use.
Next up is basically the step to generate our initial documentation.
php artisan scribe:generate
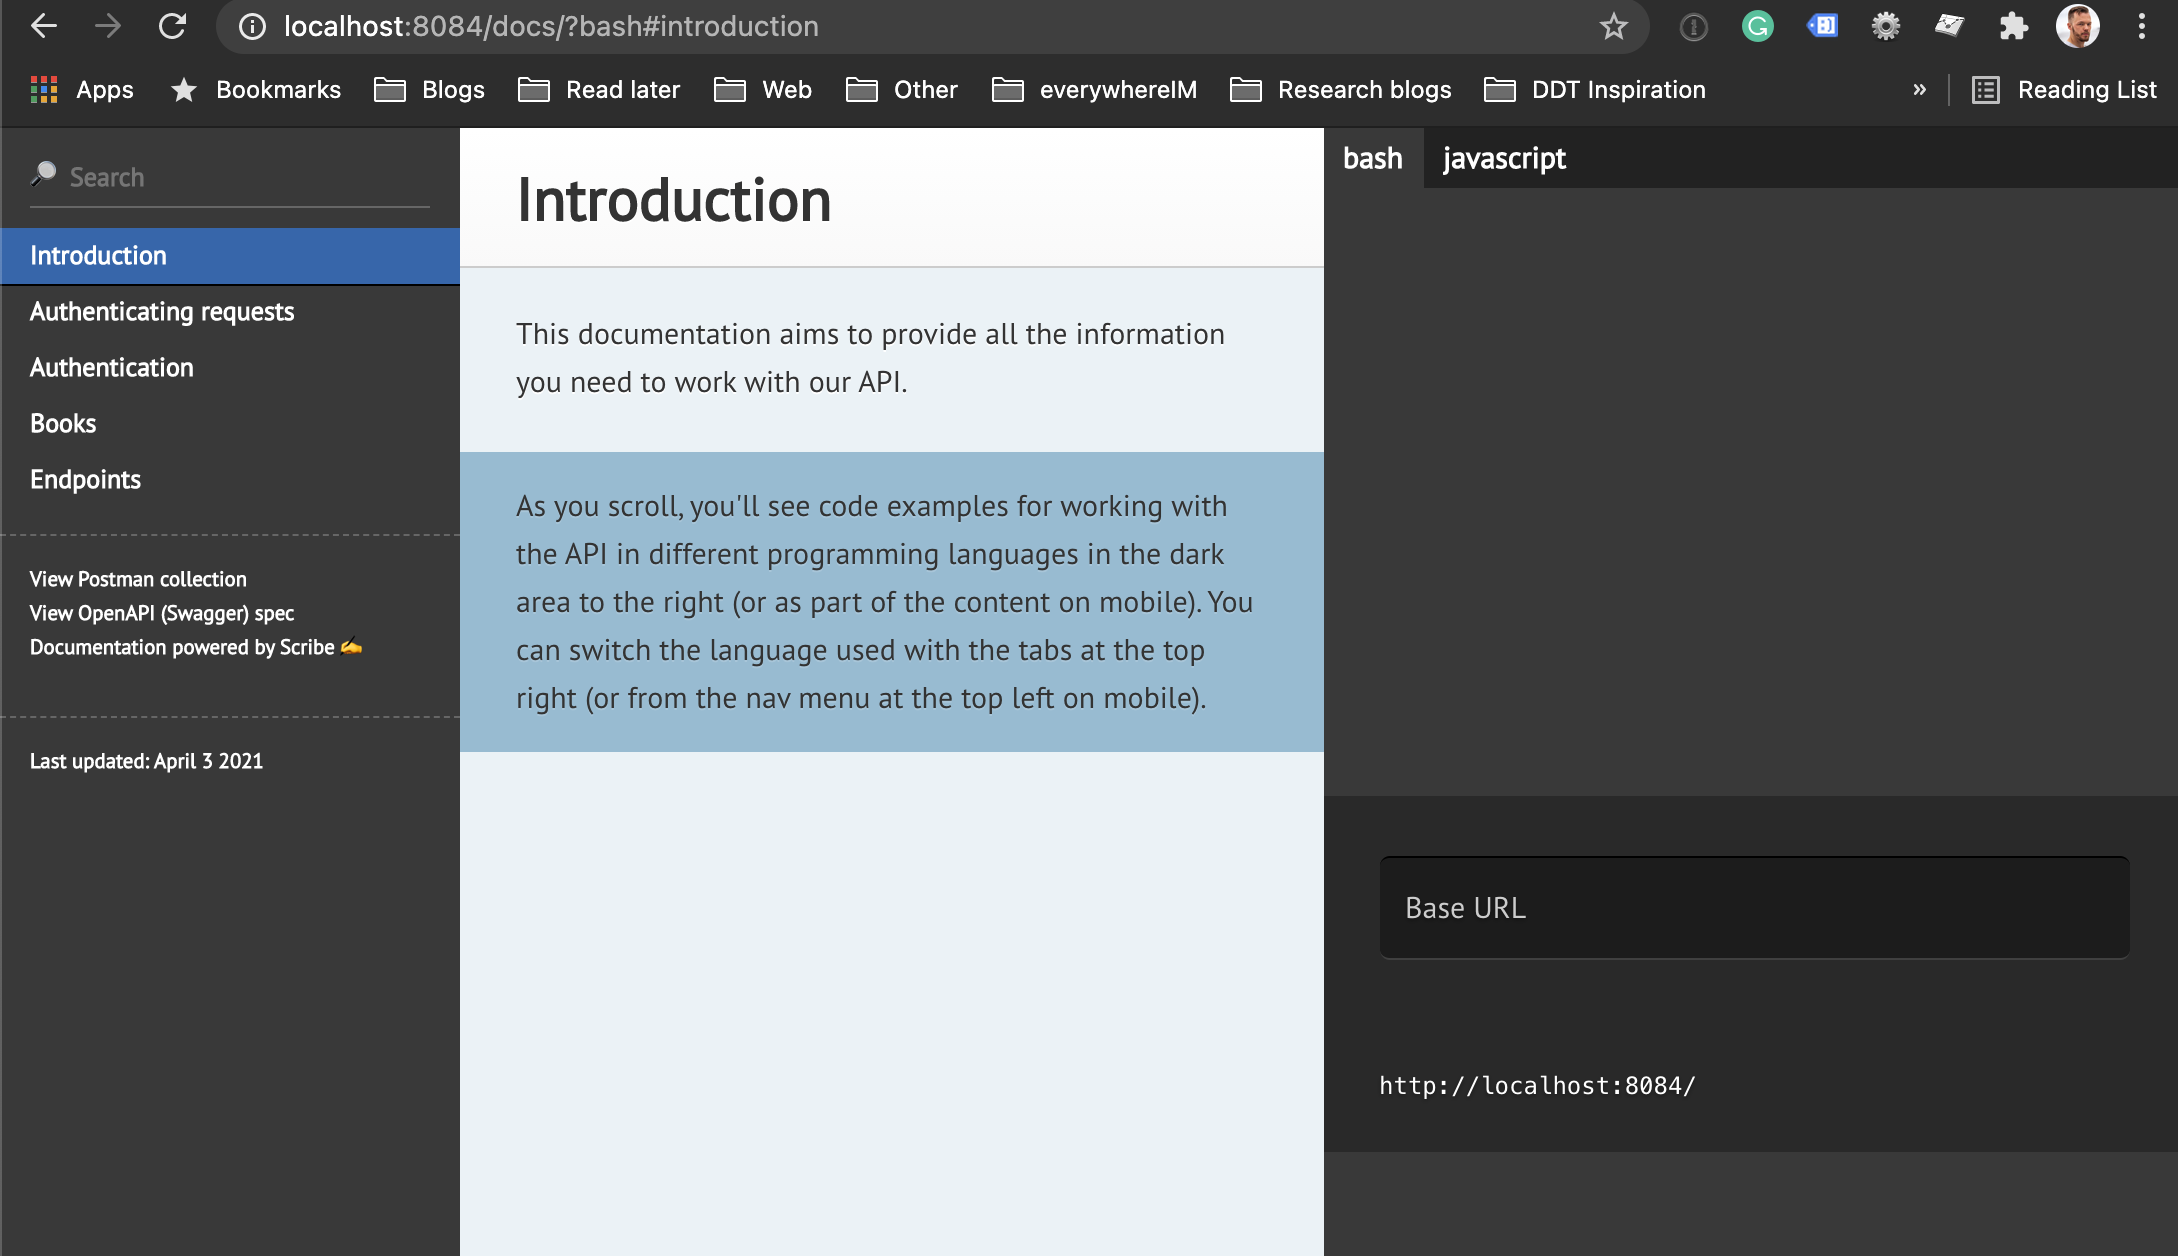
We should now be able to visit our documentation on:
localhost:port/docs/
You should see something similar to this.
Making our documentation better
For now, we didn't add much information. We can use the PHP Doc annotation to add information for each file.
Let's open up the AuthenticationController.php and check how we can make it better.
First of all, above our class annotation, we can add a general piece of information.
/**
 * @group Authentication
 *
 * API endpoints for managing authentication
 */
class AuthController extends Controller
{
    // Functions
}
This will group all functions inside this file, as well as add a short description about it.
Now for the login function, we can add the following doc.
/**
 * Log in the user.
 *
 * @bodyParam   email    string  required    The email of the  user.      Example: testuser@example.com
 * @bodyParam   password    string  required    The password of the  user.   Example: secret
 *
 * @response {
 *  "access_token": "eyJ0eXA...",
 *  "token_type": "Bearer",
 * }
 */
public function login(Request $request)
{
    // Code here
}
That's quite the piece. First, we name the function and state what parameters it's expecting and what the return looks like.
If we now generate our API doc, we should see the following.
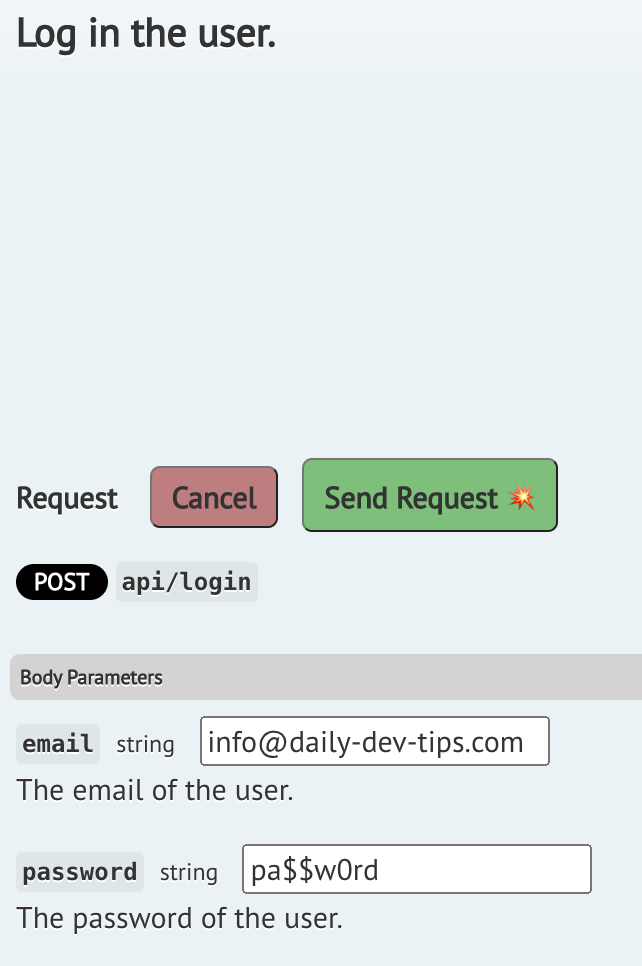
Cool right! It shows exactly what's needed and what response a user can expect.
If you are interested in making your documentation optimal, check out Scribe's documentation on PHP doc.
Thank you for reading, and let's connect!
Thank you for reading my blog. Feel free to subscribe to my email newsletter and connect on Facebook or Twitter



