
CSS Shapes - Triangles

Yesterday we had our first introduction in CSS Shapes and started with the basic shapes.
Today I want to check out a very useful and a bit of an odd shape. The triangle has many ways of building, but most people use the border hack to create them.
Creating triangles in CSS
Let's create a basic down carrot.
<div class="triangle-down"></div>
For the demo purpose, I added some colors to see what actually makes it appear like a triangle.
.triangle-down {
  width: 0;
  height: 0;
  border-left: 50px solid red;
  border-right: 50px solid purple;
  border-top: 100px solid blue;
}
The actual magic part is the border-top. We'll see that's what we'll see, but we are offsetting the left and right by half of it.
In the example, I added a red and purple color.
This will result in the following:
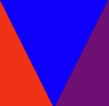
As you can see, the result is looking like a triangle.
To make this perfect, we need to set the sides to transparent.
.triangle-down {
  width: 0;
  height: 0;
  border-left: 50px solid transparent;
  border-right: 50px solid transparent;
  border-top: 100px solid blue;
}
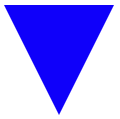
Let's say we want the arrow to point up and not down. We can simply switch the border-top to be border-bottom.
.triangle-up {
  width: 0;
  height: 0;
  border-left: 50px solid transparent;
  border-right: 50px solid transparent;
  border-bottom: 100px solid blue;
}
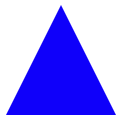
The same can be applied to make left and right arrows:
.triangle-left {
  width: 0;
  height: 0;
  border-top: 50px solid transparent;
  border-left: 100px solid blue;
  border-bottom: 50px solid transparent;
}
.triangle-right {
  width: 0;
  height: 0;
  border-top: 50px solid transparent;
  border-right: 100px solid blue;
  border-bottom: 50px solid transparent;
}
This is basically the same concept, but we switch around by defining the top and bottom and using the left and right as offsets with a color.
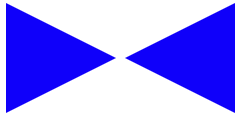
You can even offset triangles to point to a specific corner. For instance point to left bottom:
.triangle-left-bottom {
  width: 0;
  height: 0;
  border-bottom: 100px solid blue;
  border-right: 100px solid transparent;
}
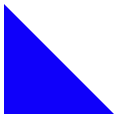
Can you figure out how to create the other corners?
You can always have a play with this Codepen.
Thank you for reading, and let's connect!
Thank you for reading my blog. Feel free to subscribe to my email newsletter and connect on Facebook or Twitter
About the author
I'm a full-stack developer from South Africa 🇿🇦. I love writing about JavaScript, HTML and CSS.
Comments
Join the discussionNo comments yet. Be the first to comment.



