
CSS Shapes - Other shapes

So far we have gone through some basic CSS shapes, and triangles in CSS. Today we'll be focussing on some cool other shapes.
The shapes that will be covered in this article are the following:
Trapezoid in CSS
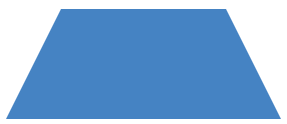
The first shape we'll be looking at today is the Trapezoid. It's basically a warped rectangle. And we can actually create this by leveraging the borders as we've seen with the CSS Triangles.
.trapezoid {
  border-bottom: 100px solid #3e92cc;
  border-left: 50px solid transparent;
  border-right: 50px solid transparent;
  height: 0;
  width: 150px;
}
That will give us the following result:
Parallelogram in CSS
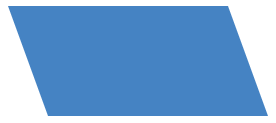
Now onto the parallelogram, which is another rectangle but skewed a specific way, and that's exactly how to create this shape.
.parallelogram {
  width: 200px;
  height: 100px;
  transform: skew(20deg);
  background: #3e92cc;
}
With that, we get the following result.
Hexagon in CSS
Another cool shape we can create is the hexagon. A six-pointed element, and although it sounds easy, it has quite the challenge to it.
For our example, we use a rectangle and use CSS pseudo-elements to add the top and bottom triangles to it.
.hexagon {
  width: 90px;
  height: 50px;
  background: #3e92cc;
  position: relative;
}
.hexagon::before {
  content: '';
  position: absolute;
  top: -25px;
  border-left: 45px solid transparent;
  border-right: 45px solid transparent;
  border-bottom: 25px solid #3e92cc;
}
.hexagon::after {
  content: '';
  position: absolute;
  bottom: -25px;
  border-left: 45px solid transparent;
  border-right: 45px solid transparent;
  border-top: 25px solid #3e92cc;
}
And that will give us this result:

Egg in CSS
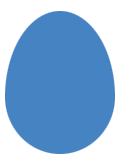
And for one of my favorites, the egg! It's quite simple to create as we use the ellipsis but adjust it a bit.
.egg {
  display: block;
  width: 100px;
  height: 130px;
  background-color: #3e92cc;
  border-radius: 50% 50% 50% 50% / 60% 60% 40% 40%;
}
And we get this cool-looking egg.
Demonstration of CSS Shapes
As usual, you can try these shapes on the following Codepen, try to make some adjustments, and see what happens.
Thank you for reading, and let's connect!
Thank you for reading my blog. Feel free to subscribe to my email newsletter and connect on Facebook or Twitter
About the author
I'm a full-stack developer from South Africa 🇿🇦. I love writing about JavaScript, HTML and CSS.
Comments
Join the discussionNo comments yet. Be the first to comment.



