
Creating segment tabs in Ionic

I'm a full-stack developer from South Africa 🇿🇦. I love writing about JavaScript, HTML and CSS.
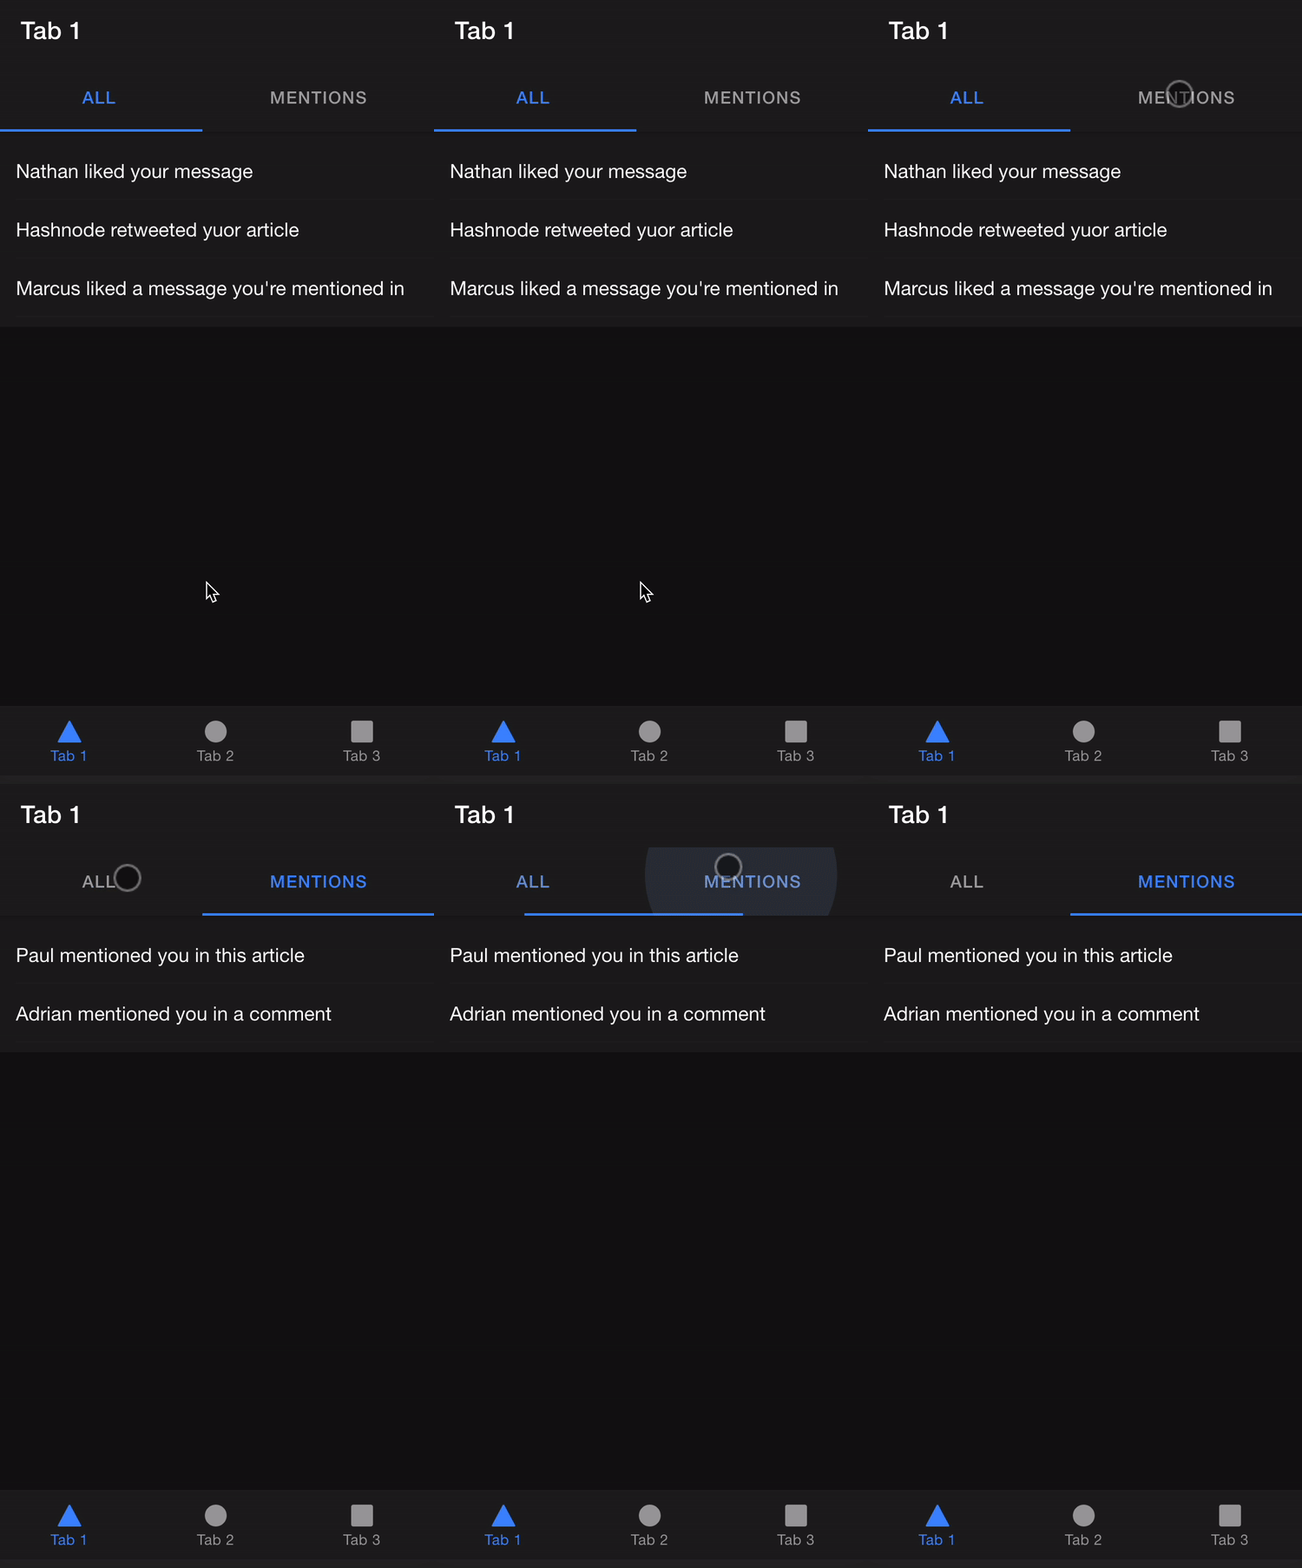
Segments, we see them everywhere. For example, the Twitter app Notification tab has two segments (All/Mentions).
Today I'll be showing you how you can create this in your Ionic app.
It will look like this:
Adding the segment tabs to an Ionic app
Let's start from out Ionic starter again. You can find the code on GitHub.
We will add the segment on the tab1.page.html.
<ion-header [translucent]="true">
  <ion-toolbar>
    <ion-title> Tab 1 </ion-title>
  </ion-toolbar>
  <ion-toolbar>
    <ion-segment [(ngModel)]="type">
      <ion-segment-button value="all">
        <ion-label>All</ion-label>
      </ion-segment-button>
      <ion-segment-button value="mentions">
        <ion-label>Mentions</ion-label>
      </ion-segment-button>
    </ion-segment>
  </ion-toolbar>
</ion-header>
In our header, we add a second toolbar. The second toolbar will show up below the title page and include two segments. These segments are linked to the ngModel (type), with which we'll show the correct content.
For now, we get the following result:
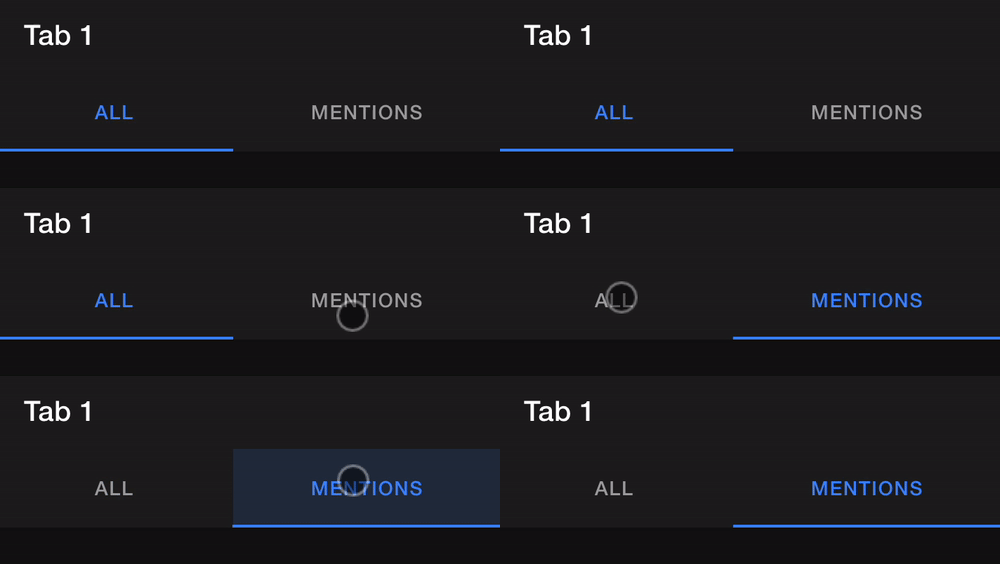
That's pretty cool, but it doesn't do anything yet.
Let's open up the tab1.page.ts and add some technical functionality.
export class Tab1Page {
  type: string = 'all';
}
We set the type variable to "all" initially, with switching between the segments, the type variable will be changed.
Now we can head back to our tab1.page.html and add some content sections.
<ion-content [fullscreen]="true">
  <ng-container [ngSwitch]="type">
    <ion-list *ngSwitchCase="'all'">
      <ion-item>Nathan liked your message</ion-item>
      <ion-item>Hashnode retweeted yuor article</ion-item>
      <ion-item>Marcus liked a message you're mentioned in</ion-item>
    </ion-list>
    <ion-list *ngSwitchCase="'mentions'">
      <ion-item>Paul mentioned you in this article</ion-item>
      <ion-item>Adrian mentioned you in a comment</ion-item>
    </ion-list>
  </ng-container>
</ion-content>
This will switch the type, making use of a container. The container is not rendered, so ideal for making switch cases like this.
Inside we have two ion-lists that show the respective items. And that's it. We now have a segmented page which is super useful to show large datasets.
You can find today's code on GitHub.
Thank you for reading, and let's connect!
Thank you for reading my blog. Feel free to subscribe to my email newsletter and connect on Facebook or Twitter



