
Creating custom entities in medusa

In the previous article, we first looked at creating a custom entity with medusa-extender. This is a super quick way to do it, but something else we can do is create this custom entity directly with medusa.
In this article, I'll show you how to achieve the same effect in medusa itself.
Creating an entity in medusa
First, we have to create a new folder called models in our src directory.
There, create the post.ts file, which will become our new entity.
The file itself will look like this:
import { BeforeInsert, Column, Entity, PrimaryColumn } from "typeorm";
import { BaseEntity} from "@medusajs/medusa";
import { generateEntityId } from "@medusajs/medusa/dist/utils"

@Entity()
export class Post extends BaseEntity {
    @Column({type: 'varchar'})
    name: string | null;

    @BeforeInsert()
    private beforeInsert(): void {
        this.id = generateEntityId(this.id, "post")
    }
}
Here we say it should extend the medusa base entity. (You can also pick SoftDeletableEntity)
And always generate a random ID on creation.
Now we can generate a new migration by running the following command in your terminal.
npx typeorm migration:create -n Post --dir src/migrations
Add the following format for the up and down functions inside the migration file.
public async up(queryRunner: QueryRunner): Promise<void> {
    await queryRunner.query(
        `CREATE TABLE IF NOT EXISTS "post" (
            "id" character varying NOT NULL,
            "name" character varying NOT NULL,
            "created_at" TIMESTAMP WITH TIME ZONE NOT NULL DEFAULT now(),
            "updated_at" TIMESTAMP WITH TIME ZONE NOT NULL DEFAULT now()
        )`
    )
    await queryRunner.createPrimaryKey("post", ["id"])
}

public async down(queryRunner: QueryRunner): Promise<void> {
    await queryRunner.dropTable("post", true)
}
This is a default TypeORM migration, and you can find a lot of information about these commands on their website.
Next up, we'll have to run the migration.
Before we do that, ensure you build the latest version with: npm run build and then execute the migrations.
medusa migrations run
It should say that the new migration has been executed, and you should be able to see it in your database now.
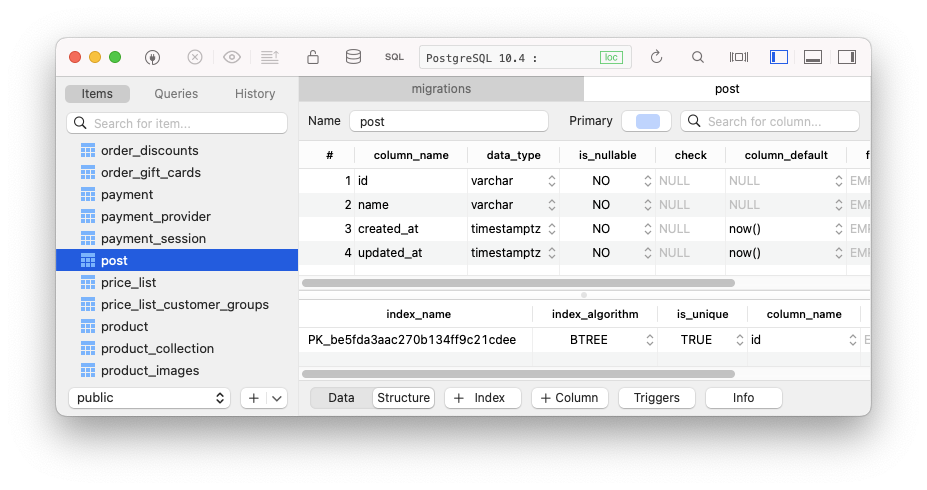
As you can see, it's super similar to how it works with medusa-extender. And it all comes down to preference.
Thank you for reading, and let's connect!
Thank you for reading my blog. Feel free to subscribe to my email newsletter and connect on Facebook or Twitter
About the author
I'm a full-stack developer from South Africa 🇿🇦. I love writing about JavaScript, HTML and CSS.
Comments
Join the discussionNo comments yet. Be the first to comment.



