
Creating a subscriber in medusa

Another cool feature in medusa is that we can create custom subscribers. Subscribers are actions that are triggered by certain events.
Check out this list with all events available.
In our case, we want to subscribe to the product.created event so we can eventually request external information for each product created.
Installing Redis
The subscriber fires based on Redis, so to make this work, you'll have to set up Redis for medusa.
First, install Redis on your machine. You can follow the documentation on the Redis website.
Once installed, open up your medusa server project and find the medusa-config.js file.
You will see the following line, which defines the Redis URL. You can set it to another value via the .env file. (However, in most cases, this default will work).
const REDIS_URL = process.env.REDIS_URL || 'redis://localhost:6379';
Then a bit lower, you need to enable Redis in the config.
module.exports = {
  projectConfig: {
    // Turn the line below on
    redis_url: REDIS_URL,
    database_database: './medusa-db.sql',
    database_type: 'sqlite',
    store_cors: STORE_CORS,
    admin_cors: ADMIN_CORS,
  },
  plugins,
};
And that's it. You now have Redis enabled.
Creating a custom subscriber in medusa
Now that we have Redis installed let's create our custom subscribers.
In your medusa server project, find the src/subscribers folder and, in there, create a new file called: productNotifier.js.
I'm using this naming as I want to be a notifier for new products.
The setup for each subscriber looks like this.
class ProductNotifierSubscriber {
  constructor({ eventBusService }) {
    eventBusService.subscribe('product.created', this.handleProduct);
  }

  handleProduct = async (data) => {
    console.log('New product: ' + data.id);
  };
}

export default ProductNotifierSubscriber;
In the example above, we subscribe to the product.created event, which is triggered each time a product is created.
We can tell medusa to execute our own handleProduct function.
Inside this function, we log the product for now.
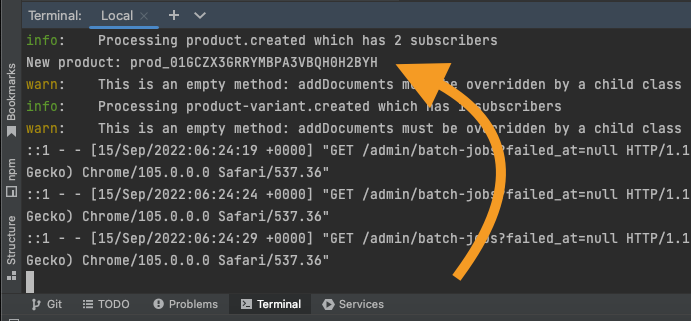
Go ahead and spool up your server. Now visit the admin portal and add a new product. You should see the server log showing this log now.
Thank you for reading, and let's connect!
Thank you for reading my blog. Feel free to subscribe to my email newsletter and connect on Facebook or Twitter
About the author
I'm a full-stack developer from South Africa 🇿🇦. I love writing about JavaScript, HTML and CSS.
Comments
Join the discussionNo comments yet. Be the first to comment.



