
Creating a One-on-One Interactive Video Meeting Web Tool Using Agora

I'm a full-stack developer from South Africa 🇿🇦. I love writing about JavaScript, HTML and CSS.
This article is originally posted on the agora blog.
Many traditional human interactions have moved online. And as the technology to enable this move becomes ubiquitous, the transition seems inevitable for many industries. Over the course of the past year, we have seen many companies and developers launch digital solutions that can replace traditional human interaction. And building live video streaming and chat web apps might now be easier than you realize.
In this tutorial, I’ll show you how to create your own one-on-one video meeting tool. By the end of it, you will see how easy it is.
Some potential use-cases for such a tool:
- Patient-doctor video call
- Mentor-mentee video call
- Client- contractor video call
- One-on-one consultant video call
We will be using Agora to connect two people so they can have a video conference. We will be using vanilla JavaScript to create this project. The cool part is that you can type along and create your own version!
The end result will look like this demo:

Prerequisites
For this project, you will need an Agora account, which can be created following this guide. You will need a basic knowledge of JavaScript and HTML. But don’t worry — I will guide you through this process.
For this tutorial to work, we will be using the Visual Studio Code live server plug-in.
Project Setup
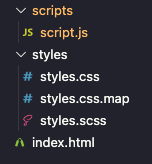
For this project, we will need to create a folder on our computer. Let’s call this folder agora-demo.
After you create this project structure, open the folder in Visual Studio Code. The project structure in VSCode will look like this:
This will be a plain JavaScript-powered tutorial that doesn’t include any frameworks. We will be using a SASS compiler to convert an SCSS file into a CSS file.
We also will be using Live Server to start our project.
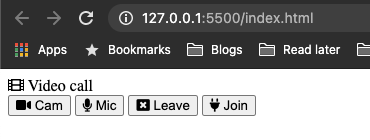
Once you have Live Server running, we can view our project on 127.0.0.1:5500/index.html.
First, let’s get started with Agora. You can follow the documentation on how to set up your account:
Building a One-on-One Video Conferencing Tool
Let’s head back to Visual Studio so we can start building our tool.
Note: The demo will provide only one channel. While Agora supports generating as many channels as you need, in this guide we won’t provide a UI so users won’t be able to create their own channels.
HTML Structure
We will start by setting up our HTML in index.html. In our case, we are creating a very basic look, where the user will see a screen with the remote’s user stream in the center. Their own stream will be in the right-hand corner, with some controls at the bottom.
<!DOCTYPE html>
<html>
  <head>
    <meta charset="UTF-8" />
    <meta name="viewport" content="width=device-width, initial-scale=1.0" />
    <title>Video Call</title>
    <script
      src="https://kit.fontawesome.com/c8500fcdd6.js"
      crossorigin="anonymous"
    ></script>
    <link href="./styles/styles.css" rel="stylesheet" />
  </head>
  <body>
    <div class="container">
      <header><i class="fas fa-film"></i> Video call</header>

      <section class="holder holder--video">
        <div id="remote" class="holder--video-remote waiting"></div>
        <div id="me" class="holder--video-me"></div>
      </section>
      <section class="holder holder--options">
        <button class="holder--options-option" id="btnCam">
          <i class="fas fa-video"></i>
          Cam
        </button>
        <button class="holder--options-option" id="btnMic">
          <i class="fas fa-microphone"></i>
          Mic
        </button>
        <button class="holder--options-option hidden" id="btnStop">
          <i class="fas fa-window-close"></i> Leave
        </button>
        <button class="holder--options-option" id="btnStart">
          <i class="fas fa-plug"></i> Join
        </button>
      </section>
    </div>
    <script src="https://download.agora.io/sdk/release/AgoraRTC_N-4.2.1.js"></script>
    <script src="./scripts/script.js"></script>
  </body>
</html>
We also used a CDN to load Fontawesome and Agora into our project. And we linked to our CSS stylesheet and our JavaScript file. That concludes the HTML part. We should now have something that looks like this:
That doesn’t look very appealing, does it?
In the next step, we will be adding some styling to make this look better.
Styling the Application
The first thing we’ll do is reset all the paddings and margins.
* {
  margin: 0;
  padding: 0;
  font-family: Roboto, "Helvetica Neue", Arial, sans-serif;
  -webkit-box-sizing: border-box;
          box-sizing: border-box;
}
Let’s make the body act as a grid so we can center our application in the middle of the page.
body {
  display: -ms-grid;
  display: grid;
  place-items: center;
  min-height: 100vh;
  width: 100%;
  background: #f15bb51f;
}
Then we can give the container some basic flex styling and give the header some padding so it’s not so dense.
.container {
  display: flex;
  width: 100%;
  max-width: 800px;
  margin: 0 auto;
  flex-direction: column;
  padding: 1rem;
  header {
    margin-bottom: 1rem;
    font-size: 2rem;
    font-weight: bold;
    i {
      color: #00f5d4;
    }
  }
}
We also will need a hidden class to hide the start and stop buttons.
.hidden {
  display: none !important;
}
Then we can style the two holders (one for video and one for the buttons).
The video styling looks like this:
.holder {
  border-radius: 15px;
  background: #00bbf9;
  width: 100%;
  min-height: 50px;
  border: 1px solid #333;

  &--video {
    position: relative;
    overflow: hidden;
    margin-bottom: 0.5rem;
    min-height: 500px;
    color: #fee440;
    &-me {
      position: absolute;
      right: 0.5rem;
      top: 0.5rem;
      width: 150px;
      height: 150px;
      overflow: hidden;
      border: 3px solid #fff;
      border-radius: 15px;
      background: #efefef;
      display: flex;
      justify-content: center;
      align-items: center;
      font-style: italic;
      &.connecting {
        &:before {
          content: "Connecting...";
        }
      }
    }
    &-remote {
      position: relative;
      display: flex;
      align-items: center;
      justify-content: center;
      min-height: 500px;
      &.waiting {
        &:before {
          content: "Waiting...";
        }
      }
      video {
        position: relative !important;
        display: block;
        transform: rotateY(180deg);
        object-fit: cover;
      }
    }
  }
}
This styling makes sure that the video has some space and that the video elements placed inside it are positioned accordingly.
You might have spotted the :before pseudo-element. We use those to give feedback to the user about what’s happening.
Then the button bar needs the following styling:
.holder {
  &--options {
    display: flex;
    justify-content: space-around;
    align-items: center;
    padding: 1rem 0;
    &-option {
      display: flex;
      flex-direction: column;
      align-items: center;
      background-color: none;
      outline: none;
      border: 0px;
      background: none;
      color: #fff;
      i {
        background: #fff;
        border-radius: 50%;
        margin-bottom: 0.5rem;
        font-size: 1.5rem;
        width: 64px;
        height: 64px;
        display: flex;
        align-items: center;
        justify-content: center;
        color: #555;
        box-shadow: 0 25px 50px -12px rgba(0, 0, 0, 0.25);
      }
      &.active {
        i {
          color: #00f5d4;
        }
      }
    }
  }
}
This gives the buttons a nice appeal by using the box-shadow and giving them some space. We also add an active class to showcase which button is active.
Our application should look like this:
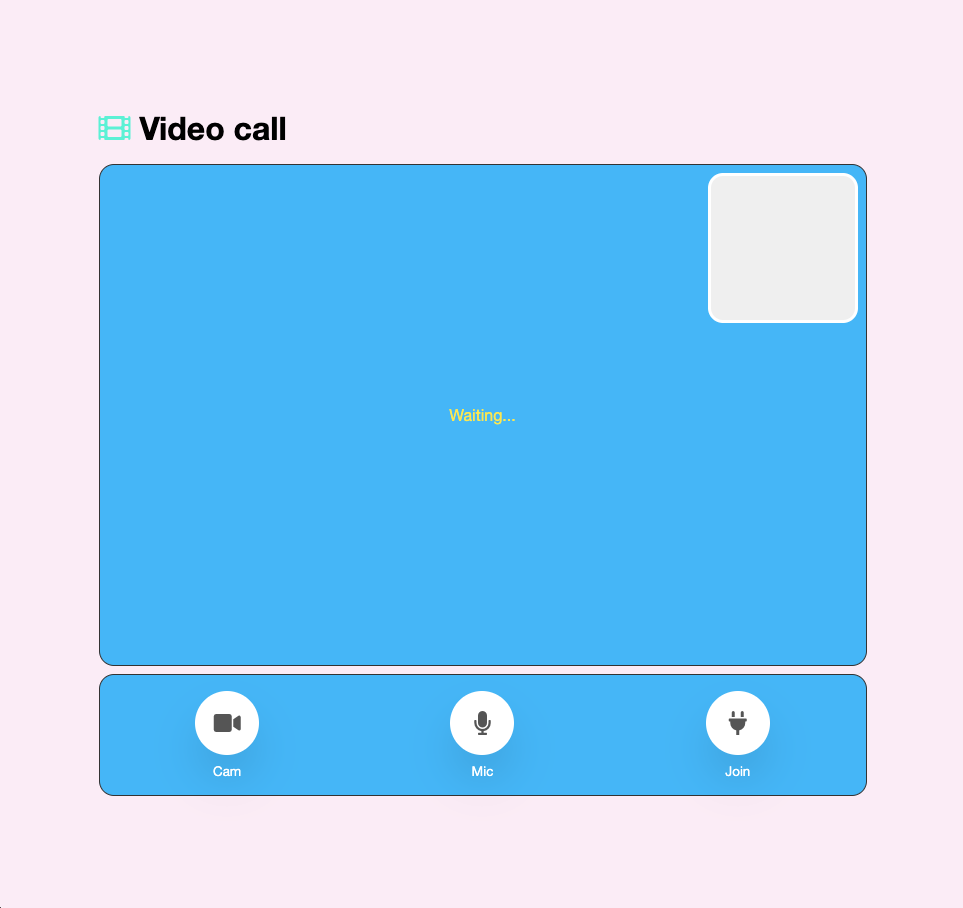
OK, it’s beginning to look like a meeting tool. But it won’t really do anything yet.
Connecting to Agora
Let’s connect to Agora. For this, we need to perform a couple of steps in our script.js file.
First, we will create some variables. We will need some options to hold our appID and token. We will also add our channel here.
const options = {
  appId: "{APPID}",
  channel: "demo",
  token: "{TOKEN}",
};
Another variable will hold the users’ own local streams.
let rtc = {
  client: null,
  localAudioTrack: null,
  localVideoTrack: null,
};
Then let’s add all of the front-end elements we want to access at one point.
const btnCam = document.getElementById("btnCam");
const btnMic = document.getElementById("btnMic");
const btnStart = document.getElementById("btnStart");
const btnStop = document.getElementById("btnStop");
const me = document.getElementById("me");
const remote = document.getElementById("remote");
The next step is to create a join function that will connect us to Agora.
const join = async () => {
  rtc.client = AgoraRTC.createClient({ mode: "rtc", codec: "vp8" });
  return await rtc.client.join(
    options.appId,
    options.channel,
    options.token,
    null
  );
};
Creating Our Video Conferencing
Now that we have Agora set up, let’s make this app work and connect our buttons so that we can start having that video chat!
The first button we want to connect to is the join button.
btnStart.addEventListener("click", () => {
  startBasicCall();
});
When we click this button it should run the startBasicCall function.
This function will make sure we call the join function, start our video and audio, and subscribe to the stream.
async function startBasicCall() {
  join().then(() => {
    startVideo();
    startAudio();

    rtc.client.on("user-published", async (user, mediaType) => {
      await rtc.client.subscribe(user, mediaType);
      remote.classList.remove("waiting");

      if (mediaType === "video") {
        const remoteVideoTrack = user.videoTrack;
        remoteVideoTrack.play("remote");
      }

      if (mediaType === "audio") {
        const remoteAudioTrack = user.audioTrack;
        remoteAudioTrack.play();
      }
    });
  });
  btnStop.classList.remove("hidden");
  btnStart.classList.add("hidden");
}
As you can see, we call the join function, and on the callback, we call the start video and audio functions. Then we connect to the stream to wait for the other user to connect. If they connect, we update the specific stream to start receiving.
The remoteVideoTrack.play() takes the argument of remote, which references the ID of the div it should render on.
The last part is that we hide the join button and show the leave button.
Now, let’s create the startVideo function.
const startVideo = async () => {
  me.classList.add("connecting");
  rtc.localVideoTrack = await AgoraRTC.createCameraVideoTrack();
  rtc.client.publish(rtc.localVideoTrack);
  me.classList.remove("connecting");
  rtc.localVideoTrack.play("me");
  btnCam.classList.add("active");
};
The first step here is that we add the connecting class, This will show the user we are doing something. Then we set the rtc variable to update the localVideoTrack with an Agora connected video track. Then we publish this track and remove the connecting class.
With the rtc.localVideoTrack.play(“me”); we tell the div with ID “me” to play this user’s local stream. And we finish by adding the active class to our camera button.
For the startAudio function, we do the same thing, but we use the AgoraRTC.createMicrophoneAudioTrack method.
const startAudio = async () => {
  rtc.localAudioTrack = await AgoraRTC.createMicrophoneAudioTrack();
  rtc.client.publish(rtc.localAudioTrack);
  btnMic.classList.add("active");
};
We also want to be able to stop the stream, so let’s connect to our stop button.
btnStop.addEventListener("click", () => {
  leave();
});
The leave function will look like this:
const leave = () => {
  stopVideo();
  stopAudio();
  rtc.client.leave();
  btnStop.classList.add("hidden");
  btnStart.classList.remove("hidden");
};
This will call the stop video and audio function, and leave the channel. We also switch out the leave button with the join button.
Let’s create these stop functions.
const stopAudio = () => {
  rtc.localAudioTrack.close();
  rtc.client.unpublish(rtc.localAudioTrack);
  btnMic.classList.remove("active");
};
We close the local audio connection and unpublish it for the other receiver. We then remove the active class from our button.
The same goes for the video.
const stopVideo = () => {
  rtc.localVideoTrack.close();
  rtc.client.unpublish(rtc.localVideoTrack);
  btnCam.classList.remove("active");
};
In this case, we stopped the whole stream. But what if we only want to disconnect our video or audio temporarily?
btnCam.addEventListener("click", () => {
  btnCam.classList.contains("active") ? stopVideo() : startVideo();
});
btnMic.addEventListener("click", () => {
  btnMic.classList.contains("active") ? stopAudio() : startAudio();
});
Based on the active class for either the audio or the video, we will call the respective start or stop functions.
Making Sure It’s a One-on-One Call
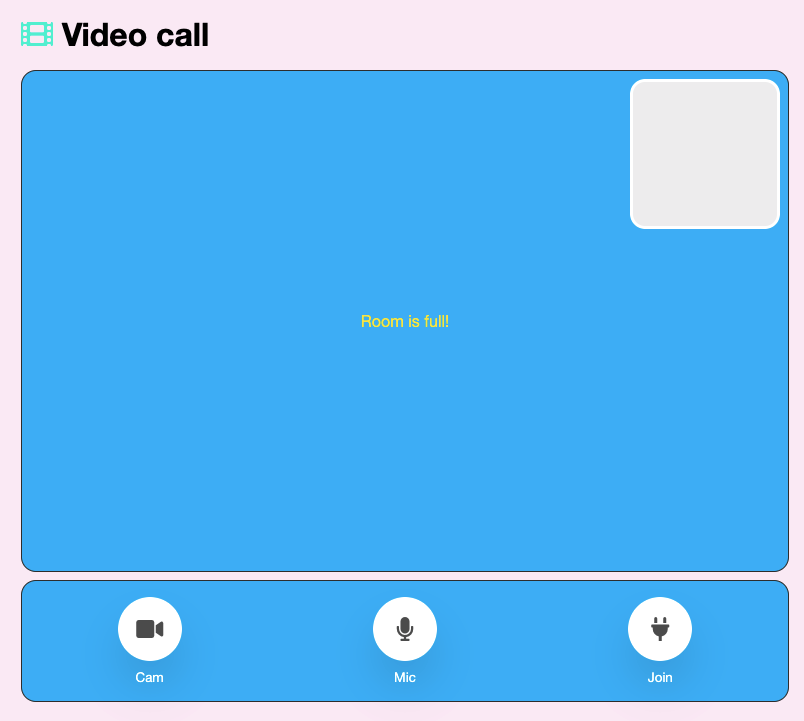
Since we want to make sure that the call is one-on-one and that no other people can join our channel, let’s add some checks using Agora RTC.
Once a person joins this channel, we will check the number of users the client has. If this number is greater than 1, it should be invalid and the user trying should be removed.
Let’s modify the user-published callback:
rtc.client.on("user-published", async (user, mediaType) => {
  if (rtc.client._users.length > 1) {
    roomFull();
  }
  // Rest of the code
});
The roomFull function will handle all the logic for us:
const roomFull = () => {
  leave();
  remote.classList.add("full");
};
This will call the leave function we made before and add a full class to the remote user div.
Now we just need to add some styling to this div:
.holder - video-remote.full:before {
  content: "Room is full!";
}
You can find this demo code on GitHub.
Testing
To test the application, you can download the files from GitHub. Make sure you open the script.js file and add your client details. Then you can open the index.html file in one browser tab and duplicate it in another tab.
You should be able to see yourself twice now. It’s best to mute the microphone since it can echo.
Conclusion
And that’s it — we now have an interactive meeting tool using Agora and vanilla JavaScript!
Thanks to Agora, building such an interactive meeting tool is easier than ever. I’m challenging you to think of other ways to use Agora and come up with your own video solution.
Thank you for reading, and let's connect!
Thank you for reading my blog. Feel free to subscribe to my email newsletter and connect on Facebook or Twitter


