
Configure Tailwind JIT for a node express app

In this article, we will be adding the amazing Tailwind JIT feature to a Node Express app.
We'll focus on the complete setup from A-Z, but if you want more details on a Node express setup, check out my previous article on a basic node express app.
Setting up the node express project
Let's start with step one, creating the project and adding all the dependencies.
I'll be using the terminal for these commands, but feel free to create them by hand.
First, let's create a folder and navigate to this folder.
mkdir node-express-tailwind && cd node-express-tailwind
Once we are inside this folder, let's use npm to initialize a new project.
npm init -y
While we are at it, let's add the dependencies we need:
npm i express tailwindcss
We'll also need the postcss CLI globally installed:
npm install -g postcss-cli
Basic express application
Now let's go ahead and create the basic express application that can serve an HTML file.
Create a file called server.js inside this server place the following code:
const express = require('express');

const port = 8000;
const app = express();

app.use(express.static('public'));

app.listen(port, console.log(`Server started on ${port}`));
As you can see, we defined our public folder, so go ahead and create a folder called public at the root of your project.
Create an index.html file inside and put some basic HTML inside to test it works.
<!DOCTYPE html>
<html lang="en">
  <head>
    <meta charset="UTF-8" />
    <meta http-equiv="X-UA-Compatible" content="IE=edge" />
    <meta name="viewport" content="width=device-width, initial-scale=1.0" />
    <title>Express website</title>
  </head>
  <body>
    <h1>Hello world! 👋</h1>
  </body>
</html>
Now let's modify our package.json so it will run this script on start.
"scripts": {
    "start": "node server"
},
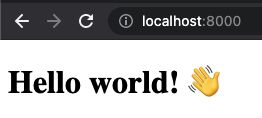
Then in your terminal run, npm start and your website should spool up.
Visit http://localhost:8000 to view your website.
Adding Tailwind to the mix
Now it's time for the fun part, adding Tailwind to the mix.
We'll start with the basics and move to JIT in a bit. Since we already installed Tailwind as a dependency, we can initialize a Tailwind config file.
npx tailwindcss init
This will create a basic tailwind.config.js file.
Next, head over to your public folder and create a folder called styles. Inside that folder, create a file called tailwind.css.
@tailwind base;
@tailwind components;
@tailwind utilities;
Now we need a way to compile this CSS into a usable file. For this, we need PostCSS.
Create a file called postcss.config.js in your root project.
module.exports = {
  plugins: [require('tailwindcss'), require('autoprefixer')],
};
And lastly, we need a way to run a compile command.
Open your package.json and add the following script:
"scripts": {
    "tailwind:css": "postcss public/styles/tailwind.css -o public/styles/style.css",
    "start": "npm run tailwind:css && node server"
},
Now, if we run our npm start command, we will first run the tailwind command. This will compile the tailwind css into a style.css file.
We can then go ahead and use this in our HTML file:
<head>
  <!-- Other stuff -->
  <link rel="stylesheet" href="styles/style.css" />
</head>
Let's also add some basic HTML, to see if Tailwind is loading:
<div class="flex justify-center min-h-screen items-center">
  <div class="w-1/4 p-4">
    <div class="relative pb-[200%]">
      <img
        class="absolute h-full w-full object-cover rounded-lg shadow-md"
        src="https://m.media-amazon.com/images/M/MV5BYzE5MjY1ZDgtMTkyNC00MTMyLThhMjAtZGI5OTE1NzFlZGJjXkEyXkFqcGdeQXVyNjU0OTQ0OTY@._V1_FMjpg_UX1000_.jpg"
      />
    </div>
    <div class="px-4 -mt-8 relative z-10">
      <div class="bg-white p-6 shadow-xl rounded-lg">
        <h2>Deadpool</h2>
      </div>
    </div>
  </div>
</div>
You might have spotted. I'm using some JIT code right there.
The part that states pb-[200%] is JIT code to compile to:
padding-bottom: 200%'
But that won't work right now. However, the rest of the code will compile and give us a basic Tailwind card!

Enable Tailwind JIT compiler in a Node express app
So how do we make sure this JIT compiler works?
Head over to your tailwind.config.js file and change/add the following rules:
module.exports = {
  mode: 'jit',
  purge: ['./public/*.html'],
};
Wait, that's it?
YEP!
Refresh your website and be amazed:

And just like Deadpool, we absolutely love how easy it is to get a basic Node express app with Tailwind JIT setup!
You can find the full code example on the following GitHub repo.
Thank you for reading, and let's connect!
Thank you for reading my blog. Feel free to subscribe to my email newsletter and connect on Facebook or Twitter
About the author
I'm a full-stack developer from South Africa 🇿🇦. I love writing about JavaScript, HTML and CSS.
Comments
Join the discussionNo comments yet. Be the first to comment.



