
Checkboxify your images with JavaScript ✅

I'm a full-stack developer from South Africa 🇿🇦. I love writing about JavaScript, HTML and CSS.
Lately, we have been on a journey with Canvas and have learned the following elements to it:
- Getting started with the HTML canvas
- Vanilla JavaScript save canvas as an image
- Vanilla JavaScript colouring our canvas elements 🌈
- Vanilla JavaScript images in canvas
- Vanilla JavaScript canvas images to black and white
Today, we are doing something indirectly using canvas, and this has been something that's been on my mind for a long time!
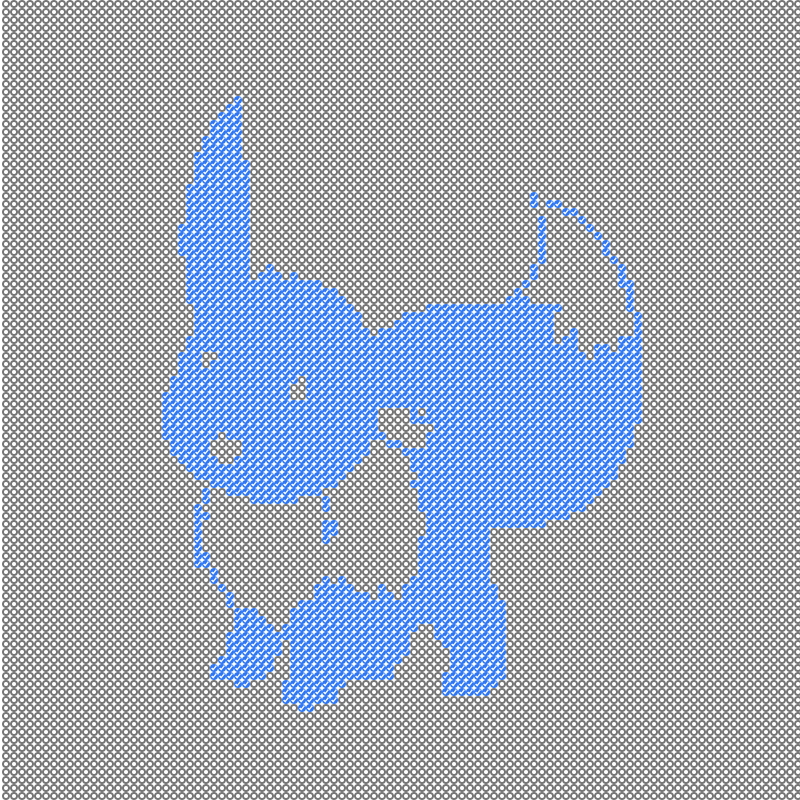
We are creating checkbox art! ✅
I don't know if this was an official art-form, but now it is.
The result will look like this:
HTML Structure
As for our HTML, we need our sample image, a canvas to use and out output div.
<img src="https://cdn.hashnode.com/res/hashnode/image/upload/v1600097347472/FaJTB7UrN.jpeg" id="eeveelutions" />
<canvas id="canvas" width="100" height="100"></canvas>
<div id="output"></div>
In this case the image is 200x200 The canvas is 100x100 and the output will become 400x400.
CSS Styling
Because we are using checkboxes to style, I am floating them to make them snap to each other.
And using <br /> to create a new row.
The br will actually act as a clear for the float.
body {
  display: flex;
  align-items: center;
  justify-content: center;
  height: 100vh;
  margin: 0;
  padding: 0;
}
canvas {
  opacity: 0;
}
input {
  width: 4px;
  height: 4px;
  margin: 0;
  padding: 0;
  float: left;
}
br {
  clear: both;
}
#output {
  width: 400px;
  line-height: 0px;
}
Our canvas, we are hiding by setting the opacity to 0.
JavaScript checkboxify your images
First let's define all our variables.
const img = document.getElementById("eeveelutions");
const canvas = document.getElementById("canvas");
const ctx = canvas.getContext("2d");
const output = document.getElementById("output");
let loaded = 0;
Now we need to listen to our image load before we act on it.
img.onload = function () {
  loaded++;
    // Do stuff
};
We count when the image gets loaded because it will fire twice, the actual load, and once it gets drawn on canvas.
Next up, we can add the image to the canvas
ctx.drawImage(img, 0, 0, 100, 100);
The parameters of this are: (source, x, y, width, height)
Ok, so we now have our canvas, and the image is drawn on it. We must then check if it's the second load and start doing some magic inside that load.
if (loaded > 1) {
    // The second draw on the canvas
}
We can then get the imageData from the canvas. (x, y, width, height)
const imgData = ctx.getImageData(0, 0, canvas.width, canvas.height);
I'll now show you the rest of the function
let j = 0;
for (i = 0; i < imgData.data.length; i += 4) {
  let count = imgData.data[i] + imgData.data[i + 1] + imgData.data[i + 2];

  let _break = document.createElement("br");
  let checkbox = document.createElement("INPUT");
  checkbox.setAttribute("type", "checkbox");
  checkbox.checked = true;
  if (count > 383) checkbox.checked = false;

  output.appendChild(checkbox);
  j++;
  if (j === 100) {
    j = 0;
    output.appendChild(_break);
  }
}
We are using the j parameter to count the rows, so every 100 lines are 1 row, so we need to add a <br /> element.
The main loop only loops over every four elements, since the imageData API gives us rgba values for each pixel, so four values to define 1 pixel.
Then we count the colours of our rgba pixel by adding the first three (r g b).
And check if this pixel is a black or a white pixel by checking if it's bigger then 383 (half of 255+255+255).
Then we create a checkbox, and if our pixel is black, we make it checked.
Last we add our checkbox to the output div, and if needed, add our row break.
There you go, have a play around on this Codepen.
Browser Support
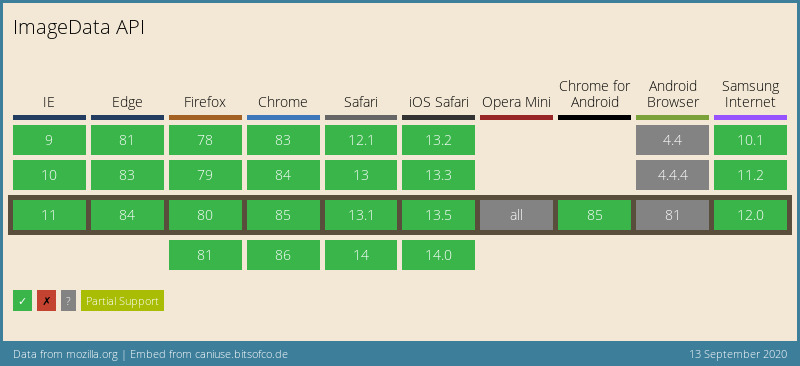
The imageData API, as well as canvas, have very good support!
Thank you for reading, and let's connect!
Thank you for reading my blog. Feel free to subscribe to my email newsletter and connect on Facebook or Twitter



