
Adding Typesense search to an Astro static generated website
I'm a full-stack developer from South Africa 🇿🇦. I love writing about JavaScript, HTML and CSS.
In today's article, we will try to solve a problem that most static site generators have, search capabilities.
As these sites don't come with a backend that can handle any interactions, it's very hard to add a search mechanism to these websites.
And that's precisely where Typesense comes in! Typesense is an open-source search engine that is blazingly fast! Not only is it easy to get started with, but it also comes with unique features like:
- Typo Tolerance (Made a typo, don't worry Typesense will still find what you're looking for)
- Cloud-hosted solution (So you don't have to fixate on getting it set up)
- Multiple indexes (So you can split out results)
- And much more amazing features
For this article, we'll look into the following topics:
- Setting up Typesense cloud
- Creating a schema in Typesense
- A searchable JSON index in Astro
- Populating the search database with Astro static posts
- Creating the search interface in Astro
- Setting a post-build command to run every build
Let's get started right away.
Setting up Typesense cloud
Typesense offers many hosting ways, but using their unique cloud hosting solution is the easiest way to get started with it.
Head over to the Typesense cloud and log in with GitHub.
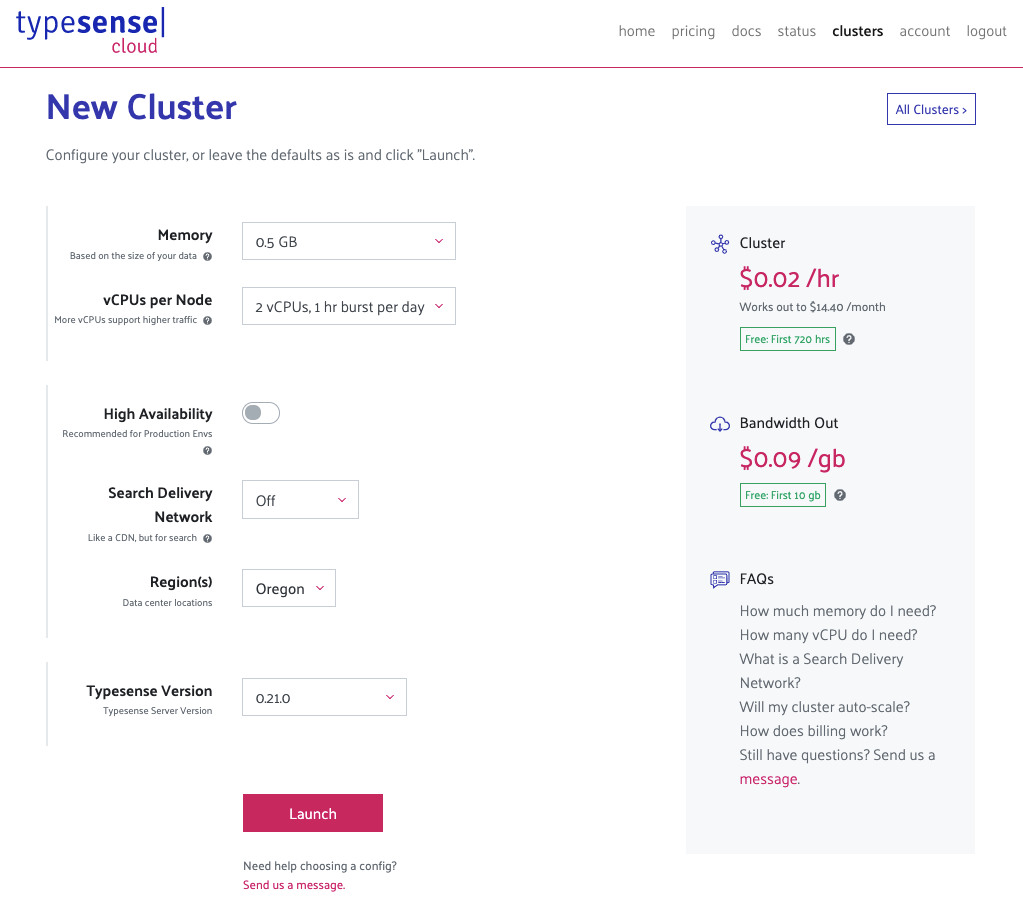
From there, spin up a new cluster. This might take a while to set up initially. You can go ahead and use the default settings of the cluster.
Once the cluster is done and entirely in service, click the "Generate API Keys" button at the top.
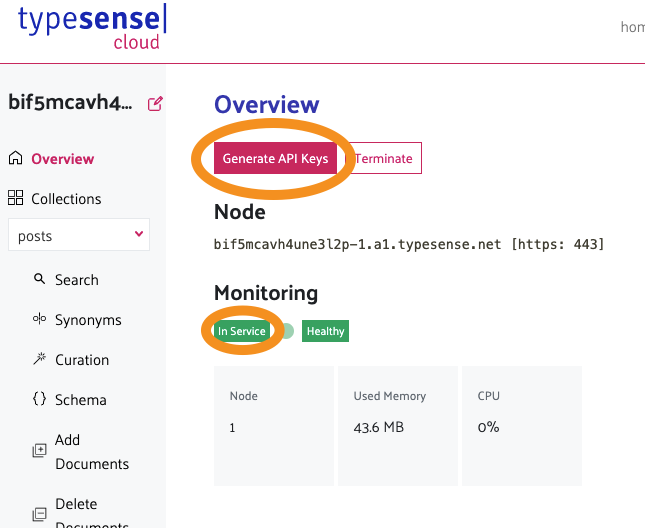
This will download a text file. You need to keep safe. Once you downloaded this file, we are already done with this side of the project!
Setting up Astro
Now it's time to set up a basic Astro website, and that is super simple as Astro comes with a pre-defined blog starter kit.
But first, create a folder and navigate to this folder.
mkdir astro-blog && cd astro-blog
Next up spool up the Astro blog example:
npm init astro --blog
Once you've done this, open the project in your favorite editor and add some more blog posts so we can see its effect.
You can create these new blog posts by duplicating the existing ones and changing the title, date, and content.
Once you have a solid amount of blog posts, run the follo0wing command to start up Astro.
npm run dev
Now you can visit http://localhost:3000 to visit your blog for the first time.
Creating a schema in Typesense
Let's look a bit at how the schematics will work for our search.
- We need a way to send all our posts data to Typesense cloud
- Then, we need a frontend search page to display the search form and results
We are now looking at step one. Remember, we only created a cluster in Typesense so far, so Typesense has no idea what a blog post is.
Create a new folder called lib in your Astro project and place it in the src directory.
Inside this lib folder, create a file called typesense.js.
This file will act as our middleware between Astro and Typesense cloud.
Before we go any further, let's create a .env file to keep our secret data safe.
Install the dotenv package by running the following command:
npm i -D dotenv
Then you can create the .env file at the root of your project and add the following variables.
TYPESENSE_HOST=xxx.a1.typesense.net
TYPESENSE_PORT=443
TYPESENSE_PROTOCOL=https
TYPESENSE_ADMIN_KEY=xxx
TYPESENSE_SEARCH_KEY=xxx
SEARCH_ENDPOINT=http://localhost:3000/search.json
Fill out the details you got from your Typesense credential file.
Another package we need to make this work is the typesense package. Install it by running the following command.
npm i typesense
Now let's get started on this typesense.js file, by including the packages we need:
require('dotenv').config();
const Typesense = require('typesense');
const fetch = require('node-fetch');
Now we need to create an async function that is self-executing. We need this since we want to use await later on in the process.
The function will look like this:
(async () => {
  // All our code
})().catch((err) => {
  console.error(err);
});
Then we need to spool up a new Typesense client.
// Create a new client
const client = new Typesense.Client({
    nodes: [
      {
            host: process.env.TYPESENSE_HOST,
            port: process.env.TYPESENSE_PORT,
            protocol: process.env.TYPESENSE_PROTOCOL,
      },
    ],
    apiKey: process.env.TYPESENSE_ADMIN_KEY,
    connectionTimeoutSeconds: 2,
});
As you can see, the client takes a few parameters, which we fill in our .env file.
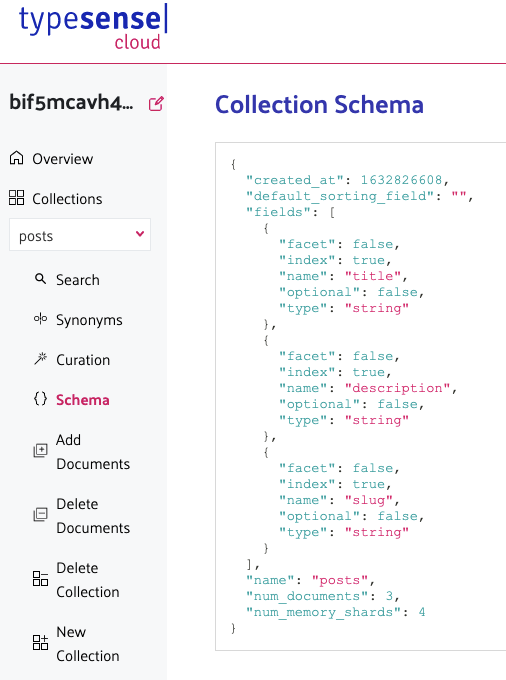
The next thing we need to do is define a schema that represents a post. In our case, we want to use the following fields:
- title
- description
- slug (URL to the post)
To create this schema write the following code:
// Create a post schema
const postsSchema = {
    name: 'posts',
    fields: [
      { name: 'title', type: 'string' },
      { name: 'description', type: 'string' },
      { name: 'slug', type: 'string' },
    ],
};
Then we can go ahead and create this schema! As you can see, this uses the await, seeing we want to create this first and only then insert our post data.
// Create post schema
await client.collections().create(postsSchema);
Now we are at a point where we should run this file and create the schema in the Typesense cloud.
Run the following command to test this file:
node src/lib/typesense.js
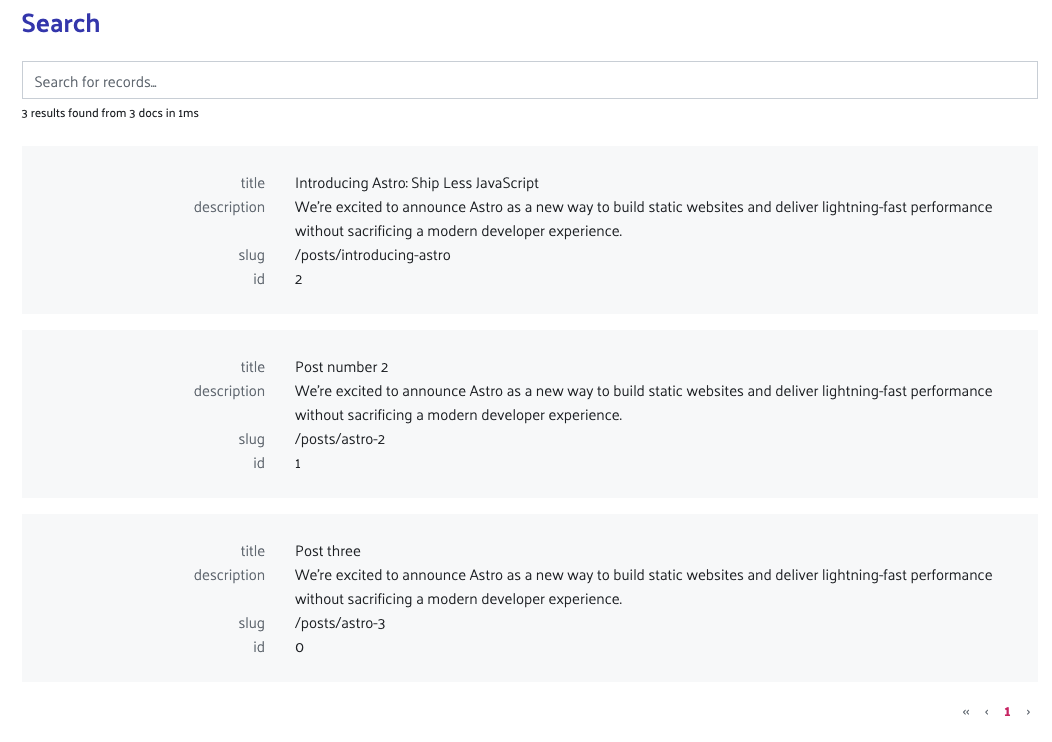
Then you can head over to the Typesense cloud to see if the schema is created correctly.
However, we haven't pushed any data to this yet, because we don't have an excellent way to retrieve these!
A searchable JSON index in Astro
To get this data, we want to publish a JSON file with our post data. We can then read this endpoint in our typesense.js file and populate our search database with it!
When writing this article, Astro does not have a reliable way of creating a JSON file with populated data. However, there is a workaround for this, which will work for our purpose.
Create a file called search.json.astro and place it in the pages directory.
Inside this, we want to retrieve all our posts and return only the information we need for our search population.
The following command will retrieve all our posts.
const allPosts = Astro.fetchContent("./posts/*.md");
To get the field, we need we must map the data accordingly.
allPosts.map((p) => {
    return {
      title: p.title,
      description: p.description,
      slug: p.url,
    };
})
This will map only the title, description, and slug, which is all we need for now!
Then we need to wrap this response in a JSON.stringify method like so:
const json = JSON.stringify(
  allPosts.map((p) => {
    return {
      title: p.title,
      description: p.description,
      slug: p.url,
    };
  })
);
And then, we have to return this json object like so:
---
{json}
With this in place, we have an endpoint available at http://localhost:3000/search.json that we can leverage.
You can find my JSON response online as an example.
Populating the search database with Astro static posts
Now that we have a way of fetching all the data we want to populate, it's time to head back to our typesense.js file and make some changes.
The first thing we want to do is to delete our current posts index. We do this to make sure we don't populate the same content more than once.
Add the following code before the postsSchema code.
// Delete the old posts collection if it exists
try {
    await client.collections('posts').delete();
} catch (error) {
    console.error('Could not delete posts collection');
}
This code will completely delete the existing posts index to generate a new one from scratch.
Then below the part where we create the posts collection, add the following code to fetch our JSON file and parse it.
// Retrieve data json
const data = fetch(process.env.SEARCH_ENDPOINT).then((response) =>
    response.json()
);
The last thing we need to do is loop this data and add a new document for each entry.
// Loop over each item and create document
data.then((res) => {
    for (post of res) {
      client.collections('posts').documents().create(post);
    }
});
Rerun the code and visit your Typesense cloud to see your search database populated.
node src/lib/typesense.js
That finalizes our part of populating Typesense with data. The next thing we want is a way to search this data on our front end.
Creating the search interface in Astro
Create a new page in Astro called search.astro. This will be our search endpoint.
It will be available on http://localhost:3000/search.
Inside we want to load a couple of things in the front matter section, including the dotenv package.
---
import BaseHead from '../components/BaseHead.astro';
import BlogHeader from '../components/BlogHeader.astro';
import dotenv from 'dotenv';
dotenv.config();

let title = 'Search';
let description = 'Type the words you are searching for 🎱';
let permalink = 'https://example.com/';
---
Then in the HTML section (below the last ----), we can start building our HTML structure for this page.
<html lang="en">
  <head>
    <BaseHead title={title} description={description} permalink={permalink} />
    <link rel="stylesheet" href="/search.css" />
  </head>

  <body>
    <BlogHeader />
    <div class="layout">
      <article class="content">
        <section class="intro">
          <h1>{title}</h1>
          <p>{description}</p>
        </section>
        <section>
            <div id="searchbox"></div>
            <div id="hits"></div>
        </section>
      </article>
    </div>
  </body>
</html>
This will render a pretty basic website view, with a header and two divs. We'll be using these two divs to populate our search and our results.
The following is a bit of a hack around Astro at the moment, as we need a way to include some external JavaScripts for this.
Below the closing body tag, include the following two scripts.
<script src="https://cdn.jsdelivr.net/npm/typesense-instantsearch-adapter@2/dist/typesense-instantsearch-adapter.min.js"></script>
<script src="https://cdn.jsdelivr.net/npm/[email protected]/dist/instantsearch.production.min.js" integrity="sha256-LAGhRRdtVoD6RLo2qDQsU2mp+XVSciKRC8XPOBWmofM=" crossorigin="anonymous"></script>
And then add an inline script that will hold our variables.
{`<script>
const TYPESENSE_HOST = '${process.env.TYPESENSE_HOST}';
const TYPESENSE_PORT = '${process.env.TYPESENSE_PORT}';
const TYPESENSE_PROTOCOL = '${process.env.TYPESENSE_PROTOCOL}';
const TYPESENSE_SEARCH_KEY = '${process.env.TYPESENSE_SEARCH_KEY}';
</script>`}
These variables are needed for the frontend part of our search, which we'll get to in a second.
Do note only to use the search key here and not the admin key!
Then include a script like this:
<script type="text/javascript" src="/search.js"></script>
Head over to the public folder and create this search.js file.
Inside this we need to initialize a new Typesense search adapter like so:
const typesenseInstantsearchAdapter = new TypesenseInstantSearchAdapter({
  server: {
    apiKey: TYPESENSE_SEARCH_KEY,
    nodes: [
      {
        host: TYPESENSE_HOST,
        port: TYPESENSE_PORT,
        protocol: TYPESENSE_PROTOCOL,
      },
    ],
    cacheSearchResultsForSeconds: 2 * 60,
  },
  additionalSearchParameters: {
    queryBy: 'title,description',
  },
});
As you can see, this is now using the variables as we set them in our Astro file. (You could also put these directly in this file)
Then we can initialize a new client and define what index we are looking for.
const searchClient = typesenseInstantsearchAdapter.searchClient;
const search = instantsearch({
  searchClient,
  indexName: 'posts',
});
As you can see above, we are looking for the posts index.
Then we need to add two widgets, being the search box and the hits box like so:
search.addWidgets([
  instantsearch.widgets.searchBox({
    container: '#searchbox',
  }),
  instantsearch.widgets.hits({
    container: '#hits',
    templates: {
      item: `
        <div class="search-preview">
            <a href="{{slug}}"><h3>{{title}}</h3></a>
            <p>{{ description }}</p>
                <a href="{{ slug }}">Read more</a>
        </div>`,
    },
  }),
]);
You can style the hits template however you would like.
The last step we need to do is to start the search with this command.
search.start();
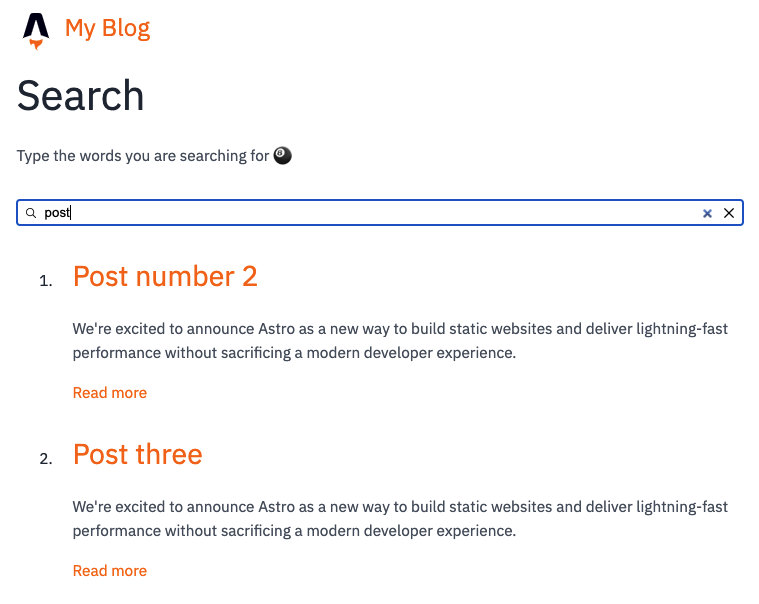
And that's it. We are now able to run our Astro website and see the search in action.
npm run dev
Setting a post-build command to run every build
The last thing we need to do is populate this search every time we run the build command.
To do this, head over to your package.json file and add the following script.
"scripts": {
    "postbuild": "node src/lib/typesense.js",
}
This script will be triggered after a build is done and populate our search index on the Typesense cloud!
For a demo on this Typesense Astro, project visit the following website: Astro Typesense demo
Or view the complete code example on GitHub.
I hope you enjoyed this article and got some inspiration for how you can also add a search page to your static-generated website.
Thank you for reading, and let's connect!
Thank you for reading my blog. Feel free to subscribe to my email newsletter and connect on Facebook or Twitter


