
Adding Tailwind CSS to an Angular project

Yesterday we learned how to set up our first Angular project. Today we will be adding Tailwind CSS so we can easily use its simplicity in styling components.
Note: when setting up your project, make sure you select
SCSS.
Tailwind is a CSS framework, much like bootstrap, but it doesn't include any card or navbar components.
We can call it a utility framework. It makes use of utility classes like: shadow-lg, rounded, w-full, etc.
At the time of writing, I'm using Angular 10 and Tailwind 1.8
Adding Tailwind CSS to our app
Ok, so we set up our basic Angular application, now let's add the Tailwind package.
Open your terminal and run the following command to install Tailwind
npm install tailwindcss -D
Then we need the ngx-build-plus package.
npm install ngx-build-plus
We also need various postcss packages and a custom web pack builder.
npm install postcss-scss postcss-import postcss-loader -D
That's all the installs. We now need a webpack.config.js file in the root of our project.
This file will have the following content.
module.exports = {
    module: {
        rules: [
        {
            test: /\.scss$/,
            loader: 'postcss-loader',
            options: {
            postcssOptions: {
                ident: 'postcss',
                syntax: 'postcss-scss',
                plugins: [
                require('postcss-import'),
                require('tailwindcss'),
                require('autoprefixer'),
                ],
            },
            },
        },
        ],
    },
};
I won't go in to much detail, but we are creating webpack rules so that we can run SCSS in our application. And register tailwind as a plugin.
Next up, we need to change our angular.json file to tell it we created this custom webpack file.
Open your editor and make the following changes.
- build/builder:
ngx-build-plus:browser - ✚ add line:
"options": {
    "extraWebpackConfig": "webpack.config.js",
}
- serve/builder:
ngx-build-plus:dev-server - ✚ add line:
"options": {
    "extraWebpackConfig": "webpack.config.js",
},

Adding the Tailwind styles
Now it's time to add the Tailwind css to our application.
Open the styles.scss file, you can find it in the src folder.
Add the following lines.
@import 'tailwindcss/base';
@import 'tailwindcss/components';
@import 'tailwindcss/utilities';
This tells our application to import all the Tailwind default CSS styles.
Now we need to init our Tailwind by running the following code in our terminal.
npx tailwind init
This will create a tailwind.config.js file for us.
Using Tailwind in our Angular application
We can now go ahead and try out our new Tailwind CSS.
Let's open up our welcome.component.html file and make the following changes.
<div class="fixed z-10 inset-0 overflow-y-auto">
<div class="flex items-end justify-center min-h-screen pt-4 px-4 pb-20 text-center sm:block sm:p-0">
<div class="fixed inset-0 transition-opacity">
<div class="absolute inset-0 bg-gray-500 opacity-75"></div>
</div>
<span class="hidden sm:inline-block sm:align-middle sm:h-screen"></span>​
<div class="inline-block align-bottom bg-white rounded-lg text-left overflow-hidden shadow-xl transform transition-all sm:my-8 sm:align-middle sm:max-w-lg sm:w-full" role="dialog" aria-modal="true" aria-labelledby="modal-headline">
<div class="bg-white px-4 pt-5 pb-4 sm:p-6 sm:pb-4">
<div class="sm:flex sm:items-start">
<div class="mx-auto flex-shrink-0 flex items-center justify-center h-12 w-12 rounded-full bg-red-100 sm:mx-0 sm:h-10 sm:w-10">
<!-- Heroicon name: exclamation -->
<svg class="h-6 w-6 text-red-600" xmlns="http://www.w3.org/2000/svg" fill="none" viewBox="0 0 24 24" stroke="currentColor">
<path stroke-linecap="round" stroke-linejoin="round" stroke-width="2" d="M12 9v2m0 4h.01m-6.938 4h13.856c1.54 0 2.502-1.667 1.732-3L13.732 4c-.77-1.333-2.694-1.333-3.464 0L3.34 16c-.77 1.333.192 3 1.732 3z" />
</svg>
</div>
<div class="mt-3 text-center sm:mt-0 sm:ml-4 sm:text-left">
<h3 class="text-lg leading-6 font-medium text-gray-900" id="modal-headline">
Deactivate account
</h3>
<div class="mt-2">
<p class="text-sm leading-5 text-gray-500">
Are you sure you want to deactivate your account? All of your data will be permanently removed. This action cannot be undone.
</p>
</div>
</div>
</div>
</div>
<div class="bg-gray-50 px-4 py-3 sm:px-6 sm:flex sm:flex-row-reverse">
<span class="flex w-full rounded-md shadow-sm sm:ml-3 sm:w-auto">
<button type="button" class="inline-flex justify-center w-full rounded-md border border-transparent px-4 py-2 bg-red-600 text-base leading-6 font-medium text-white shadow-sm hover:bg-red-500 focus:outline-none focus:border-red-700 focus:shadow-outline-red transition ease-in-out duration-150 sm:text-sm sm:leading-5">
Deactivate
</button>
</span>
<span class="mt-3 flex w-full rounded-md shadow-sm sm:mt-0 sm:w-auto">
<button type="button" class="inline-flex justify-center w-full rounded-md border border-gray-300 px-4 py-2 bg-white text-base leading-6 font-medium text-gray-700 shadow-sm hover:text-gray-500 focus:outline-none focus:border-blue-300 focus:shadow-outline-blue transition ease-in-out duration-150 sm:text-sm sm:leading-5">
Cancel
</button>
</span>
</div>
</div>
</div>
</div>
Note: You can find more examples on the Tailwind component page.
Now, if we run ng serve, we should see the following result.
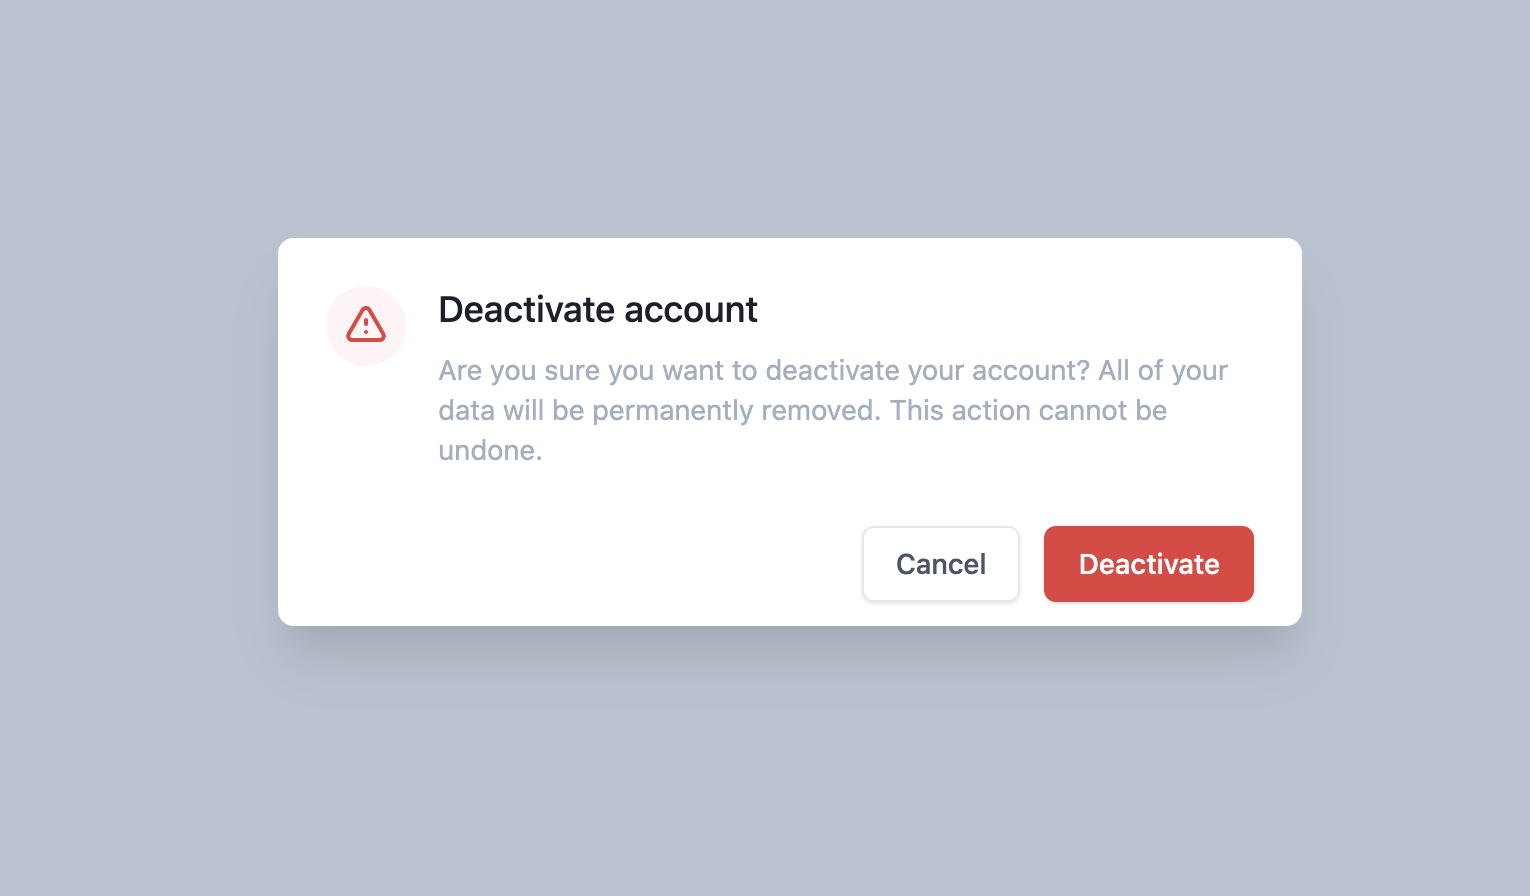
You can also find this project on GitHub.
Thank you for reading, and let's connect!
Thank you for reading my blog. Feel free to subscribe to my email newsletter and connect on Facebook or Twitter
About the author
I'm a full-stack developer from South Africa 🇿🇦. I love writing about JavaScript, HTML and CSS.
Comments
Join the discussionNo comments yet. Be the first to comment.



