
5 Things you need to know about screenshots on a Mac

I'm a full-stack developer from South Africa 🇿🇦. I love writing about JavaScript, HTML and CSS.
I really struggled to find a good title for this article, as you can see. 🤦♂️
However, I realized the Mac Screenshot function has a lot of hidden gems you might not know! So I decided to dedicate a blog post to these 5 must-know things about the Mac Screenshot functionality.
1. All the shortcuts
When I'm using my Mac, I use a lot of shortcuts, and taking screenshots comes with a variety of shortcuts that can make your life so much easier!
- Capture the entire screen:
Shift + Command + 3 - Capture a portion of the screen:
Shift + Command + 4. This will give you a crosshair with which you can select an area. (I use this one the most) - Capture a window:
Shift + Command + 4, Then:Spacebar. You can now hover windows and take a specific screenshot (P.s. try to hover your menu bar) - Open the screenshot app:
Shift + Command + 5, In the app, you can quickly see all the options - Screenshot your Touch Bar:
Shift + Command + 6, Totally useless, I know, but there you go
2. You can edit your screenshots
Did you know that if you click the screenshots while they are in the bottom right corner, you can edit them?

I really enjoy this feature and use it to quickly mark my screenshots with arrows and circles all the time!
3. Record your screen
Not only does the screenshot app allow you to take a picture, but you can even record your screen with it!
You can find these by opening the Screenshot app on your Mac. You can either find it through the Spotlight search or by shortcuts: Shift + Command + 5.
Then you'll see two buttons on the right, one for recording the entire screen and one for a portion.
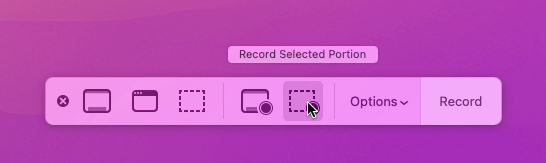
You can then click the "Record" button, and you'll get a new recording icon in your menu bar. Use this icon to stop the recording.
4. Change the default output
Another thing that some people might find annoying is that the screenshots, by default, end up on your desktop.
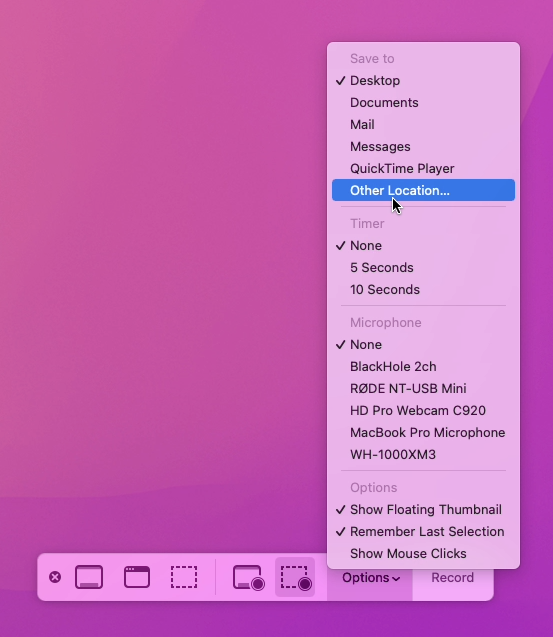
You can, however, change this by opening up the Screenshot app. Again use the Spotlight search of shortcut: Shift + Command + 5.
And click the options button, there you'll see the output menu where you can change it to anything you like.
5. You can set a timer
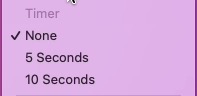
Sometimes you might want to take a screenshot and hover a button or item. In that case, you can set the app to use a timer.
You can set this timer in the Options menu described in #4. The default is "None", and you can set it to 5 or 10 seconds!
I hope you learned something new about the screenshot capabilities on your Mac!
Thank you for reading, and let's connect!
Thank you for reading my blog. Feel free to subscribe to my email newsletter and connect on Facebook or Twitter



