
Using forms in Next.js

Today we are looking at another well-used element of web applications: Forms. And to be precise, how to use forms in Next.js.
We want to learn how we can hijack the form submit to use this data in a Next.js application.
Creating a form in Next.js
To create a form, we can leverage basic HTML forms.
Let's open up our pages/contact.js page and add a very basic one field form:
<div className='max-w-xs my-2 overflow-hidden rounded shadow-lg'>
    <div className='px-6 py-4'>
      <div className='mb-2 text-xl font-bold'>Contact us</div>
      <form className='flex flex-col'>
        <label htmlFor='name' className='mb-2 italic'>Name</label>
        <input className='mb-4 border-b-2' id='name' name='name' type='text' autoComplete='name' required />
        <button type='submit' className='px-4 py-2 font-bold text-white bg-blue-500 rounded-full hover:bg-blue-700'>Submit</button>
      </form>
    </div>
</div>
If we then run our application npm run dev, we should see the following form show up:
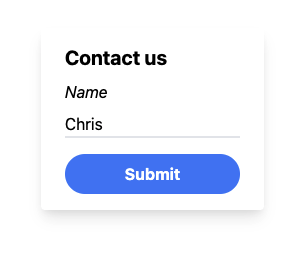
But if we now submit this form, it will just post to the same URL with some parameters, which is not what we want.
Handling form data in Next.js
To start hijacking the form we can add a onSubmit handler on the form element like so:
<form className='flex flex-col' onSubmit={submitContact}>
This will invoke the submitContact function once we submit the form.
Let's go ahead and create this function on our contact page.
const submitContact = async (event) => {
    event.preventDefault();
    alert(`So your name is ${event.target.name.value}?`);
};
We stop the form's default behavior (which is submitting) and alert back to the user.
This will look like this:
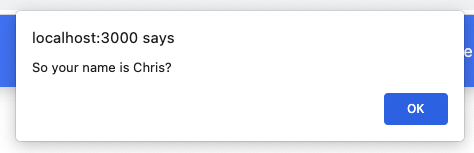
Right, that's an excellent start as we already have the form stopped and can control it.
Sending the form data externally
But it's not super useful to alert back. We often want to send this data somewhere that we can use it.
We want to use this data and send it to an external API to find out how old someone is based on their name?
Yes, there is an API for that 😂
const submitContact = async (event) => {
    event.preventDefault();
    const name = event.target.name.value;
    const res = await fetch(`https://api.agify.io/?name=${name}`);
    const result = await res.json();
    alert(`Hi ${name} your age is most likely: ${result.age}`);
};
As you can see, we can perform a fetch request to this API and pass the name the user gave us as input.
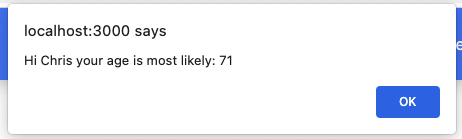
Then we await the result and alert the user with his predicted age!
Pretty cool, if I do say so myself.
My age is pretty disappointing, but here you go:
Using the Next.js API
In the above example, we are posting to an external API. Often we want to leverage the Next API.
Let's create a new API endpoint by adding a file called contact.js in pages/api.
Inside this file create the following handler function:
export default function handler(req, res) {
  const body = req.body;
  if (!body.name) {
    return res.status(500).json({ msg: 'Name was not found' });
  }

  res.status(200).json({ name: `${body.name} Lastname` });
}
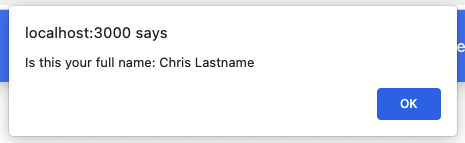
This function will return a 500 status code if no name is provided and return 'name Lastname' as a response.
Not really a great use case, but let's try this out.
Modify the submitContact function to post to this internal API.
const submitContact = async (event) => {
    event.preventDefault();
    const name = event.target.name.value;
    const res = await fetch('/api/contact', {
      body: JSON.stringify({
        name: name,
      }),
      headers: {
        'Content-Type': 'application/json',
      },
      method: 'POST',
    });
    const result = await res.json();
    alert(`Is this your full name: ${result.name}`);
};
Now, if we decide to fill out the form, we get the following alert.
I'm pretty stoked at how versatile Next.js is with internal vs. external API usage!
You can find the complete code on GitHub.
Thank you for reading, and let's connect!
Thank you for reading my blog. Feel free to subscribe to my email newsletter and connect on Facebook or Twitter
About the author
I'm a full-stack developer from South Africa 🇿🇦. I love writing about JavaScript, HTML and CSS.
Comments
Join the discussionNo comments yet. Be the first to comment.



