# React basics: explaining the useContext hook
Sometimes we have data that we need to access in almost all parts of our components.
It will become a hassle to pass them down to each component, exactly where context comes in.
In this example, I'll use a specific theme for a website.
Our website has a blue and a red theme, which the user can toggle based on their preferences.
## Creating a context
Before we can do anything, we need to create a new context to wrap around our application.
So, let's look at how that works, create a new file called `ThemeContext.js` and start by adding the imports we need.
```js
import { createContext, useState } from 'react';
```
Now let's define our themes, this is still pretty hardcoded, but it will work fine for this demo.
```js
const themes = {
blue: {
background: 'blue',
color: 'white',
},
red: {
background: 'red',
color: 'black',
},
};
```
As you can see, we have a blue and a red theme.
The first thing we need to do now is create an actual context with a default value.
In my case, I want the red theme to be the blue theme to be the default.
```js
export const ThemeContext = createContext(themes.blue);
```
And then, we can export a `ThemeProvider` which helps us wrap this theme around our app.
```js
export function ThemeProvider(props) {
return (
{props.children}
);
}
```
This provider can now be wrapped around our app to apply the context. Let's head over to our `App.js` file and do that.
```js
import { ThemeProvider } from './context/ThemeContext';
function App() {
return (
The rest of our app
);
}
export default App;
```
This gives us access to anything in the theme.
## Using the context
Pretty cool, but how do we now use this context?
Create a sample component that will act as our paint. This component will take the context and display the correct color.
```jsx
import { useContext } from 'react';
import { ThemeContext } from '../context/ThemeContext';
export default function Paint() {
const theme = useContext(ThemeContext);
return (
I'm the paint
);
}
```
This component will render a simple div, with colors based on whatever our theme is.
Head back to your `App` and include this component.
```js
import Paint from './components/Paint';
return (
);
```
You should now see the block in your browser like so:
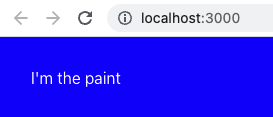
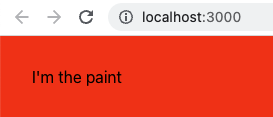
If we now change our `ThemeContext` to be red, we should see a red box.
```js
```
## Adding a toggle
This is pretty exciting stuff already, but it becomes super powerful by adding a dynamic switch for our theme.
Let's say we want to render two buttons. Each button will set a different theme.
To do this, we first have to use [`useState`](https://daily-dev-tips.com/posts/react-basics-explaining-the-usestate-hook/) in our `ThemeContext` file.
```js
import { createContext, useState } from 'react';
export function ThemeProvider(props) {
const [theme, setTheme] = useState('blue');
const themeProviderData = {
theme: themes[theme],
setTheme: (theme) => setTheme(theme),
};
return (
{props.children}
);
}
```
As you can see, I use the `useState` function to now set a basic theme (blue).
Then I create a primary object containing the current theme data and pass the `setState` function to modify the state variable.
Then we pass this object as the value of our theme.
One thing to note here is that we changed from passing a single variable to passing an object.
So head over to your `Paint` component and change the import like so:
```js
const { theme } = useContext(ThemeContext);
```
Then we can go ahead and create a new component called `Toggle`.
```js
import { useContext } from 'react';
import { ThemeContext } from '../context/ThemeContext';
export default function Toggle() {
const { setTheme } = useContext(ThemeContext);
return (
<>
);
}
```
As you can see, this function extracts the `setTheme` function from our context.
It then renders two buttons and appends this function with a specific value.
Go ahead and include this component in your `App` like so:
```js
import Toggle from './components/Toggle';
function App() {
return (
);
}
export default App;
```
And there we have it. We can now toggle between our two themes!

I've also added this project on [GitHub](https://github.com/rebelchris/react-basics/tree/context) if you want to see more details.
### Thank you for reading, and let's connect!
Thank you for reading my blog. Feel free to subscribe to my email newsletter and connect on [Facebook](https://www.facebook.com/DailyDevTipsBlog) or [Twitter](https://twitter.com/DailyDevTips1)