# Plain HTML starter with Tailwind CSS
Ever needed just a plain HTML started, but with the power of Tailwind?
We can of course, load Tailwind from a CDN, but that kind of goes against the power of Tailwind. It would load every styling element, of which 90% isn't used in our project.
We also couldn't add extensions simply.
So I decided to look if there was a plain HTML starter. I don't need fancy React, Vue, or whatever framework. Just plain HTML will do.
And I couldn't find it at first, so here we go. Let's make our own plain HTML tailwind starter!
> TL;DR: You can find the [plain HTML Tailwind starter on GitHub](https://github.com/rebelchris/HTML-Tailwind-Starter)
## Creating the structure
Let's first start by creating the structure.
```bash
mkdir html-tailwind-starter
cd html-tailwind-starter
```
This will create a folder called `html-tailwind-starter` and move into it.
In there, we can initialize NPM so we can leverage Tailwind.
```bash
npm init -y
```
> Note: The -y flag will say yes to all questions in there.
Now let's add Tailwind from the npm package.
```bash
npm install tailwindcss
```
Now let's create a styles.css file and add the Tailwind elements.
```css
@tailwind base;
@tailwind components;
@tailwind utilities;
```
## Processing the Tailwind CSS
Now we need a way to process the Tailwind CSS for us, usually a framework would come in handy, but underwater, most of them use postCSS. So let's just add it ourselves.
```bash
npm install postcss-cli autoprefixer
```
Then we can create a `postcss.config.js` file which will handle what needs to happen with which CSS file.
```js
module.exports = {
plugins: [require('tailwindcss'), require('autoprefixer')]
};
```
Now we can add the actual build command to convert the Tailwind basic to our end CSS file.
Open up your `package.json` and add a build script.
```json
"build": "postcss styles.css -o src/styles.css"
```
In your terminal, you can now run the following command. It will convert the input css file to styles.css located in the src folder.
```bash
npm run build
```
## Adding the HTML file
Now that we have our Tailwind converted into our `src` folder, I'm going to add the `index.html` into the `src` folder.
```html
Basic HTML/Tailwind starter
Welcome
```
Technically you can now open up the `index.html` file in a browser and see the result.

We can, however, also add the live server to make our lives a bit easier.
```bash
npm install -g live-server
```
And then add a custom script in our `package.json` again.
```json
"dev": "npm run build && live-server src --port=8080"
```
This will serve the live-server on the src folder.
We can run it with:
```bash
npm run dev
```
And it should run our postcss and start the server on `localhost:8080`.
## Adding a Tailwind config file
One thing I personally think is a must is the Tailwind config. We can extend certain elements, but more importantly, we can use the purge option.
We can add the file by running the following command.
```bash
npx tailwindcss init
```
Let's add a custom color to it first.
```js
module.exports = {
purge: [],
darkMode: false, // or 'media' or 'class'
theme: {
extend: {
colors: {
'daily-dev-tips': '#F89283'
}
}
},
variants: {
extend: {}
},
plugins: []
};
```
Now we can use this color in our `index.html`.
```html
Welcome
```
Re-run the `npm run dev` command.
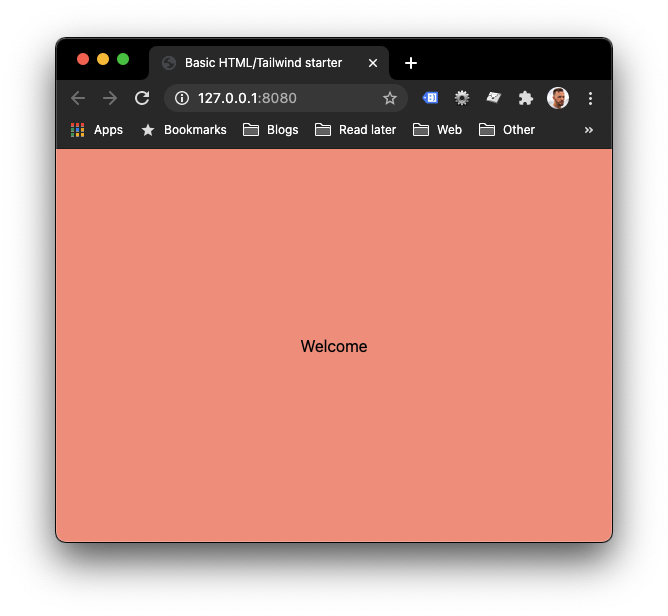
And there we go, a custom color in our Tailwind!
## Adding the purge option to the Tailwind config
As mentioned, we would want to leverage the purge option. Let's see the initial file that is created now.
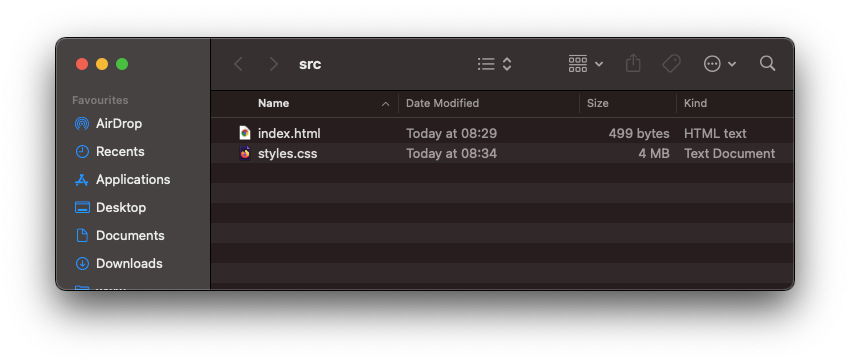
The initial CSS file is 4MB, wow and we only used one div so far?
Yep, we got the whole Tailwind classes in there!
So how can we fix this?
Open up the `tailwind.config.js` file and modify the purge rule to look like this.
```js
module.exports = {
purge: {
enabled: true,
content: ['src/*.html']
}
// Other stuff
};
```
This will enable the purge and only use the classes in the `src` folder for HTML files.
Now re-running the dev command will result in the following.
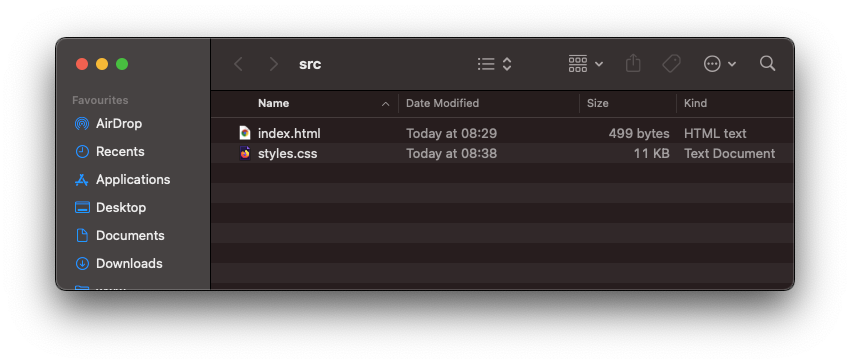
11KB is way better than the 4MB, so happy with that win!
Now you can start building your Tailwind project based on just the HTML file in the `src` directory.
You can find the whole project on [GitHub](https://github.com/rebelchris/HTML-Tailwind-Starter) as well.
### Thank you for reading, and let's connect!
Thank you for reading my blog. Feel free to subscribe to my email newsletter and connect on [Facebook](https://www.facebook.com/DailyDevTipsBlog) or [Twitter](https://twitter.com/DailyDevTips1)