
Loading WordPress posts in Next.js

I'm a full-stack developer from South Africa 🇿🇦. I love writing about JavaScript, HTML and CSS.
We had a look at how we can use WordPress as a headless CMS with GraphQL as our database point.
We'll let's take that and use that knowledge to create a front-end in Next.js.
Our goal for today is to load our WordPress posts in a Next.js front-end by querying the GraphQL endpoint.
Creating the GraphQL API call
Let's start by adding a .env file to our project. This is a file where we can set up variables specific to the platform we are on.
Create this .env file in the root of your project and add the WordPress URL like so:
WP_URL=http://localhost:8000/graphql
Let's also create a folder called lib. It's where we will add our functions and calls.
Inside this lib folder, create a file called api.js. This file will act as the main source of our API communication.
The first thing we need in this file is the WordPress URL we just set.
const API_URL = process.env.WP_URL;
Then we want a generic GraphQL request. Since we can send a specific query with each GraphQL request, we can create one generic API call.
async function fetchAPI(query, {variables} = {}) {
  const headers = {'Content-Type': 'application/json'};

  const res = await fetch(API_URL, {
    method: 'POST',
    headers,
    body: JSON.stringify({query, variables}),
  });

  const json = await res.json();
  if (json.errors) {
    console.log(json.errors);
    throw new Error('Failed to fetch API');
  }

  return json.data;
}
Then we'll create a function to retrieve all posts by using the function above.
export async function getLatestPosts() {
  const data = await fetchAPI(
    `
      query AllPosts {
        posts(first: 10, where: { orderby: { field: DATE, order: DESC } }) {
          edges {
            node {
              id
              title
              excerpt
              featuredImage {
                node {
                  sourceUrl
                }
              }
            }
          }
        }
      }
    `
  );

  return data?.posts;
}
This function will use our fetchAPI function and pass a GraphQL query to it. This query will ask for ten posts ordered by date and fetch some specific fields.
Using the data on the homepage
The next step we need to do is call this data and render it on the homepage.
Let's use the getStaticProps again to fetch the data on build time.
import {getLatestPosts} from '../lib/api';

export async function getStaticProps() {
  const latestPosts = await getLatestPosts();
  return {
    props: {latestPosts},
  };
}
We call the getLatestPosts function on our lib/api.js file and return those posts as props.
Now we need to modify our Home function actually to retrieve these posts props.
export default function Home({latestPosts: {edges}}) {
  // Render
}
Then we can wrap our existing elements into multiple ones bases on the posts and add the data.
{
  edges.map((post) => (
    <div
      className="max-w-xs mx-2 my-2 overflow-hidden rounded shadow-lg"
      key={post.node.id}
    >
      <img
        className="w-full"
        src={post.node.featuredImage?.node.sourceUrl}
        alt={post.node.title}
      />
      <div className="px-6 py-4">
        <div className="mb-2 text-xl font-bold">{post.node.title}</div>
        <div
          className="text-base text-grey-darker"
          dangerouslySetInnerHTML={{__html: post.node.excerpt}}
        ></div>
      </div>
    </div>
  ));
}
And with that, we now have our WordPress posts rendered on our homepage!
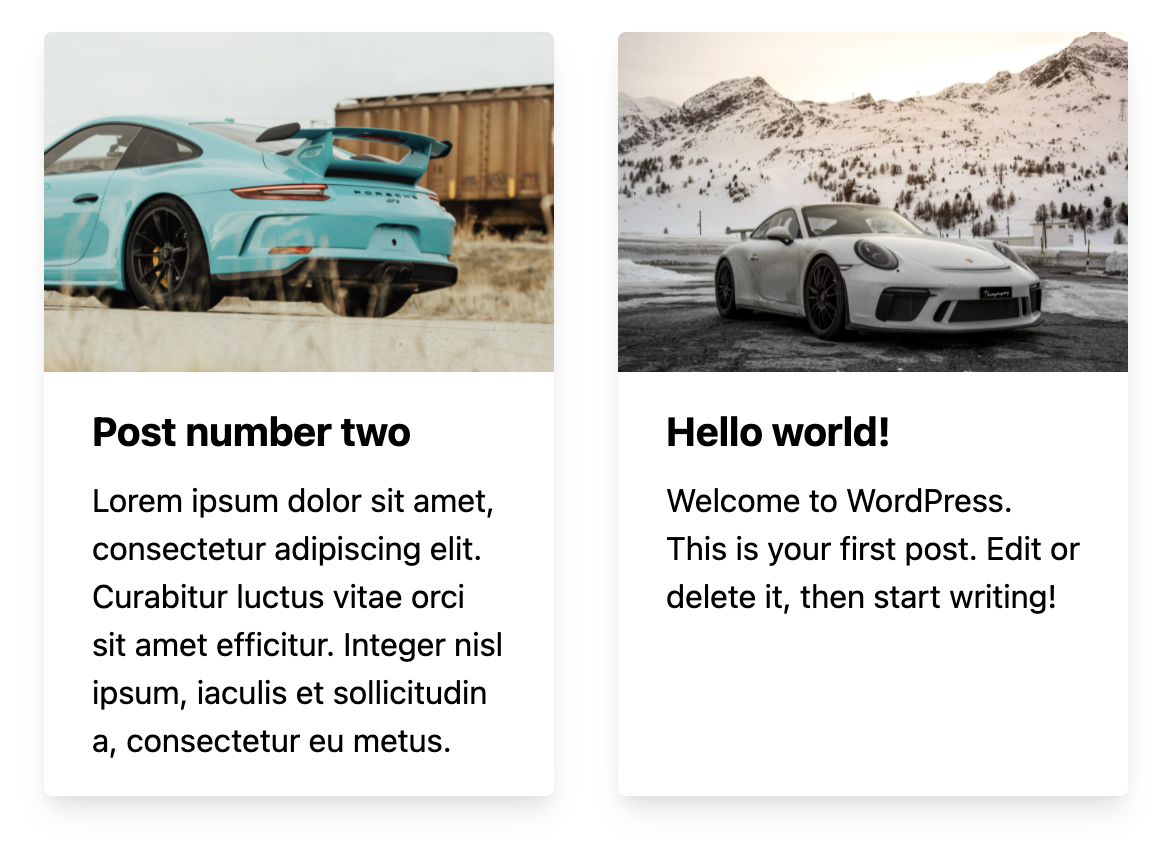
If you want a detailed view of the complete code, check out the GitHub repo.
Thank you for reading, and let's connect!
Thank you for reading my blog. Feel free to subscribe to my email newsletter and connect on Facebook or Twitter



