
Kubernetes 101 - Kubernetes dashboard

I'm a full-stack developer from South Africa 🇿🇦. I love writing about JavaScript, HTML and CSS.
I wanted to dive into the Kubernetes Dashboard for this article and run Kubernetes locally via Docker desktop.
It's a good first option to run it locally and see what's happening more visually.
Enabling Kubernetes in Docker Desktop
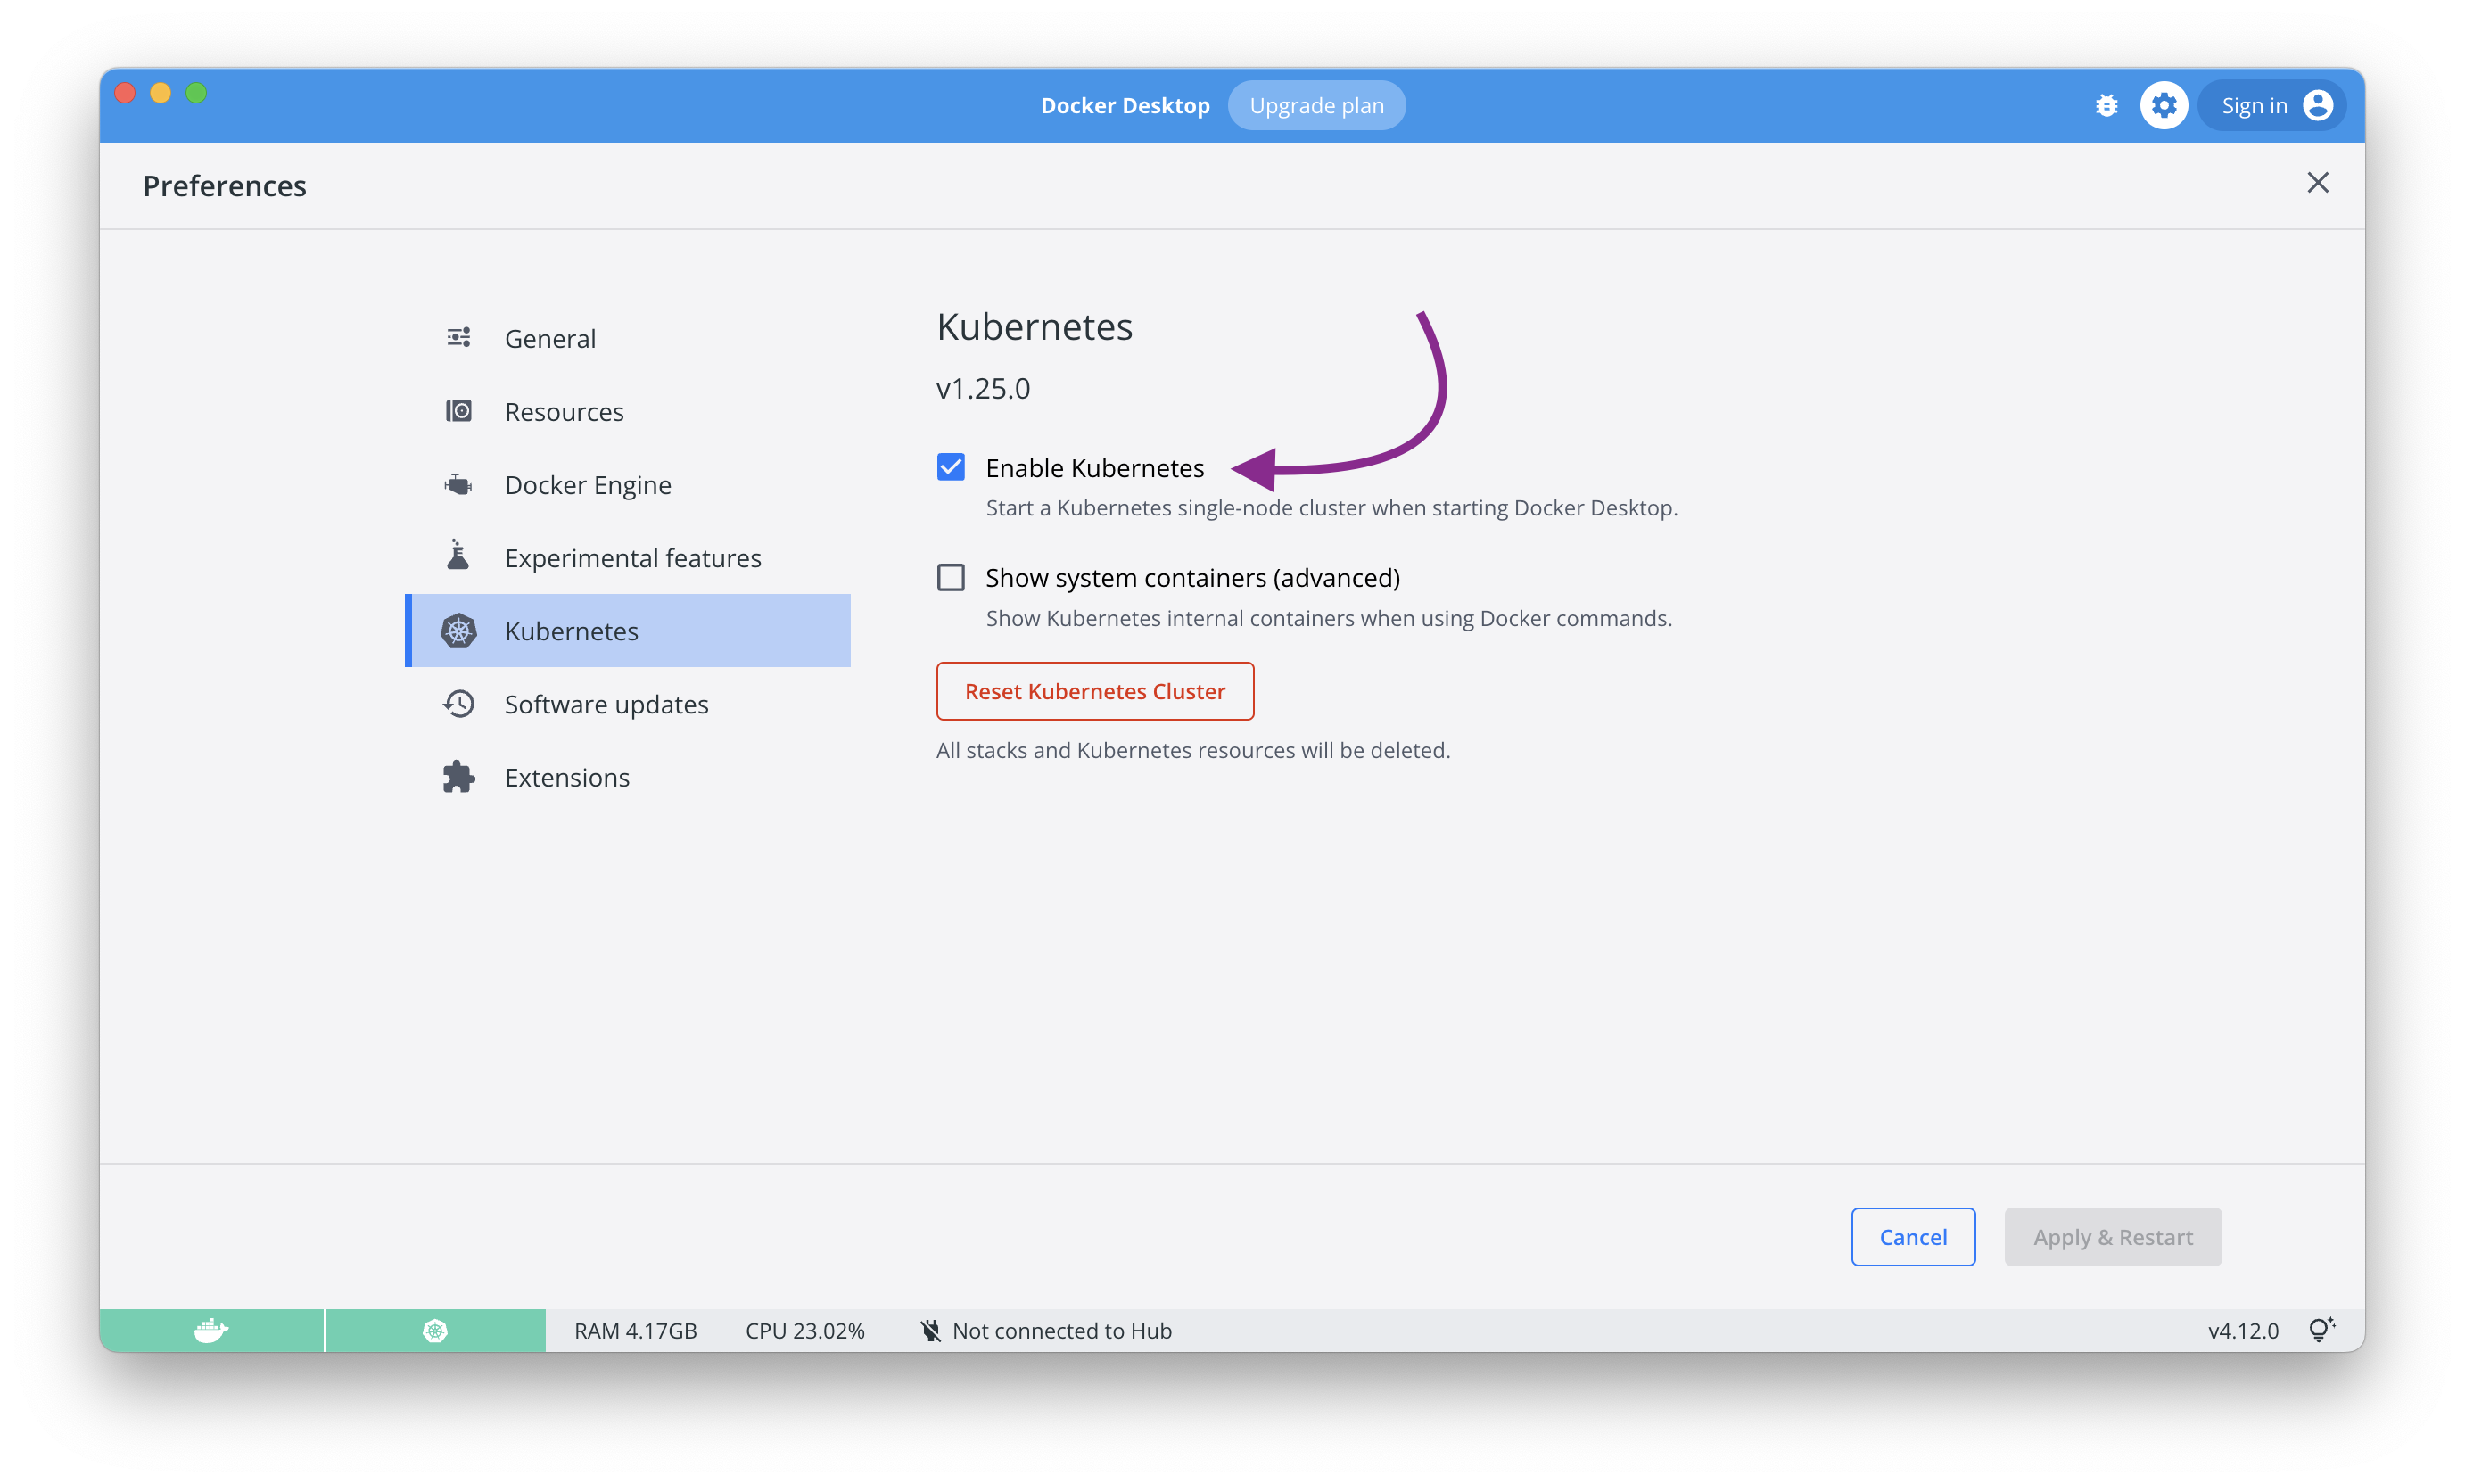
This article's first step is enabling Kubernetes in your docker desktop system.
To do this, you need to open up your docker desktop application and click the settings icon in the top right corner.
From the settings panel, click "Kubernetes" and select the "Enable Kubernetes" option.
Then you'll have to select "Apply & Restart", which will take quite some time to complete.
Installing Kubernetes Dashboard
Now that you have Kubernetes installed, it's time to add the dashboard.
The first thing to do here is to install the actual project with the following command.
kubectl apply -f https://raw.githubusercontent.com/kubernetes/dashboard/v2.2.0/aio/deploy/recommended.yaml
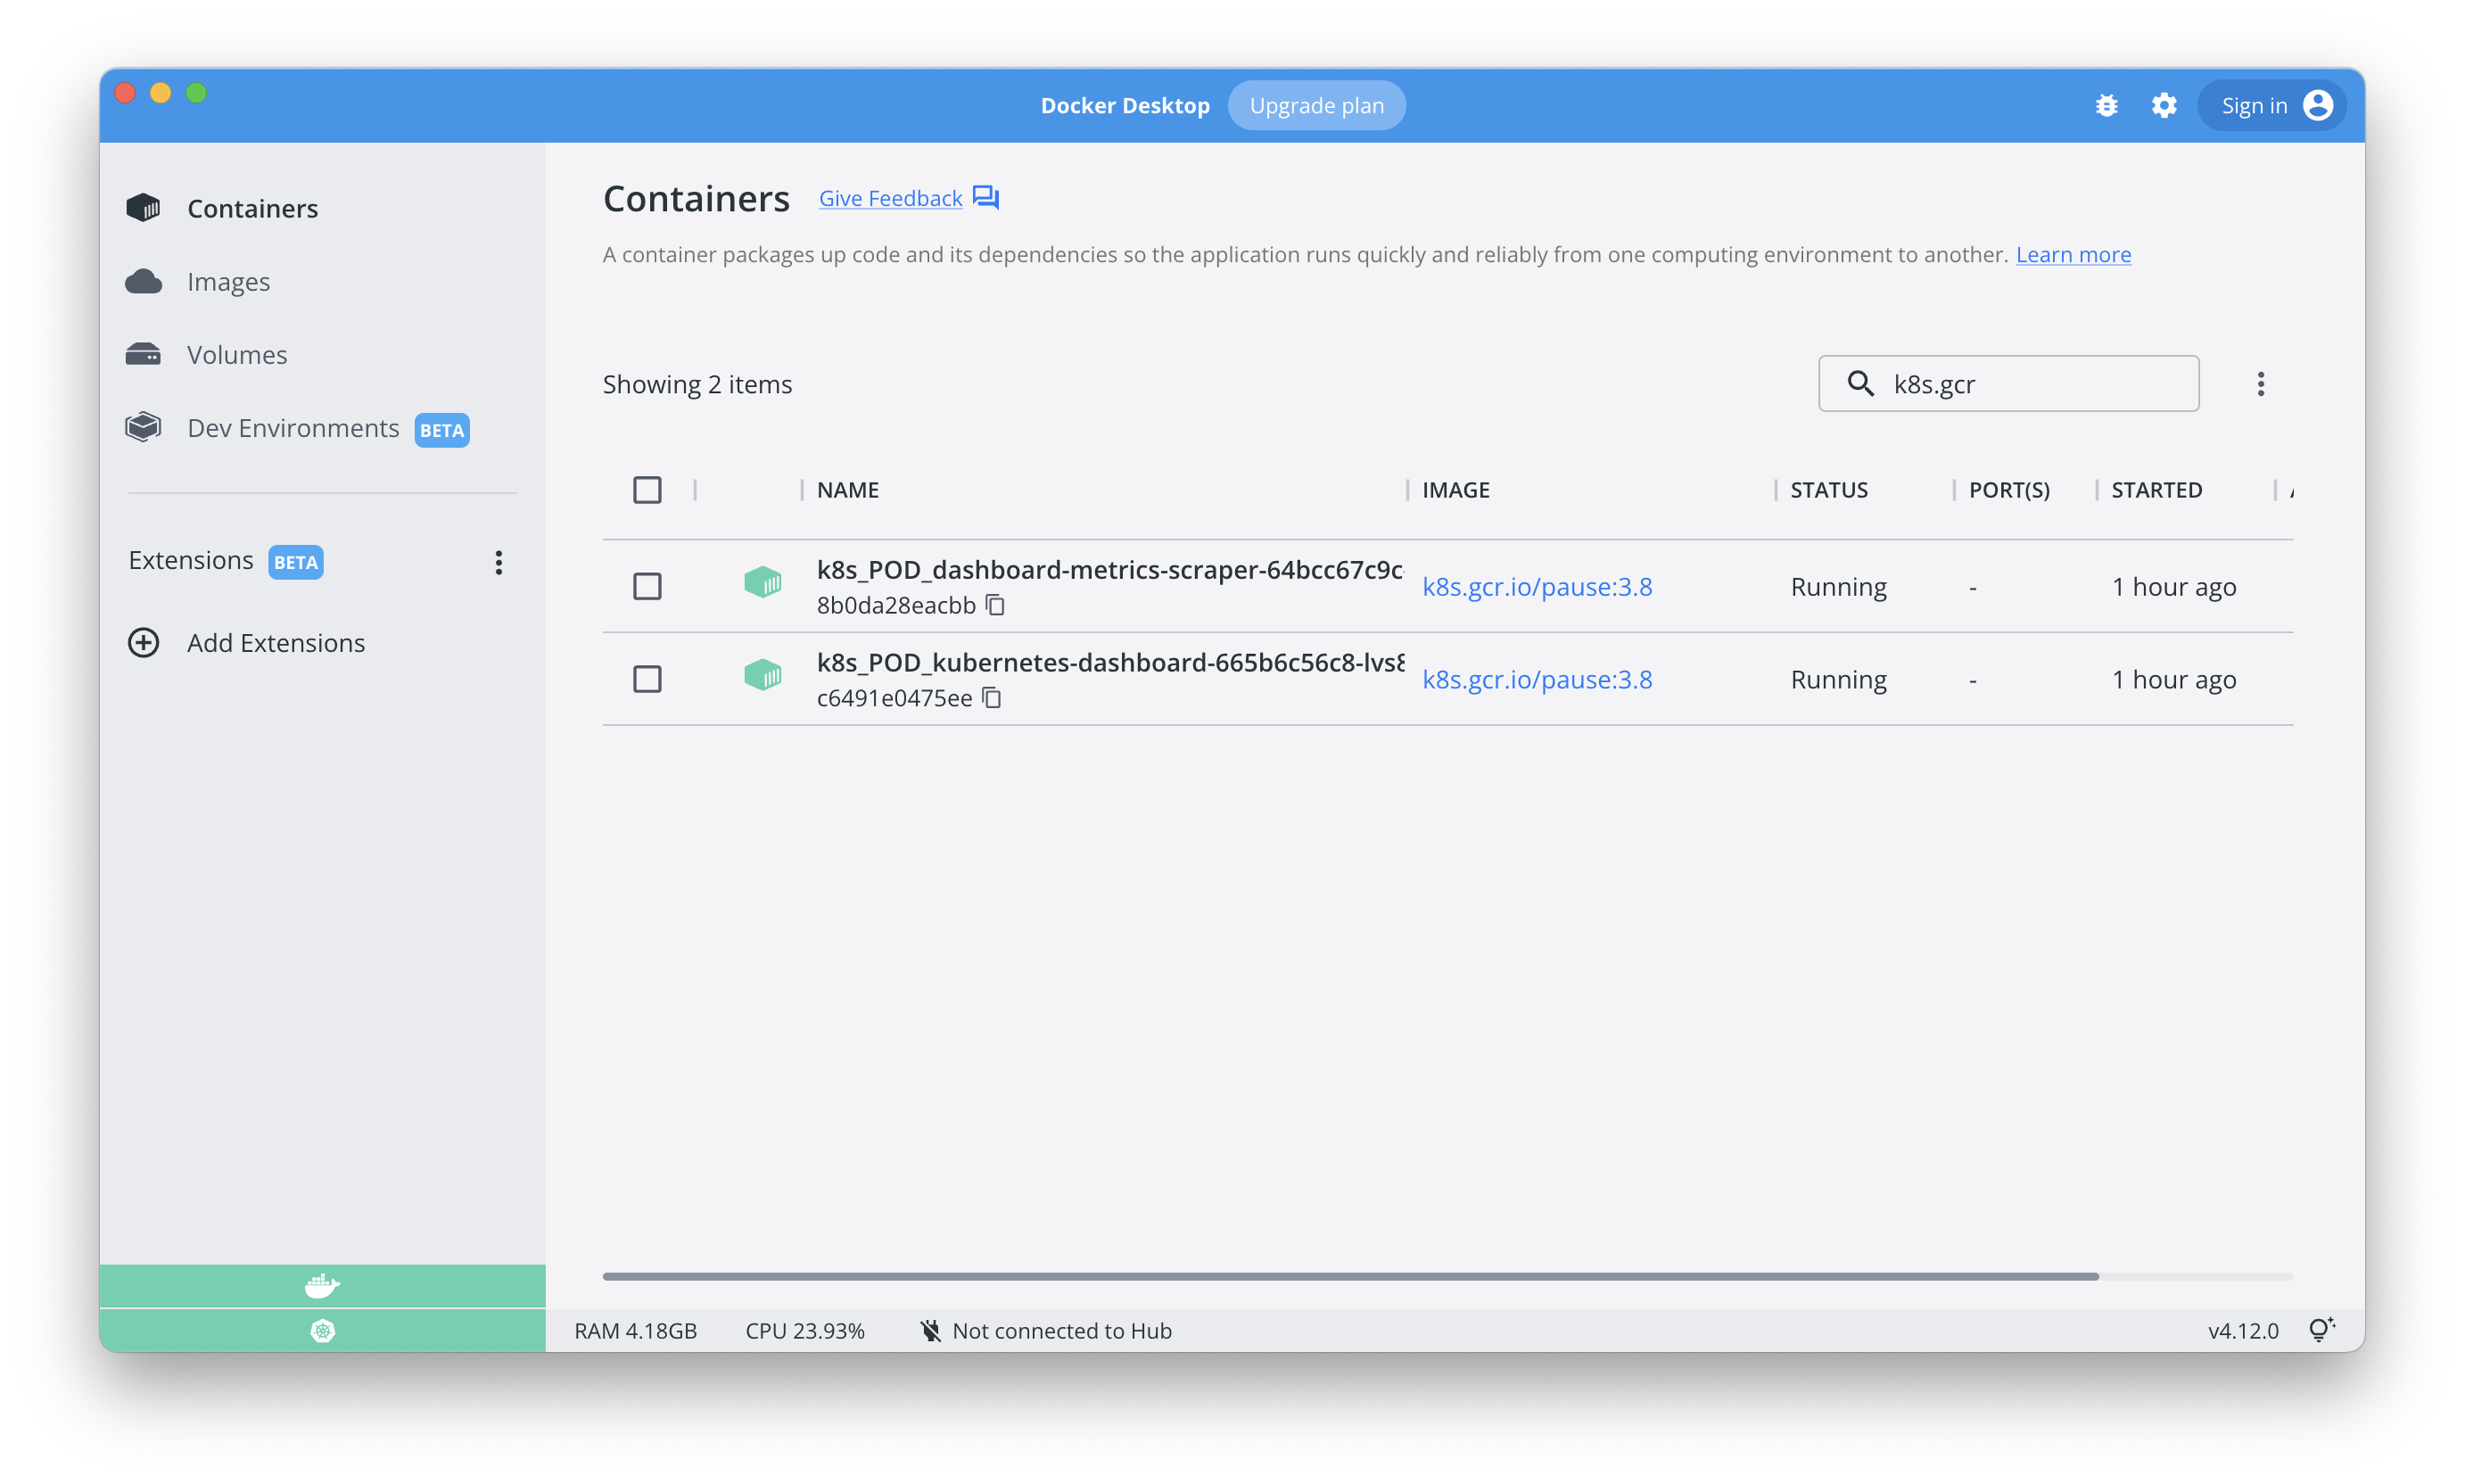
Once it's installed, you can go over to your Docker desktop and see it already there.
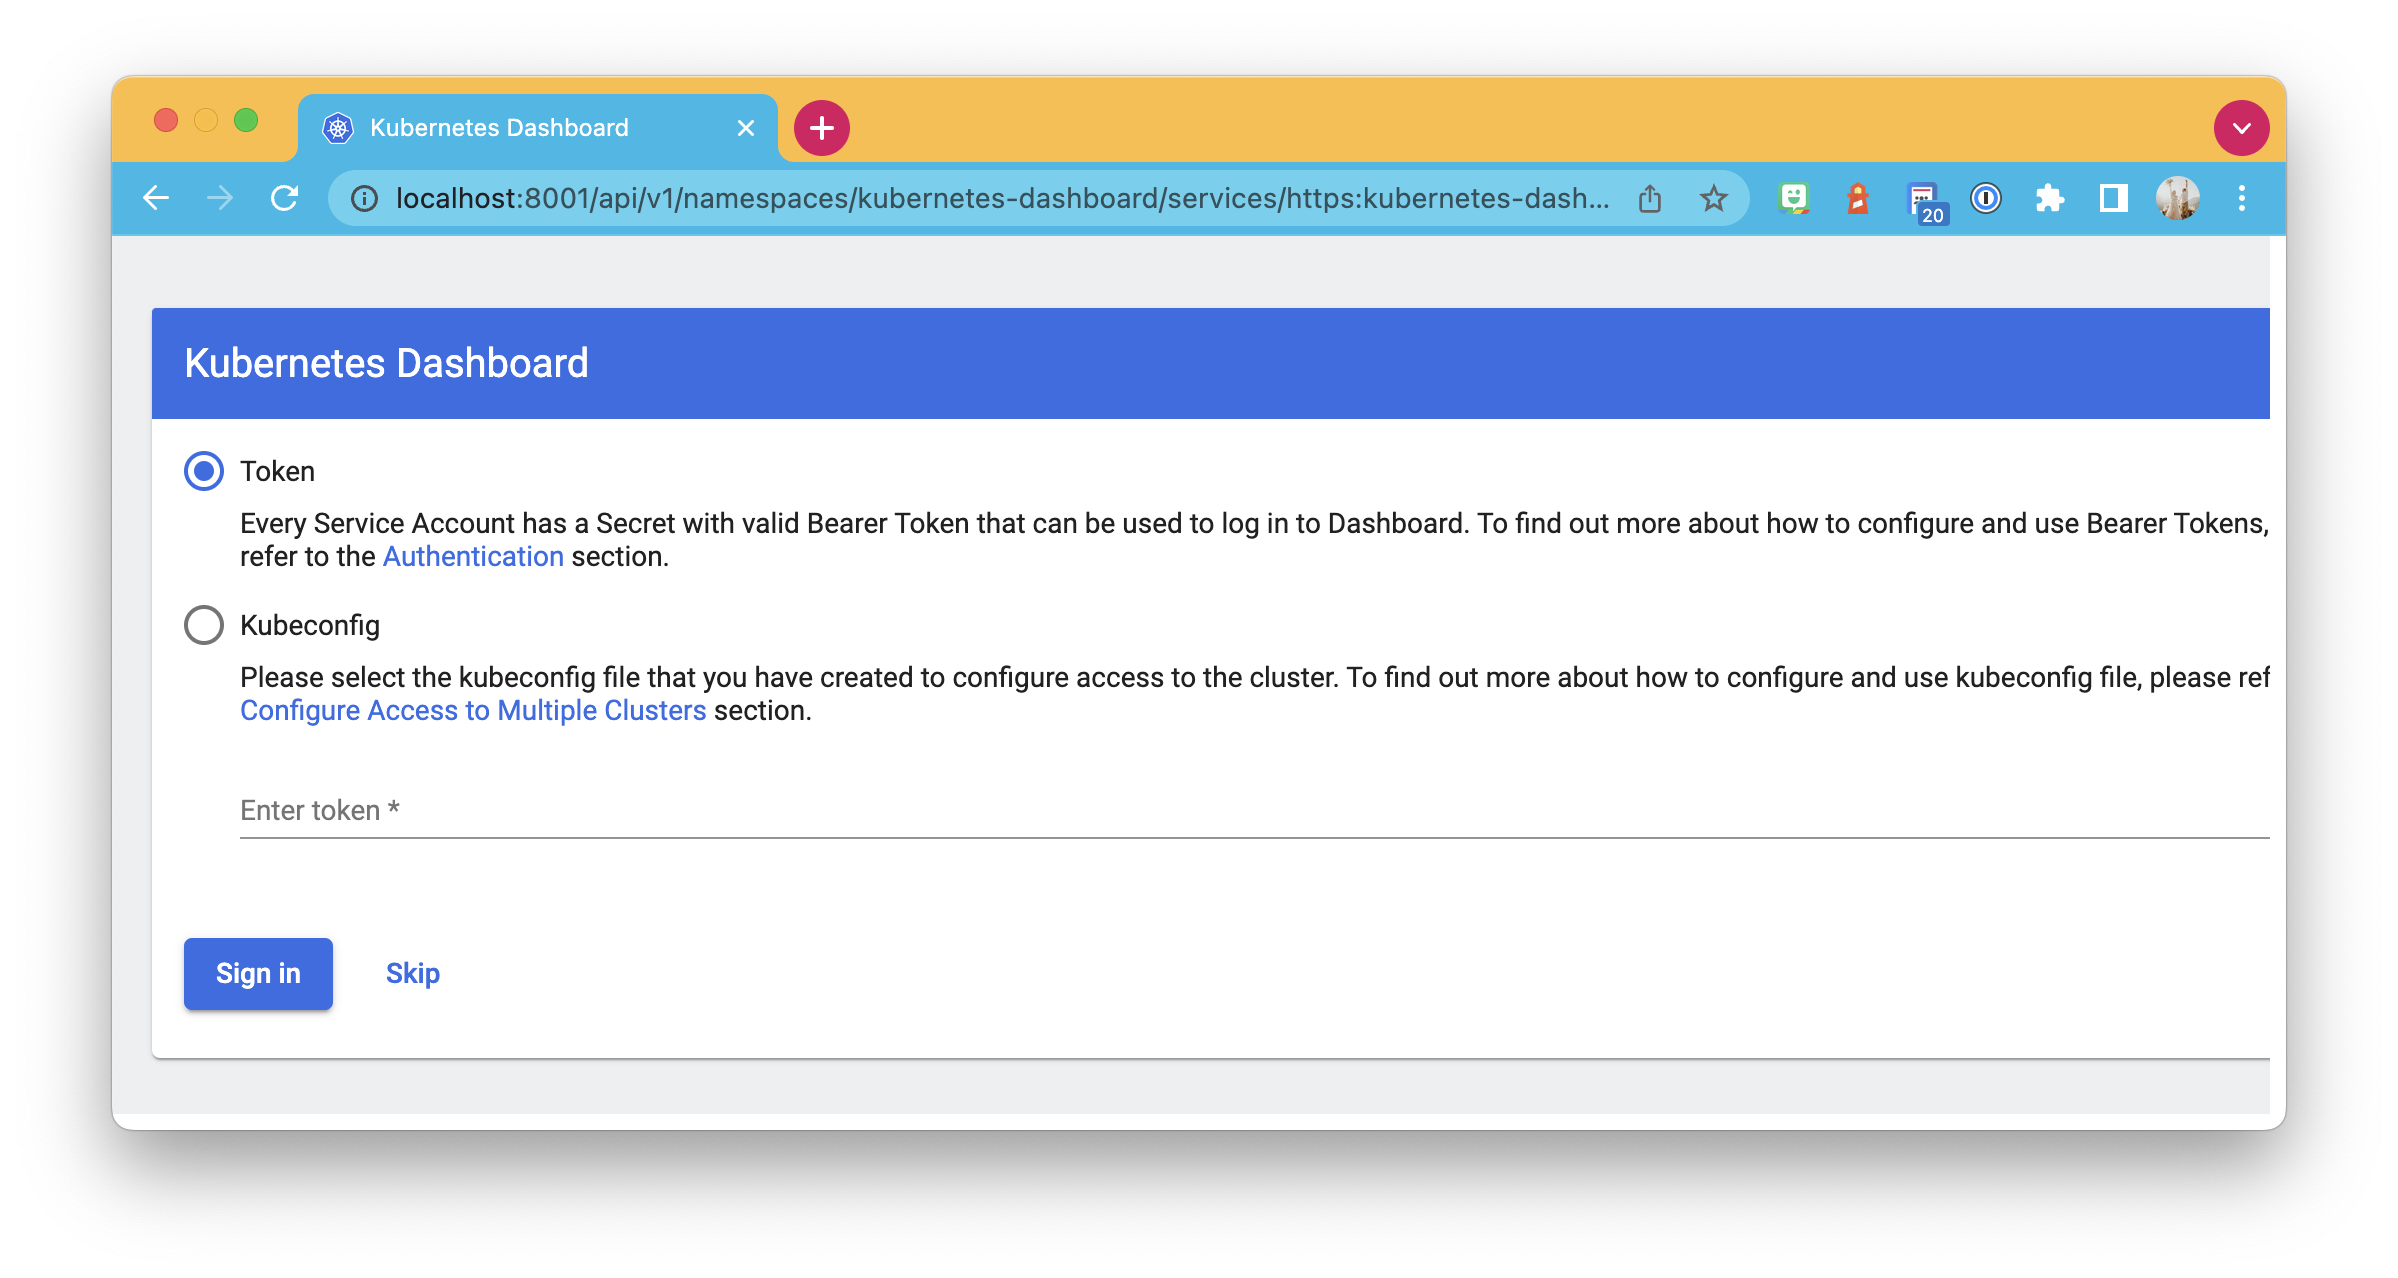
You can also spool the dashboard by running kubectl proxy and visiting the following URL.
http://localhost:8001/api/v1/namespaces/kubernetes-dashboard/services/https:kubernetes-dashboard:/proxy/
However, it will prompt you with a login like the one below, and we don't have any way of logging in yet.
Creating an admin user
To get the login token for the dashboard. It's best to create an admin user.
Note: Be aware this exposes your local Kubernetes setup, so do be careful with this.
To start, we must first create some config elements for our user.
The first one is a Service Account with the name admin-user in our kubernetes-dashboard workspace.
Go ahead and create a file called: admin-user.yml and put the following contents in it.
apiVersion: v1
kind: ServiceAccount
metadata:
  name: admin-user
  namespace: kubernetes-dashboard
Secondly, we'll need a Cluster Role Binding, which gives the Service Account access to a cluster.
Create a file called admin-cluster.yml and put the following in it.
apiVersion: rbac.authorization.k8s.io/v1
kind: ClusterRoleBinding
metadata:
  name: admin-user
roleRef:
  apiGroup: rbac.authorization.k8s.io
  kind: ClusterRole
  name: cluster-admin
subjects:
  - kind: ServiceAccount
    name: admin-user
    namespace: kubernetes-dashboard
We must apply these configs to our Kubernetes with the following commands.
kubectl apply -f admin-user.yml
kubectl apply -f admin-cluster.yml
Once that's done, we can create our token for the user by running this command:
kubectl -n kubernetes-dashboard create token admin-user
It will output a string of text, which is your token.
The dashboard
With the token, we are now able to log in.
So spool up the dashboard by running: kubectl proxy and visit the dashboard on http://localhost:8001/api/v1/namespaces/kubernetes-dashboard/services/https:kubernetes-dashboard:/proxy/
On the login page, enter your token, and you should be logged in.
Once logged in, you can change the namespace in the top left corner. I switched to the Kubernetes Dashboard namespace, and you'll see something like this.
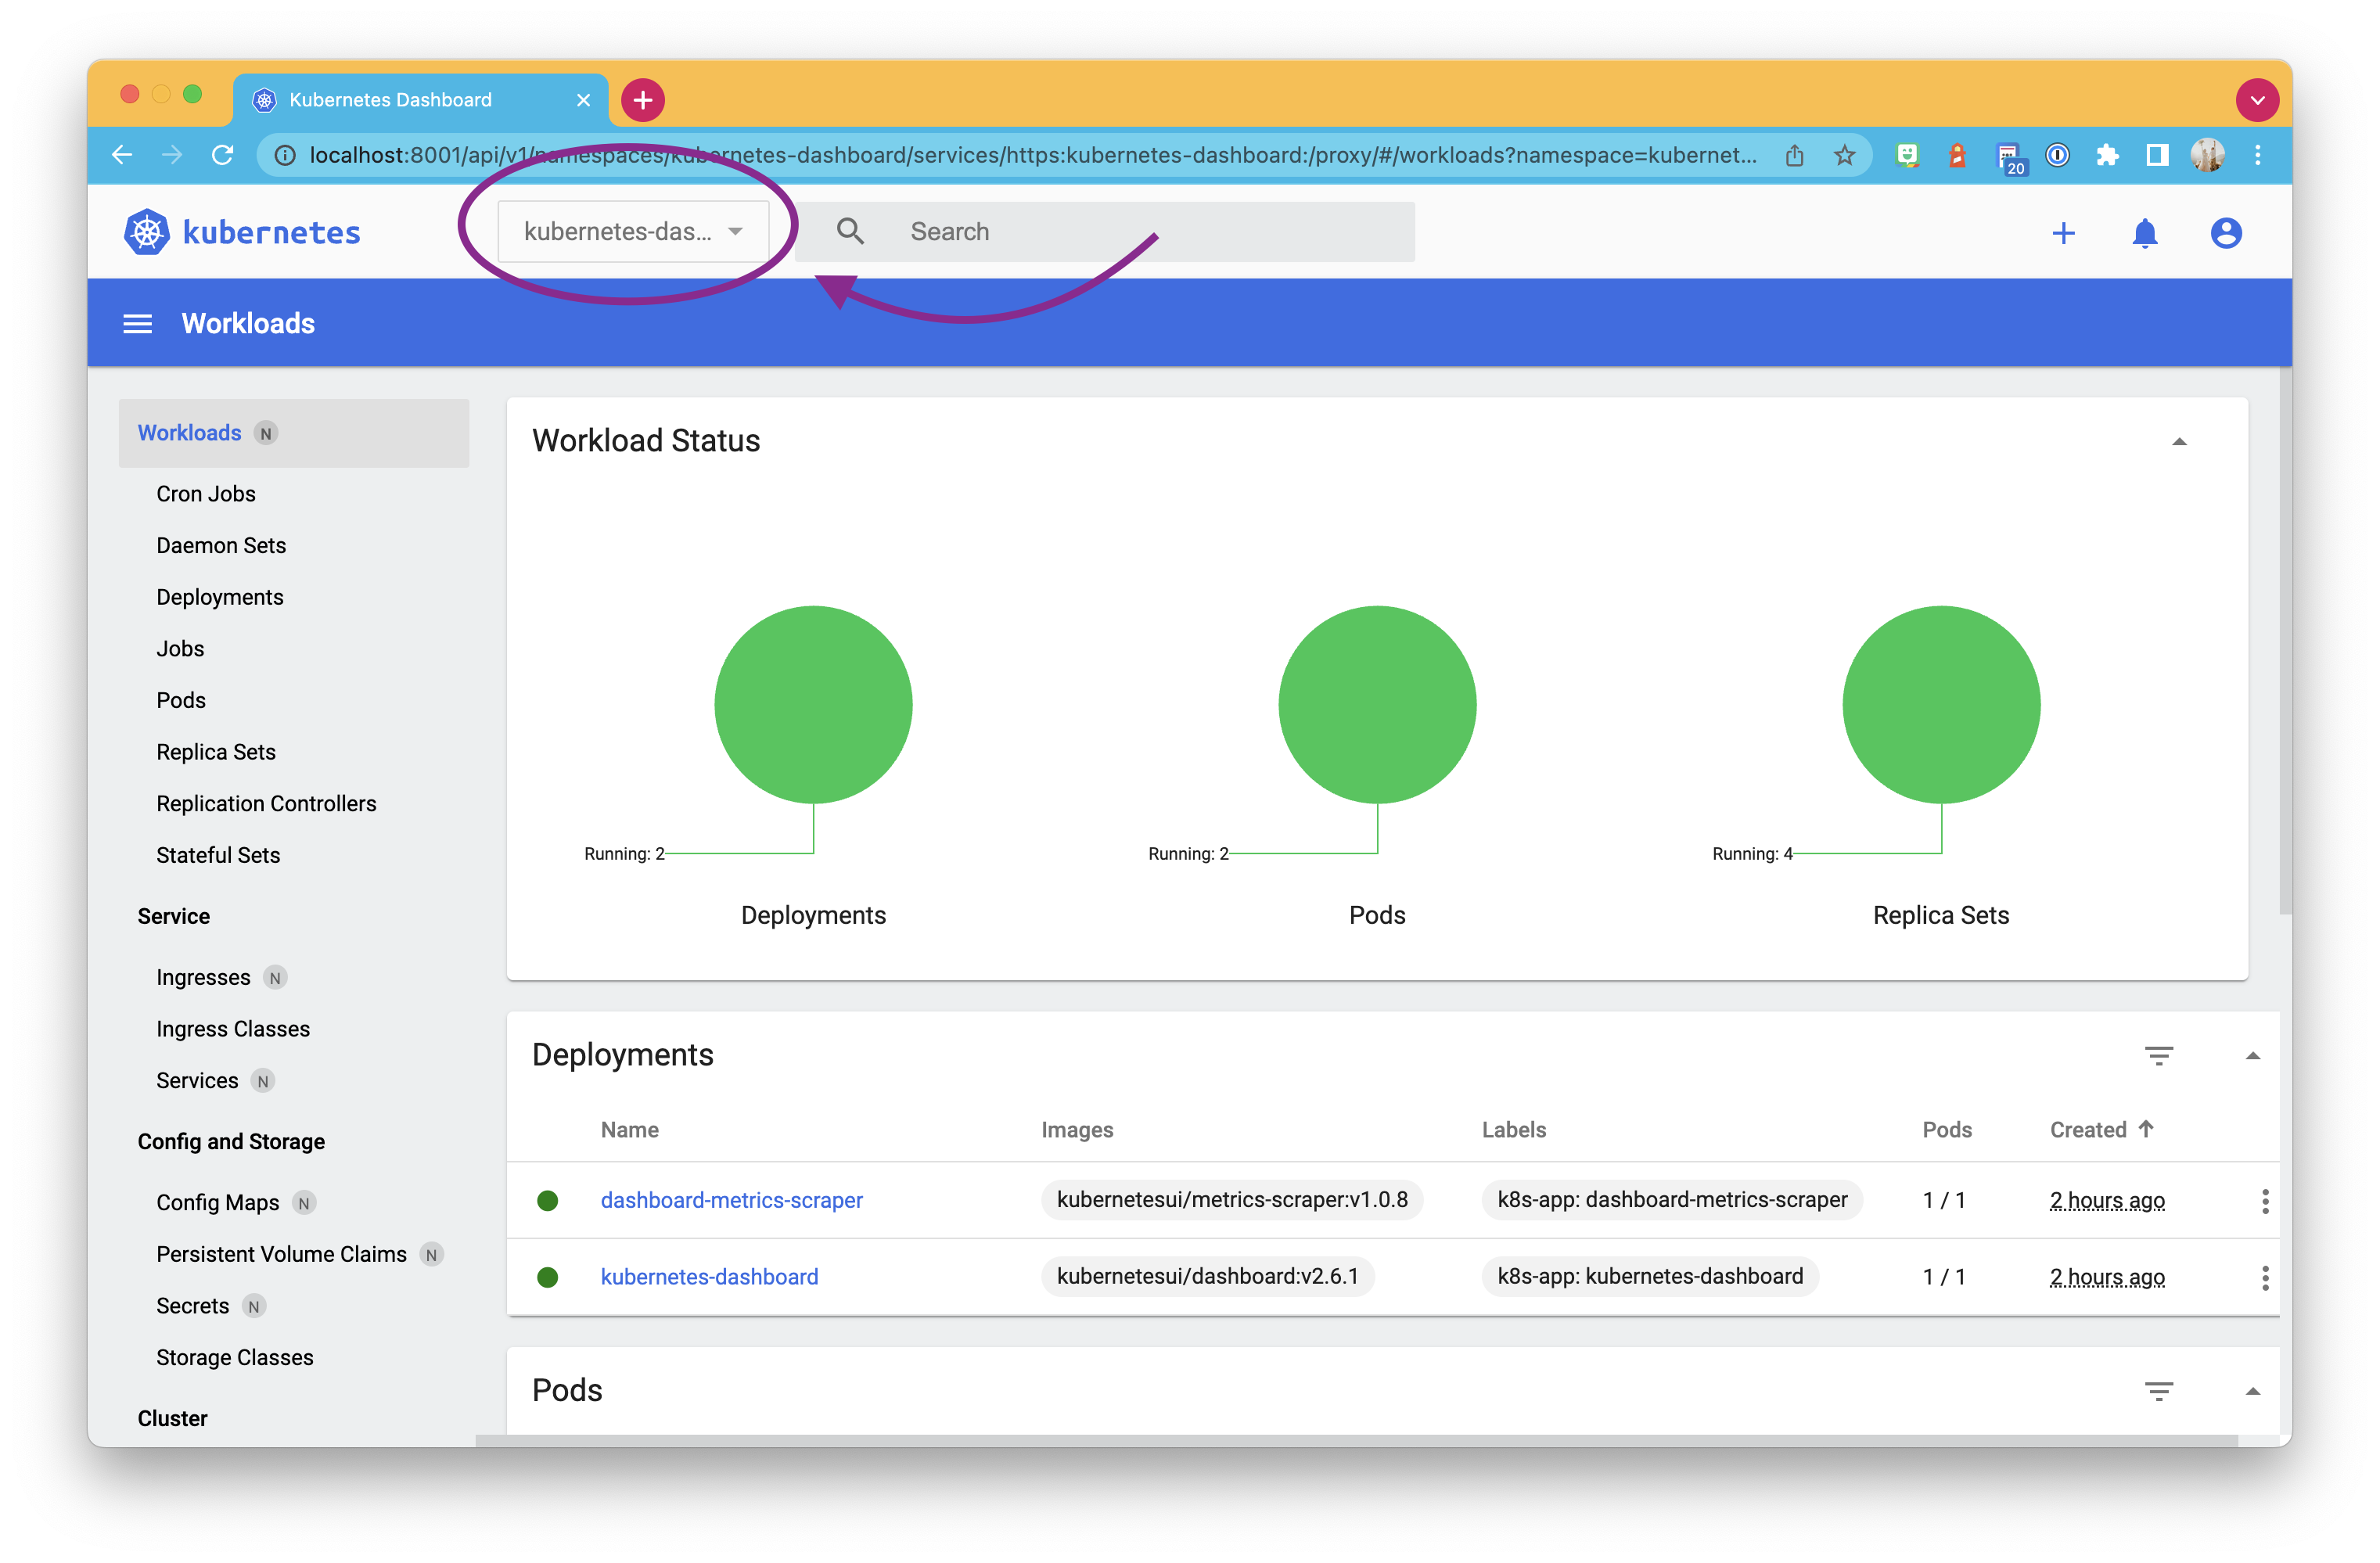
Pretty cool stuff. You'll also be able to create clusters from here, which is nice!
Thank you for reading, and let's connect!
Thank you for reading my blog. Feel free to subscribe to my email newsletter and connect on Facebook or Twitter


