
HTML output element
I've seen this element around a couple of times in articles but never needed it or decided to see what it can do.
In general, it's supposed to be used as an output for other input elements.
Sounds pretty cool for certain use-cases.
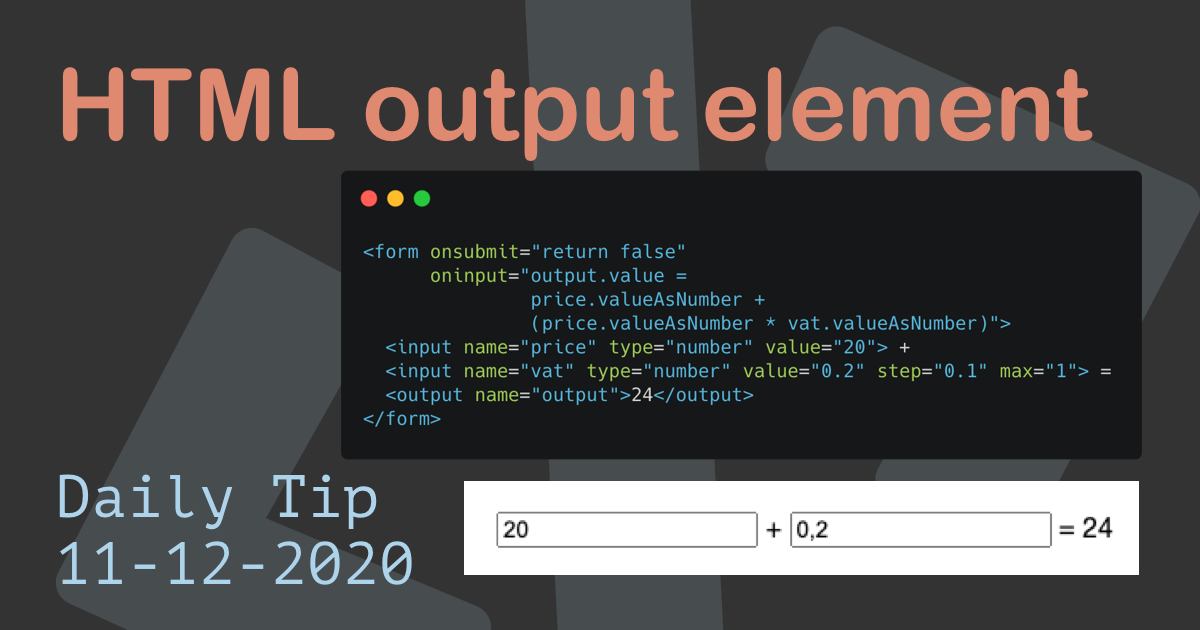
Let's say we need to build a VAT calculator?
The end result:

Using the HTML output element
To use this element we can simply write <output name="output"></output>.
But that doesn't mean it actually does anything.
To make it work, it needs a form wrapped around it and some inputs to mix values from.
Let's start by doing that.
<form
  onsubmit="return false"
  oninput="output.value = parseInt(inputOne.value) + parseInt(inputTwo.value)"
>
  <input name="inputOne" type="number" value="2" /> +
  <input name="inputTwo" type="number" value="3" /> =
  <output name="output">5</output>
</form>
You might think, oh well, but that's cheating you just put some values in there.
The magic comes in running this code. Try and change the input values!
As you can see it does rely on JavaScript to actually render a new value in the output element.
In this case we state that output.value (the name output) equals a parsed one + two.
Note: Their names reference the elements used.
HTML output VAT calculator
Let's say we need an VAT calculator, these general have an input number and a vat percentage.
<form
  onsubmit="return false"
  oninput="output.value = price.valueAsNumber + (price.valueAsNumber * vat.valueAsNumber)"
>
  <input name="price" type="number" value="20" /> +
  <input name="vat" type="number" value="0.2" step="0.1" max="1" /> =
  <output name="output">24</output>
</form>
As you can see we are no longer using the parseInt method.
Instead we can use the valueAsNumber on input types. This makes it easier to use decimals.
Then we define the sum function as follows:
output = price + (price * vat)
The names above are all the names used in our HTML.
As you can see, not fancy scripts were needed, and we can fully style this any way we would like!
I hope you learned some good practical use cases for the HTML output element.
Feel free to have a play with this Codepen.
Browser Support
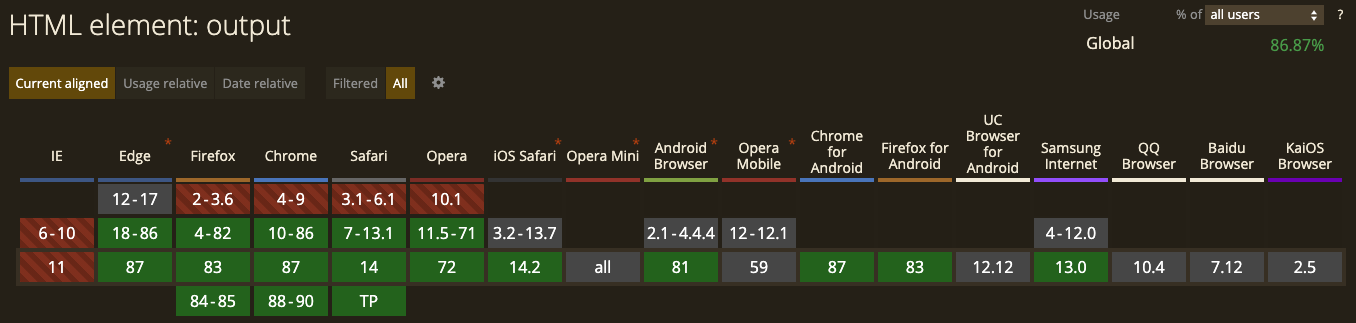
This output element is pretty well supported and goes back to pretty old versions. We do run into issues on IE and Opera mini.
Thank you for reading, and let's connect!
Thank you for reading my blog. Feel free to subscribe to my email newsletter and connect on Facebook or Twitter
About the author
I'm a full-stack developer from South Africa 🇿🇦. I love writing about JavaScript, HTML and CSS.
Comments
Join the discussionNo comments yet. Be the first to comment.



