# Browser extensions - new tab extension
We already looked at our first extension that didn't have a view and a custom theme.
Now let's look at how we can make a new tab extension.
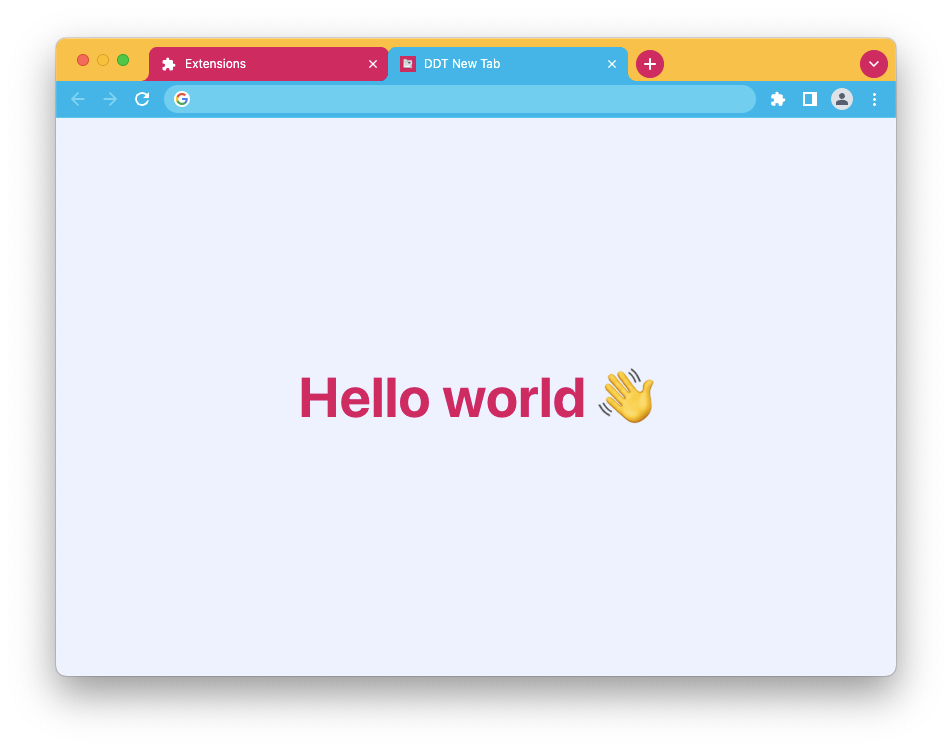
The idea behind these is that they replace the new tab with a webpage we created.
The result will be a new tab like this:
## New tab extension setup
To get started, we first have to create a new folder and navigate into it.
```bash
mkdir new-tab-extension && cd new-tab-extension
```
Now open up the project in your favorite editor.
The first thing we will add is the `manifest.json`. This is always the main entry point for any browser extension.
```js
{
"manifest_version": 3,
"version": "1.0",
"name": "New Tab Extension",
"description": "A demo first new tab experience",
"action": {
"default_icon": "icons/icon-48.png"
},
"icons": {
"48": "icons/icon-48.png"
},
"chrome_url_overrides" : {
"newtab": "new-tab.html"
}
}
```
We defined this one as manifest version 3 and filled out the details as required.
The main difference here lies in the `chrome_url_overrides`.
You can tell you want to override some default browser behavior.
In our example, we overwrite the `newtab` to open a file called `new-tab.html`.
This is a file we will create and make our own.
Add the `new-tab.html` file to the root of your project.
I added the following basic html structure to it.
```html
DDT New Tab
Hello world 👋
```
You can extend this as much as you want.
As you can see, we can even link to stylesheets.
I added a new stylesheet in a `css` directory.
I do a basic reset inside the file and center the text on the page.
```css
*,
*::before,
*::after {
box-sizing: border-box;
}
* {
margin: 0;
}
html,
body {
height: 100%;
}
body {
line-height: 1.5;
-webkit-font-smoothing: antialiased;
display: grid;
place-items: center;
background-color: rgb(238 242 255);
}
p,
h1,
h2,
h3,
h4,
h5,
h6 {
overflow-wrap: break-word;
}
h1 {
font-size: 10vmin;
color: rgb(218 0 96);
}
```
## Testing the extension
We don't want to publish to the stores without testing our extension, so let's see what it takes to try it locally.
I prefer to use Chrome as it has a quicker interface for it.
In Chrome, click the plugins button and open up that page.
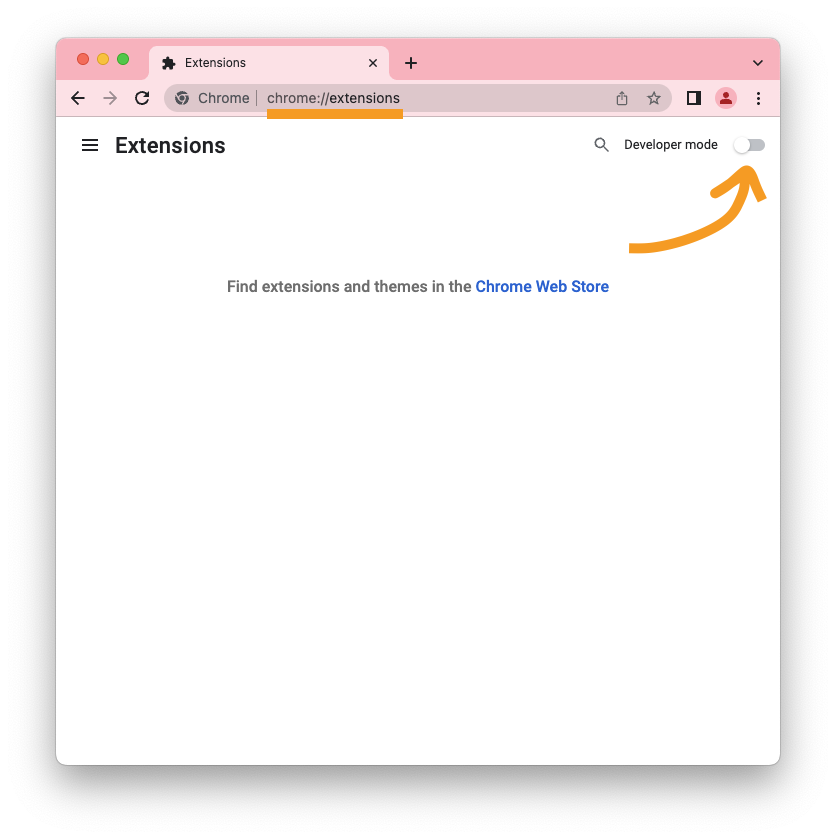
Next, toggle the developer mode on. You'll get another menu where you get the option to load unpacked extensions.
Click the load unpacked and navigate to the `new-tab-extension` folder.
Chrome will notify you that the new tab is overwritten and if you want to keep it.
You can also download this extension from [GitHub](https://github.com/rebelchris/new-tab-extension/tree/part-1) and try it out yourself.
### Thank you for reading, and let's connect!
Thank you for reading my blog. Feel free to subscribe to my email newsletter and connect on [Facebook](https://www.facebook.com/DailyDevTipsBlog) or [Twitter](https://twitter.com/DailyDevTips1)