# Adding a sitemap in Eleventy
In today's article, you will learn how to add a sitemap to your Eleventy website.
A sitemap is an essential part of helping search engines understand your website's structure and one of the quickest ways to optimize your site SEO wise.
With a sitemap, you tell the search engine which pages you want it to crawl. It will learn from this and prioritize these pages over the ones that are not documented in the sitemap.
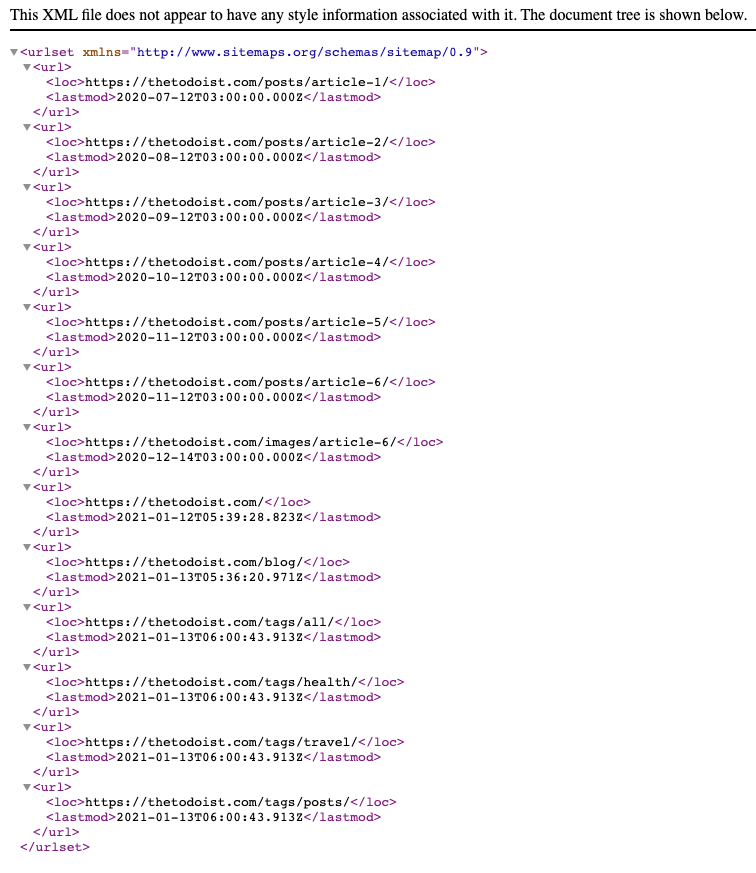
We will be creating an `XML` based sitemap for the lifestyle blog series.
However, we don't want to create all these entries manually, so let's create a custom script that can generate it for us.
The `sitemap.xml` will look like this.
## What should a sitemap look like?
First of all, let's see what a sitemap should look like.
Looking at google's requested format for `XML` we get the following result.
```xml
http://www.example.com/foo.html
2018-06-04
```
I use an Atom feed for my website, so if you want to learn more about the formats, check out [Google's article on Sitemap formats](https://developers.google.com/search/docs/advanced/sitemaps/build-sitemap#sitemapformat).
## Adding a XML sitemap to an Eleventy website
Let's start by creating a file in our `src` directory called `sitemap.njk`.
You might be wondering, but I thought it was going to be an `XML` file? And you are right. We can however, do this by adjusting the permalink as such:
```html
---
permalink: '/sitemap.xml'
---
```
All right, this will already create a file called `sitemap.xml`, so now let's add all the entries we want in it.
```xml
{% for page in collections.all %}
{{ page.url | url }}
{{ page.date.toISOString() }}
{% endfor %}
```
This will give us the following result:
```xml
/posts/article-1/
2020-07-12T03:00:00.000Z
/posts/article-2/
2020-08-12T03:00:00.000Z
/sitemap.xml
2021-01-24T11:59:09.087Z
```
Pretty cool, but as you can see, we are missing the full URL, and at the bottom, we even see the sitemap itself being indexed.
That is something we don't want, so let's exclude the sitemap from being entered.
```html
---
permalink: /sitemap.xml
eleventyExcludeFromCollections: true
---
```
This will ensure this page is not mentioned in any collection, so it won't show up in our sitemap.
Then we need to look into adding the full URL.
A good practice is to create a site-wide variable that we can store certain variables in.
Let's create a file called `site.json` inside our `src/_data` folder.
```js
{
"name": "The Todoist",
"url": "https://thetodoist.com"
}
```
You can extend the information in there as much as you like. We can use the variables in the following manner:
```html
{{ site.url }}
```
So let's add that to our sitemap.
```html
---
permalink: /sitemap.xml
eleventyExcludeFromCollections: true
---
{% for page in collections.all %}
{{ site.url }}{{ page.url | url }}
{{ page.date.toISOString() }}
{% endfor %}
```
That's it. We now get the desired sitemap output!
## Adding a robots.txt file in Eleventy
Another good SEO addition is the robots.txt file. This file is generally read first by crawlers and includes whether a site should be indexed at all.
In there, we can however, also note where our sitemap is located.
Create a file called `robots.njk` inside the `src` directory.
```html
---
permalink: '/robots.txt'
eleventyExcludeFromCollections: true
---
User-agent: * Allow: / Sitemap: {{ site.url }}/sitemap.xml
```
Here we state that the file should be `robots.txt` and should be excluded from the sitemap.
Then we place the robots' content; in this case, we allow all robots on all paths.
In the last line, we state where the crawler can find our sitemap.
The output looks like this:
```text
User-agent: *
Allow: /
Sitemap: https://thetodoist.com/sitemap.xml
```
If you follow the series, you can find the full code in this [GitHub repo](https://github.com/rebelchris/eleventy-todoist/tree/part8).
### Thank you for reading, and let's connect!
Thank you for reading my blog. Feel free to subscribe to my email newsletter and connect on [Facebook](https://www.facebook.com/DailyDevTipsBlog) or [Twitter](https://twitter.com/DailyDevTips1)